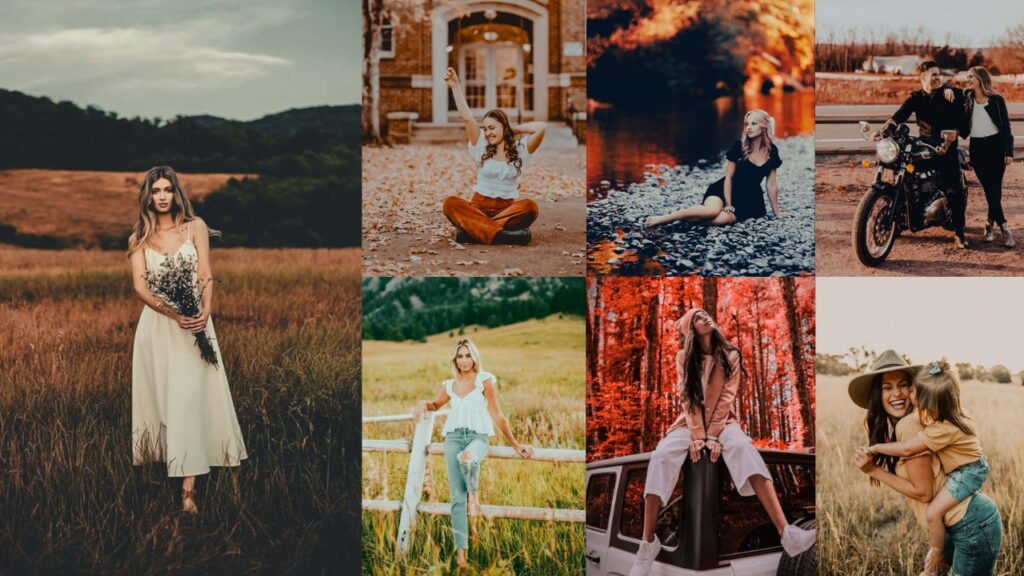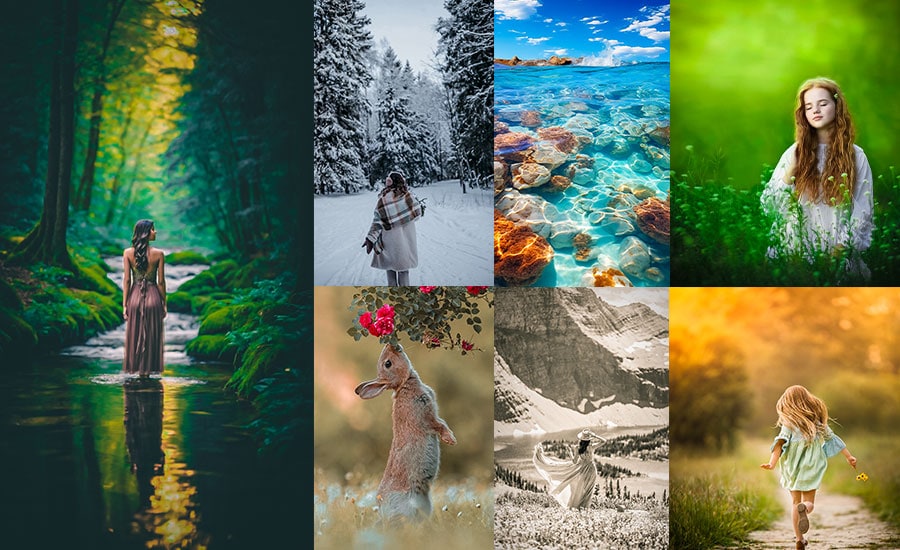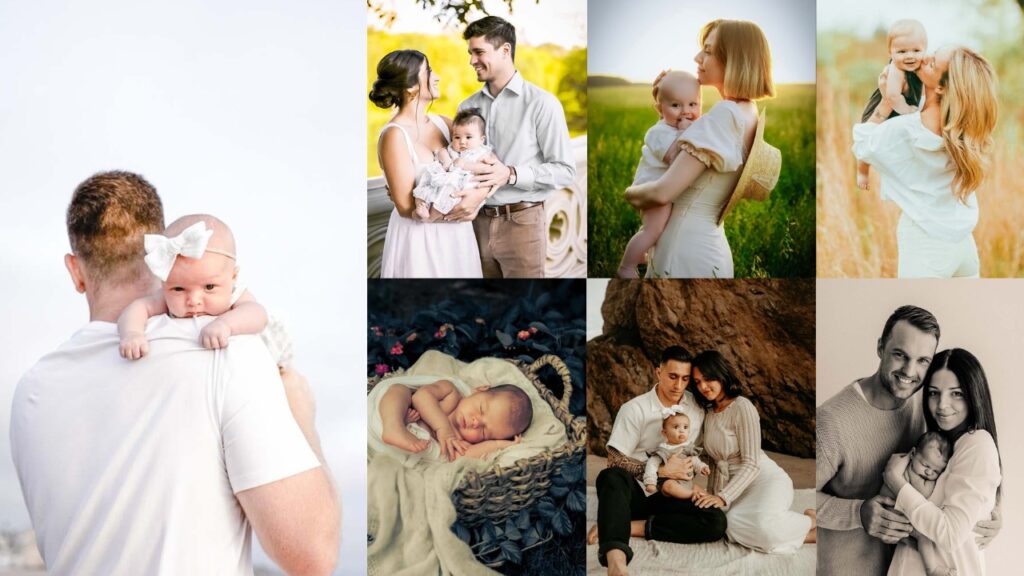
You just wrapped a newborn session. The lighting was perfect, the baby finally fell asleep in that tiny knitted wrap, and you got the shot, the one that made the parents tear up when they saw the preview. Now comes the part most photographers quietly dread: editing 300 images and making every single one look that good.
That’s exactly what this collection solves. These Presets were built to give you a professional, consistent starting point for every image in a session, whether you shoot in a bright studio, by a bedroom window, or at golden hour outdoors. One click brings your image 80% of the way there. The remaining 20% is just fine-tuning your exposure and white balance for your specific camera and light.
A great newborn preset doesn’t make the photo look edited! it makes the photo look like you. It enhances what was already there and gives you back the hour you would have spent sliding knobs manually.

Pauline Jackson
I create thoughtfully crafted presets that enhance color, improve lighting, and bring consistency to every photo, making professional editing faster, simpler, and more enjoyable.
75 Newborn Photography Lightroom Presets Free Download
Every preset collection below is professionally designed to maintain consistent color rendering across a full newborn photography session. They adjust color temperature, skin tone accuracy, contrast, and light balance, the four most critical elements in newborn editing. Presets are available in DNG and XMP formats.
Which Preset Style Should You Choose?
| If your session looks like this… | Try this preset style |
|---|---|
| Bright window light, white backdrop, soft wraps | Bright & Airy or Soft & Dreamy |
| Neutral studio background, flash or continuous light | Clean & Natural or Matte |
| Vintage props, knitted wraps, wooden crates | Vintage or Film-Inspired |
| Mixed or difficult indoor lighting | Black & White |
| Dark backdrop, dramatic studio setup | Moody or High Contrast |
| Pastel pink, mint, or cream-styled session | Pastel |
| Outdoor golden-hour lifestyle shoot | Film-Inspired or Bright & Airy |
- Pauline Jackson
- 1. Soft and Dreamy Newborn
- 2. Vintage Newborn
- 3. Black and White Newborn
- 4. Clean and Natural Newborn
- 5. Moody Newborn
- 6. Bright and Airy Newborn
- 7. Pastel Newborn
- 8. Matte Newborn
- 9. Film-Inspired Newborn
- 10. High Contrast Newborn
- 11. Warm and Cozy Newborn
- 12. Cool and Calm Newborn
- 13. Dark Newborn
- Step 1 – Correct Exposure Before Applying the Preset
- Step 2 – Fix White Balance First for Accurate Skin Tones
- Step 3 – Use the Presets as a Starting Point, Not a Final Edit
- Step 4 – Sync Across the Whole Session in One Click
1. Soft and Dreamy Newborn
The Soft and Dreamy collection wraps newborn photos in a gentle, hazy warmth that emphasizes the delicate skin tones and peaceful atmosphere of those first days. This style works exceptionally well with natural window light and produces a timeless look that parents consistently request for printed wall art and albums.
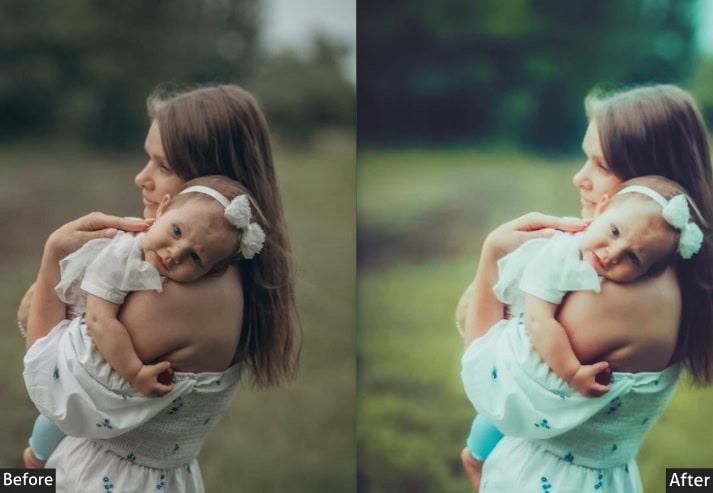
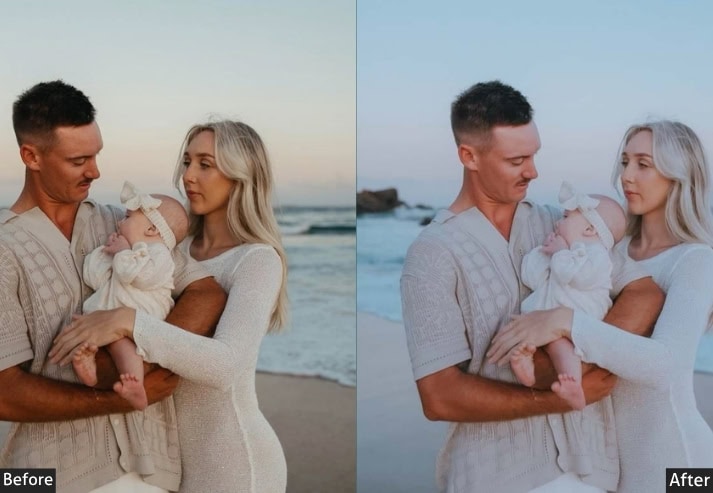
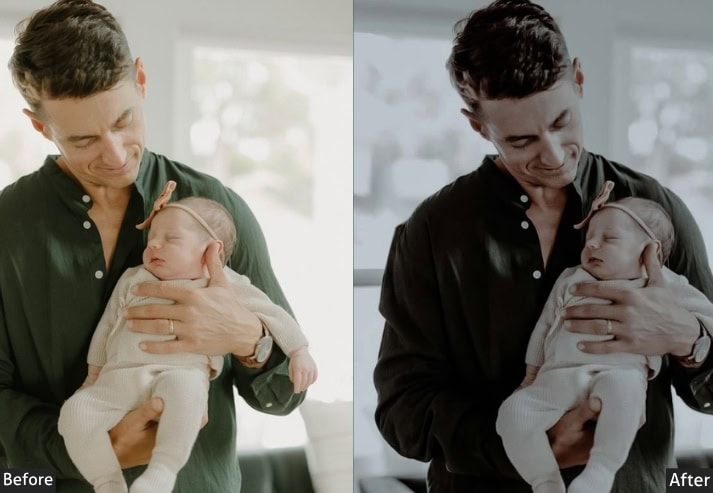
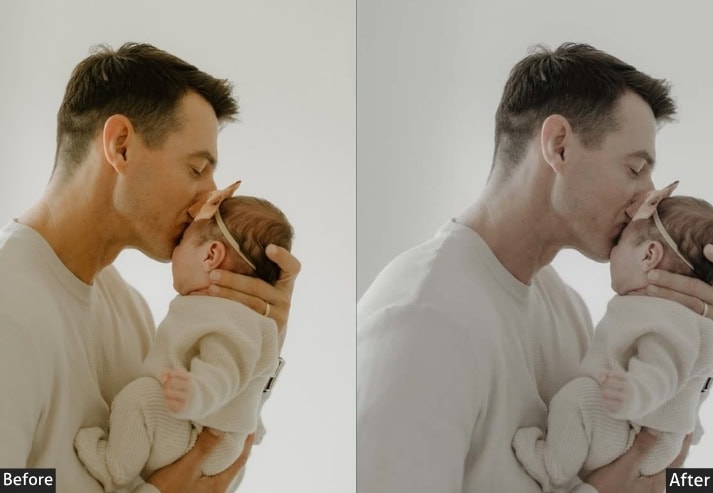
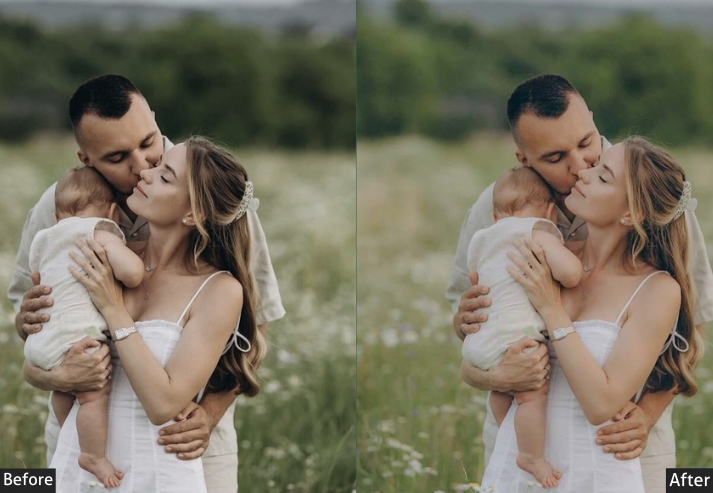
Light Panel: Exposure +10% (subtle lift) | Contrast -15% (soft relaxed look) | Highlights -20% (reduced glare) | Shadows +20% (softened dark areas) | Whites -10% | Blacks +10%. Color Panel: Temp +5 (gentle warmth) | Tint +5 (rosy touch) | Vibrance +10% | Saturation -10% (muted tones). Effects Panel: Clarity -20% (dreamy softness) | Dehaze -10% (extra haze) | Vignette -10 (soft edges). Detail Panel: Sharpening +10 (subtle detail) | Noise Reduction +20 (smooth finish).
Purpose: An ethereal, tender vibe.
Best For: Soft-lit shots, close-ups of tiny hands, or cuddly family scenes.
Usage: tweak exposure if it’s too bright, and adjust the haze to achieve that perfect dreamy level.
Style: Warm, hazy, and oh-so-soft.
2. Vintage Newborn
The Vintage Newborn collection recreates the warm, faded palette of analog film photography, adding grain, lifted shadows, and muted color contrast that gives images a timeless, heirloom quality. This style of photography particularly well when props such as wooden crates, knitted wraps, or floral headbands are used during the session.
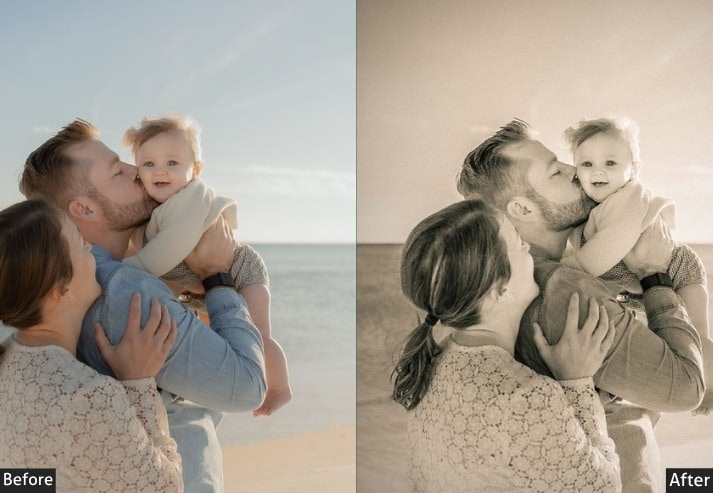
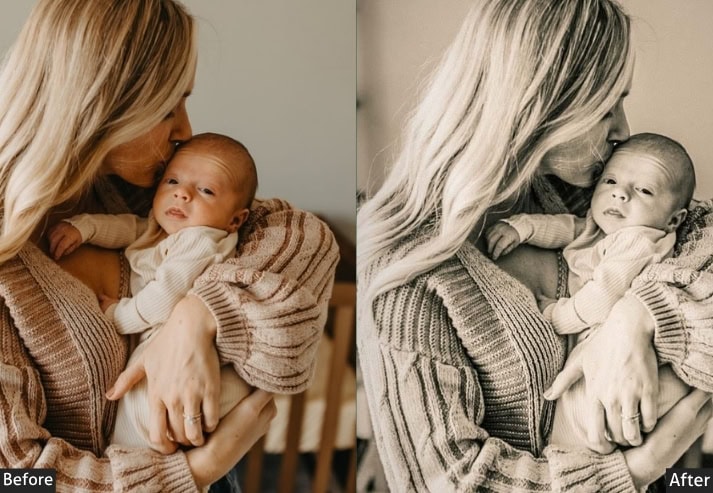
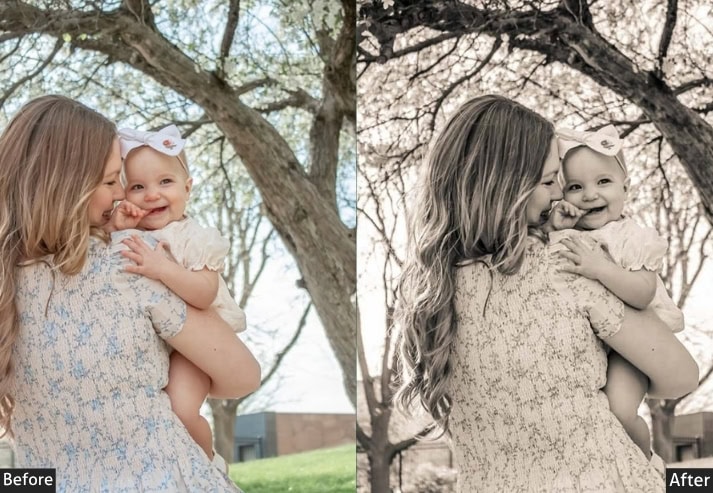
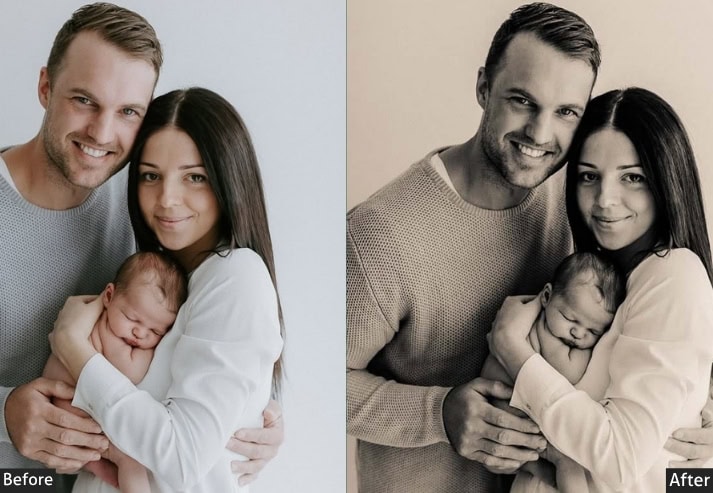
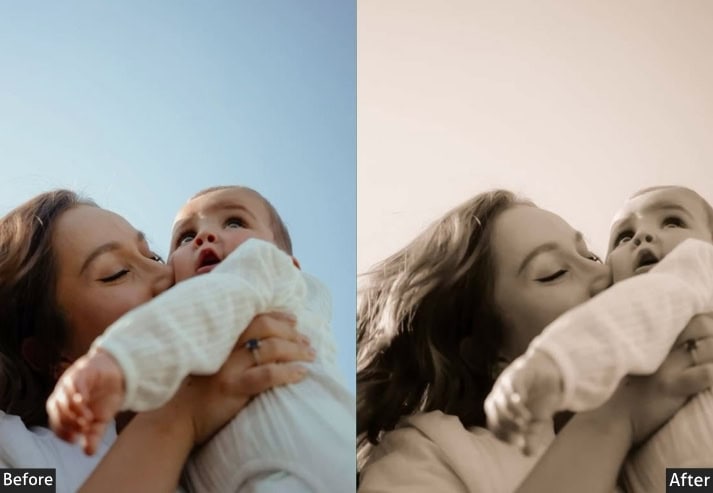
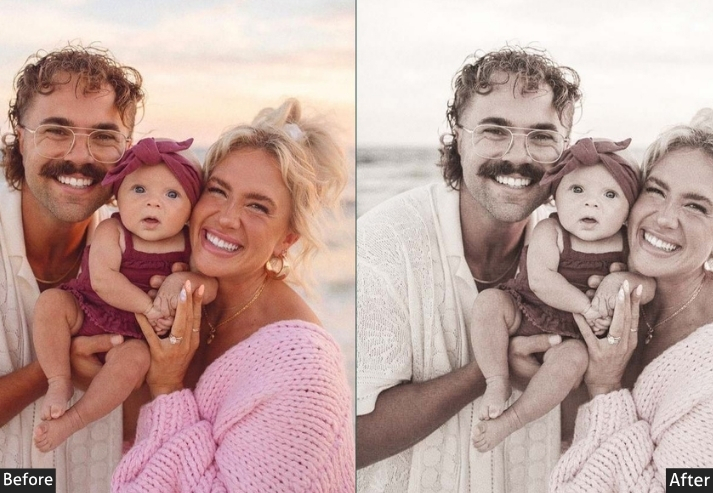
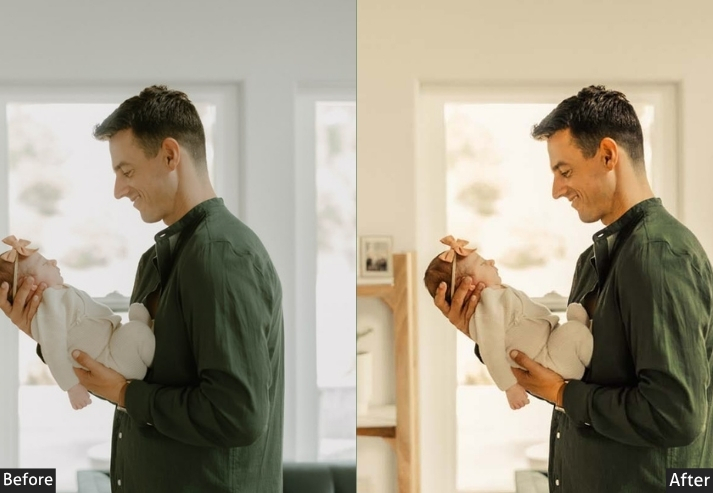
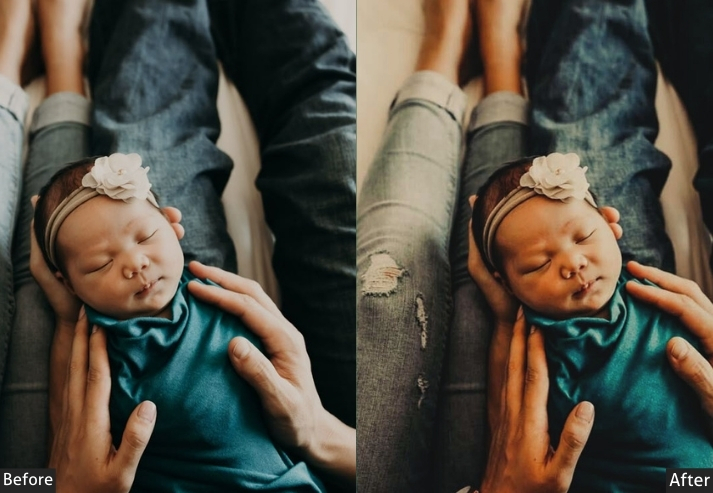
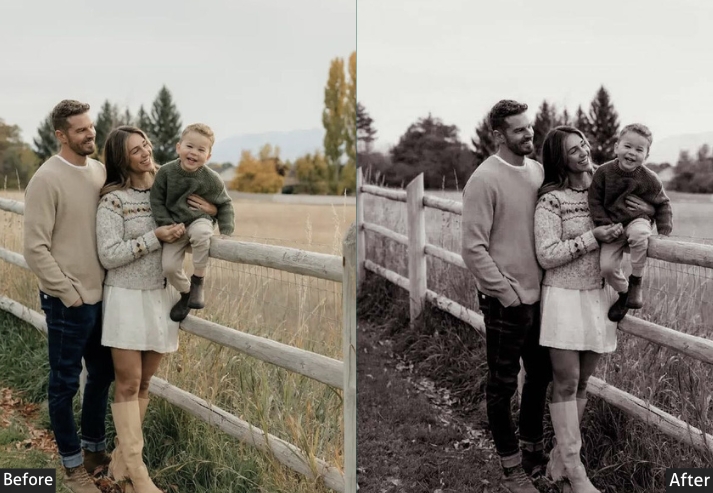
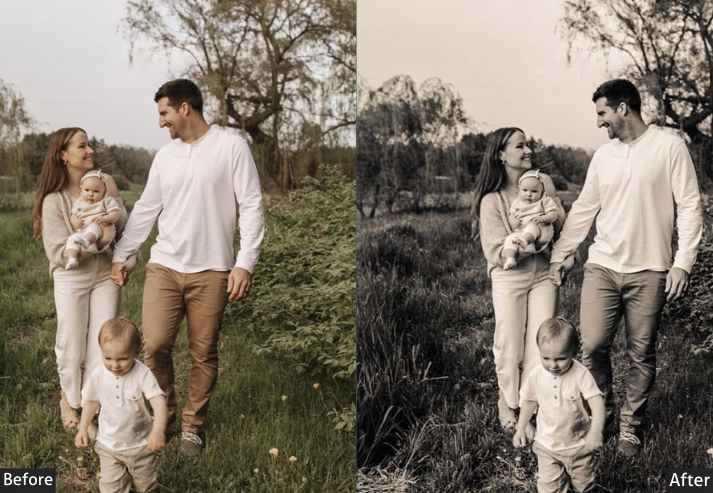
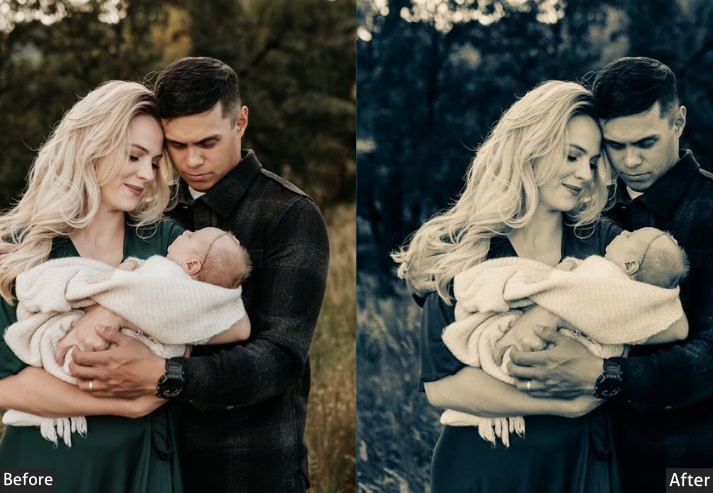
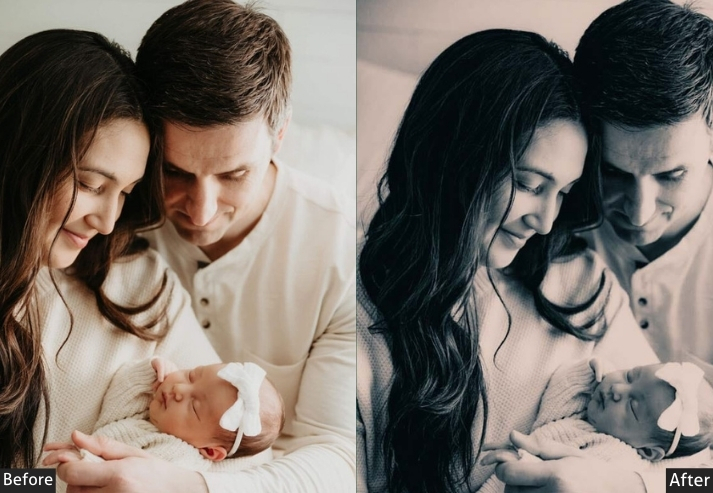
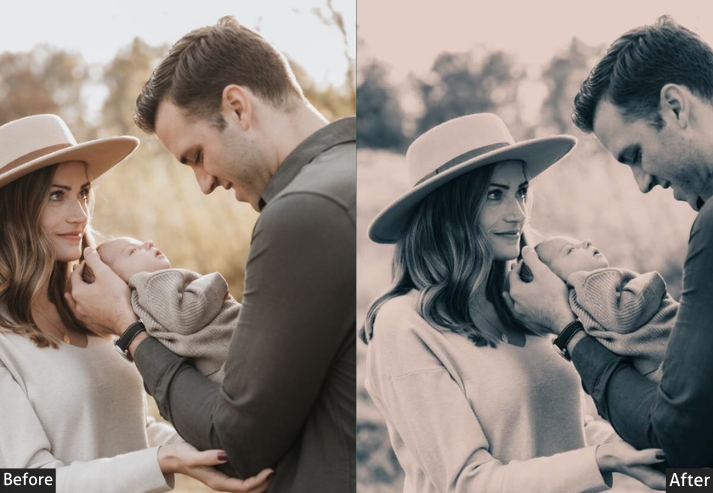
Light Panel: Exposure -5% (retro dimness) | Contrast +10% | Highlights -15% | Shadows +15% | Whites -5% | Blacks +5%. Color Panel: Temp -5 (cooler tones) | Tint +10 (vintage blush) | Vibrance -10% | Saturation -20% (faded look). Effects Panel: Clarity +10% (subtle edge) | Dehaze +5% | Grain +20 (old-school texture) | Vignette -15. Detail Panel: Sharpening +15 | Noise Reduction +10.
Purpose: nostalgic, heirloom charm.
Best For: Prop-heavy pics, vintage outfits, or family portraits with a timeless twist.
Usage: tweak the grain for texture, and adjust the temp for skin tones.
Style: Faded and grainy with a retro soul.
3. Black and White Newborn
Black-and-white conversion strips away color distractions and directs the viewer’s attention to what matters most: expression, texture, and the emotional connection between parent and child. These presets are a reliable choice when mixed-light color casts make color editing difficult, and they remain a perennial favorite for statement wall prints.
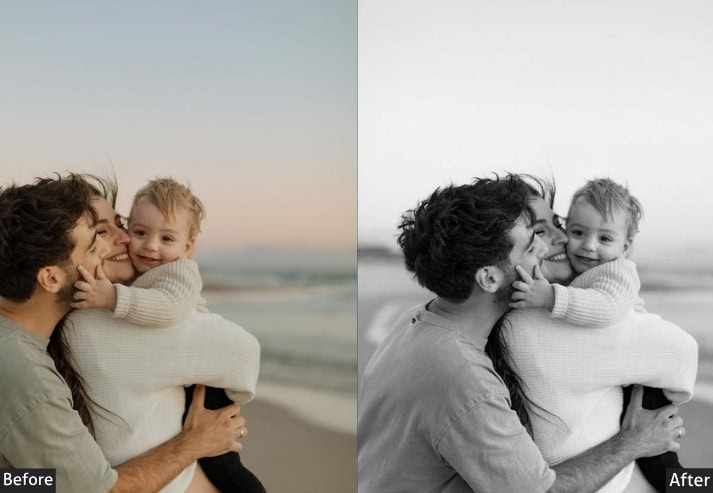
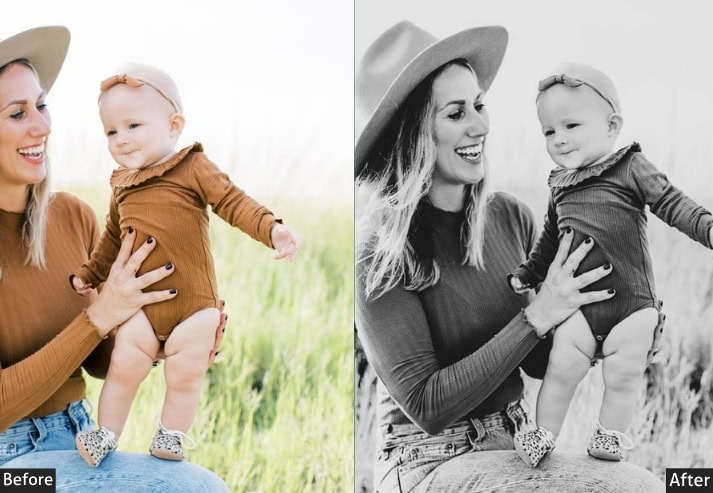
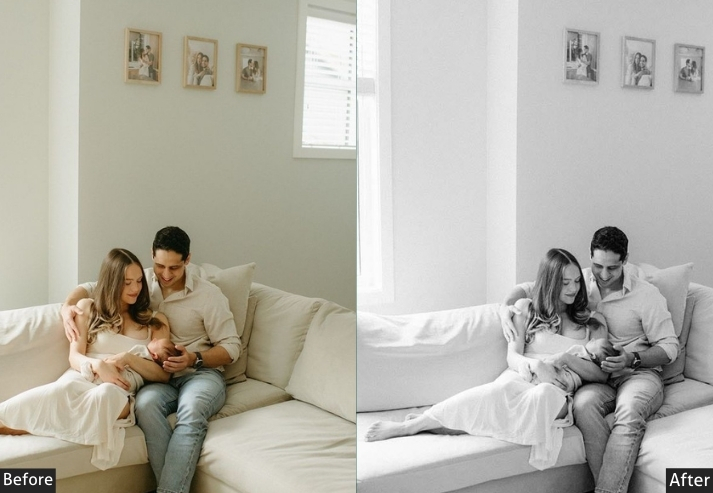
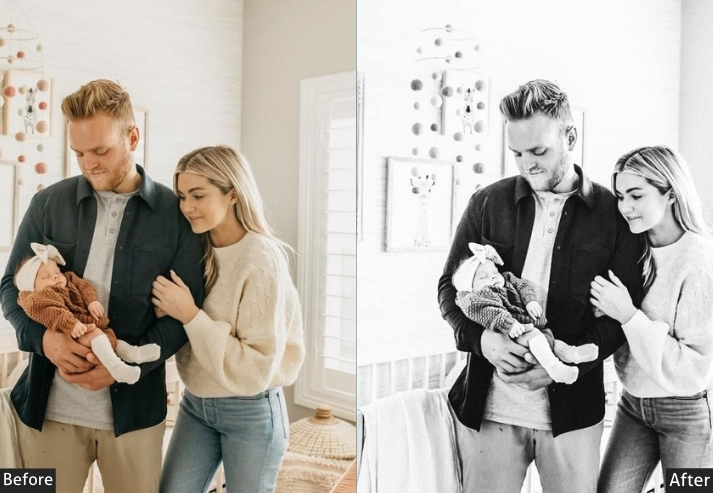
Light Panel: Exposure +5% | Contrast +20% (make it pop) | Highlights -10% | Shadows +10% | Whites +10% | Blacks -10%. Color Panel: Convert to B&W | Black & White Mix adjusted to brighten skin tones and deepen blankets. Effects Panel: Clarity +15% (enhanced texture) | Dehaze +5% | Vignette -10. Detail Panel: Sharpening +20 | Noise Reduction +15.
Purpose: emotion and form, no distractions.
Best For: Portraits, close-ups, or any shot where feelings trump hues.
Usage: mess with the B&W Mix to control tone, and tweak contrast for drama.
Style: From soft and subtle to bold and striking.
4. Clean and Natural Newborn
This one is built for photographers who want the finished image to feel barely edited, true-to-life skin tones, balanced whites, and accurate color rendering. This style is the most versatile in the collection and works consistently across both studio setups and on-location sessions in natural light.
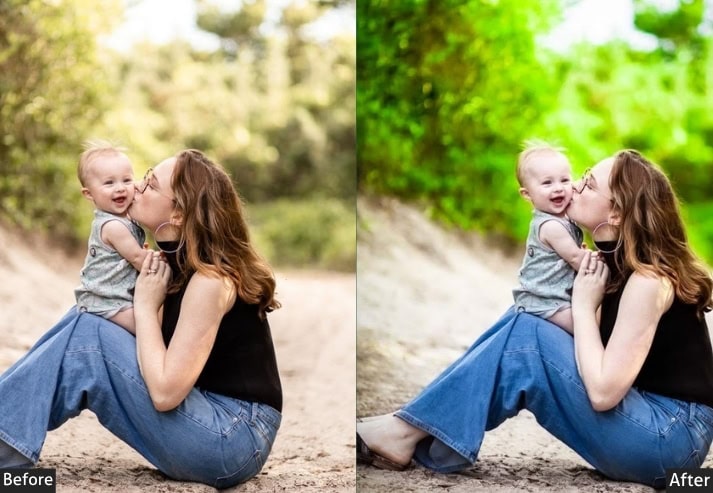
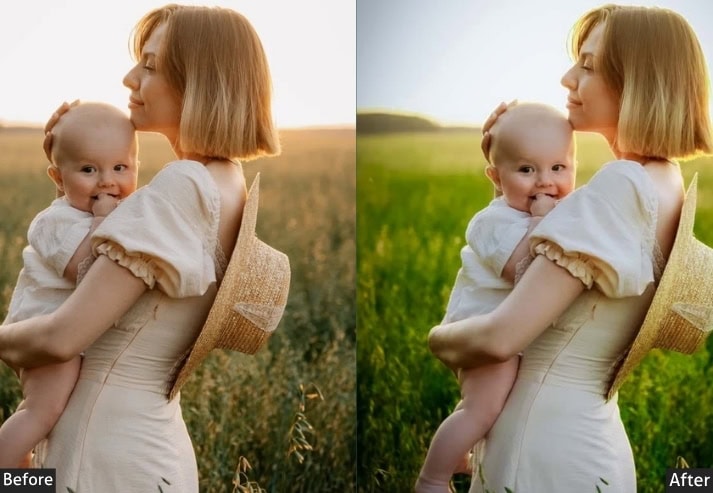
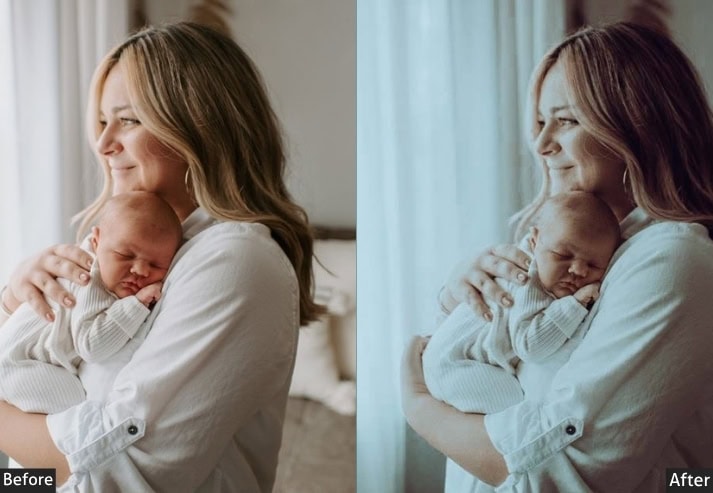
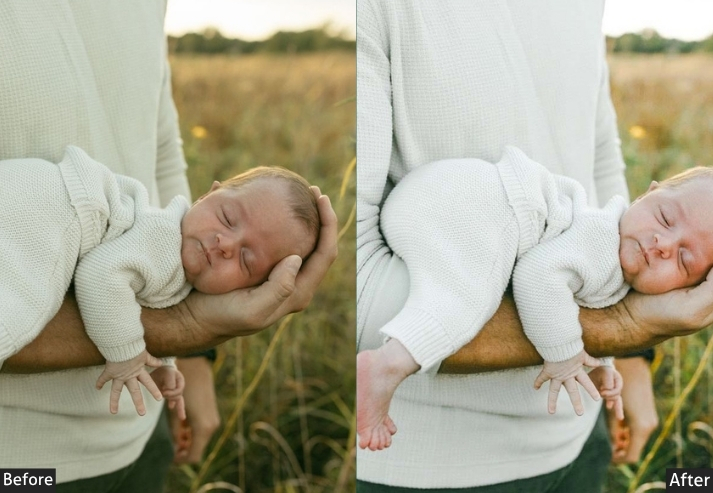
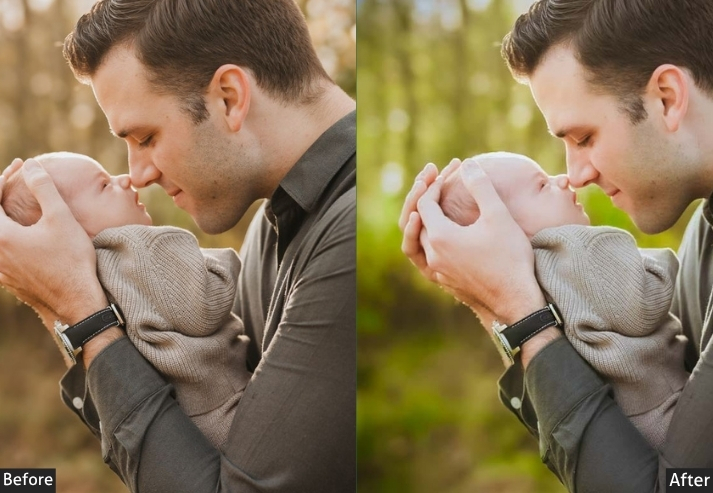
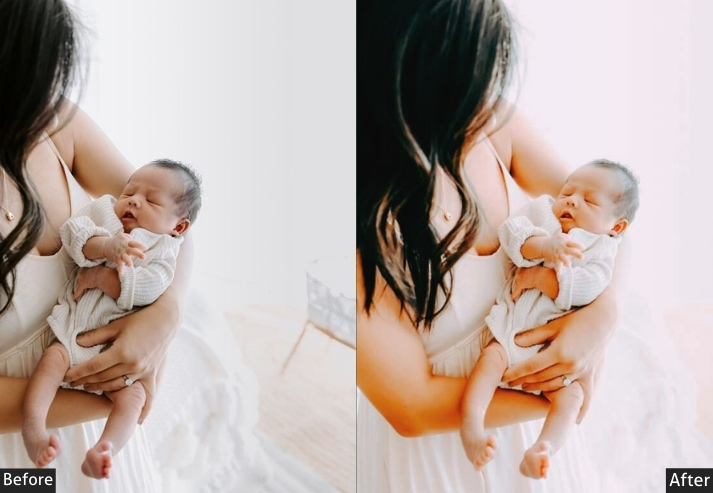
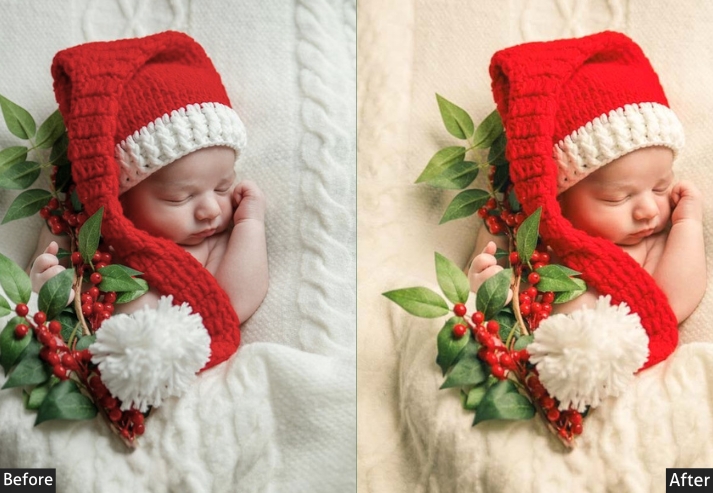
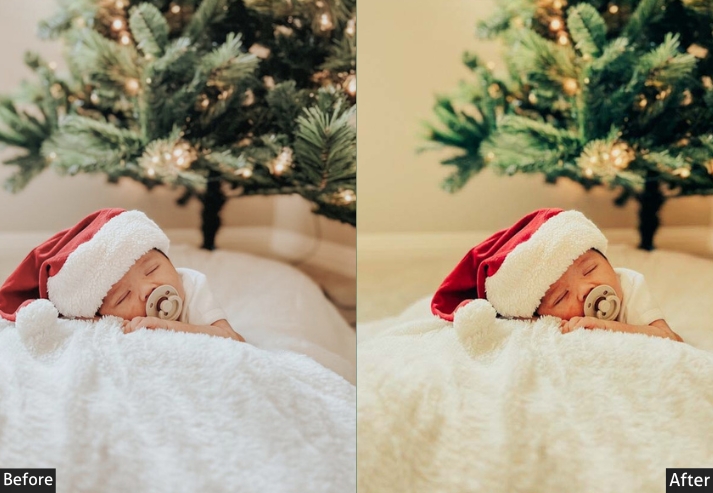
Light Panel: Exposure +5% | Contrast +5% | Highlights -5% | Shadows +5% | Whites +5% | Blacks -5%. Color Panel: Temperature 0 | Tint 0 (neutral balance) | Vibrance +10% | Saturation +5%. Effects Panel: Clarity +10% (crisp touch) | Dehaze 0 | Vignette 0. Detail Panel: Sharpening +15 | Noise Reduction +10.
Purpose: To enhance, without overdoing it, realism rules.
Best For: Any newborn shot needing a timeless, authentic look.
Usage: Tweak exposure or white balance slightly, and you’re golden.
Style: Clean, natural, and true.
5. Moody Newborn
Moody presets use deeper shadows, richer contrast, and cooler color temperatures to create a cinematic, storytelling quality in newborn images. While less common as a primary newborn style, these presets stand out powerfully for environmental portraits and darker, more editorial-style sessions where the background plays a significant role.
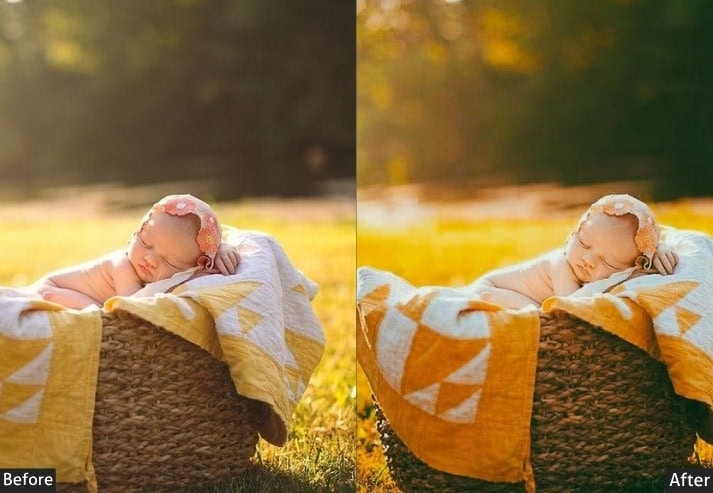
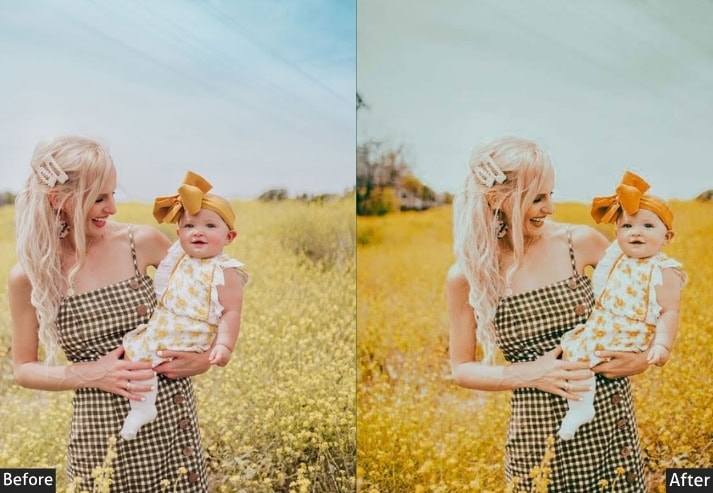
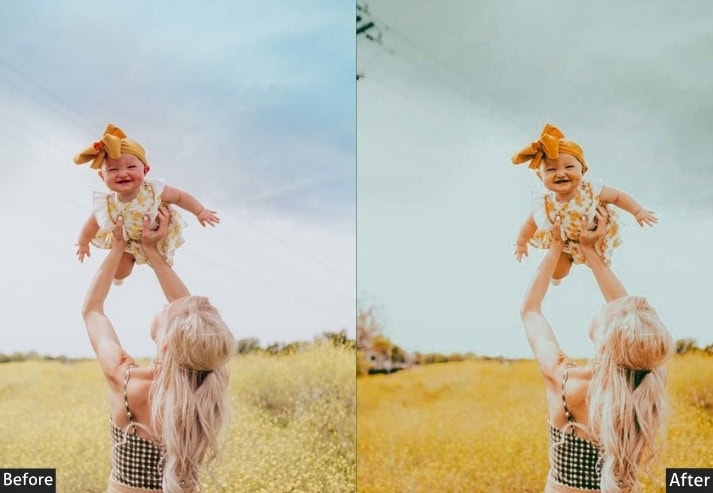
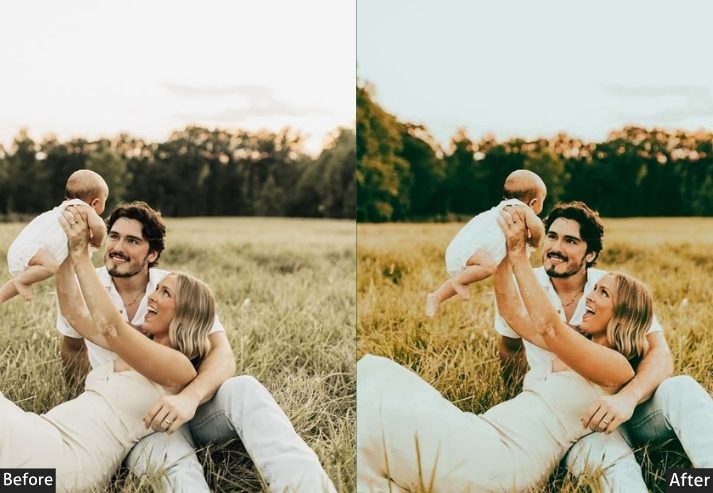
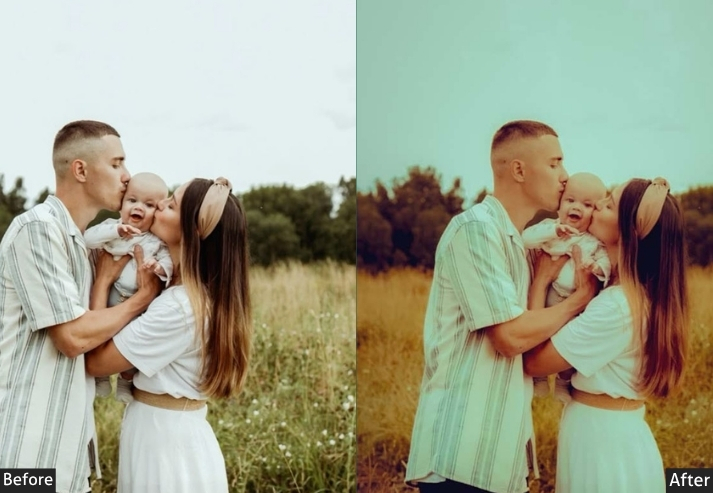
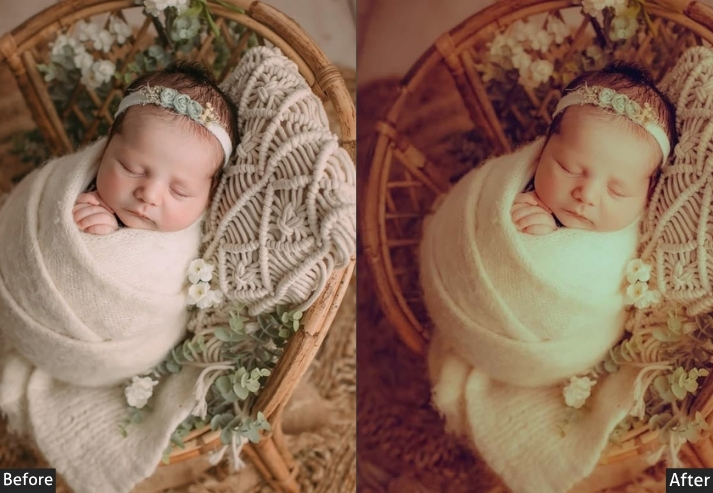
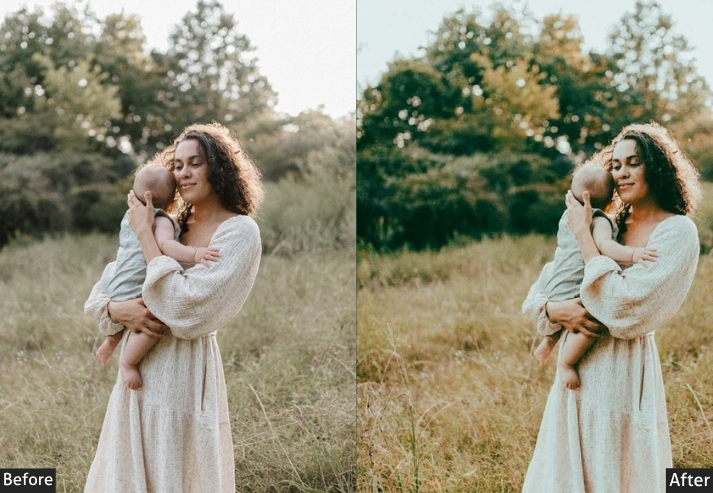
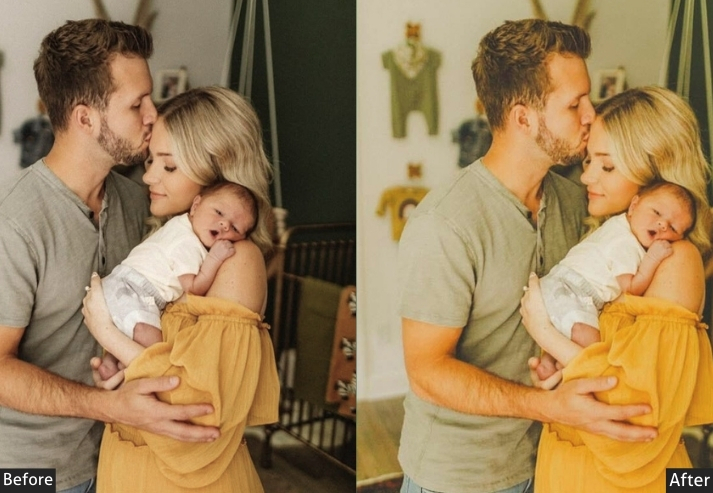
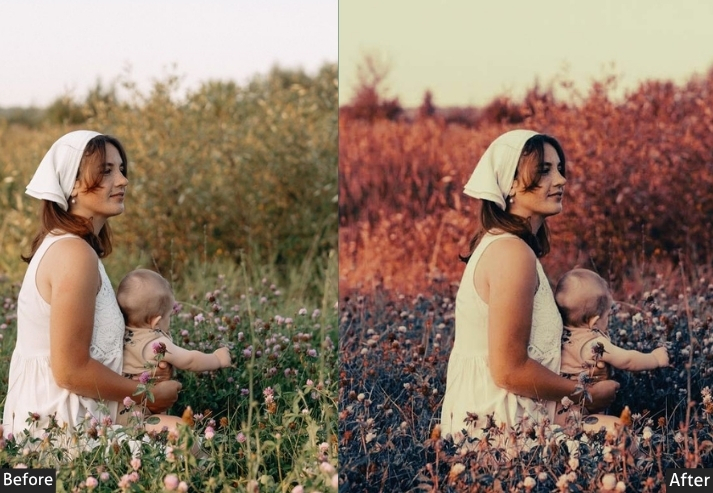
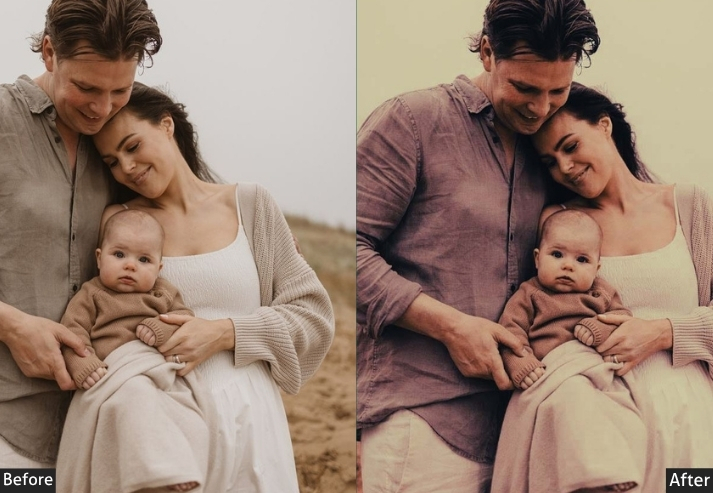
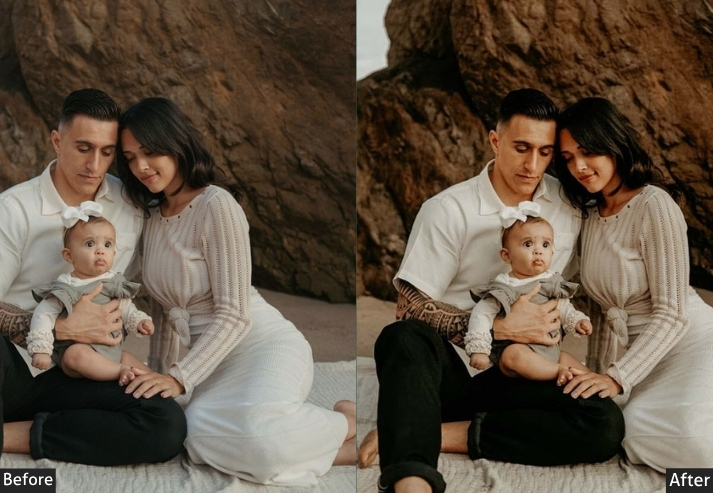
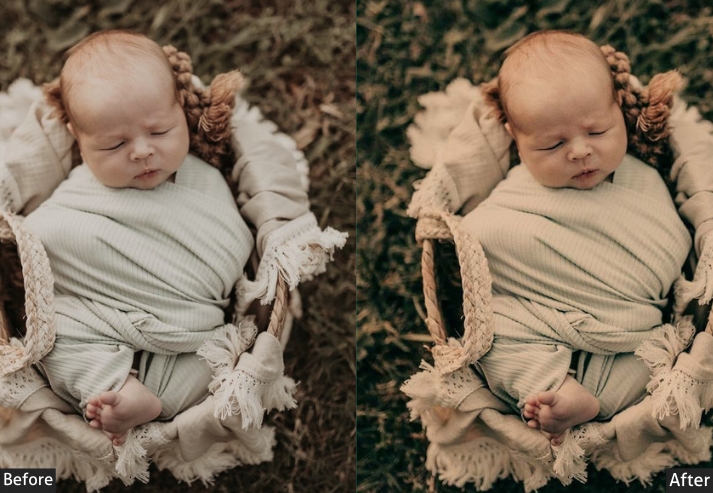
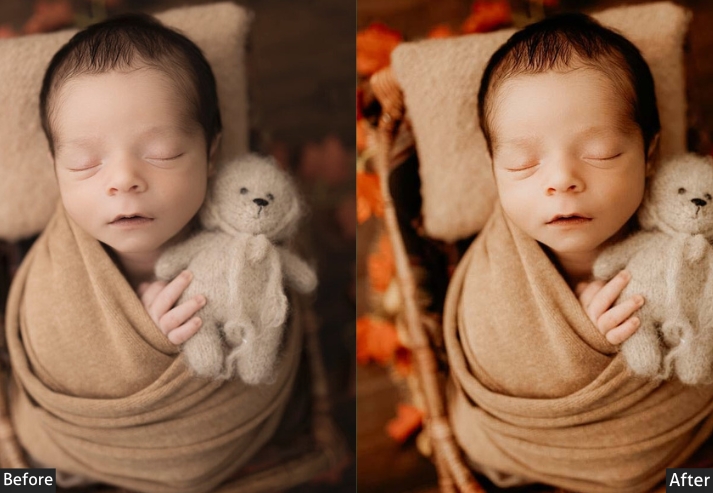
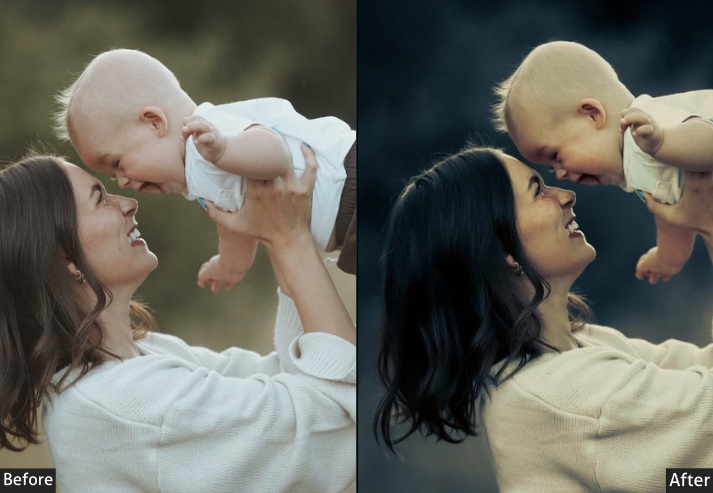
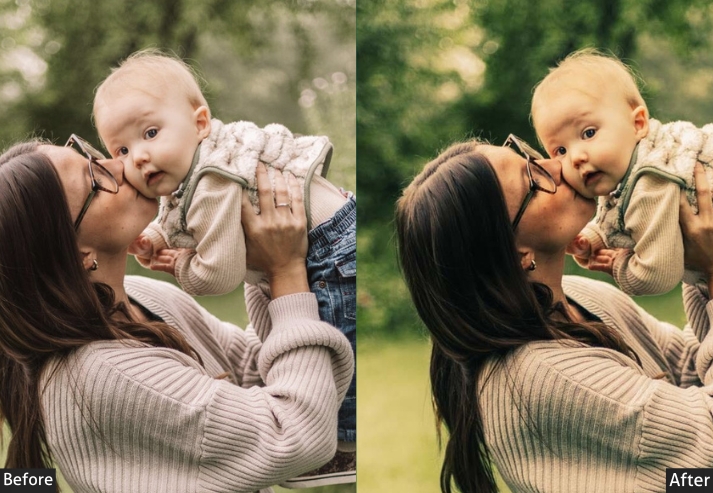
Light Panel: Exposure -10% (darkened mood) | Contrast +20% | Highlights -20% | Shadows -10% | Whites -10% | Blacks +10%. Color Panel: Temp -5 (cool tones) | Tint +5 | Vibrance +15% | Saturation +10%. Effects Panel: Clarity +20% (sharp drama) | Dehaze +10% | Vignette -20 (framing focus). Detail Panel: Sharpening +20 | Noise Reduction +15.
Purpose: add depth and emotion with a dramatic flair.
Best For: Shots with cool lighting or shadows that beg for a story.
Usage: adjust exposure so it’s not too dark, and play with temp to set the mood.
Style: Rich, dark, and intense.
6. Bright and Airy Newborn
Bright and Airy is consistently the most requested editing style in newborn photography. These presets lift shadows, soften contrast, and add a warm, luminous glow that makes images feel open, joyful, and full of life. Ideal for clients who share images on social media or want a light-and-clean aesthetic for nursery wall prints.
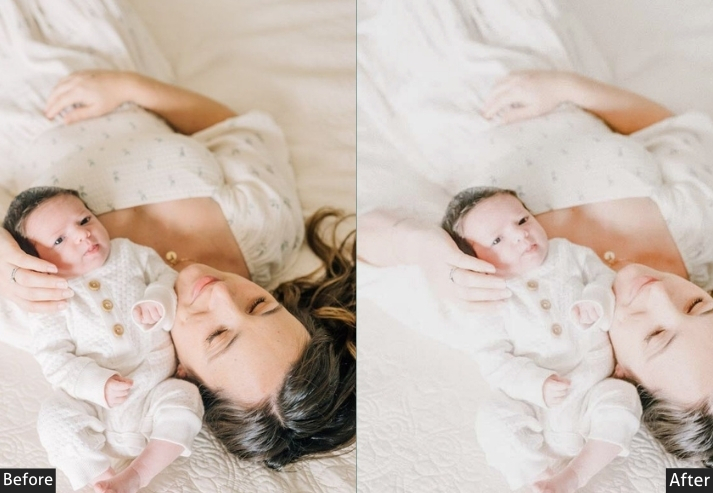
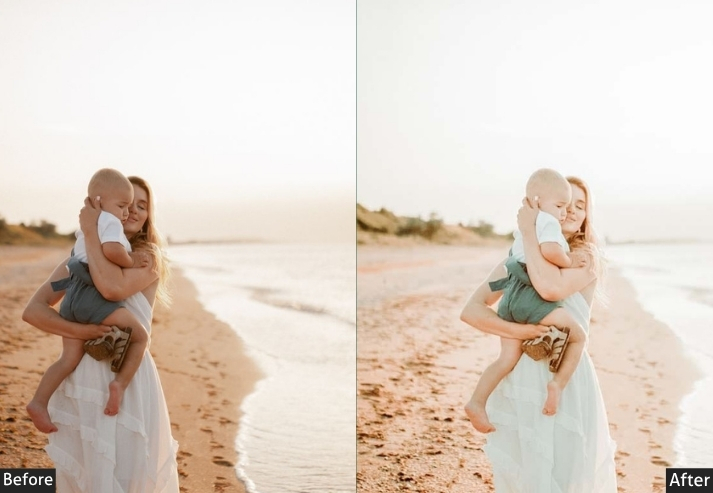
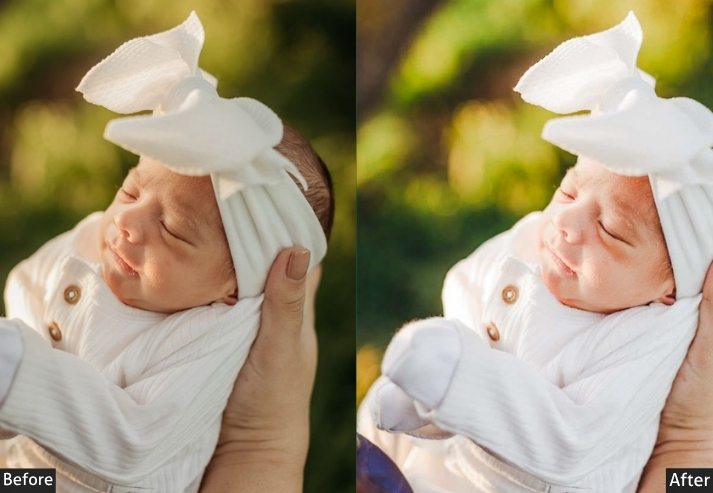
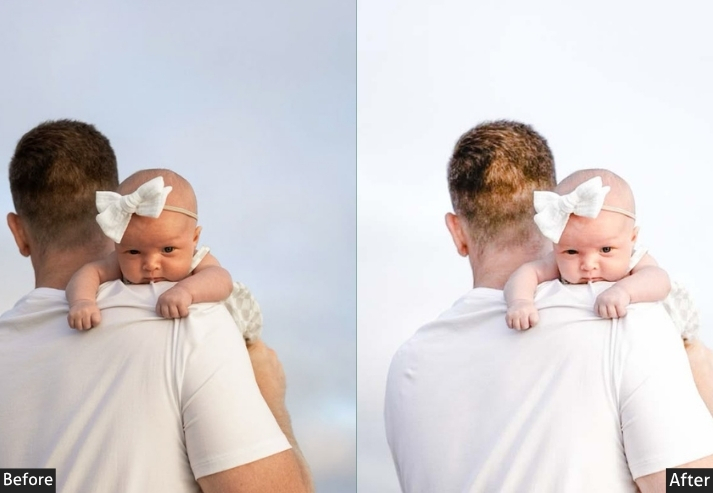
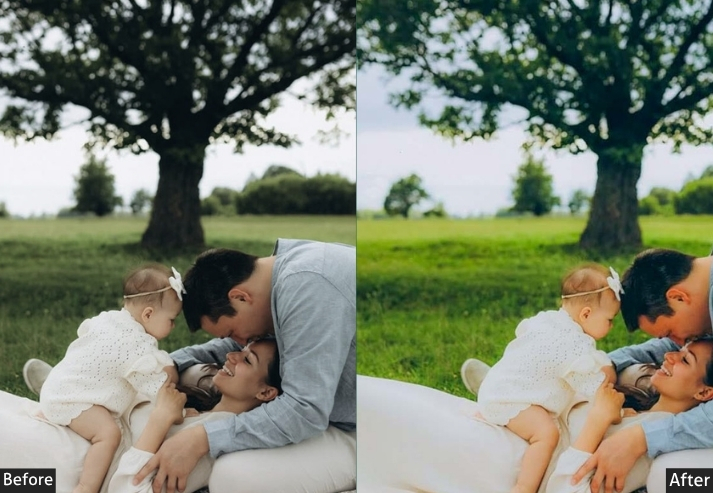
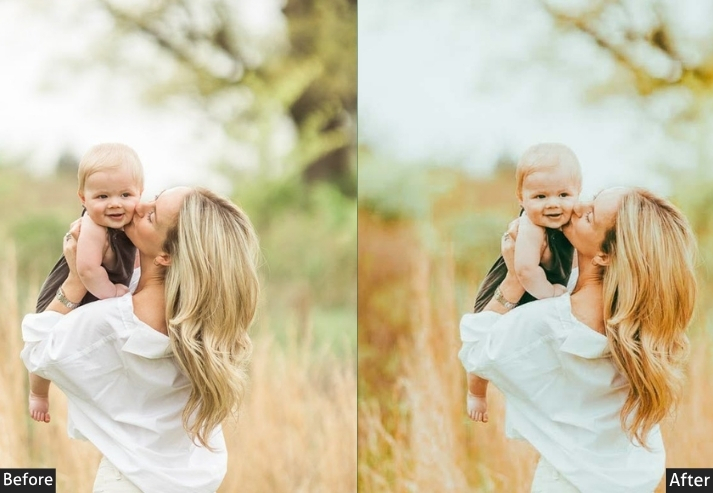
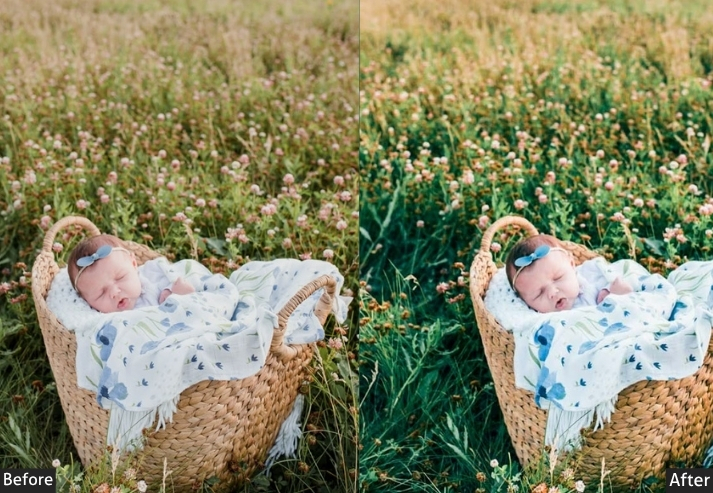
Light Panel: Exposure +15% (brightness boost) | Contrast -10% | Highlights -15% | Shadows +25% | Whites +10% | Blacks +10%. Color Panel: Temperature +5 | Tint +5 | Vibrance +15% | Saturation -5% (soft vibrance). Effects Panel: Clarity -10% (soft look) | Dehaze -5% | Vignette -5. Detail Panel: Sharpening +10 | Noise Reduction +20.
Purpose: a fresh, happy, airy feel.
Best For: Sunny shots, outdoor pics, or any smiley moment.
Usage: watch the exposure and balance highlights.
Style: Bright, soft, and breezy.
7. Pastel Newborn
Pastel presets reduce saturation across the image while gently warming the tint, producing a delicate, muted color palette reminiscent of watercolor illustrations. This style is a strong match for sessions styled with soft-toned props, blush pinks, mint greens, and cream-colored wraps.
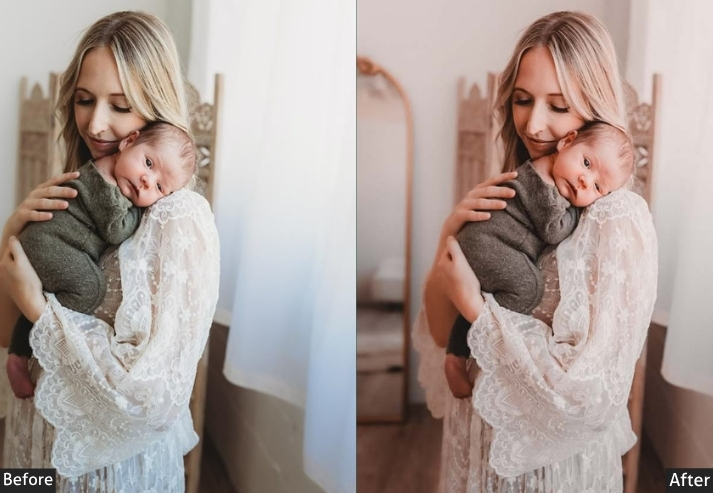
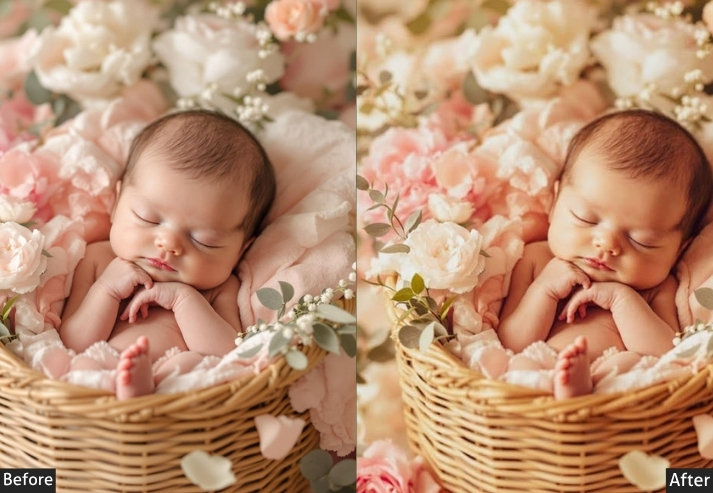
Light Panel: Exposure +5% | Contrast -10% | Highlights -10% | Shadows +10% | Whites -5% | Blacks +5%. Color Panel: Temperature +5 | Tint +10 | Vibrance -10% | Saturation -20% (pastel perfection). Effects Panel: Clarity -15% (softened look) | Dehaze -10% | Vignette -10. Detail Panel: Sharpening +10 | Noise Reduction +15.
Purpose: a gentle, pastel-hued dreamscape.
Best For: Soft-lit shots or pics with pastel props.
Usage: tweak the tint for that pastel and adjust the saturation.
Style: Muted, whimsical, and tender.
8. Matte Newborn
Matte presets lift the black point to create that characteristic velvety, low-contrast finish popularized by contemporary editorial photography. The result is a modern, sophisticated look that photographs especially well against neutral and grey backgrounds.
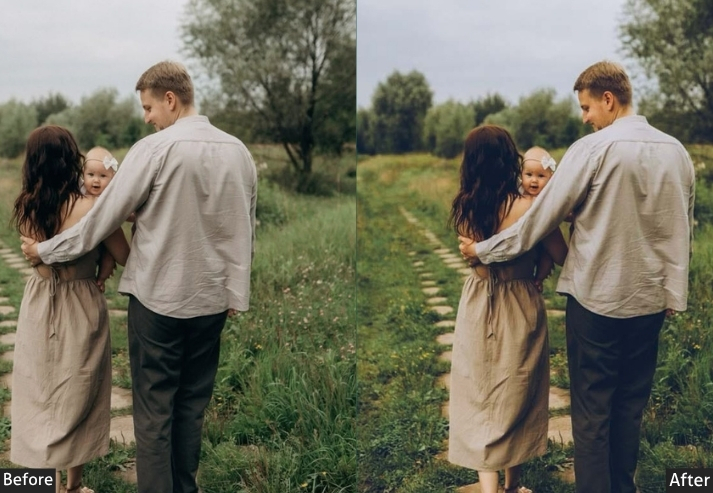
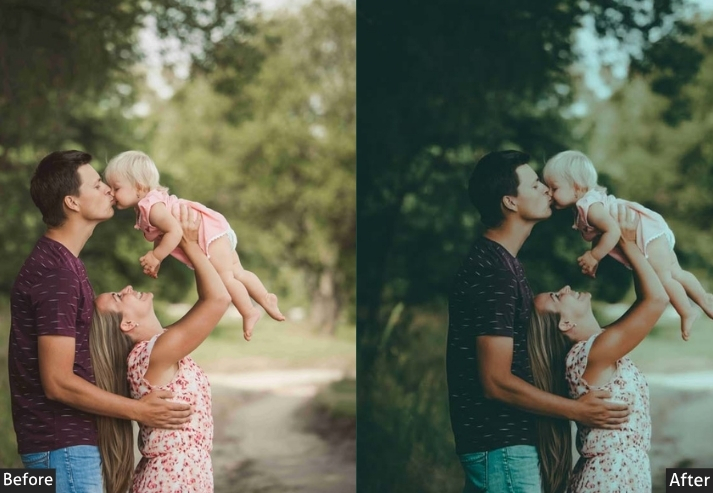
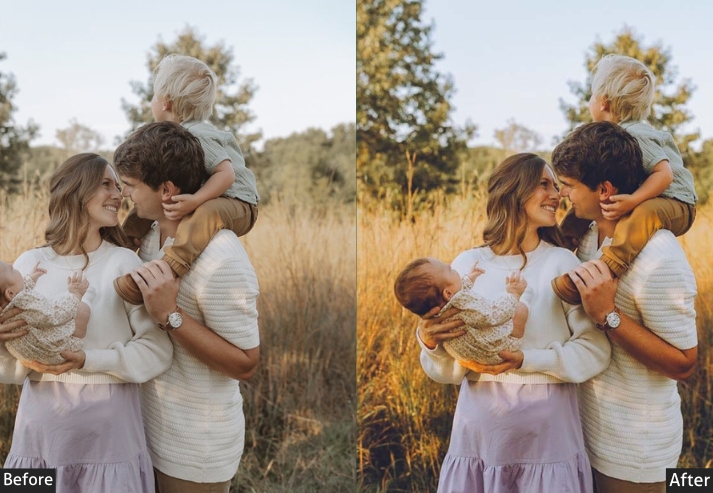
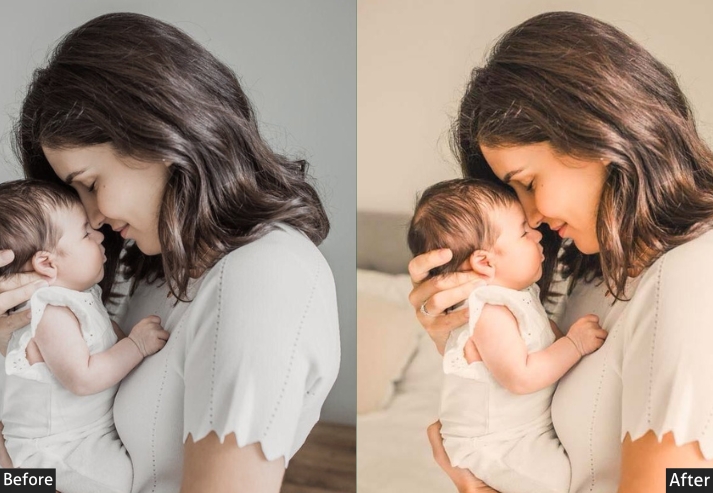

Light Panel: Exposure +5% | Contrast -15% | Highlights -10% | Shadows +15% | Whites -10% | Blacks +20% (matte magic). Color Panel: Temperature 0 | Tint 0 | Vibrance +5% | Saturation -10%. Effects Panel: Clarity -10% | Dehaze +5% | Grain +10 | Vignette -10. Detail Panel: Sharpening +15 | Noise Reduction +15.
Purpose: a sleek, matte finish with a contemporary edge.
Best For: Neutral backdrops or stylish, modern shots.
Usage: adjust blacks for the matte effect, and tweak exposure.
Style: Velvety, soft, and chic.
9. Film-Inspired Newborn
Film-Inspired presets emulate the color science of classic analog film stocks, adding intentional grain, unique color channel shifts, and slightly compressed tonal ranges. Each preset in this collection references a different film aesthetic, giving photographers a range of cinematic options from golden-hour Kodak-style warmth to muted Fuji coolness.
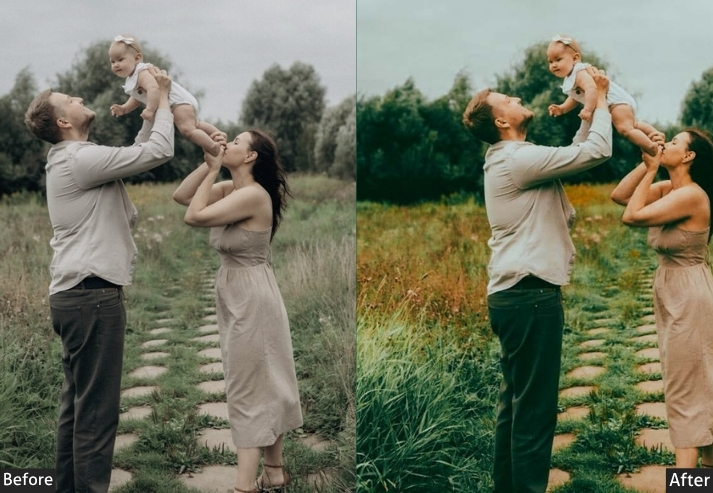
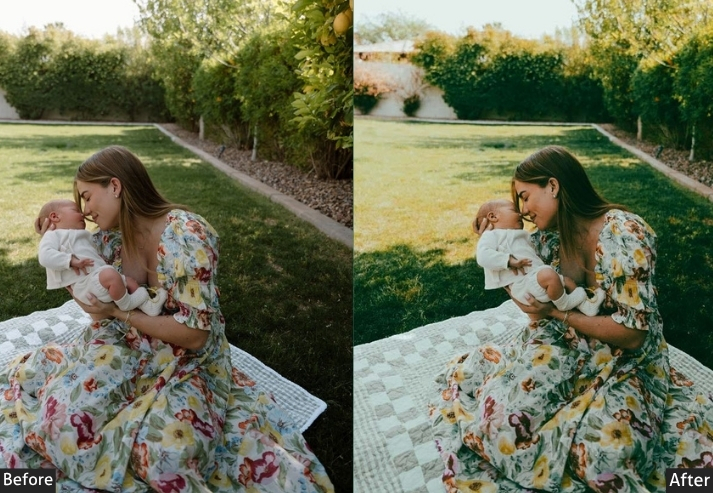
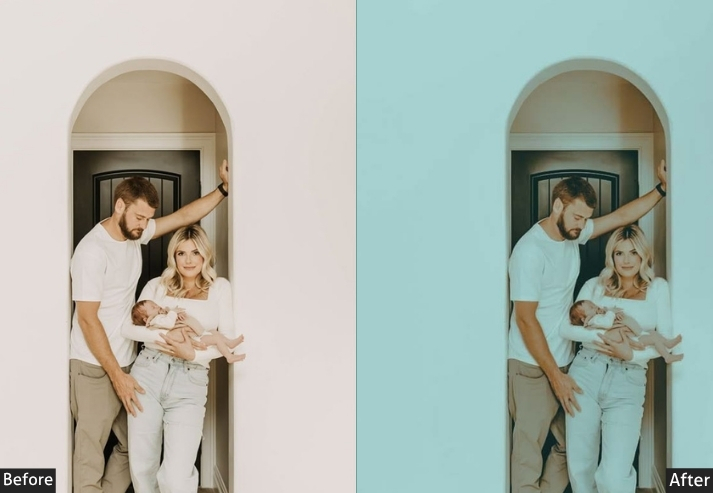
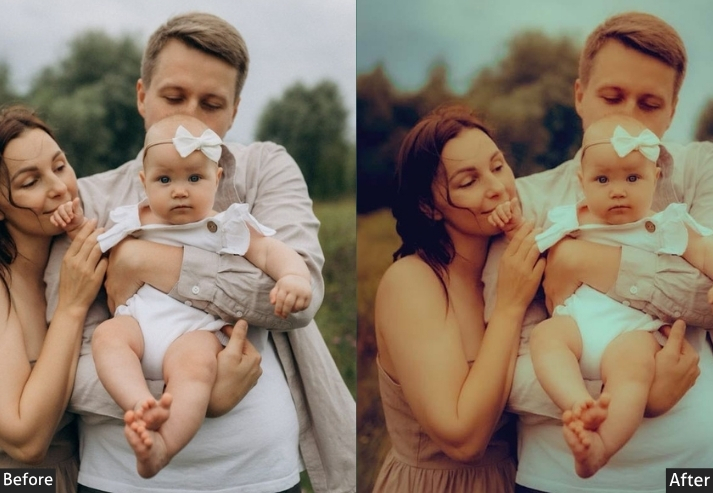
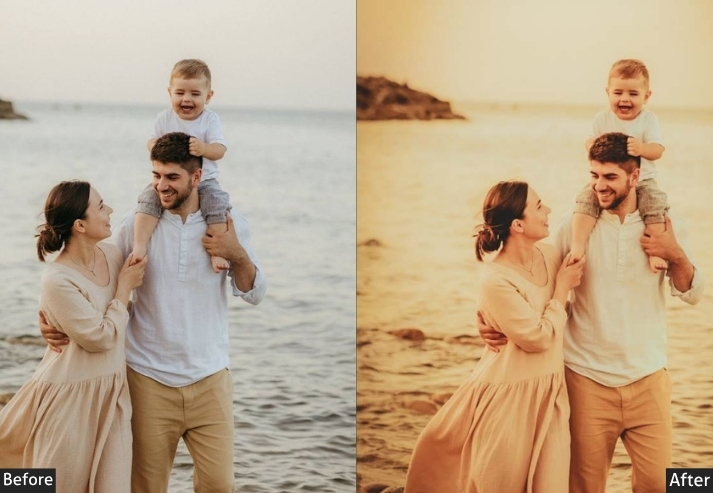
Light Panel: Exposure +5% | Contrast +10% | Highlights -10% | Shadows +10% | Whites +5% | Blacks -5%. Color Panel: Temperature -5 | Tint +5 | Vibrance +10% | Saturation +5%. Effects Panel: Clarity +10% | Dehaze +5% | Grain +15 (film vibes) | Vignette -10. Detail Panel: Sharpening +15 | Noise Reduction +10.
Purpose: the artistic soul of film photography.
Best For: Any shot craving a dose of nostalgia or flair.
Usage: tweak grain and tones for your fave film look.
Style: Grainy, colorful, and retro.
10. High Contrast Newborn
High Contrast presets are designed for images where strong graphic compositions, bold backgrounds, or deliberate overexposure are part of the visual intent. They amplify vibrancy and punch up saturation, less common in traditional newborn work, but highly effective for editorial-style sessions or social media standout images.
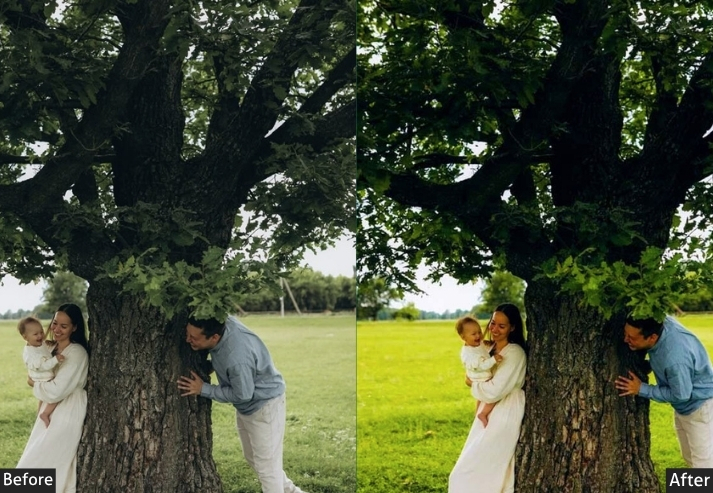
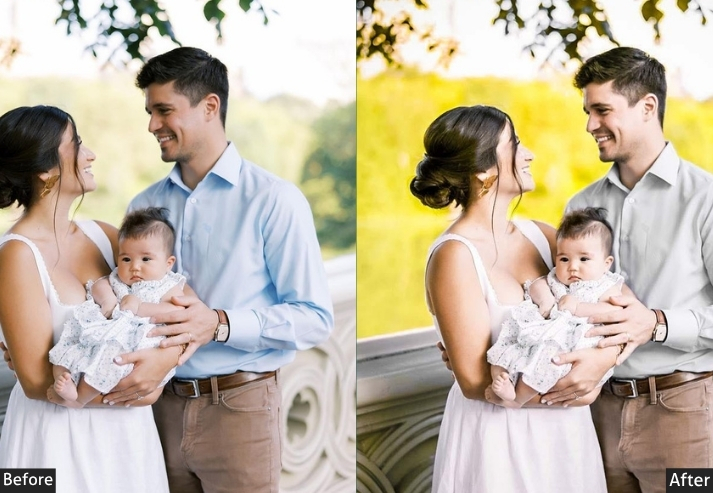
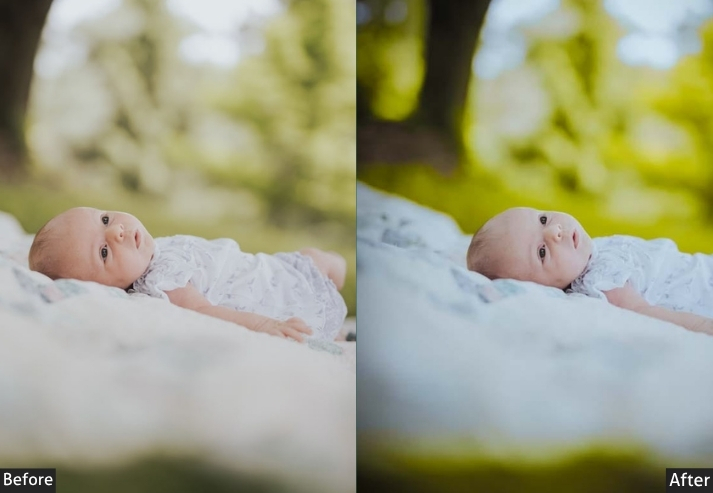
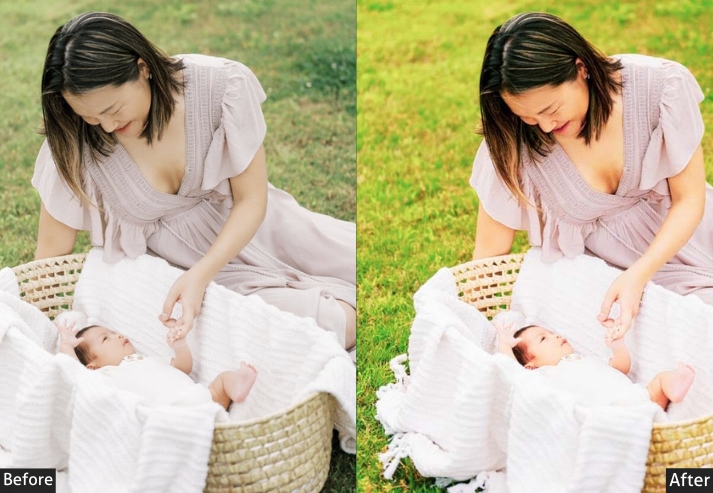
Light Panel: Exposure +5% | Contrast +25% (go big!) | Highlights -15% | Shadows -15% | Whites +10% | Blacks -10%. Color Panel: Temperature 0 | Tint 0 | Vibrance +20% | Saturation +15%. Effects Panel: Clarity +25% (sharp!) | Dehaze +10% | Vignette -15. Detail Panel: Sharpening +25 | Noise Reduction +10.
Purpose: eye-catching, vibrant shots with punch.
Best For: Well-lit pics where details and colors need to shine.
Usage: ease off contrast if skin tones get funky, and adjust clarity.
Style: Bold, vivid, and dynamic.
11. Warm and Cozy Newborn
Golden tones and a snuggly feel make it best for capturing love and warmth. It’s comfort food for your eyes!
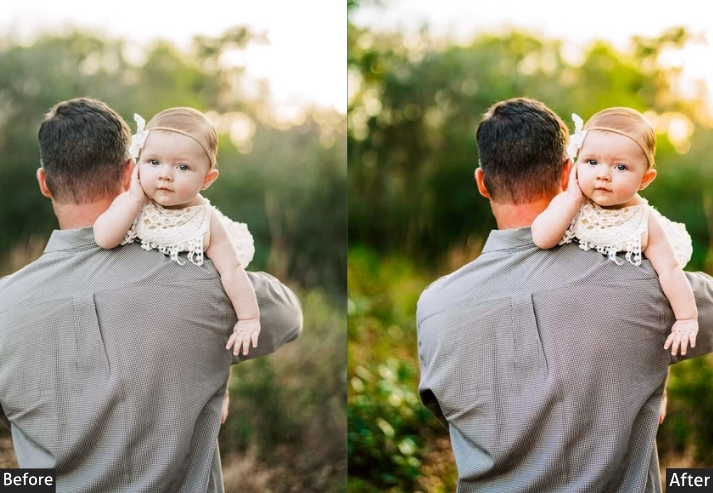
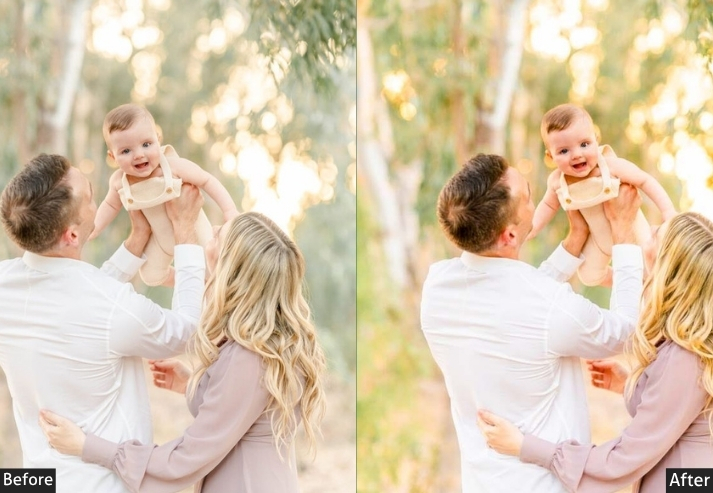
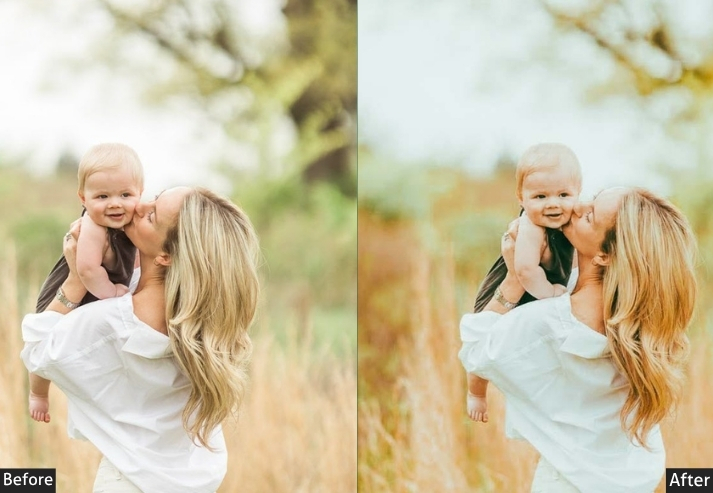
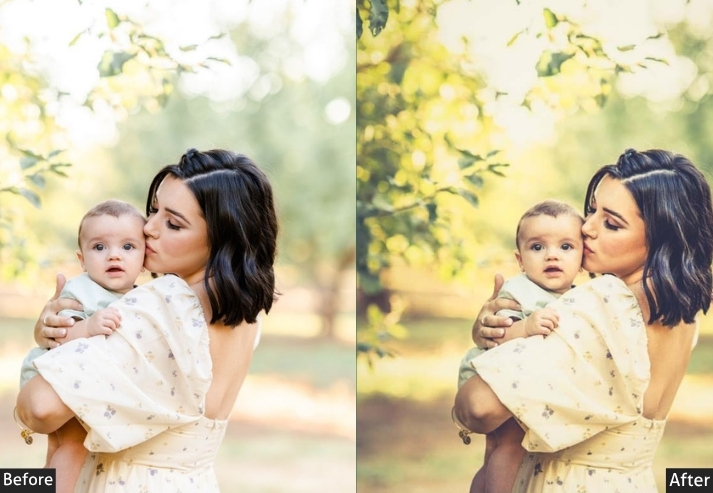
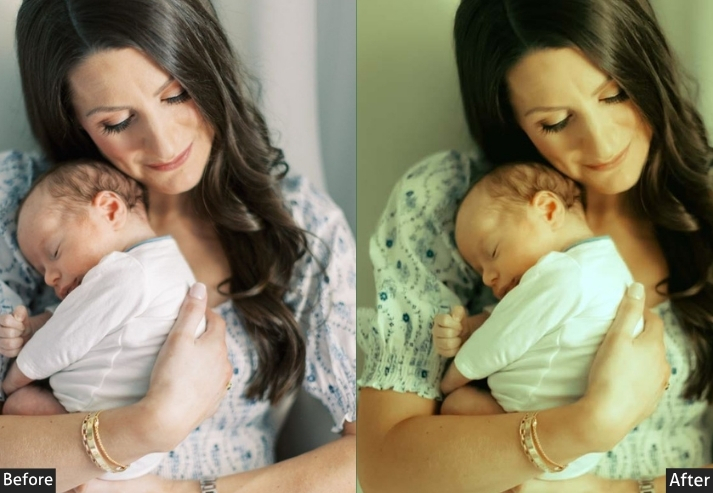
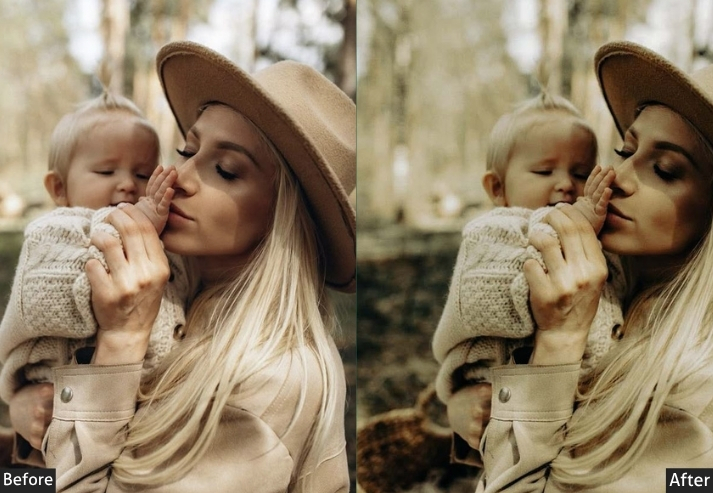
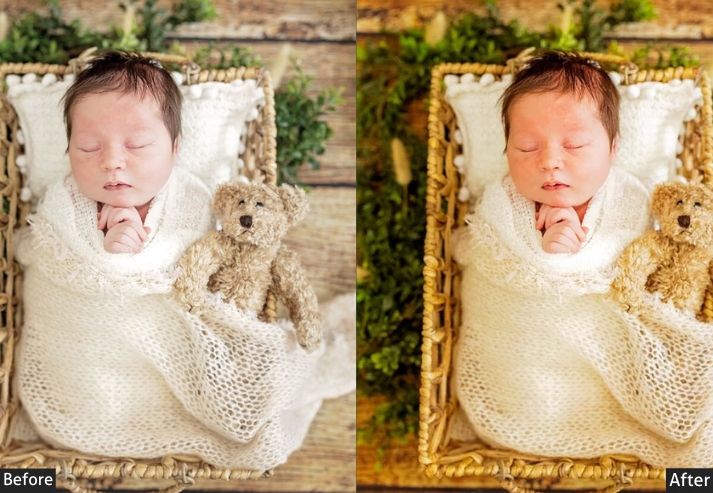
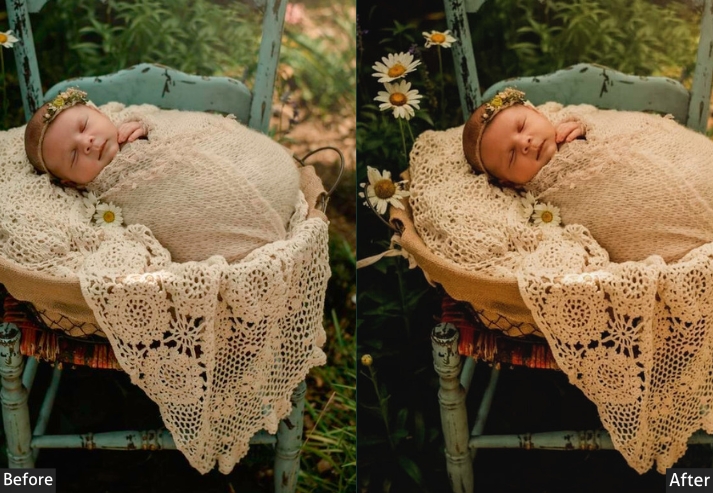
Light Panel: Exposure +5% | Contrast +5% | Highlights -10% | Shadows +10% | Whites +5% | Blacks -5%. Color Panel: Temperature +10 (toasty!) | Tint +5 | Vibrance +15% | Saturation +10%. Effects Panel: Clarity +5% | Dehaze 0 | Vignette -10. Detail Panel: Sharpening +10 | Noise Reduction +15.
Purpose: warmth and comfort.
Best For: Warm-lit shots, cuddles, or family love.
Usage: tweak the temp for that golden glow and adjust the exposure.
Style: Golden, cozy, and inviting.
12. Cool and Calm Newborn
Need some zen? Cool and Calm presets bring a serene, soothing vibe with cool tones that whisper peace.
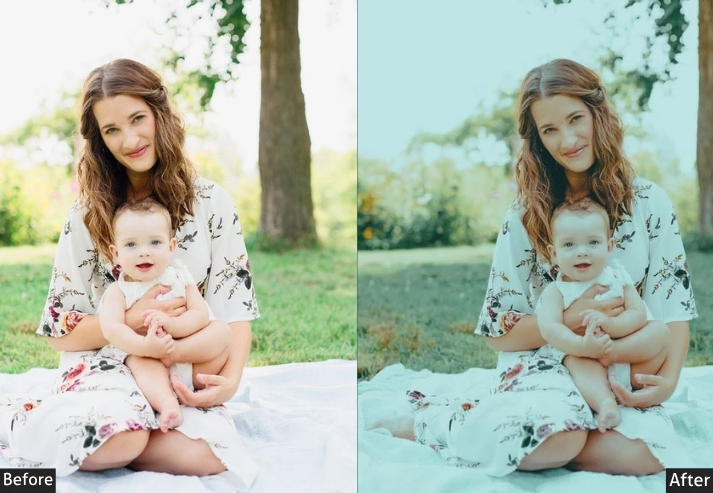
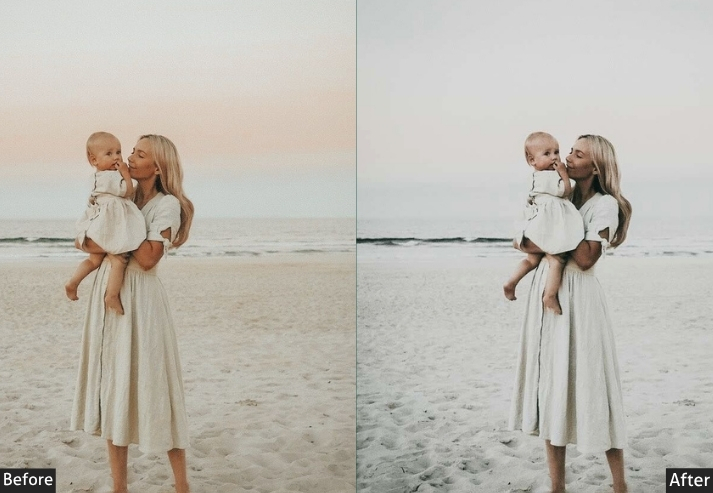
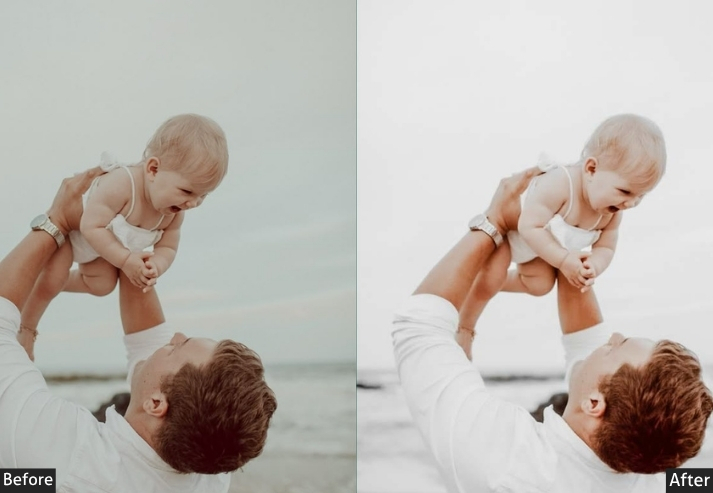
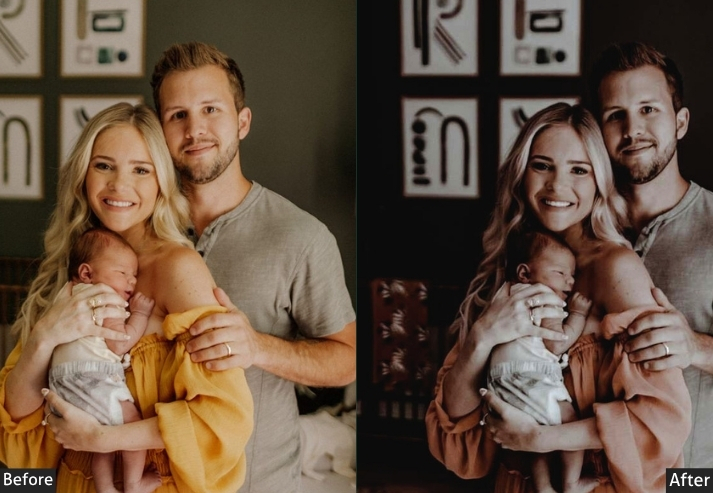
Light Panel: Exposure +5% | Contrast -5% | Highlights -10% | Shadows +10% | Whites -5% | Blacks +5%. Color Panel: Temperature -10 (cool it) | Tint -5 | Vibrance +10% | Saturation -5%. Effects Panel: Clarity -10% (soft serenity) | Dehaze -5% | Vignette -10. Detail Panel: Sharpening +10 | Noise Reduction +20.
Purpose: A tranquil, calming look.
Best For: Sleeping babies, cool light, or quiet scenes.
Usage: adjust the temp for coolness and tweak the softness.
Style: Cool, peaceful, and gentle.
13. Dark Newborn
Dark presets plunge your newborn photos into a rich, mysterious realm, where deep tones and subtle highlights create a cozy, dramatic vibe. It’s like tucking your little one into a velvet night, with just a whisper of light to show off those tiny features.
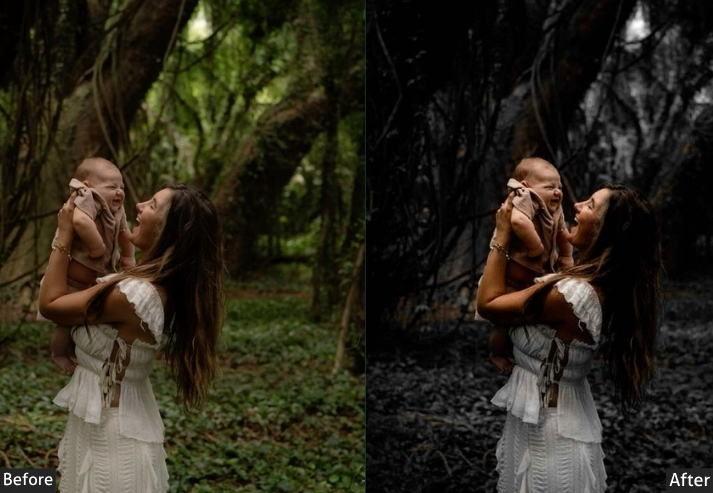
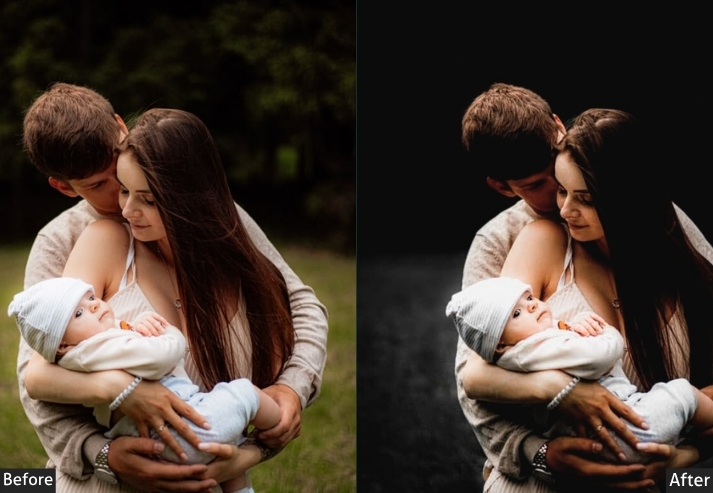
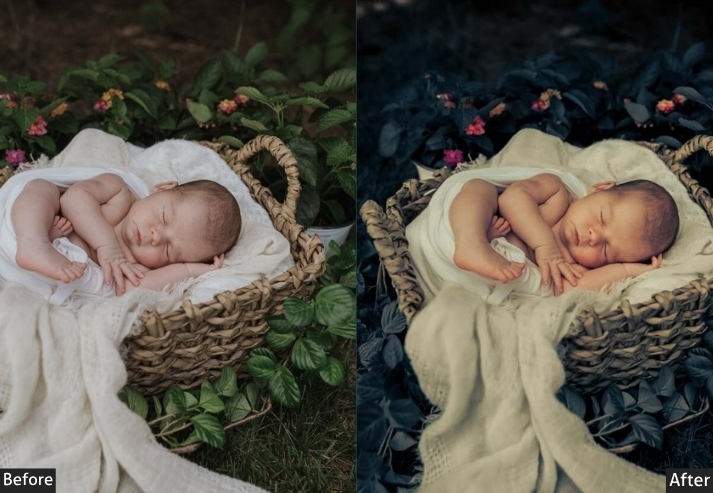
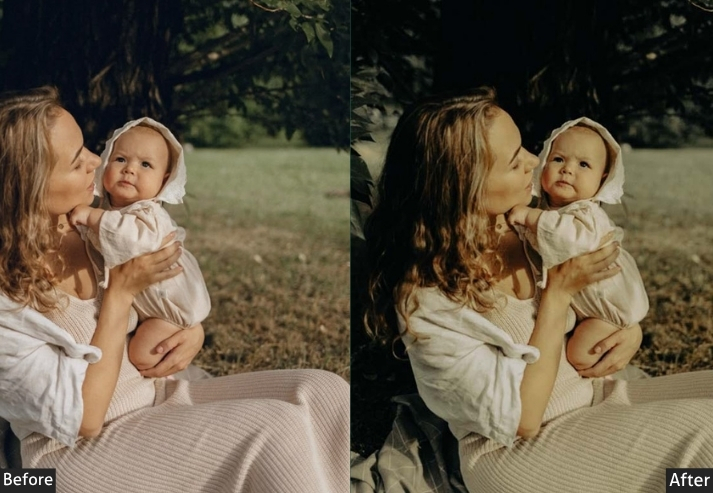
Light Panel: Exposure -15% (deep and dark) | Contrast +15% | Highlights -25% (softened brights) | Shadows -10% | Whites -15% | Blacks +15% (rich depth). Color Panel: Temperature -10 (cool and moody) | Tint +5 (touch of warmth) | Vibrance +10% | Saturation -10% (subtle hues). Effects Panel: Clarity +15% (sharp details) | Dehaze +10% | Vignette -25 (draws the eye inward). Detail Panel: Sharpening +20 | Noise Reduction +20 (smooth shadows).
Purpose: A dramatic, intimate mood with rich, shadowy tones.
Best For: Low-light shots, cozy setups, or pics with dark blankets and props.
Usage: adjust exposure to keep skin tones flattering, and tweak the vignette for focus.
Style: Deep, mysterious, and intimate.
Who are these presets for?
- Professional newborn photographers who want consistent color grading across full client sessions without spending hours in the Develop module.
- Family and lifestyle photographers who occasionally photograph newborns and need reliable skin-tone accuracy without deep expertise in Lightroom.
- New parents and hobbyist photographers shooting at home with a phone or entry-level camera, and wanting beautiful, polished results fast.
- Lightroom beginners who want to study real professional settings and understand how each slider affects newborn skin tones, contrast, and light.
How to Get the Best Results from Newborn Presets?
Presets are powerful, but they’re not magic. A preset applied to a severely underexposed RAW file or an image with a strong mixed-light color cast will still look off without a couple of manual adjustments. Here’s how professional newborn photographers get consistent, beautiful results every single time.
Step 1 – Correct Exposure Before Applying the Preset
Before you click any preset, set your exposure close to correct. Bring your Exposure slider to where baby’s skin looks natural, not blown out, not muddy. You don’t need to perfect it, just get it in the right range. A preset can then do the stylistic heavy lifting from that foundation rather than trying to compensate for extreme under- or overexposure.
Step 2 – Fix White Balance First for Accurate Skin Tones
Newborn skin is extremely sensitive to white balance errors. A blue tint makes a sleeping baby look cold and unwell. An orange cast makes skin look splotchy. Before applying a preset, set your white balance by clicking on a neutral grey or white area in the frame. A white blanket, a nappy wrap, or a light grey backdrop all work well. Once your white balance is close to accurate, apply the preset and see how skin tones respond.
Step 3 – Use the Presets as a Starting Point, Not a Final Edit
Every camera sensor renders color slightly differently. A Nikon Z6 renders greens warmer than a Sony A7IV. A Canon EOS R captures slightly cooler whites than a Fujifilm X-T5. These differences mean that no preset will be 100% perfect for your camera straight out of the box, but it will get you 80–90% of the way there. The final 10–20% is always a quick personal adjustment to Highlights, Shadows, or Temperature.
Step 4 – Sync Across the Whole Session in One Click
One of the biggest time-savers in Lightroom is the Sync Settings function. Edit your best image from the session, then select all images shot in the same lighting setup, and click Sync. All presets and manual adjustments carry across instantly. A 300-image newborn session can be edited to a consistent finish in under 20 minutes using this workflow.
Last Moments
Newborn photography is unlike any other genre. You have a window of roughly 5-15 days after birth and sometimes less to capture a look, a curl of tiny fingers, a sleeping expression that will never exist again in quite the same way. The photography itself demands patience, skill, and sensitivity. The editing should never undo that.
These presets were built with one goal: to protect what you captured. Not to over-saturate it, over-process it, or paste a trendy filter over it. Each one is designed to enhance the natural light and skin tones already in your image, giving you a starting point that respects the moment rather than replacing it.
More Presets For You:
Family Photography Lightroom Presets Free Download
Fujifilm Lightroom Presets Free Download
Pet Lightroom Presets Free Download
Lifestyle Lightroom Presets Free Download
Indoor Lightroom Presets Free Download
Instagram Lightroom Presets Free Download
Automobile Lightroom Presets Free Download