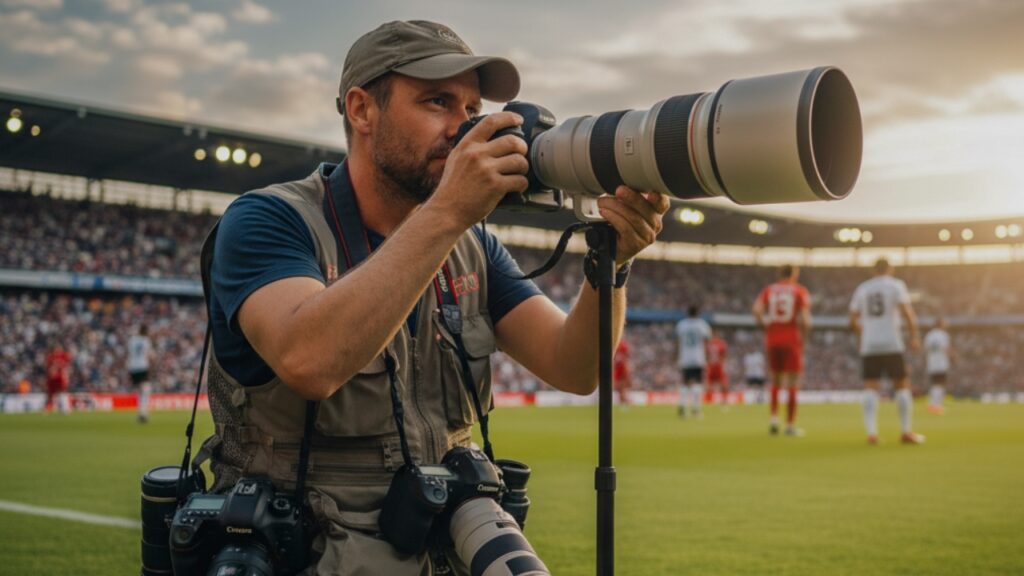
I still remember the exact moment I knew I wanted to be a sports photographer. I was sixteen, sitting in the nosebleed section at a high school basketball game, watching my friend’s older brother sprint up and down the court with a massive camera and an even bigger smile. He was inside the action – not just watching the game, but becoming part of its story. Meanwhile, I was stuck behind a sea of parents holding iPads.
That night changed everything…Fast forward twelve years, and I’ve shot everything from Little League games in the pouring rain to World Cup qualifiers where the roar of 60,000 fans literally vibrates through your chest. I’ve been accidentally hit by soccer balls (three times), splashed by basketball sweat (too many times to count), and once had a hockey puck miss my lens by about two inches.
And honestly? I wouldn’t trade this career for anything. If you’re reading this, chances are you’ve got that same itch – that weird combination of loving sports and having an eye for capturing moments that make people say “wow.” Maybe you’ve already been sneaking your camera into local games, or maybe you’re starting to wonder if this could be more than just a hobby.
Either way, I’ve got you covered. Let’s talk about how to actually turn this dream into your reality. 🙌
I write about sports photography, editing techniques, gear, and creative ideas to help photographers create sharper, more impactful images on and off the field.
- Amy Kontras
- The Glamorous Part:
- The Not-So-Glamorous Part (That Nobody Talks About):
- Step 1: Fall in Love with a Sport (Then Learn Everything About It)
- Step 2: Master Your Camera (Before You Master Sports)
- Step 3: Start Local (and I Mean Really Local)
- Step 4: Build a Portfolio That Makes People Stop Scrolling
- Step 5: Invest in Gear (But Not All at Once!)
- Step 6: Shoot, Fail, Learn, Repeat (The 10,000-Hour Rule)
- Step 7: Network Like Your Career Depends On It (Because It Does)
- Step 8: Turn Pro (The Business Side Nobody Warns You About)
- Step 9: Keep Evolving (Or Get Left Behind)
- The Gear I Actually Use (My Current Setup)
- Week 1: Foundation
- Week 2: Practice
- Week 3: Make Contact
- Week 4: First Real Shoot
- My Editing Workflow (Step-by-Step)
- Software Recommendations
- Editing Speed Tips
Checklist for Sports Photographers
Before we dive deep, here’s your starter pack checklist. Don’t panic if you don’t have everything yet-we’ll cover how to build up gradually!
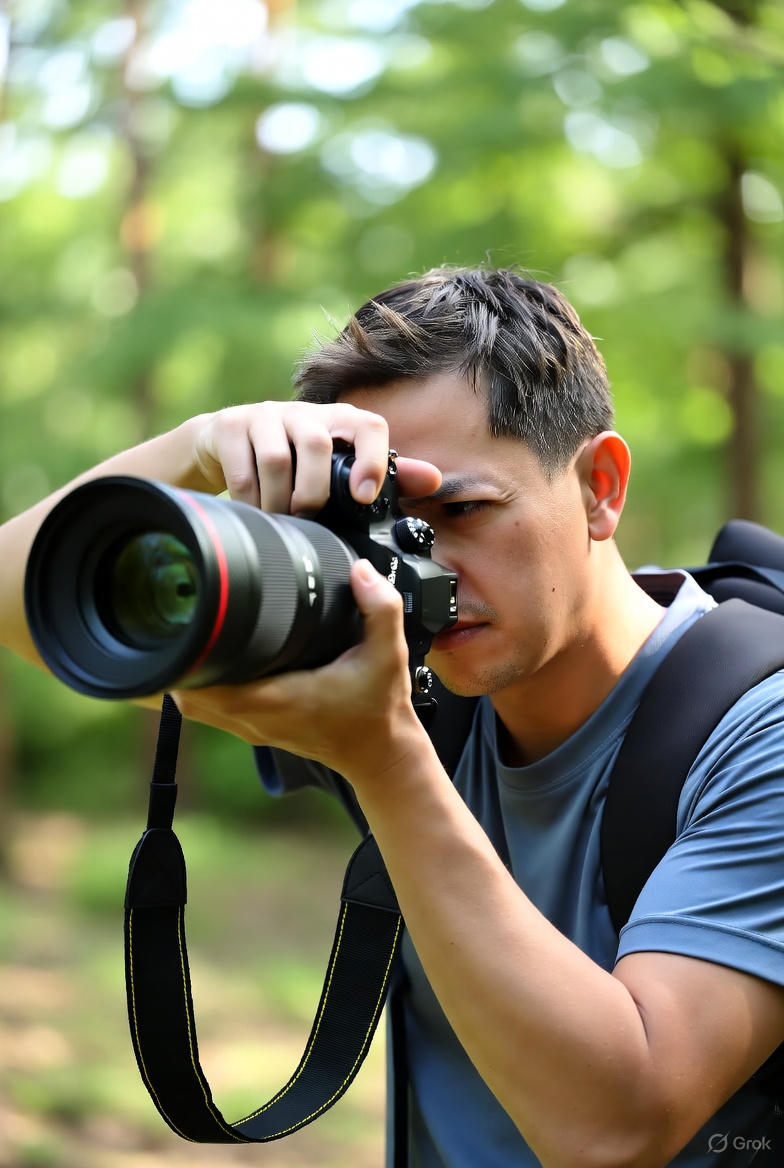
Essential Gear:
- DSLR or mirrorless camera with fast autofocus
- Telephoto lens (70-200mm minimum)
- Fast memory cards (64GB or higher)
- Backup battery (trust me on this one!)
- Monopod for stability
- Camera bag with weather protection
Skills to Develop:
- Understanding of shutter speed, aperture, and ISO
- Knowledge of the sports you’re shooting
- Fast reflexes and anticipation
- Post-processing basics
- Business skills (if going pro)
Professional Must-Haves:
- Online portfolio website
- Social media presence
- Backup equipment
- Basic editing workflow
- Network of contacts
What Does a Sports Photographer Actually Do?
Before we start the “how,” let’s get real about what this job actually involves – because it’s way more than just showing up with a camera.
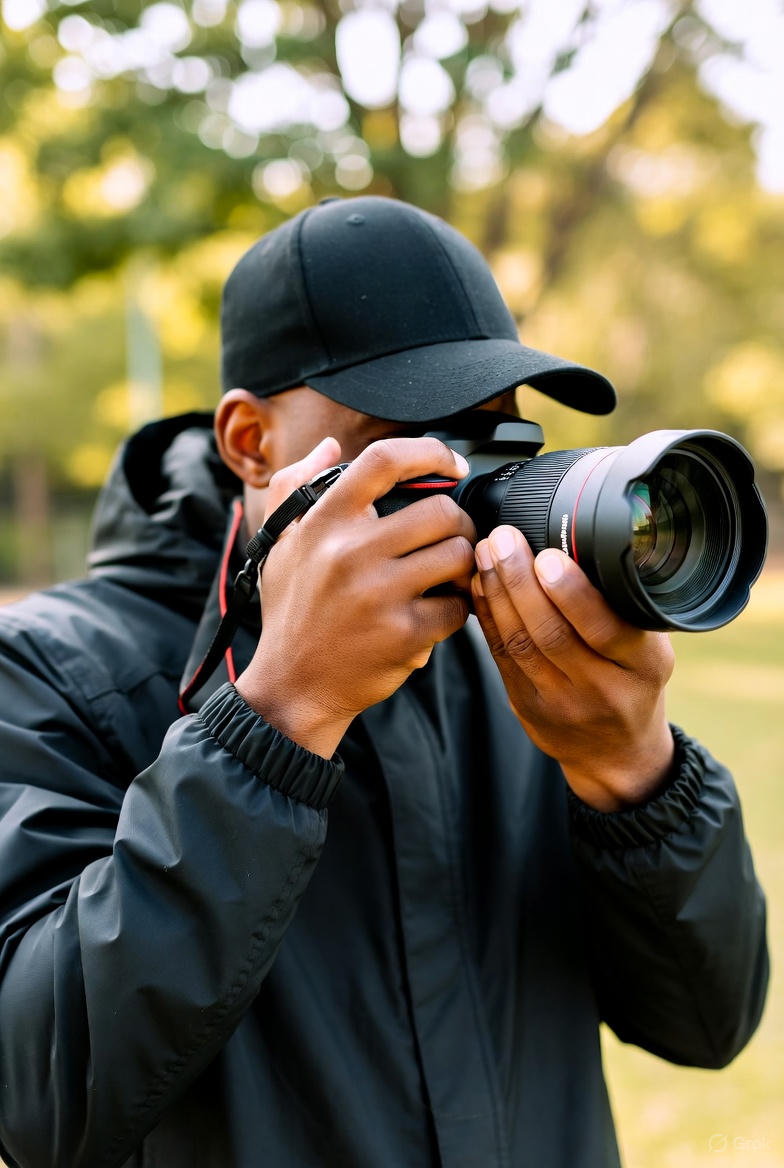
The Glamorous Part:
- Capturing career-defining moments of athletes.
- Getting the best seat in the house (seriously, where else can you stand courtside for free?).
- Traveling to incredible venues and events.
- Seeing your photos in magazines, newspapers, or going viral online.
- Being part of the energy and emotion of live sports.
The Not-So-Glamorous Part (That Nobody Talks About):
- Standing in freezing rain for three hours during a football game.
- Lugging 30+ pounds of equipment everywhere you go.
- Missing the game-winning shot because you blinked (yep, it happens).
- Working nights, weekends, and holidays when everyone else is relaxing.
- Constantly networking and hustling for your next gig.
- Editing hundreds (sometimes thousands) of photos after each event.
- Managing your own business if you’re freelance.
If you just read that second list and thought “still worth it,” you’re probably in the right place. 🎯
How to Get Into Sports Photography (The REAL Journey)
So grab your camera (or borrow one!), and let’s discuss everything you need to know about becoming a sports photographer. Warning: this guide is long, detailed, and packed with real-world advice from someone who’s made every mistake in the book so you don’t have to!
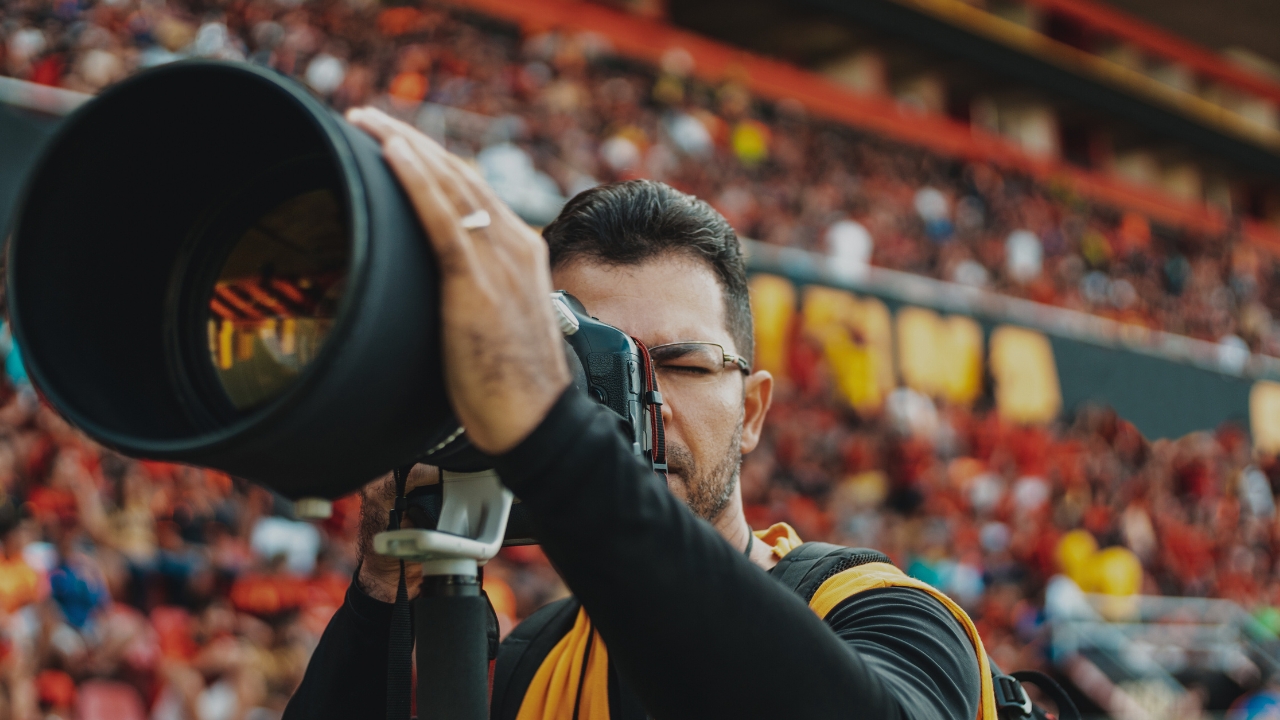
Step 1: Fall in Love with a Sport (Then Learn Everything About It)
This is where most generic guides get it wrong. They’ll tell you to “understand the sport you’re shooting.” That’s like telling someone to “be good at cooking” when they ask how to become a chef. Let me be more specific.
Why This Actually Matters:
When I first tried shooting hockey, I kept missing the goals. Every. Single. Time. Why? Because I was watching where the puck WAS, not where it was GOING. Hockey players can read the play three moves ahead – and if you want to capture THE moment, you need to think like them.
The difference between a decent sports photo and a career-making shot often comes down to anticipation.
How to Actually Do This:
Pick ONE sport to start with – ideally one you already love or play yourself. Here’s your game plan:
- Watch games like a photographer, not a fan:
- Where does the action concentrate?
- What moments make you emotional?
- Where are the photographers positioned at professional games?
- Study the athletes:
- Who has the best victory celebrations?
- Which players are known for dramatic facial expressions?
- What signature moves do you want to capture?
- Learn the “money moments”:
- Basketball: the peak of a dunk, blocked shots, tip-offs
- Football: the catch, the tackle, the quarterback scramble
- Soccer: the header, the slide tackle, the save, the celebration
- Baseball: the swing, the catch, the slide into base
- Actually play the sport (if possible):
- I learned more about football positioning in one season of intramural flag football than I did in five years of watching games from the stands
- You don’t need to be good – you just need to understand the rhythm
| Sport | Watch For | Pre-focus On | Best “Money Moment” |
|---|---|---|---|
| Basketball | Player driving to the basket, set shot forming | The rim / paint area | Peak of the dunk – arm fully extended |
| Soccer / Football | Through-ball played into space | The penalty box | Headed goal / goalkeeper full stretch dive |
| American Football | Wide receiver breaking off route | 5 yards beyond the line of scrimmage | Ball in hands, face visible, defender behind |
| Baseball | Pitch release – triggers everything else | Home plate / first base bag | Contact + bat flex, or the diving catch |
| Hockey | Puck entering offensive zone | The crease (goalie area) | Goalie sprawl save with puck visible |
| Tennis | Ball toss on serve | The service box / baseline | Racquet contact – maximum ball compression |
| Track & Field | Runners bunching at a curve | Inside of a curve / finish line | Finish line lean – torso breaking the tape |
| Swimming | Flip turn approaching | End of the pool / lane 1-2 for leaders | Butterfly stroke out of water, face visible |
Pro tip: Start following sports photographers on Instagram. Study their work religiously. Notice where they position themselves, how they frame shots, and what makes their photos stop your scroll. My favorites? Neil Leifer (iconic), Walter Iooss Jr. (legendary composition), and Ezra Shaw (modern master).
Step 2: Master Your Camera (Before You Master Sports)
Here’s an uncomfortable truth: You’re going to miss A LOT of shots at first. Like, thousands of them. I once shot an entire soccer game only to realize back home that I’d left my camera in the wrong autofocus mode. Every Single Photo was blurry!!! I almost cried…
The point is: you need to know your camera so well that adjusting settings becomes muscle memory.
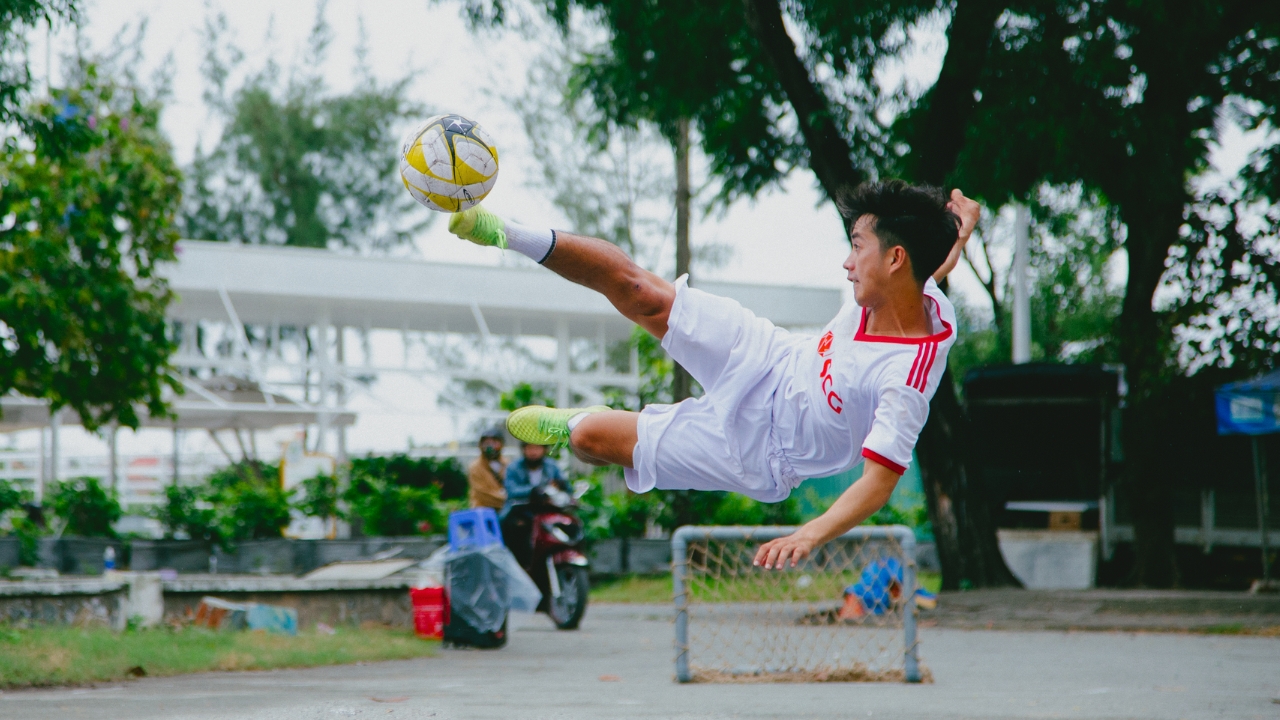
The Essential Technical Skills:
1. Shutter Speed is Your Best Friend
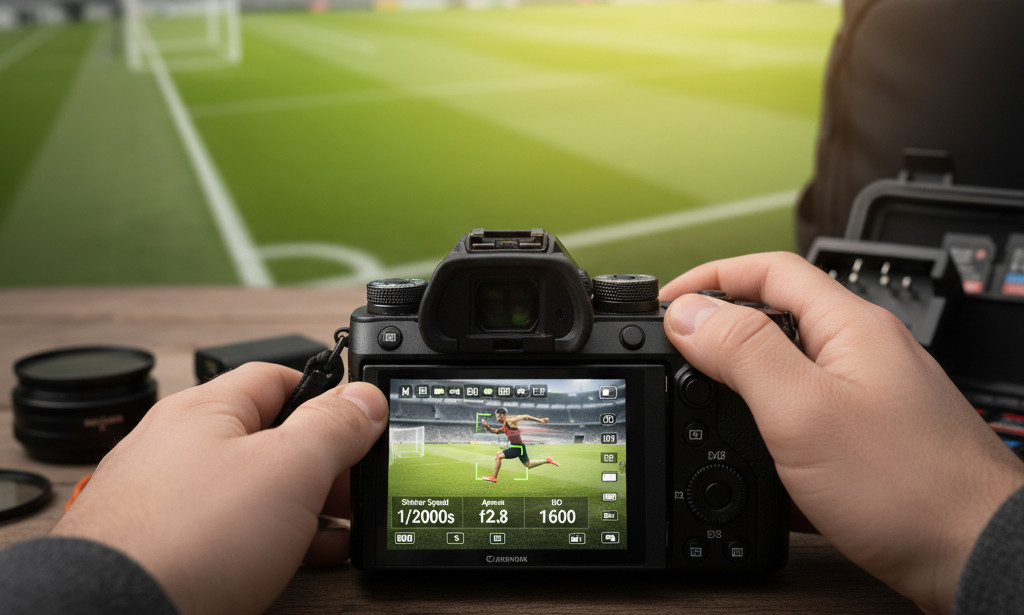
Sports photography lives and dies by shutter speed. You need it FAST – we’re talking 1/1000 sec or faster for most sports. Here’s my cheat sheet:
- 1/500 sec: Slower sports like golf or baseball (pitcher wind-up).
- 1/1000 sec: Soccer, football, basketball.
- 1/2000 sec+: Hockey, motorsports, tennis, anything SUPER fast.
| Scenario | Shutter Speed | Aperture | ISO | White Balance | AF Mode |
|---|---|---|---|---|---|
| Outdoor Daylight (soccer, football, baseball) | 1/1000–1/2000 | f/4–f/5.6 | 200–400 | Auto or Daylight | AI Servo / AF-C |
| Outdoor Overcast | 1/800–1/1600 | f/2.8–f/4 | 400–800 | Cloudy | AI Servo / AF-C |
| Indoor Sports (basketball, volleyball, wrestling) | 1/500–1/1000 | f/2.8 | 1600–6400 | Custom / Kelvin | AI Servo / AF-C |
| Stadium / Night Lights | 1/800–1/1600 | f/2.8–f/4 | 800–3200 | Custom (tricky!) | AI Servo / AF-C |
| Action Sports (skateboarding, BMX, surfing) | 1/2000+ (freeze) or 1/60 (blur) | f/4–f/8 | As needed | Auto | Single-point AF |
| Swimming / Water Sports | 1/1000–1/2000 | f/4–f/5.6 | 400–1600 | Custom (fix the green!) | AI Servo / AF-C |
| Track & Field | 1/1600–1/2500 | f/4–f/5.6 | 200–640 | Auto or Daylight | AI Servo + Zone AF |
2. Aperture: The Balancing Act
You want a shallow depth of field (a blurry background, a sharp subject), but you also need enough of the athlete in focus. I typically shoot between f/2.8 and f/5.6.
- f/2.8-4: Great for isolating a single athlete, beautiful bokeh.
- f/4-5.6: Better for group shots or when you need more depth.
3. ISO: Embrace the Noise (Sometimes)
Indoor sports or night games? You’re cranking that ISO up. Period.
- Outdoor, sunny day: ISO 100-400.
- Indoor arena: ISO 3200-6400 (or higher!).
- Night football under lights: ISO 1600-3200.
Modern cameras handle noise way better than they used to. I’d rather have a sharp, slightly grainy photo than a blurry, “clean” one.
4. Continuous Autofocus (AI Servo for Canon, AF-C for Nikon)
Set it and forget it. Your camera will track moving subjects. Learn to trust it.
Most Important Setting: Switch to Continuous Autofocus (Canon: AI Servo, Nikon: AF-C, Sony: AF-C). This tells your camera to KEEP focusing on moving subjects.
Focus Point Selection:
- Start with a single-point center focus (easier to control)
- Progress to zone AF for more flexibility
- Advanced: Use Real-time tracking or 3D tracking if your camera has it
My Personal Focus Strategy:
- Focus on the athlete’s chest/torso (more consistent than face)
- For helmeted sports, focus on jersey numbers
- Pre-focus on spots where action will happen (goalposts, home plate, etc.)
- Let the camera track, but be ready to override
5. Burst Mode is Your Secret Weapon
Shoot in continuous high-speed mode. Yes, you’ll end up with 2,000 photos from one game. Yes, you’ll delete 1,850 of them. But those 150 keepers? Chef’s kiss 👨🍳
6. Positioning and Composition
Where Should You Stand?
The secret to great sports photography is anticipation + position. You can have the best camera in the world, but if you’re standing in the wrong spot, you’ll miss the shot.
General Rules:
- Get low – Shoot from the athlete’s eye level or lower (makes them look more powerful)
- Think backgrounds – Ugly fences and crowds ruin great shots
- Follow the action – Move! Don’t plant yourself in one spot
- Shoot into the action – Capture athletes coming toward you, not away
Sport-Specific Positioning:
- Soccer/Football: Corners of the field, shooting toward the goal
- Basketball: Behind the baseline, low angle
- Baseball: First base line, behind home plate (if allowed)
- Track: Inside curves, finish line
- Swimming: End of pool, slightly elevated
Advanced Composition Techniques for Sports Photography
Positioning gets you to the right spot. Composition is what separates snapshots from photographs. Here are the techniques I use every game:
- Leading lines: Use court lines, lane markings, or stadium architecture to direct the eye toward your subject.
- Negative space: Leave empty sky or field ahead of a runner. It implies speed and future motion.
- Environmental context: Pull back occasionally to show the stadium, crowd, and atmosphere. The “big picture” shot tells the story that the tight crops can’t.
- Panning shots: Use a slow shutter speed (1/60–1/125 sec) and track your subject horizontally. The background blurs, the athlete stays sharp. pure motion energy.
- Fill the frame: For emotion shots, get in close. Eyes, sweat, tension. These are what people remember.
- The peak of action rule: Every athletic movement has a peak, the highest point of a jump, the moment of contact. That’s your frame. Not before, not after.
- Break the rule of thirds intentionally: Centering a sprinter charging straight at you creates confrontational energy. Rules exist to be broken when you have a reason.
💡 Pro tip on backgrounds: Before the game starts, walk the perimeter and note which shooting positions have clean backgrounds (open field, dark crowd, blue sky) vs. cluttered ones (advertising boards, fences, officials). Plan your positions around the backgrounds, not just the action.
The Golden Rules
- Shutter speed 1/1000+ for freezing action
- Continuous autofocus always
- Burst mode for action sequences
- Shoot RAW (or JPEG if you need speed)
- Multiple angles of the same action
- Anticipate, don’t react
- Check the histogram, not just the LCD screen
- Backup everything immediately
Pre-Game Checklist
- Format memory cards
- Charge ALL batteries
- Clean lens and sensor
- Set the camera to the proper sports settings
- Scout location and lighting
- Check the weather forecast
- Pack backup equipment
- Bring water and snacks (games can be LONG)
Practice Exercise (Do This Before Your First “Real” Shoot):
Go to a local park where people are playing pickup basketball or soccer. Spend an hour just practicing:
- Tracking a player across the frame.
- Anticipating where the ball will go.
- Adjusting settings quickly as lighting changes.
- Finding angles that aren’t boring straight-on shots.
The goal isn’t to get great photos – it’s to get comfortable failing. Trust me, this practice session will save you from embarrassment later.
Step 3: Start Local (and I Mean Really Local)
Forget Madison Square Garden. Forget the Super Bowl. Your journey starts at the local YMCA.
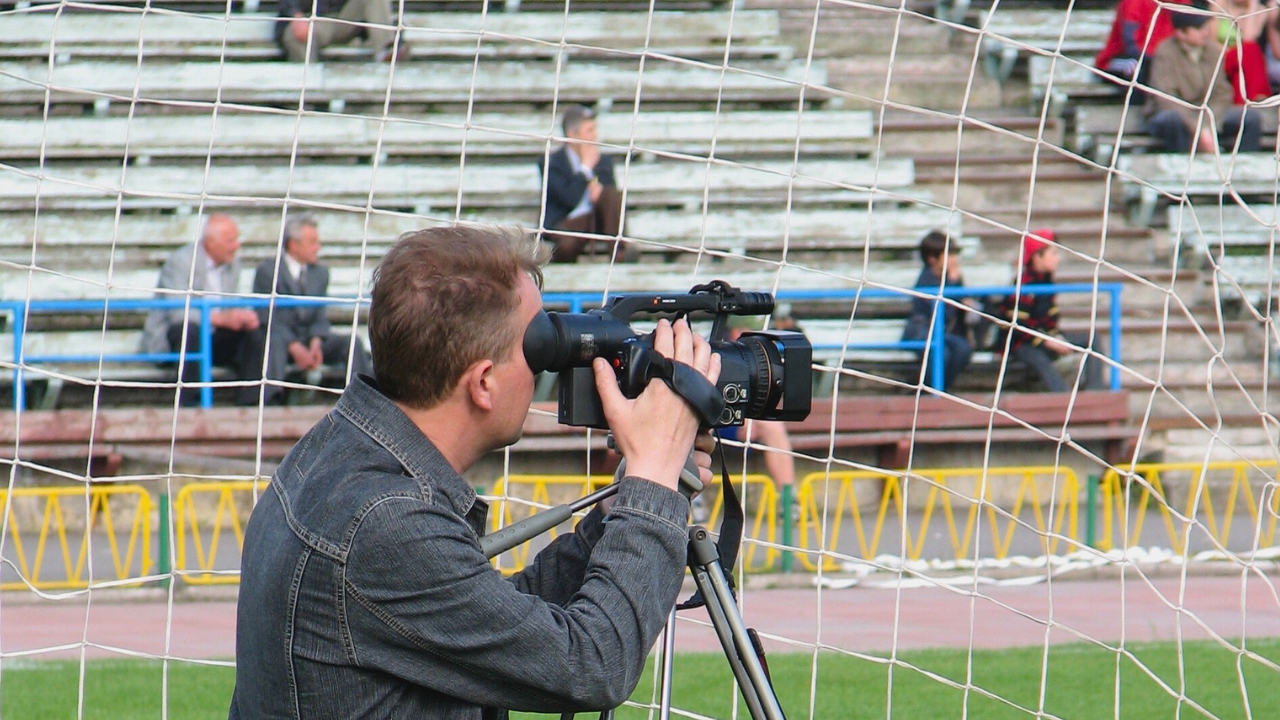
Why starting local is actually brilliant:
✅ Low pressure: Nobody’s expecting Sports Illustrated quality at a youth soccer game.
✅ Easy access: Coaches and parents are usually thrilled to have a photographer on hand.
✅ Experimentation heaven: Try weird angles, different lenses, creative ideas.
✅ Instant portfolio building: Real game action, real emotions.
✅ Networking goldmine: That parent you meet might work for a college athletics department.
How to Actually Get Started:
Week 1: Research Phase
- Check your local newspaper’s community section for game schedules.
- Follow local high schools on social media.
- Join community sports Facebook groups.
- Contact your county’s athletic association.
Week 2: Make Contact
- Email/call athletic directors at local schools.
- Reach out to youth league organizers.
- Offer your services for free initially (the goal is to build your portfolio).
- Be professional: send a simple email introducing yourself and what you can offer.
Sample Email Template:
Subject: Sports Photography Services for [School/Team Name]

Hi [Name],

My name is [Your Name], and I'm a sports photographer based in [Your Area]. I'm currently building my portfolio and would love to offer complimentary photography services for your upcoming [sport] games.

I'd provide high-resolution digital images for the team, athletes, and families to use. This would help me gain experience while giving your players and parents professional-quality photos.

Would you be open to discussing this opportunity? I'm available [days/times] and happy to work around your schedule.

Thanks for considering!

Best,
[Your Name]
[Your Portfolio Website]
[Contact Info]
Week 3+: Start Shooting
- Show up early to scout locations and angles.
- Introduce yourself to coaches and officials.
- Be respectful of players, fans, and the rules of the game.
- Stay off the field during play (seriously, don’t be THAT photographer).
The Secret Sauce: After each game, create a simple online gallery (Google Photos, Dropbox, or portfolio sites like Format or SmugMug) and share it with the team. Parents will LOVE you, they’ll tag you on social media, and word spreads FAST in youth sports communities.
Step 4: Build a Portfolio That Makes People Stop Scrolling
Your portfolio isn’t a photo dump – it’s your visual resume, your pitch deck, and your first impression all rolled into one.
What Makes a Killer Sports Photography Portfolio:
- ✨ Tack sharp (if the eyes aren’t sharp, it’s not portfolio-worthy).
- 😮 Captures emotion (triumph, defeat, determination, joy).
- 🎯 Tells a story (context matters-show the action AND the moment).
- 🎨 Strong composition (subject is clear, background isn’t distracting).
- 💥 Peak action (mid-jump, moment of contact, defining play).
Quality over quantity, always:
- 20 jaw-dropping images > 200 “pretty good” ones.
- Every single photo should make someone say “wow”.
- If you have to convince yourself it’s good enough, it’s not.
Variety shows versatility:
- Different sports (if possible).
- Different moments: action, emotion, celebration, defeat.
- Different compositions: tight shots, wide angles, creative perspectives.
- Both teams, both genders, various age groups.
Tell stories:
- Action shots alone aren’t enough.
- Include the emotion on the bench.
- Capture the disappointed faces after a loss.
- Show the celebration in the crowd.
- Document the pre-game intensity.
Where to Host Your Portfolio:
- Format or SmugMug: Sleek, professional, built for photographers.
- Adobe Portfolio (comes with Creative Cloud): Clean and simple.
- Wix/Squarespace: More customizable but requires design work.
- Instagram: Great for supplementing your main portfolio, not replacing it.
Pro tip: Create a “Best Of” section for easy browsing, then have sport-specific galleries for clients interested in particular coverage.
Getting Your Portfolio Found Online
Building the portfolio is step one. Getting it discovered is step two, and most photographers skip it entirely.
Name your image files descriptively: youth-basketball-game-phoenix-2026.jpg beats IMG_4892.jpg every time for Google Image Search.
Write alt text for every image: Describe exactly what’s happening: sport, action, emotion, context.
Create a Google Business Profile: “Sports photographer in [Your City]” searches will surface your business.
List yourself on photography directories: Thumbtack, The Knot (for multi-sport shooters), Snappr, and local business directories.
Post consistently on Instagram: Use location tags + sport-specific hashtags. Parents searching for a local basketball photographer WILL find you.
Create a simple blog: Post game recaps with photos. “City High School Basketball Season 2026” is a search term parents and coaches actually use.
Step 5: Invest in Gear (But Not All at Once!)
Let’s address the elephant in the room: sports photography gear is EXPENSIVE. Like, “Should I buy a car or this lens?” expensive.
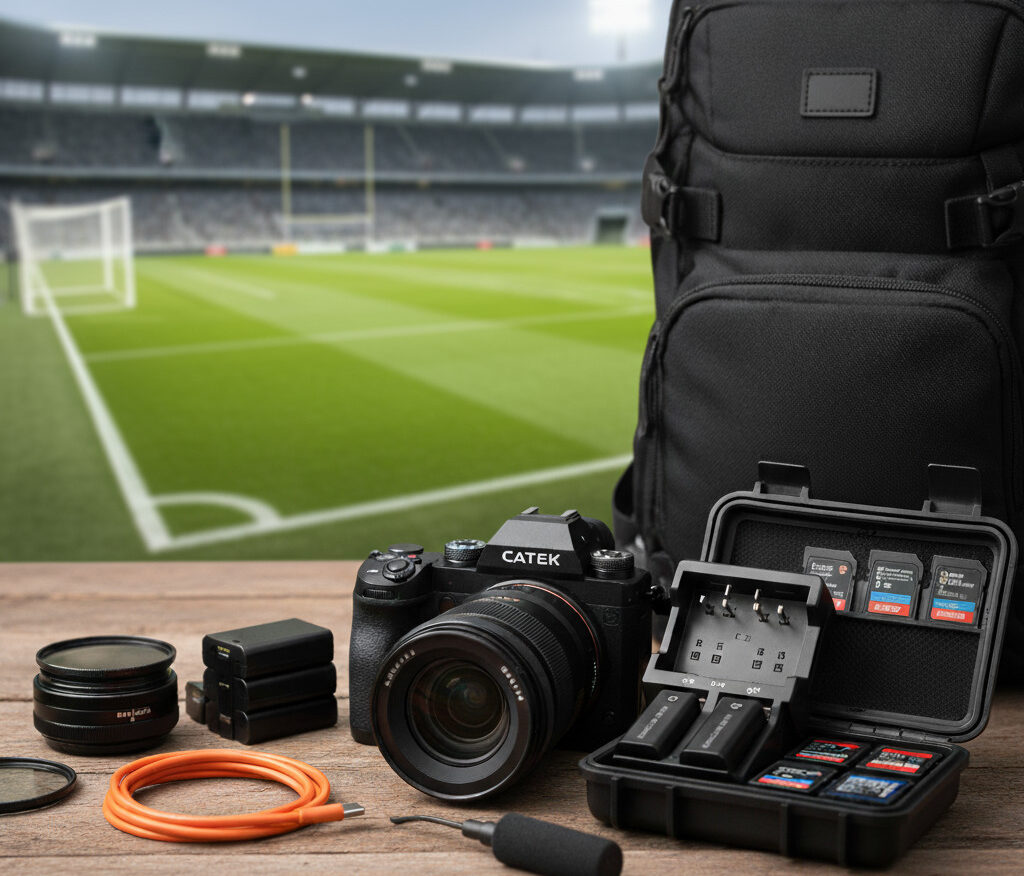
The Brutal Truth About Equipment:
You can’t shoot professional-level sports photography with a smartphone or basic point-and-shoot. You just can’t. The action is too fast, the lighting too challenging, and the distances too great.
But (and this is important): You don’t need $15,000 worth of gear to get started.
The Starter Kit (Budget: $2,000-$3,000):
Camera Body:
- DSLR: Canon 90D, Nikon D500 (both around $1,000-1,500 used).
- Mirrorless: Sony A6400, Canon R7, Fuji X-T4.
- What matters: Fast autofocus, high frame rate (8+ fps), good high-ISO performance.
Lens #1: The Telephoto Zoom (Your workhorse)
- Budget: 70-300mm f/4-5.6 ($400-600).
- Mid-range: 70-200mm f/4 ($600-1,200).
- Dream lens: 70-200mm f/2.8 ($1,800-2,500).
Lens #2: The Wide Angle (Optional but awesome)
- 24-70mm f/2.8 or 16-35mm for environmental shots, crowd reactions.
Essential Accessories:
- Memory cards: Multiple fast SD cards (64GB+).
- Monopod: Way more practical than a tripod ($50- $150).
- Extra batteries: You’ll drain them FAST ($40- $80 each).
- Camera strap: Not sexy but necessary.
- Weatherproof bag: Protect your investment.
The Upgrade Path:
Phase 1 (Starting Out): Entry-level DSLR + 70-300mm lens.
Phase 2 (Getting Paid Work): Better camera body + 70-200mm f/2.8.
Phase 3 (Going Pro): Professional body + 400mm f/2.8 (the $12,000 dream lens 😅)
Best Cameras for Sports Photography
| Budget Level | Camera | Frame Rate | AF System | Price (Approx.) | Best For |
|---|---|---|---|---|---|
| Beginner | Canon EOS Rebel T8i | 7.5 fps | 45-point AF | ~$750 | Learning, youth sports |
| Beginner | Nikon D7500 | 8 fps | 51-point AF | ~$900 | Learning, outdoor sports |
| Beginner | Sony A6400 | 11 fps | Real-Time tracking AF | ~$900 | Learning, fast AF |
| Enthusiast | Canon EOS 90D | 10 fps | 45-pt all cross-type | ~$1,200 | Indoor/outdoor, versatile |
| Enthusiast | Nikon D500 | 10 fps | 153-point Multi-CAM | ~$1,400 used | Best-in-class AF, indoor |
| Enthusiast | Sony A7 IV | 10 fps | Real-Time Eye AF | ~$2,500 | Pro-level for serious amateurs |
| Professional | Canon EOS R5 | 20 fps (electronic) | Dual Pixel CMOS II AF | ~$3,800 | All sports, pro editorial |
| Professional | Sony A9 III | 120 fps (electronic) | Global shutter + AI AF | ~$6,000 | Fastest camera made |
| Professional | Nikon Z9 | 20 fps RAW | Deep-learning subject AF | ~$5,500 | NFL/NBA sideline workhorse |
Good Lens for Sports Photography
This is where you should INVEST. A mediocre camera with a great lens beats a great camera with a mediocre lens EVERY TIME.
| Lens | Focal Range | Max Aperture | Price (New) | Best For | Verdict |
|---|---|---|---|---|---|
| Canon RF 70-200mm f/2.8L | 70–200mm | f/2.8 | ~$2,700 | All sports, indoor & outdoor | The gold standard |
| Nikon Z 70-200mm f/2.8S | 70–200mm | f/2.8 | ~$2,800 | All sports, night games | Stunning sharpness |
| Sony FE 70-200mm f/2.8 GM II | 70–200mm | f/2.8 | ~$2,800 | All sports, compact & light | Best weight-to-quality ratio |
| Tamron 70-180mm f/2.8 | 70–180mm | f/2.8 | ~$800 | Budget f/2.8 option | Best value 70-200 alternative |
| Canon EF 100-400mm f/4.5-5.6L II | 100–400mm | f/4.5–5.6 | ~$2,400 | Field sports, outdoor events | More reach when you need it |
| Sigma 150-600mm f/5-6.3 Sports | 150–600mm | f/5–6.3 | ~$1,400 | Soccer, football, baseball | Budget super-telephoto |
| Canon EF 400mm f/2.8L III | 400mm fixed | f/2.8 | ~$12,000 | NFL/NBA sidelines, pro editorial | The dream lens |
| Sigma 70-200mm f/2.8 DG DN | 70–200mm | f/2.8 | ~$1,200 | All sports, Sony/Leica L-mount | Best budget f/2.8 mirrorless |
Lens-Buying Strategy
- Start with the sport you’ll shoot most
- Court sports (basketball, volleyball): 70-200mm
- Field sports (soccer, football): 100-400mm
- Mixed/close-up: 24-70mm
- Buy used to save money (reputable sellers: KEH, MPB, B&H used)
- Rent before you buy (LensRentals, BorrowLenses)
- Consider third-party lenses (Sigma and Tamron are excellent and cheaper)
Step 6: Shoot, Fail, Learn, Repeat (The 10,000-Hour Rule)
Remember when I said I photograph about 150 games a year? I wasn’t bragging – I was making a point about volume.
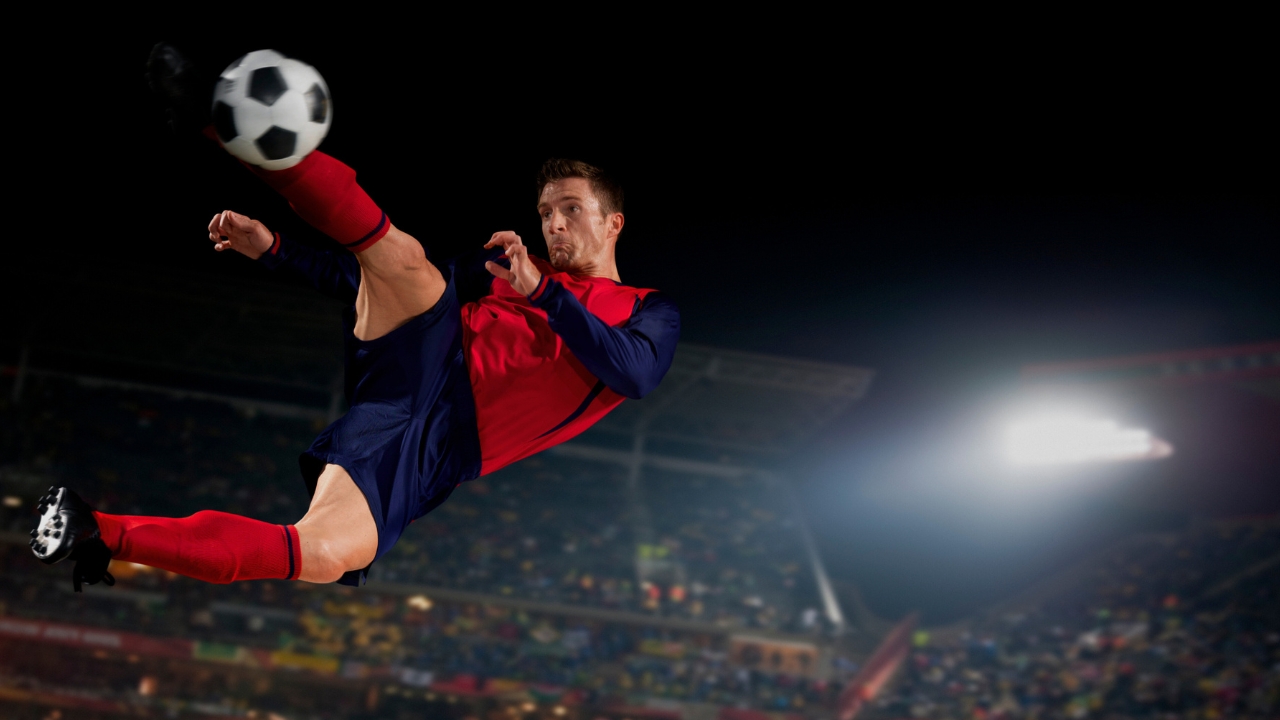
The Honest Timeline:
- Year 1: You’re going to suck. Sorry, but it’s true. You’ll miss obvious shots, your settings will be wrong, and you’ll feel like you’re drowning.
- Year 2: You’re starting to “get it.” Your keeper rate goes from 5% to 15%. You can anticipate some plays. You’re not constantly chimping (checking your screen).
- Year 3: This is where it clicks. Your instincts sharpen. You start getting shots that make other photographers ask, “How’d you get that?”
- Year 4+: You’re dangerous. Your portfolio is strong. Clients are reaching out to YOU.
How to Accelerate Your Learning:
1. Review your work critically
- After every shoot, analyze what worked and what didn’t.
- Compare your shots to pros covering the same sport.
- Delete the bad photos ruthlessly (it hurts, but it helps).
2. Shoot different sports
- Each sport teaches you different lessons.
- Basketball teaches you to shoot in terrible lighting.
- Soccer teaches you patience and anticipation.
- Football teaches you to follow fast-moving action.
3. Make more mistakes (seriously!)
- Try shooting from weird angles.
- Experiment with slow shutter speeds for motion blur.
- Attempt panning shots.
- The best way to learn what works is to discover what doesn’t.
4. Study the masters
- Neil Leifer’s composition.
- Walter Iooss Jr.’s lighting.
- Al Bello’s dramatic moments.
- Bob Martin’s creative angles.
Step 7: Network Like Your Career Depends On It (Because It Does)
Sports photography is a relationship business disguised as an art form.
Real Talk:
I’ve gotten more jobs from knowing the right people than from having the perfect portfolio. A coach who remembers you’ll recommend you to other coaches. An athlete who loves your photos will tag you. A parent will tell their friends.
Your network IS your net worth.
How to Network Without Being Annoying:
At Events:
- Introduce yourself to other photographers (they’re not your competition, they’re your colleagues)
- Chat with coaches and athletic directors after games
- Give your business card to parents who compliment your work
- Follow up with a friendly email and photo gallery link
Online:
- Engage with local sports teams on social media
- Join photography groups and forums
- Comment meaningfully on other photographers’ work (not just “nice shot!”)
- Share behind-the-scenes content of your work
Strategic Moves:
- Offer to assist established sports photographers for free
- Volunteer at major sporting events (marathons, tournaments)
- Join professional organizations (National Press Photographers Association)
- Attend sports photography workshops and conferences
The Long Game:
Building a network takes YEARS. That high school coach you photograph today might become a college coach in five years and remember you. That parent might work in sports marketing. That fellow photographer might recommend you for a gig they can’t take.
Plant seeds everywhere.
Step 8: Turn Pro (The Business Side Nobody Warns You About)
Congratulations! Your photos are getting good, people are noticing, and someone just asked, “How much do you charge?”
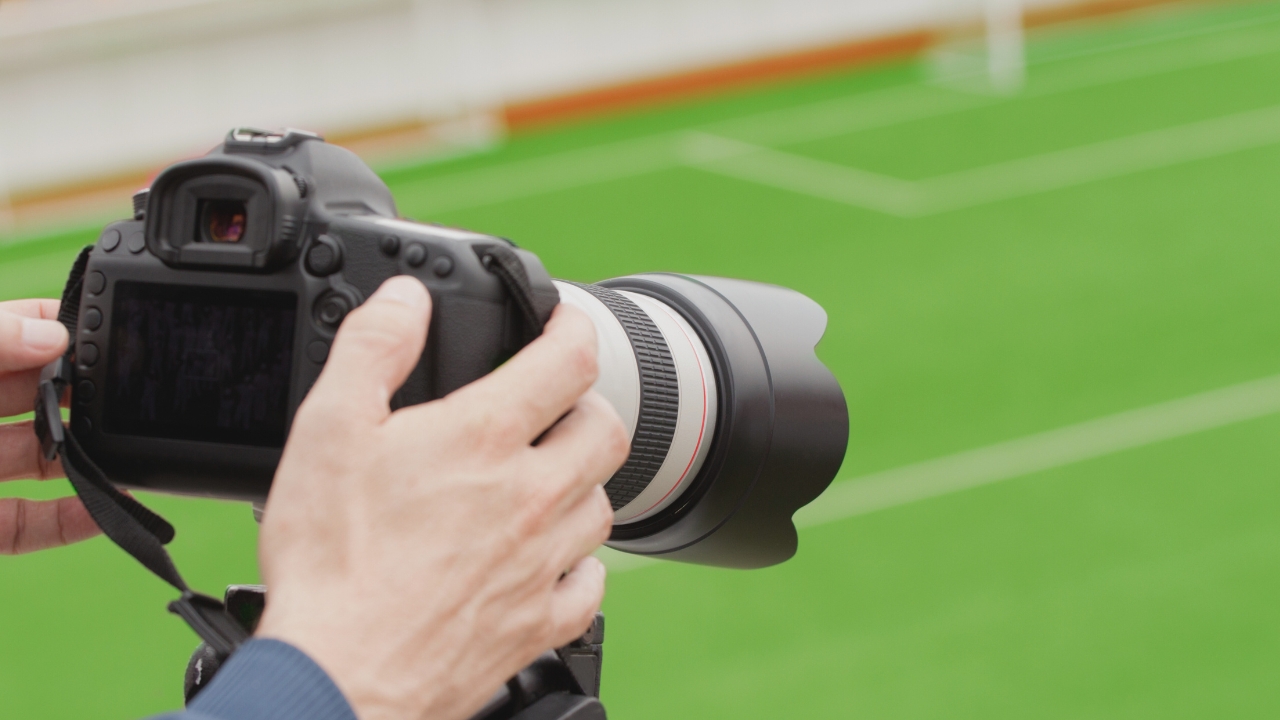
Internal panic intensifies 😅
The Business Essentials:
1. Pricing Your Work
This is where most new photographers undervalue themselves. Here’s a framework:
Local Youth Sports:
- Team packages: $150- $500 per season.
- Individual player packages: $25- $75.
- Single game coverage: $200-500.
High School Sports:
- Per game: $250-600.
- Season coverage: $1,000-3,000.
- Senior athlete photoshoots: $150- $350.
College/Semi-Pro:
- Per game: $500-1,500+
- Season contracts: $5,000-15,000+
Professional Sports (the dream):
- Staff positions: $40,000-80,000+ annual salary.
- Freelance per game: $1,000-5,000+
- Wire services (Getty, AP): Varies widely.
Remember: These are starting points. Adjust for your market, experience, and what the client can afford.
2. Legal Stuff (Boring but Necessary)
- Register your business (an LLC is recommended).
- Get liability insurance (seriously, do it).
- Have a contract template.
- Understand copyright law.
- Create model releases when needed.
3. Workflow & Delivery
- Culling: Delete the garbage immediately.
- Editing: Develop a consistent style/preset.
- Delivery: Online galleries, digital downloads.
- Turnaround: 48-72 hours for most gigs.
4. Marketing Yourself
- Professional website with portfolio.
- Active social media presence.
- Business cards (always have them!).
- Google Business Profile.
- Word of mouth (your best marketing tool).
Income Reality Check:
Part-time (side hustle): $5,000-25,000/year.
Full-time (freelance): $30,000-70,000/year.
Established pro: $70,000-150,000+/year.
Top tier (major publications/teams): $150,000+ annually.
Most sports photographers don’t get rich, but if you’re smart and hustle, you can make a comfortable living doing what you love.
Step 9: Keep Evolving (Or Get Left Behind)
The photography world changes FAST. What worked five years ago might not work today.
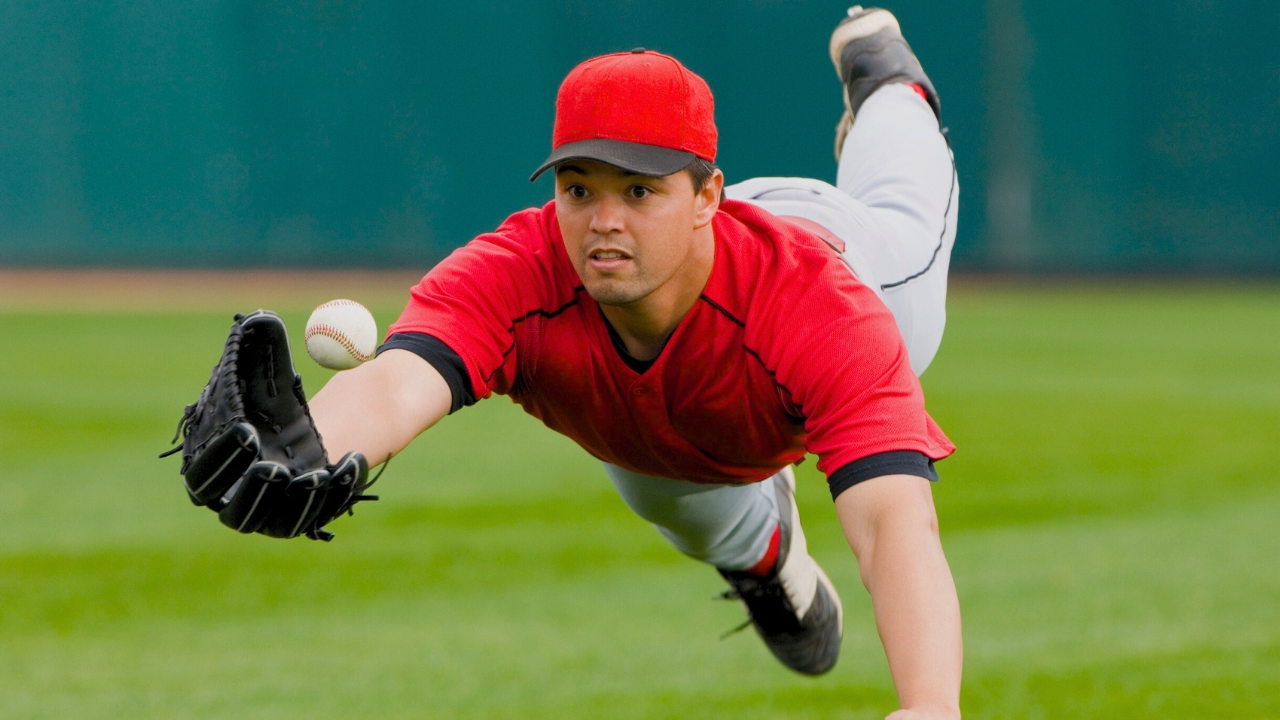
Stay Current With:
Technology:
- New camera bodies and lenses
- Editing software updates
- AI-assisted tools
- Drone photography regulations
Trends:
- Social media preferences (vertical video, reels, stories)
- Editorial style shifts
- Platform-specific content (TikTok, Instagram, etc.)
Skills:
- Video is becoming essential (learn it!)
- Photo editing techniques
- Business management
- Social media marketing
AI Tools Are Changing Sports Photography in 2026
This is something most sports photography guides haven’t caught up with yet. Artificial intelligence is now embedded in every part of the workflow, and ignoring it puts you at a competitive disadvantage.
AI autofocus (in-camera): Sony, Canon, and Nikon now use AI-powered subject recognition that tracks eyes, faces, and bodies even under helmets. It genuinely improves keeper rates by 30–40% compared to legacy AF systems.
AI culling: Tools like Aftershoot and Narrative Select use AI to automatically flag your best shots based on sharpness, eyes open, composition, and expression, cutting culling time from 2 hours to 20 minutes.
AI noise reduction: Topaz DeNoise AI and Lightroom’s Denoise feature can recover images shot at ISO 12,800 that would previously have been unusable. This is a genuine game-changer for indoor sports.
AI-assisted masking: Lightroom’s “Select Subject” and “Select Sky” features use AI to make precise local adjustments in seconds, which used to take 20 minutes of manual brushwork, and takes 3 clicks.
AI background removal: For commercial clients needing athletes on white or transparent backgrounds, tools like Adobe Firefly and Remove.bg now do this accurately even on complex hair and motion-blurred edges.
My take: AI doesn’t replace the photographer. The anticipation, positioning, and storytelling are still 100% human. But it dramatically reduces the time required for the technical work. Embrace it.
Continue Learning:
- Take online courses (CreativeLive, Lynda, YouTube)
- Attend workshops and conventions
- Join critique groups
- Hire a mentor if possible
- Never stop shooting
The Gear I Actually Use (My Current Setup)
Since everyone always asks, here’s what’s in my bag:
Cameras:
- Primary: Canon R5 (mirrorless beast)
- Backup: Canon 90D (never shoot without a backup!)
Lenses:
- Canon RF 70-200mm f/2.8: My workhorse, on my camera 80% of the time
- Canon RF 24-70mm f/2.8: Environmental shots, crowd reactions
- Canon EF 400mm f/2.8 (rented for big jobs): The dream lens
Accessories:
- Manfrotto monopod
- 6x 128GB SanDisk Extreme Pro SD cards
- 4 extra batteries
- Peak Design camera strap
- Lowepro ProTactic backpack
- Lens cleaning kit
Post-Processing:
- Lightroom Classic (culling and basic edits)
- Photoshop (advanced retouching)
- Photo Mechanic (for super fast culling on tight deadlines)
Common Mistakes (That I Absolutely Made)
Let me save you some pain by sharing my biggest mistakes:
❌ Shooting everything in JPEG instead of RAW
→ RAW files give you SO much more editing flexibility
❌ Not backing up my files
→ Lost an entire basketball game once. ONCE. Never again.
❌ Being afraid to ask for access
→ The worst they can say is no. Usually, they say yes.
❌ Overshooting and not culling ruthlessly
→ Quality > quantity in your portfolio
❌ Underpricing my work
→ Know your worth, even when starting out
❌ Not having a contract
→ Led to payment issues and scope creep
❌ Trying to shoot alone without a backup camera
→ My camera died during a championship game. Lesson learned.
❌ Not studying the sport enough
→ Missed obvious money shots because I didn’t understand the play
❌ Being too shy to network
→ Opportunities come from people, not just talent
❌ Giving up too early
→ This career takes TIME. Patience is essential.
Your Action Plan (Start This Week!)
Feeling overwhelmed? Don’t be. Here’s your simple 30-day plan:
Week 1: Foundation
- Choose your primary sport
- Watch 5 games and study photographer positioning
- Practice with your camera settings (manual mode!)
- Follow 10 sports photographers on Instagram
Week 2: Practice
- Shoot a local pickup game (park, YMCA, anywhere)
- Practice tracking moving subjects
- Experiment with different shutter speeds
- Review and critique your own photos
Week 3: Make Contact
- Research local schools/leagues
- Send 5 introduction emails
- Create a simple portfolio site
- Order business cards
Week 4: First Real Shoot
- Book your first game (even if it’s free)
- Scout the location beforehand
- Shoot the game
- Edit and deliver photos within 72 hours
- Ask for feedback
Then repeat, improve, and keep pushing forward.
How to Edit Sports Photos?
Okay, you’ve shot the game. Memory card is FULL. Now what? Time to turn those raw captures into eye-popping final images!
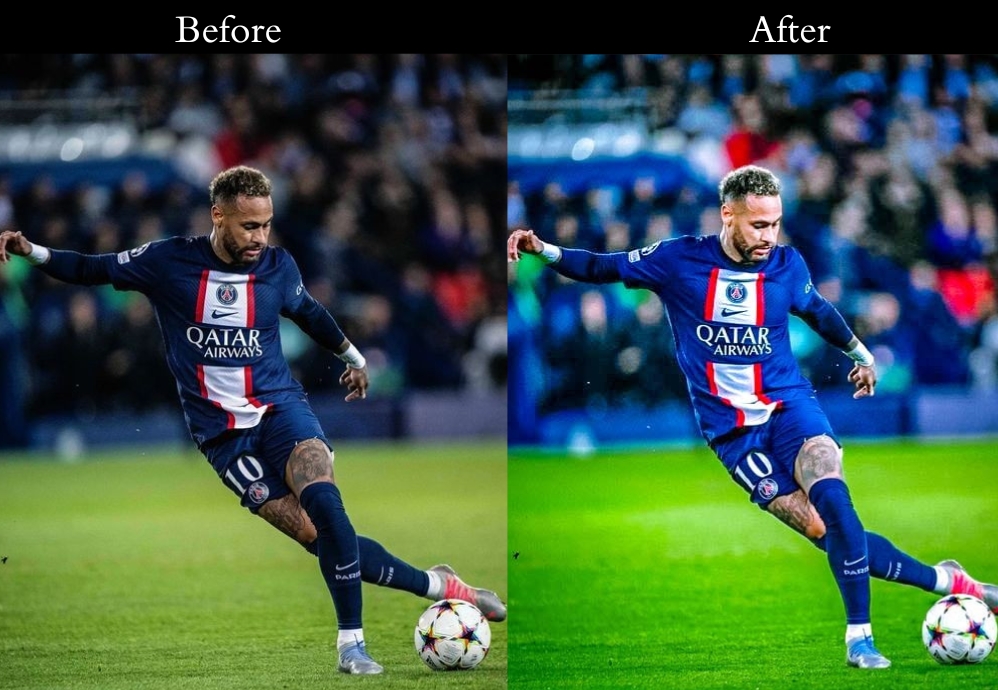
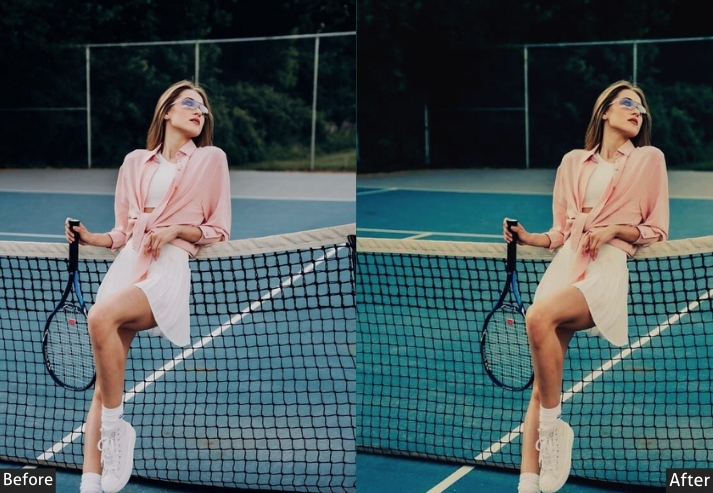
My Editing Workflow (Step-by-Step)
Step 1: Import and Cull (Be Ruthless!)
Use Photo Mechanic or Lightroom. Go through EVERY image quickly:
- ⭐ = Definite keeper
- ⭐⭐ = Portfolio-worthy
- No stars = Delete (or archive if you’re sentimental)
What to look for:
- Sharp focus (zoom in to 100%)
- Good exposure (not too dark or blown out)
- Compelling moment (action, emotion, story)
- Clean composition (subject clear, minimal distractions)
From 500 shots, I typically keep 50-100 and deliver 20-40 finals.
Step 2: Batch Adjustments
Select 5-10 images from similar conditions and apply these adjustments to ALL:
- White Balance – Fix those weird color casts first
- Exposure – Brighten or darken overall
- Contrast – Add punch (but don’t overdo it!)
- Highlights/Shadows – Recover details in bright/dark areas
Pro Tip: Create presets for different venues. “Indoor Basketball Gym A,” “Friday Night Lights,” etc. HUGE time-saver!
Step 3: Individual Image Refinement
Now fine-tune your keepers one by one:
Crop for Impact:
- Fill the frame with your subject
- Remove distractions from edges
- Use the rule of thirds (but break it when it feels right!)
- Leave space in the direction of movement
- NEVER crop at joints (looks weird)
Adjust Exposure Locally:
- Brighten faces (especially under helmets)
- Darken distracting backgrounds
- Use radial or gradient filters strategically
Color Correction:
- Ensure accurate team colors
- Boost vibrance (NOT saturation-more natural)
- Check skin tones (should look healthy, not orange or gray)
- Use HSL sliders for specific color tweaks
Sharpening:
- Add sharpening to faces, jerseys, and equipment
- Use masking to avoid sharpening noise in backgrounds
- Be subtle! Over-sharpening looks terrible
Noise Reduction:
- Essential for high ISO shots
- Balance luminance and color noise reduction
- Don’t overdo it-some grain is acceptable
Step 4: Final Polish
Add a Touch of:
- Clarity (makes details pop)
- Vibrance (makes colors sing)
- Slight vignette (draws eye to subject)
- Selective dodging/burning for drama
What NOT to Do:
- ❌ Over-saturate (looks fake)
- ❌ Over-sharpen (creates halos and looks crunchy)
- ❌ Add heavy HDR effects (this isn’t 2010)
- ❌ Use Instagram filters (please, just… no)
- ❌ Smooth skin (these are athletes, not models)
| Sport Type | Exposure Bias | Contrast | Highlights | Shadows | Clarity | Vibrance | Sharpening | Noise Reduction |
|---|---|---|---|---|---|---|---|---|
| Outdoor Daylight | +0.2 to +0.5 | +15 to +25 | -20 to -40 | +10 to +20 | +15 to +25 | +15 to +20 | 60–80 | 10–20 |
| Indoor / Gym | +0.3 to +0.7 | +20 to +30 | -10 to -30 | +20 to +40 | +10 to +20 | +10 to +15 | 50–70 | 40–60 |
| Night / Stadium | +0.3 to +0.6 | +25 to +35 | -20 to -40 | +30 to +50+30 to +50 | +10 to +20 | +10 to +20 | 50–70 | 50–70 |
| Swimming / Water | +0.1 to +0.3 | +15 to +25 | -30 to -50 | +10 to +20 | +15 to +25 | +20 to +30 | 60–80 | 15–30 |
| B&W / Dramatic | +0.2 to +0.5 | +30 to +50 | -20 to -40 | +20 to +40 | +20 to +35 | N/A (B&W) | 70–90 | 20–40 |
Software Recommendations
- Adobe Lightroom ($10/month) – Industry standard, excellent for batch processing.
- Capture One ($300 or $15/month) – More powerful, steeper learning curve.
- Luminar Neo ($79-$199) – AI-powered, great for beginners.
- ON1 Photo RAW ($100) – One-time purchase, good Lightroom alternative.
My Setup: Lightroom for 90% of work, Photoshop for specific retouching needs.
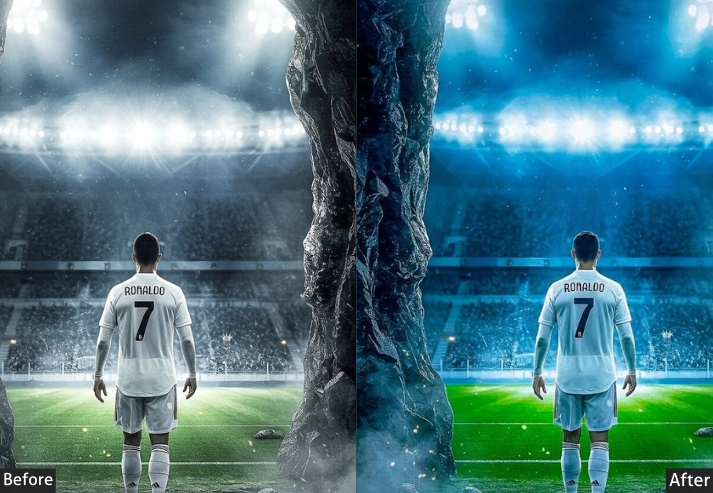
MY SECRET WEAPON: Sports Lightroom Presets Bundle
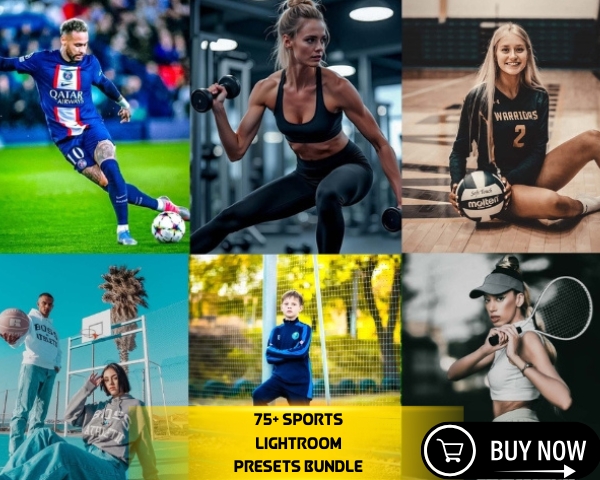
Apply preset, make minor tweaks, DONE. Cut editing time by 70%!
What’s Inside:
- 🏀 Indoor Sports Pack – Basketball, volleyball, wrestling (fixes those awful gym lights!)
- ⚽ Outdoor Sports Pack – Soccer, football, baseball (perfect for daylight and stadium lights)
- 🏃 Action Sports Pack – Running, cycling, extreme sports (adds drama and energy)
- 🏊 Water Sports Pack – Swimming, diving, water polo (handles reflections beautifully)
- 🌙 Night Game Pack – Friday night lights, evening matches (rescues high-ISO shots)
- 🎨 Creative Effects Pack – B&W conversions, vintage looks, dramatic tones
- 🔧 Problem Solver Pack – Underexposed fix, overexposed recovery, color correction
BONUS: Free lifetime updates + video tutorials showing exactly how I use each preset.
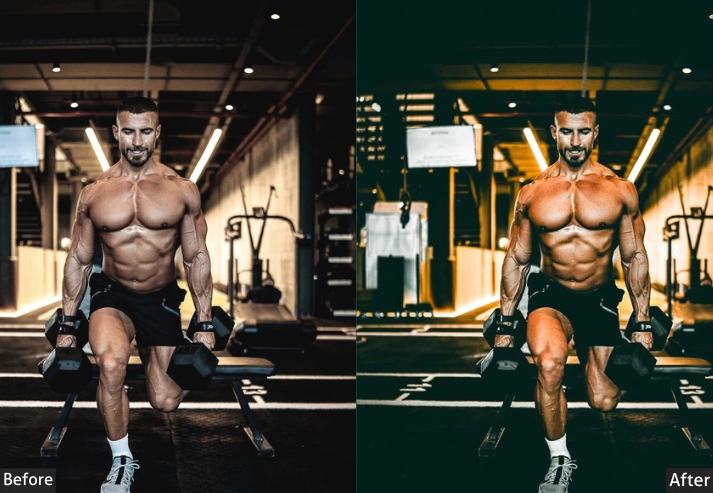
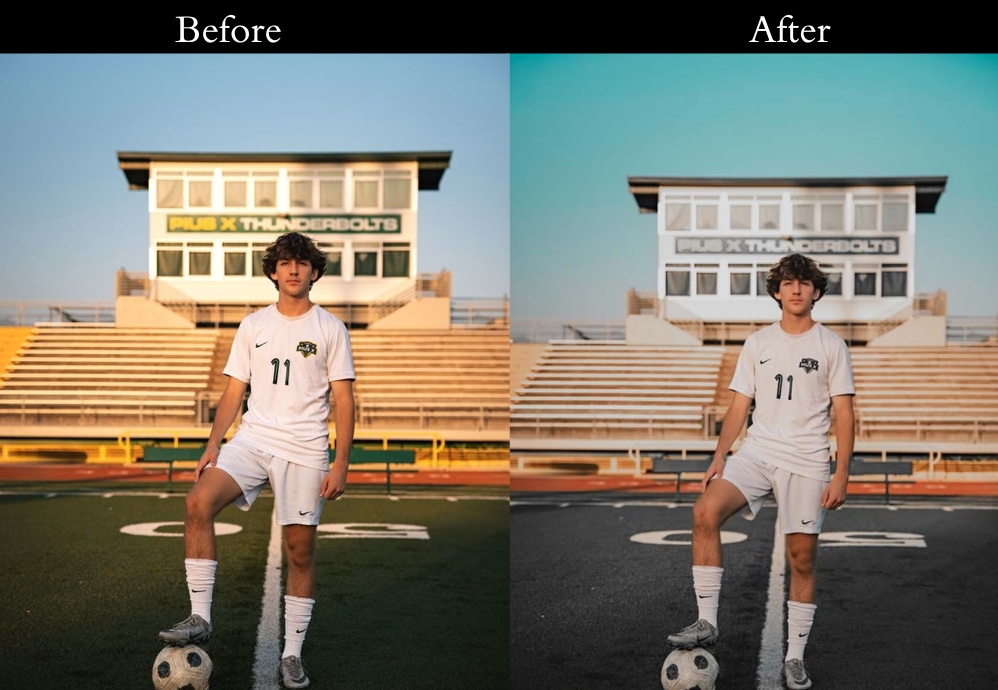
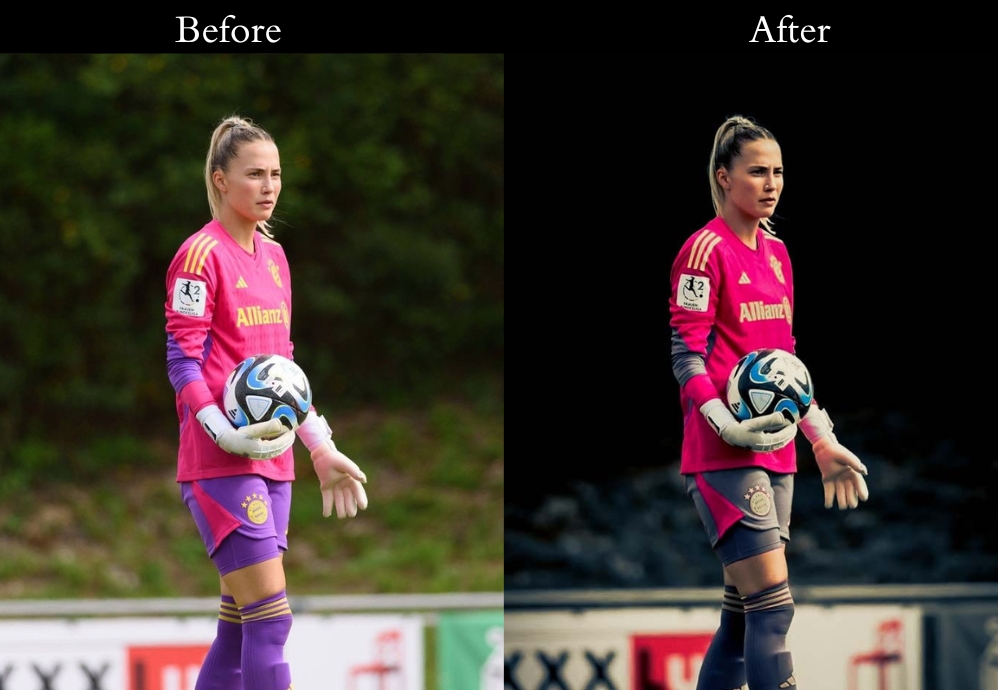
See some of my photos after using this preset bundle.
Editing Speed Tips
When you have 500+ images to process:
- Keyboard shortcuts are LIFE – Learn them!
- Sync settings across similar images
- Use presets for starting points
- Don’t obsess over perfection – good enough is good enough
- Batch export with consistent naming
I can process 50 game images in about 30-45 minutes now. When I started? 3-4 hours. Practice makes faster!
Get: 75 Sports Lightroom Presets Free Download!
The Final Word: Is This Really For You?
Sports photography is HARD. It’s physically demanding, mentally exhausting, often thankless, and financially uncertain.
You’ll work while everyone else relaxes. You’ll miss family dinners, weekends with friends, and sleep (so much sleep). You’ll invest thousands in gear before you make a dime. You’ll face rejection, criticism, and equipment failures at the worst possible moments.
But here’s the thing…
When you nail THE shot – that once-in-a-lifetime, career-defining, jaw-dropping image – nothing else compares. When an athlete hugs you because your photo made them cry, when your image ends up on the front page, when a kid tells you your photos inspired them…
That’s when you remember why you do this.
So ask yourself:
- Do you love sports enough to study them obsessively?
- Are you willing to fail publicly and keep trying?
- Can you handle the physical and mental demands?
- Are you prepared to hustle for years before “making it”?
- Does the idea of capturing history excite you more than scare you?
If you answered yes, welcome to the tribe. We’re glad you’re here. 📸
Now stop reading and go shoot something. Your journey starts TODAY.
Resources to Keep You Growing
Learning Platforms:
- CreativeLive (sports photography courses)
- YouTube (tons of free tutorials)
- Lynda/LinkedIn Learning
- KelbyOne
Communities:
- SportsShooter.com (legendary forum)
- Reddit: r/sportsphotography, r/photography
- Facebook: Sports Photography Network groups
Inspiration:
- Getty Images sports section
- Sports Illustrated photo essays
- ESPN photography features
- Bleacher Report photo stories
Business Resources:
- NPPA (National Press Photographers Association)
- ASMP (American Society of Media Photographers)
- PPA (Professional Photographers of America)
Equipment Resources:
- B&H Photo Video (new & used gear)
- KEH Camera (used equipment)
- Lensrentals (try before you buy)
- MPB (used photography equipment)
Got questions? Drop them in the comments below! I read and respond to every single one.
Now get out there and start creating magic. 🙌