I still remember my first wedding shoot. I came home with thousands of files, no real plan, and a knot in my stomach because I had no idea where to even start editing. Years later, I can tell you that editing is where a wedding gallery either becomes unforgettable or falls flat, and the gap between the two usually comes down to a repeatable workflow, not raw talent.
This guide walks through that exact workflow: culling and backing up your files, applying the right wedding photography editing techniques for different lighting situations, using Lightroom presets to speed up batch editing, and exporting galleries your clients will love. Whether you’re shooting your first wedding or your fiftieth, you’ll find practical steps plus free wedding Lightroom presets to make your editing faster and more consistent.
I’m a wedding photographer who believes the best photos come from real moments, not perfect poses. My goal is to document every smile, happy tear, and unforgettable memory with a natural, storytelling approach.
- Emma Cleary
- Why Wedding Photo Editing Matters?
- Common Editing Mistakes to Avoid
- Culling: Finding Your Best Shots Fast
- Backing Up Before You Edit
- Basic Wedding Photo Editing Techniques
- Advanced Wedding Photo Editing Techniques
- Step-by-Step Wedding Photo Editing Tutorial in Lightroom
- Popular Wedding Photography Editing Styles
- Developing Your Editing Style
- Editing Software and Tools
- Lightroom Presets For Wedding Photography
- Outsourcing Editing Services
- Cost Comparison Example (20 Weddings/Year)
- Tips and Hacks for Efficient Editing
- Common Mistakes to Avoid
- Backing Up Your Work
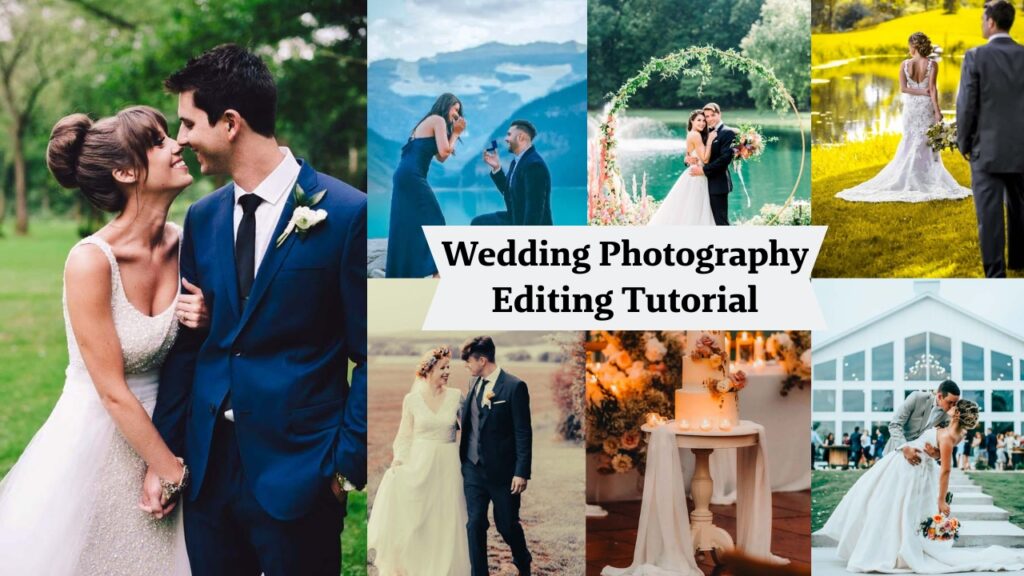
Wedding Photography Editing – Full Guidelines
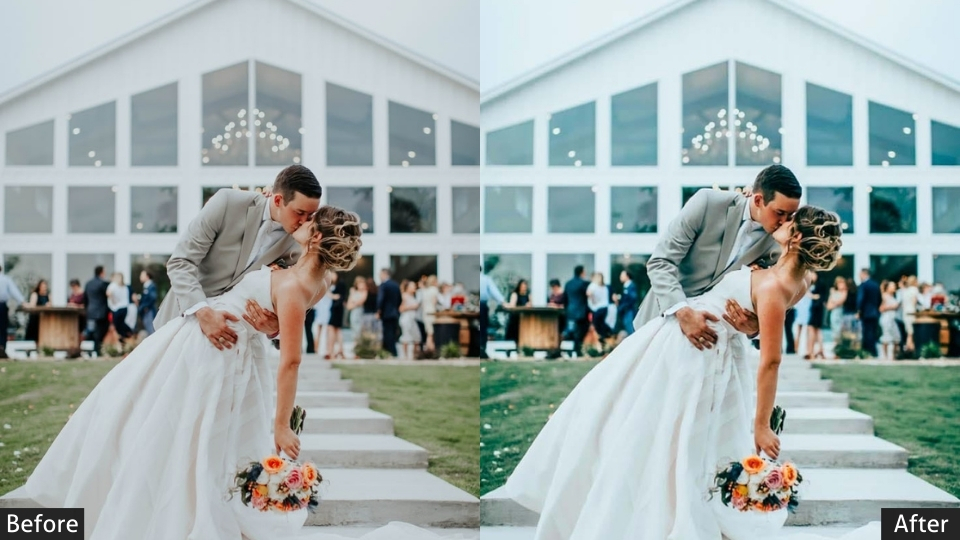
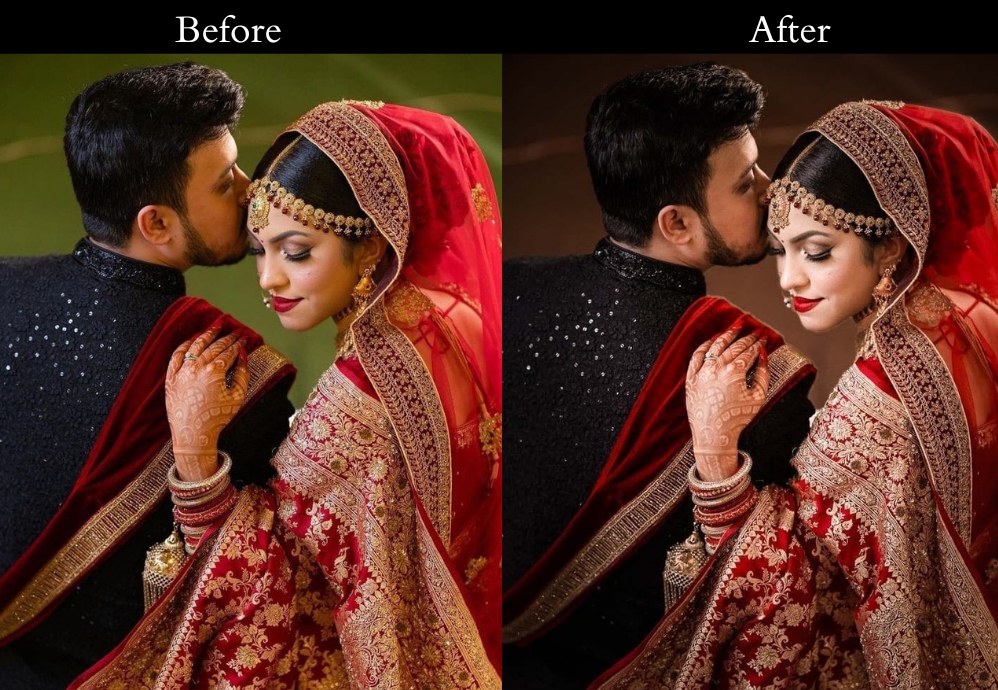
Editing isn’t just about fixing mistakes. It’s about enhancing the story and emotions of the day. A well-edited photo can make a bride’s smile glow a little brighter or turn a sunset kiss into a cinematic moment. Weddings are once-in-a-lifetime events, and your edits can elevate those fleeting moments into keepsakes that couples cherish forever.
Editing can make or break your gallery. Overdo it, and your photos might look like they belong in a sci-fi movie. Underdo it, and you risk delivering flat, lifeless images. The key is balance-think of yourself as a visual storyteller, not just a technician.
Why Wedding Photo Editing Matters?
Editing isn’t damage control, it’s storytelling. The right edit can turn a quick ceremony snapshot into a photo that a couple frames on their living room wall for the next 30 years. Get it wrong, and even a technically sharp photo can feel flat, inconsistent, or over-processed.
- Emotion Amplification: A small contrast and tone adjustment can make a tearful vow exchange feel even more powerful.
- Branding: Your editing style is often the first thing that sets your work apart in a crowded market.
- Client Satisfaction: A consistently edited gallery reads as “professional,” which directly drives word-of-mouth bookings.
Common Editing Mistakes to Avoid
- Over-editing: Plastic-looking skin or neon skies. If a photo looks “processed” at a glance, it’s gone too far.
- Inconsistent Style: A gallery should feel like one cohesive set, not a mix of five different looks.
- Ignoring Details: Stray hairs, exit signs, or a wandering guest in the background are easy fixes with an outsized impact.
Pre-Editing: Culling, Organizing & Backing Up Your Wedding Photos
Before you touch a single slider, there’s prep work that determines how smooth the rest of your workflow will be. A wedding day can produce 1,000-3,000+ images, and the first job is narrowing that down to your best shots without losing any of the originals along the way.
Culling: Finding Your Best Shots Fast
Culling means selecting the strongest images and setting aside the rest: the blinks, blurs, and duplicates. AI-assisted culling tools (like Aftershoot) can automatically flag likely keepers, reducing culling time from hours to minutes. Once you’ve culled, organize the keepers into folders or collections such as “Getting Ready,” “Ceremony,” and “Reception” so that similar lighting conditions are grouped together. This makes batch editing with presets far more effective later.
Backing Up Before You Edit
Wedding photos are irreplaceable, so back up your raw files before you start editing. The industry standard is the 3-2-1 rule: keep 3 copies of your files, on 2 different types of storage media, with 1 copy stored offsite.

- On-site during the shoot: use a camera with dual card slots, or transfer to a portable SSD during breaks.
- Primary storage: copy (don’t move) files to your computer or an external drive, and verify a few images open correctly.
- Second local backup: duplicate to a separate drive or NAS for redundancy.
- Offsite backup: upload raw files to cloud storage (Backblaze, Google Drive, Dropbox) or store a duplicate drive at another location.
- Automate it: tools like Acronis or Synology’s Hyper Backup can run this on a schedule so you never forget.
Only start editing once all backups are verified. A few extra minutes here can save an entire client relationship.
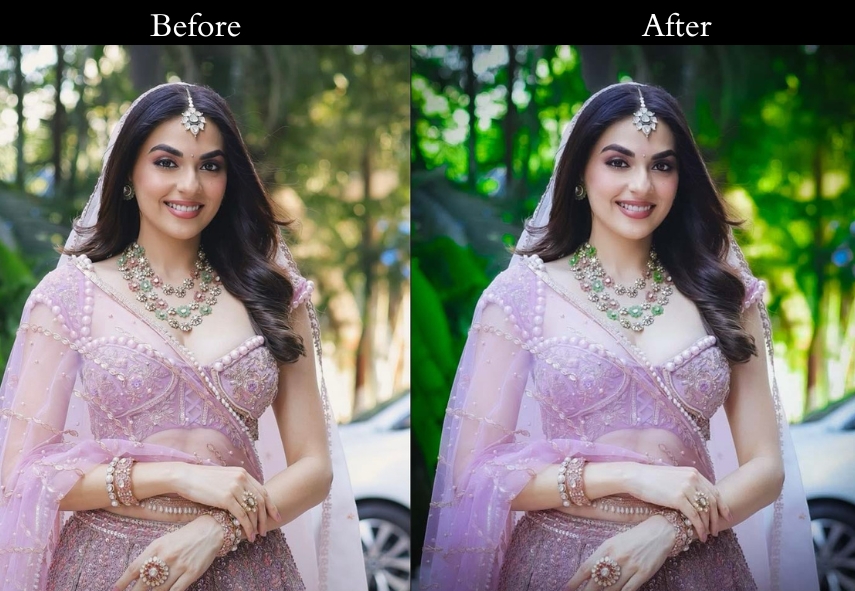
Basic Wedding Photo Editing Techniques
Every strong edit starts with these fundamentals. Get these right before reaching for presets or creative effects.
- Exposure Adjustment: Fix photos that are too bright or too dark. Pro tip: slightly underexpose in-camera to preserve detail in highlights like a wedding dress, then lift shadows in post.
- Color Correction: Weddings mix daylight, string lights, and venue uplighting, each with a different color cast. Use the white balance tool to neutralize yellow or green tints before applying any creative look.
- Cropping and Composition: Apply the rule of thirds, straighten horizons, and trim distractions from frame edges. Avoid over-cropping, which can create awkward prints later.
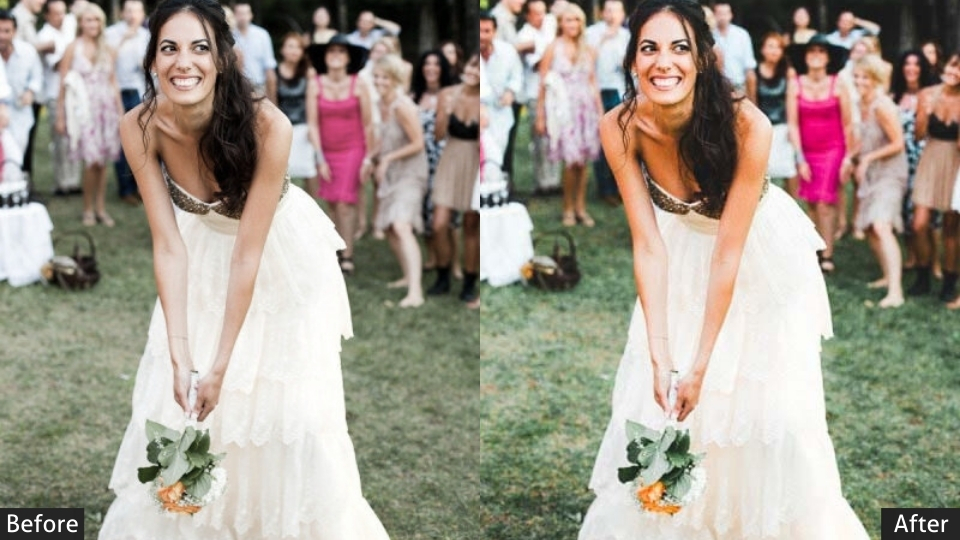
Example: A ceremony shot where the groom’s suit disappears into a dark background. Lift the shadows slightly, correct the white balance for natural skin tones, and crop out a stray chair in the corner. Small changes, big difference.
Advanced Wedding Photo Editing Techniques
Once the fundamentals are locked in, these techniques take a gallery from “good” to “wow.
- Retouching: Smooth skin, remove stray hairs, and brighten eyes, but keep it natural. Zoom in and use the adjustment brush for targeted touch-ups rather than applying heavy effects to the whole frame.
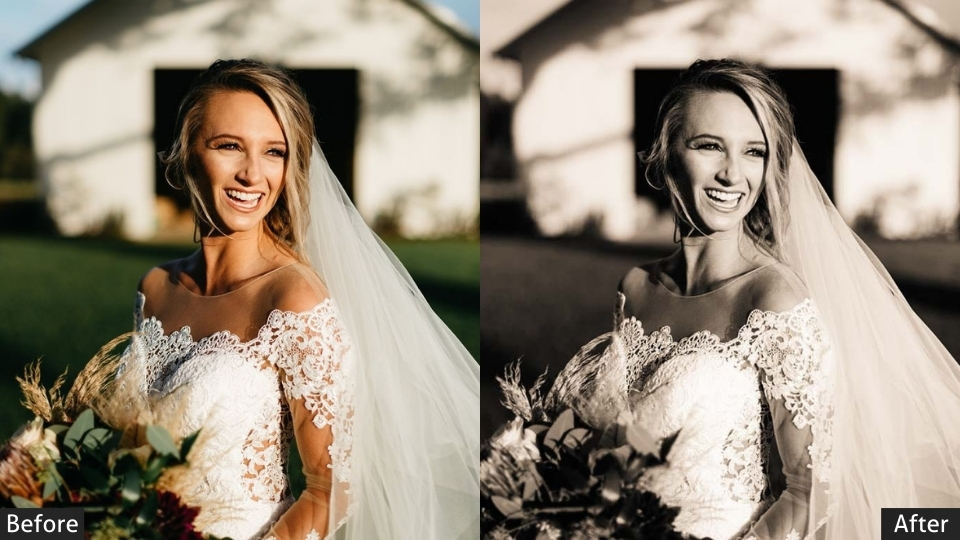
- Creative Effects: A black-and-white conversion can give vows a timeless feel, and a subtle vignette can draw the eye to the couple. Use heavy filters sparingly. They date a gallery fast.
Before-and-After: A reception photo in which the couple’s first dance is lost in a dimly lit room. Increase exposure, apply a radial filter to spotlight the couple, and add a touch of clarity to their faces. Suddenly, they’re the focal point of the frame.
Step-by-Step Wedding Photo Editing Tutorial in Lightroom
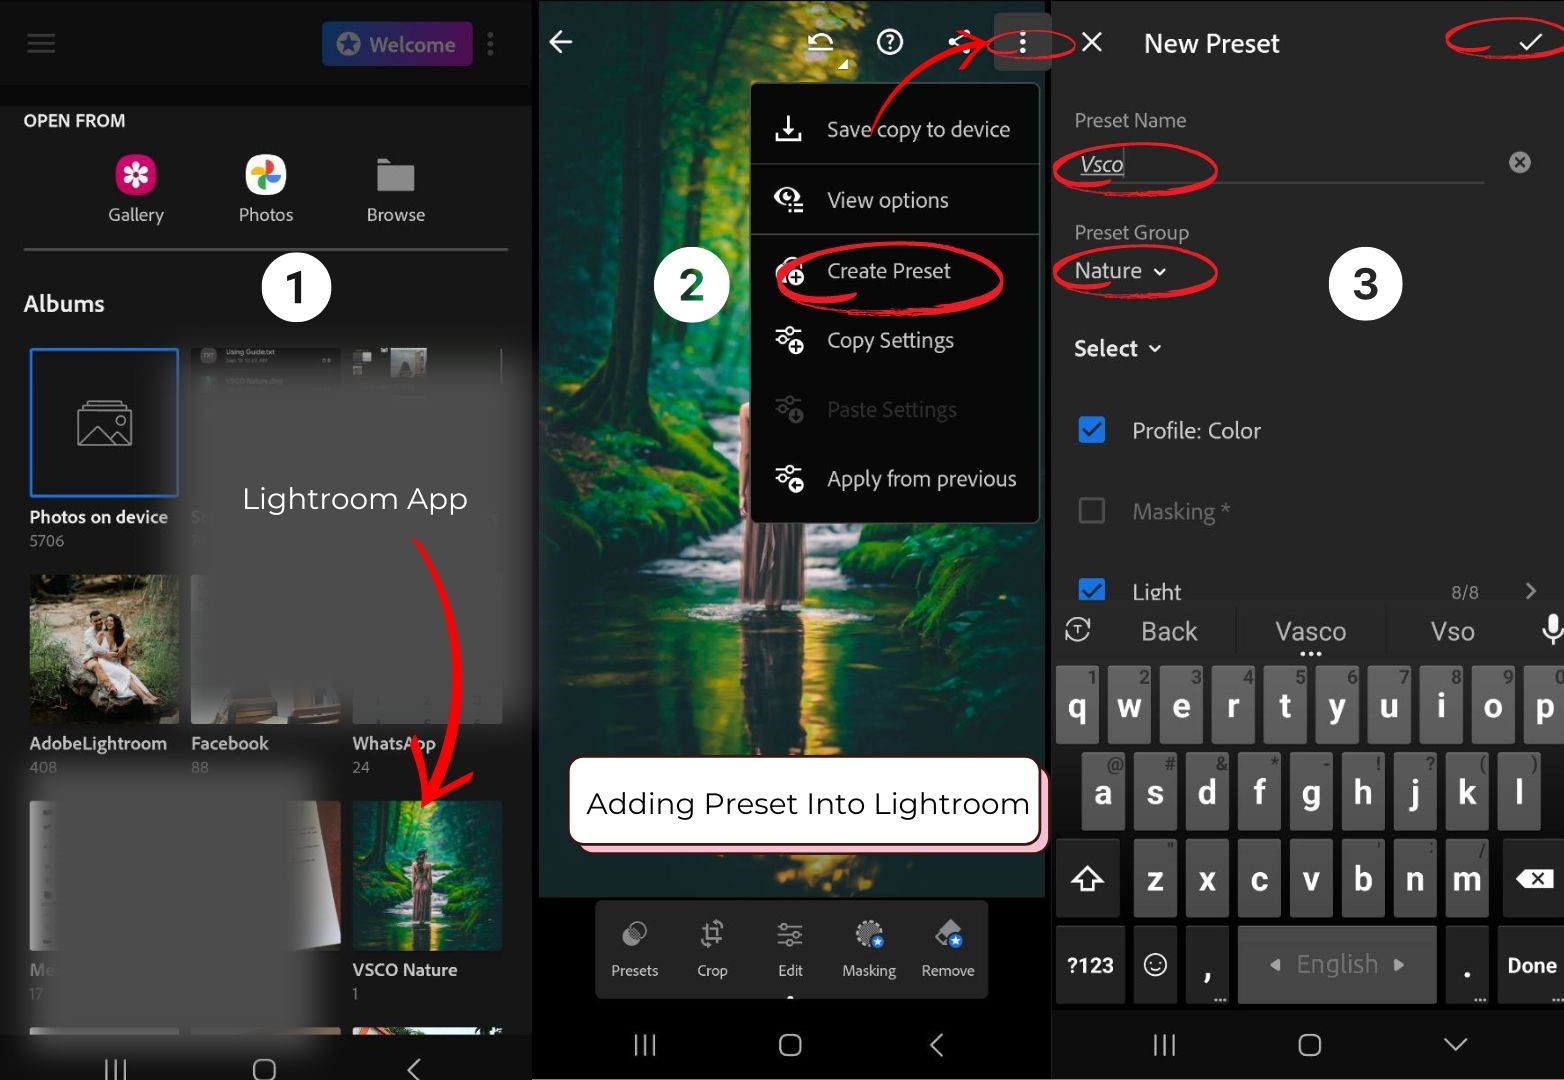
Editing wedding photos in Adobe Lightroom using presets is a time-efficient, budget-friendly way to achieve professional, consistent results. This step-by-step tutorial is tailored for wedding photographers, focusing on how to use Lightroom presets to streamline the process while maintaining high quality. It assumes you have a basic familiarity with Lightroom and a preset pack (e.g., Mastin Labs, DVLOP, or a free option). If you’re new to Lightroom, this guide keeps it simple and actionable.
Prerequisites
- Software: Adobe Lightroom Classic (part of the $9.99/month Adobe Photography Plan).
- Presets: A wedding-specific preset pack.
- Gear: Computer with Lightroom installed, raw files from a wedding shoot (e.g., CR2, NEF), and backups (follow the 3-2-1 rule: 3 copies, 2 media types, 1 offsite, like a 4TB WD drive and Backblaze).
- Time: 3-5 hours for a 500-700 image gallery (varies with experience).
Step-by-Step Wedding Photo Editing Tutorial
Step 1: Import and Organize Photos
- Connect Your Camera/Card:
- Use a card reader to transfer raw files from your SD/CF card to your computer.
- Copy (don’t move) files to a folder (e.g., Wedding_2025-07-19_ClientName_Raw).
- Verify that a few images open correctly to ensure they are not corrupted.
- Import into Lightroom:
- Open Lightroom Classic, go to the Library Module.
- Click Import (bottom-left) and select your folder.
- Choose Copy or Add (Copy creates a new folder in Lightroom’s catalog).
- Add metadata (e.g., photographer name, copyright) and keywords (e.g., “wedding,” “ClientName”) during import for easy searching later.
- Organize:
- Create subfolders or collections in Lightroom (e.g., “Ceremony,” “Portraits,” “Reception”) to group images by scene/lighting.
- Example: Right-click in the Collections panel, select Create Collection, name it “ClientName_Ceremony.”
Step 2: Cull Images
- Review Photos:
- In Library Module, switch to Grid View (G key) to see thumbnails.
- Use Loupe View (E key) to inspect individual images for focus, exposure, and composition.
- Flag Keepers:
- Rate images with stars (1-5) or flags (Pick/Reject):
- Press P to flag as “Pick” for good shots.
- Press X to flag as “Reject” for blurry/out-of-focus shots.
- Example: Select 500-700 keepers from 1000+ raw images (aim for 50-70% of total).
- Filter by Pick (Ctrl+Alt+Shift+P) to view only selected images.
- Rate images with stars (1-5) or flags (Pick/Reject):
- Delete Rejects:
- Go to Photo > Delete Rejected Photos to remove unwanted files (ensure backups are secure first).
Time Estimate: 1-2 hours for 1000 images.
Step 3: Apply Presets for Initial Edits
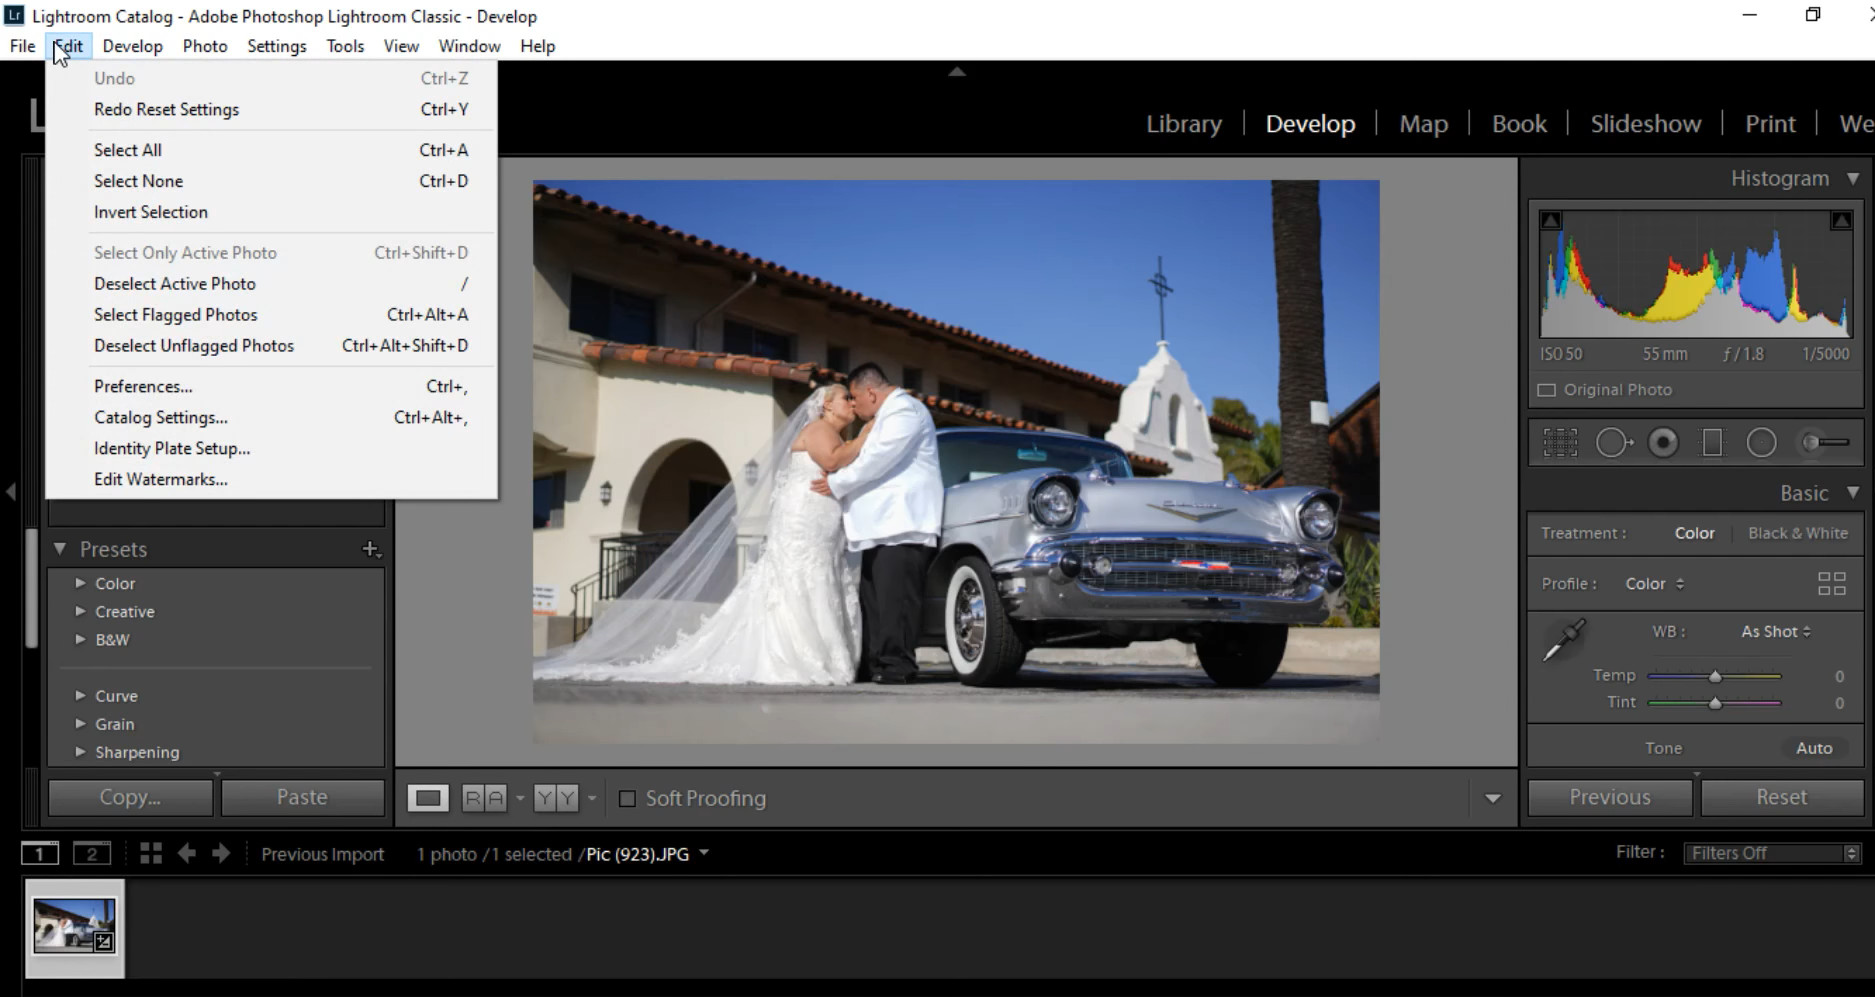
- Switch to Develop Module:
- Select a collection (e.g., “Ceremony”) and press D to enter Develop Module.
- Choose a Preset:
- On the left panel, find the Presets panel.
- Expand your preset pack (e.g., Mastin Labs Fuji 400H, FilterGrade Wedding).
- Select a preset suited for the lighting:
- Bright/Daylight: Bright & Airy, Fuji 400H Clean (e.g., outdoor ceremony).
- Low-Light/Flash: Moody Romance, Portra 800 (e.g., reception).
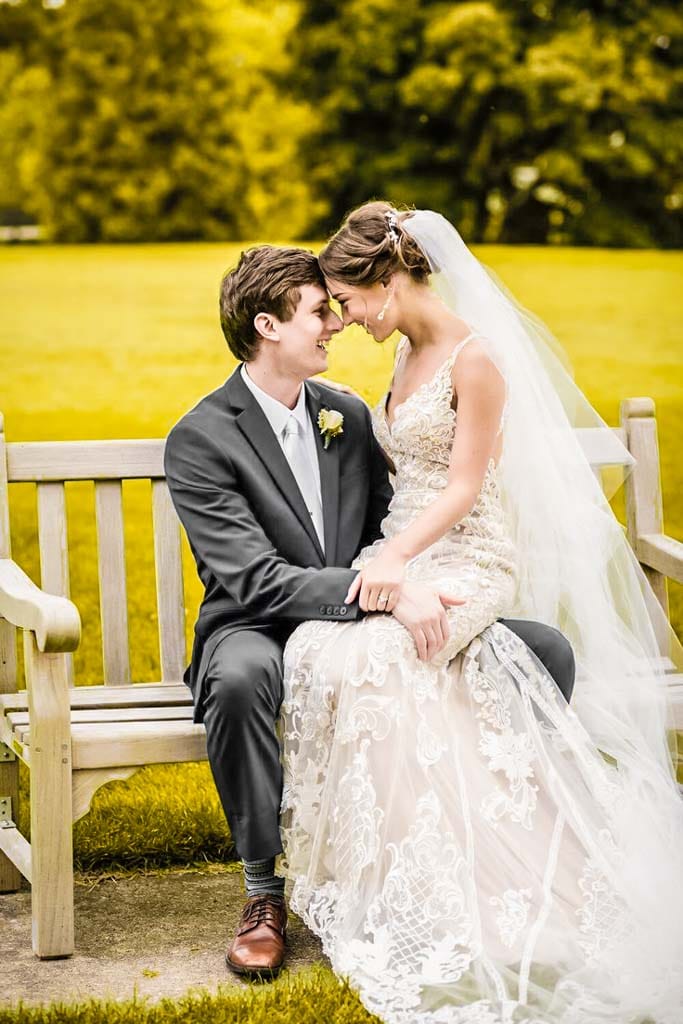
- Golden Hour: Warm & Soft, Kodachrome (e.g., couple portraits).
- Click the preset to apply it to one image. Example: Apply “Fuji 400H Daylight” to a ceremony shot.
- Tweak the Lead Image:
- Adjust key settings to match the scene:
- Exposure: Brighten/darken (e.g., +0.5 for underexposed shots).
- White Balance: Correct color casts (e.g., set Temp to 5500K for daylight).
- Contrast/Shadows: Boost shadows (+20) for detail in dark areas.
- Highlights/Whites: Lower highlights (-30) to recover bright areas like wedding dresses.
- Crop/Straighten: Use the Crop tool (R key) to fix composition or horizons.
- Example: For a golden-hour portrait, increase Warmth (+10 Temp) and Shadows (+15) for a soft, glowing look.
- Adjust key settings to match the scene:
- Batch Apply (Sync):
- Select the edited image, then hold Ctrl (Windows) or Cmd (Mac) and select similar images (e.g., all ceremony shots).
- Click Sync (bottom-right) and choose settings to apply (e.g., Preset, Exposure, White Balance).
- Review synced images to ensure consistency; tweak outliers individually.
- Repeat for Other Collections:
- Apply different presets to other groups (e.g., “Reception” with a moody preset, “Portraits” with a soft preset).
- Sync adjustments within each group.
Time Estimate: 1-2 hours for 500-700 images.
Step 4: Fine-Tune Key Images
- Select Hero Shots:
- Identify 10-20 key images (e.g., bride’s portrait, first kiss, ring shot) for extra attention.
- Use 5-star ratings (press 5) to mark these.
- Detailed Adjustments:
- Skin Tones: Use the HSL/Color panel to adjust skin hues (e.g., reduce Orange saturation to achieve more natural tones).
- Spot Removal: Use the Spot Removal tool (Q key) to fix blemishes or distractions (e.g., remove a stray hair).
- Graduated Filters: Apply filters (M key) to darken skies or brighten subjects (e.g., +0.3 Exposure on the couple).
- Vignette: Add a subtle vignette (-10 in Effects panel) for focus on subjects.
- Example: For a bride’s portrait, smooth skin with the Brush tool (K key, -10 Clarity on skin) and brighten eyes (+20 Exposure on iris).
- Save Custom Presets:
- If tweaks work well, save them as a new preset: Go to Presets > New Preset, name it (e.g., “Wedding_Portrait_Soft”), and save.
- Reuse for future weddings to save time.
Time Estimate: 1 hour for 10-20 images.

Step 5: Export for Client Delivery
- Select Final Images:
- In Library Module, filter by Pick or 4-5 stars to view final edits.
- Export Settings:
- Go to File > Export.
- Set:
- File Type: JPEG.
- Quality: 80-100 (balances size and quality).
- Resolution: 300 PPI for prints, 72 PPI for web.
- Size: Full resolution for prints (e.g., 5760x3840px) or 2048px long edge for online galleries.
- Output Folder: Create a folder (e.g., Wedding_2025-07-19_ClientName_Final).
- Watermark: Add a subtle logo (optional, in Watermark Editor).
- Example: Export 500 images as JPEGs at 300 PPI for the client USB and at 2048px for the online gallery.
- Verify Exports:
- Check a few exported files to ensure quality and correct naming.
Time Estimate: 30 minutes (depends on computer speed).
Step 6: Backup Final Edits
- Copy the exported JPEGs to your backup system (e.g., an external 4TB WD drive or Backblaze cloud).
- Keep raw files and Lightroom catalog backed up separately.
- Example: Upload JPEGs to Google Drive for client sharing and to a Synology NAS for storage.
Total Time Estimate: 3-5 hours for a 500-700 image gallery.
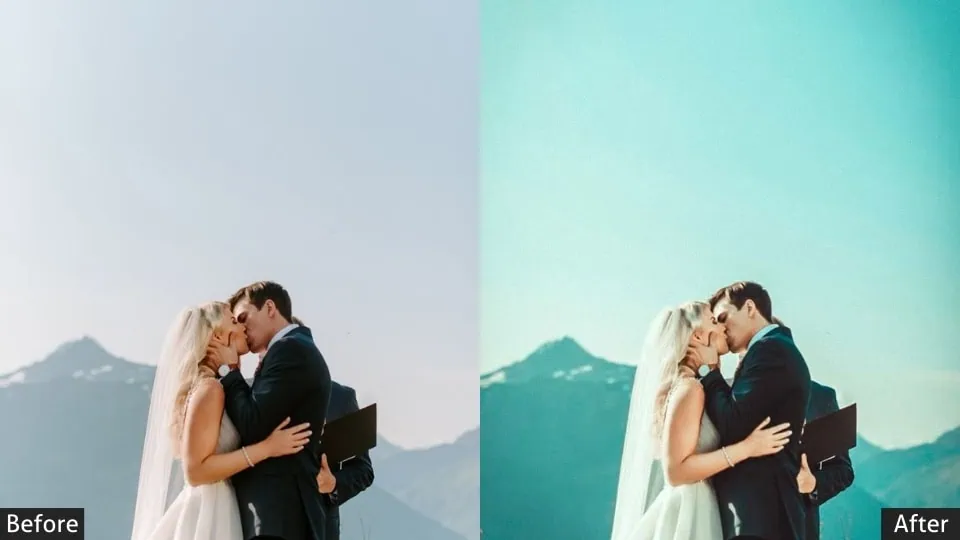
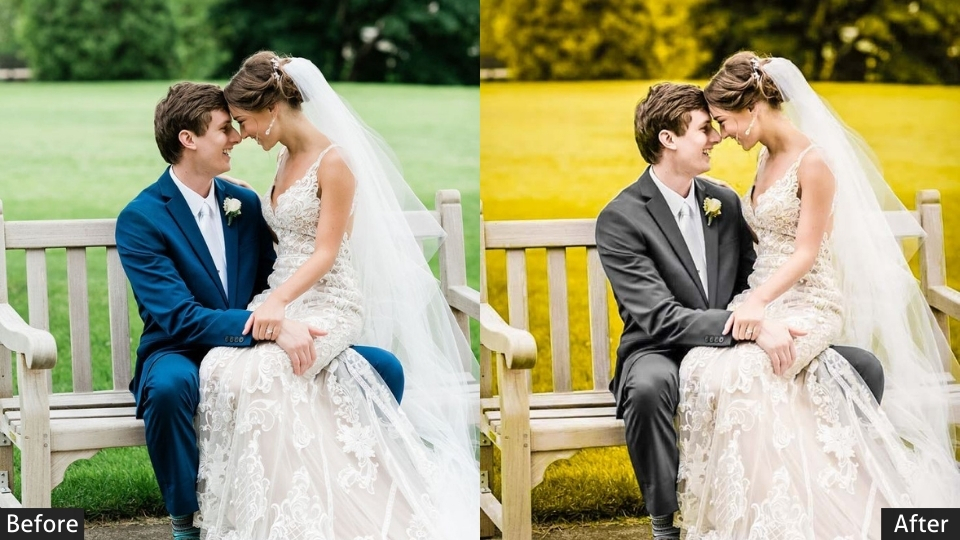
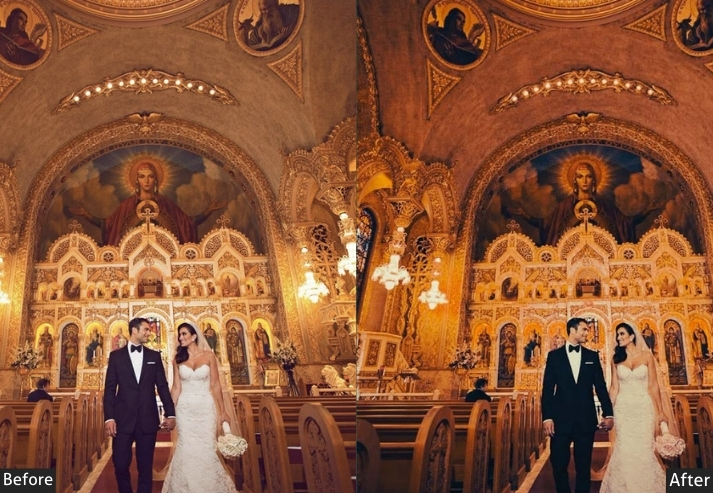
Popular Wedding Photography Editing Styles
Your editing style is your signature-it’s what makes your work yours. Here are some trending styles and how to nail them:
- Light and Airy: Perfect for spring weddings. Increase exposure, lift shadows, and use soft, pastel tones. Keep contrast low for that ethereal vibe.
- Dark and Moody: Ideal for evening or winter weddings. Lower exposure, deepen shadows, and boost rich, saturated colors. Add a vignette for drama.
- Vintage: Warm tones and faded blacks. Use split toning to add a retro feel, think sepia highlights and teal shadows.
- Classic and Timeless: True-to-life colors with balanced contrast. This never goes out of style and lets the day shine as it was.
Experiment with these to find what clicks with you and your clients. Your style is your brand, so own it!
Developing Your Editing Style
Consistency is king. Clients should recognize your work instantly. Start by editing a few weddings in different styles-play with light and airy one day, dark and moody the next. Over time, refine what feels most “you.” My style? A blend of classic and airy, with a dash of warmth, think golden-hour vibes all day long. Find yours, and your portfolio will sing.
Editing Software and Tools
Choosing the right software is like picking the perfect camera-it depends on your needs. Here’s the rundown:
- Adobe Lightroom: The wedding photographer’s B Patience. Great for batch editing (hello, 700+ photos!) and workflow management.
- Capture One: Superior color grading for photographers who geek out over tones.
- Photoshop: Perfect for detailed retouching, like erasing that photobombing cousin.
- AI Tools: Aftershoot handles culling and basic edits, saving you hours of work.
For most wedding shooters, Lightroom’s the sweet spot. Add presets (pre-made settings) to speed things up and keep your style consistent. Oh, and as of 2025, Lightroom’s AI masking tool makes selecting subjects a breeze-future-proof your workflow!
Lightroom Presets For Wedding Photography
Presets are the single biggest time-saver in a wedding photographer’s workflow. Instead of manually adjusting 15+ sliders on every image, a preset applies a consistent starting look to hundreds of photos in seconds, which you then fine-tune per scene.
Why use Lightroom presets for wedding photography:
- Efficiency: apply a cohesive look to an entire gallery via batch editing in seconds.
- Consistency: Keep ceremonies, portraits, and receptions visually unified.
- Affordability: A one-time purchase (or free pack) replaces costly per-wedding outsourcing.
- Customization: Tweak presets for different lighting conditions (golden hour, indoor flash) or to match your personal style.
Outsourcing Editing Services
Editing hundreds of photos can feel like a marathon. Too busy? Outsourcing might be your lifeline. Services like FixThePhoto offer packages: $99 for color correction on 700 photos, or $159 for color correction and retouching. Just ensure their style matches yours; consistency matters. It’s a time-saver, but always review the final edits to keep your brand intact.
Cost Comparison Example (20 Weddings/Year)
- Presets:
- Preset Pack: $5~$50 (one-time).
- Total: $50/year.
- Outsourcing:
- Average: $200/wedding (mid-range service, ~1000 images).
- Total: $4,000/year.
- Savings with Presets: ~$3,950/year, plus full creative control.
Unlike cloud subscriptions or outsourcing, presets don’t incur ongoing costs. Once purchased, they’re yours forever, making them ideal for photographers with limited cash flow.

Tips and Hacks for Efficient Editing
Time is money, especially with back-to-back weddings. Try these hacks:
- Keyboard Shortcuts: Learn them. They’re game-changers.
- Batch Editing: Apply adjustments to similar shots (e.g., all ceremony photos) with a single click.
- Presets: Create or buy them for instant looks. It’s like magic for your workflow.
- AI Assistance: Tools like Aftershoot tackle culling and basic edits fast.
Pro Tip: Use Lightroom’s “dehaze” tool to add drama to skies or the gradient filter to balance tricky exposures. Little tweaks, big wins.
Common Mistakes to Avoid
We’ve all over-edited a photo into cartoon territory. Dodge these pitfalls:
- Over-editing: If the bride looks like porcelain, dial it back.
- Inconsistent Style: Don’t let your gallery feel like a mix-and-match mess.
- Forgetting to Back Up: Losing edits (or originals) is a nightmare. Save often.
Backing Up Your Work
Wedding photos are priceless, so protect them like gold. Use external drives and cloud storage-Google Drive or Dropbox are clutch. My rule: if it’s not in three places, it’s not safe. Don’t tempt fate with a hard drive crash.
Conclusion
Wedding photography editing is equal parts technical skill and personal style. Nail the fundamentals, culling, backups, exposure, and color correction, then build a repeatable workflow with presets that reflect your unique brand. The couples you shoot for will notice the consistency, and so will the clients who book you because of it.
Ready to put this into practice? Grab our free presets and start editing your next gallery in a fraction of the time.
Learn More:
How to Install Lightroom Presets
150 Wedding Lightroom Presets Free Download
500 Wedding Photography Poses With Camera and Couple Instructions