Lightroom masks let you change the subject, sky, background, or one small feature without pushing the entire photograph in the same direction. The fastest way to make a Lightroom edit look artificial is to treat every pixel equally.
A portrait may need a brighter face but not a brighter wall. A landscape may need more sky contrast without making the mountains crunchy. One person in a group may need a small white-balance correction while everyone else already looks right. Global sliders cannot solve those problems cleanly because they affect the whole frame. That is what masking is for.
Modern Lightroom can automatically identify a subject, sky, background, object, person, or landscape element. You can then refine that selection with a Brush, Gradient, Color Range, Luminance Range, or, in supported workflows, an Intersect operation. The difficult part is no longer finding the Masking button. It is knowing which tool to start with, how to check its work, and how far to move the sliders afterward.
This Lightroom masking guide explains the complete workflow in Lightroom Classic, Lightroom Desktop, Lightroom Mobile, and Lightroom on the web.
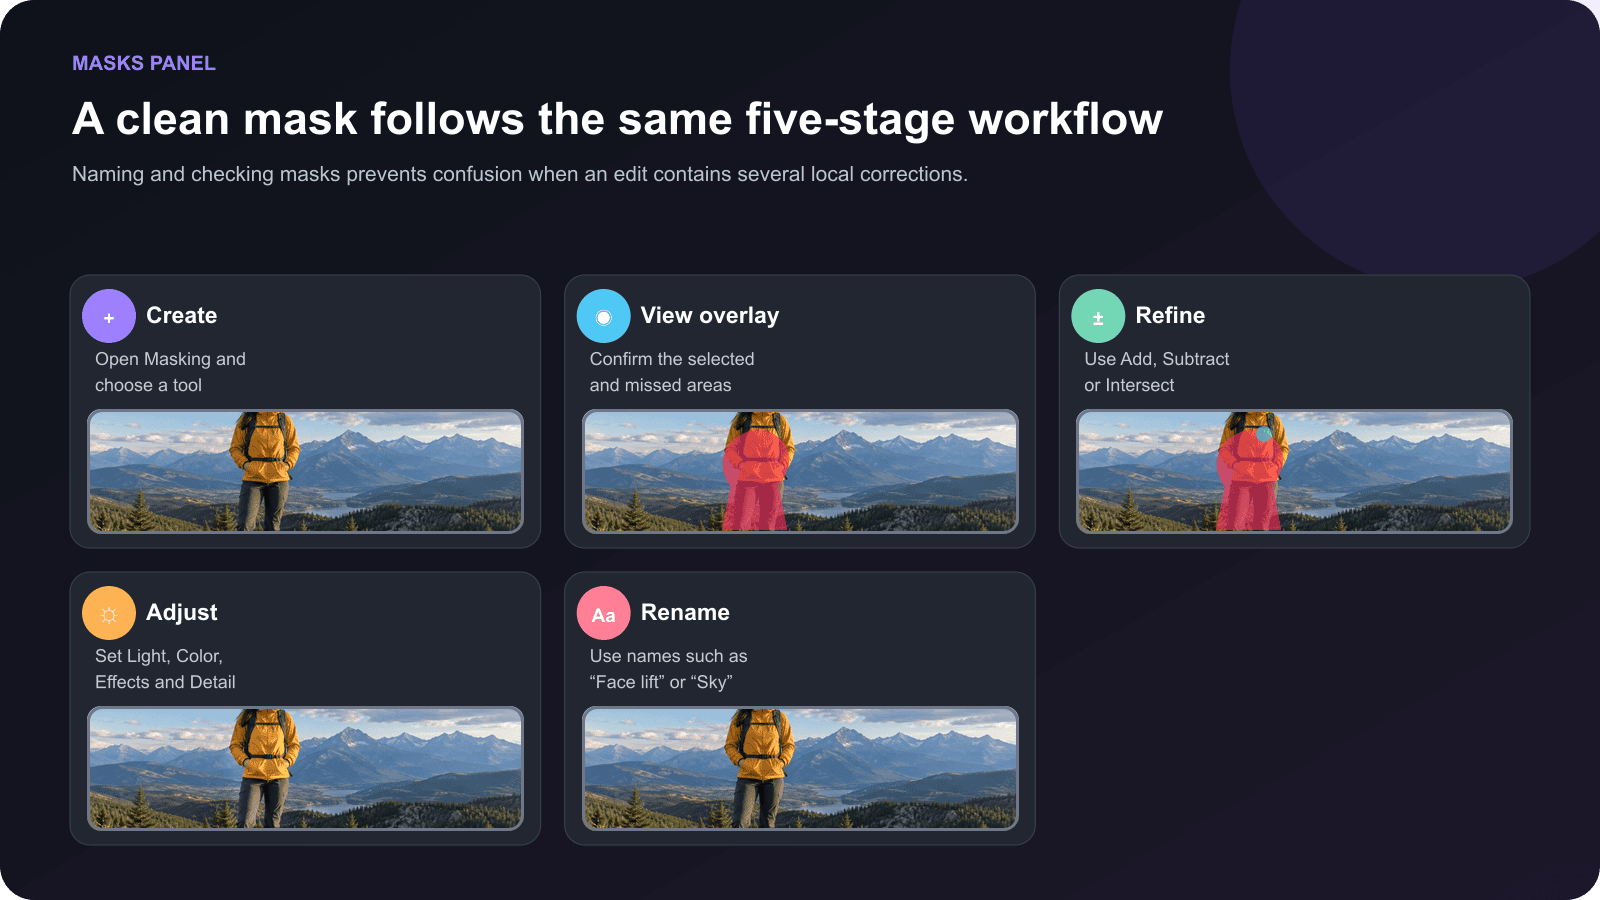
Quick answer: Open Masking, create the broadest accurate selection, usually Subject, Sky, Background or People and inspect the colored overlay. Use Add to include missing pixels, Subtract to remove spill, and Intersect to keep only the overlap between the original selection and a second mask. Then make the smallest local Light, Color, Effects or Detail adjustment that solves the problem. Toggle the mask off and on and inspect both Fit view and 100% zoom before exporting.
- What is masking in Lightroom?
- What changed in Lightroom masking during 2026?
- Lightroom masking tools explained
- How to open the Masking panel
- How to use Select Subject in Lightroom
- How to use Select Sky in Lightroom
- How to use People masks in Lightroom
- Background, Objects and Landscape masks
- Add, Subtract, Invert and Intersect explained
- How to create an Intersect mask
- Color, Luminance and Depth Range masks
- Brush, Linear Gradient and Radial Gradient masks
- How to refine mask edges in Lightroom
- Which sliders can you use inside a mask?
- A practical portrait masking workflow
- A practical landscape masking workflow
- Masking in Lightroom Classic, Desktop, Mobile and Web
- Copying and syncing AI masks
- Common Lightroom masking mistakes
- Frequently asked questions
- Final Lightroom masking checklist
What is masking in Lightroom?
A Lightroom mask is an editable selection attached to a photograph. It doesn’t cut pixels out of the file or permanently rewrite the original image. It simply tells Lightroom where to apply a group of local adjustments.
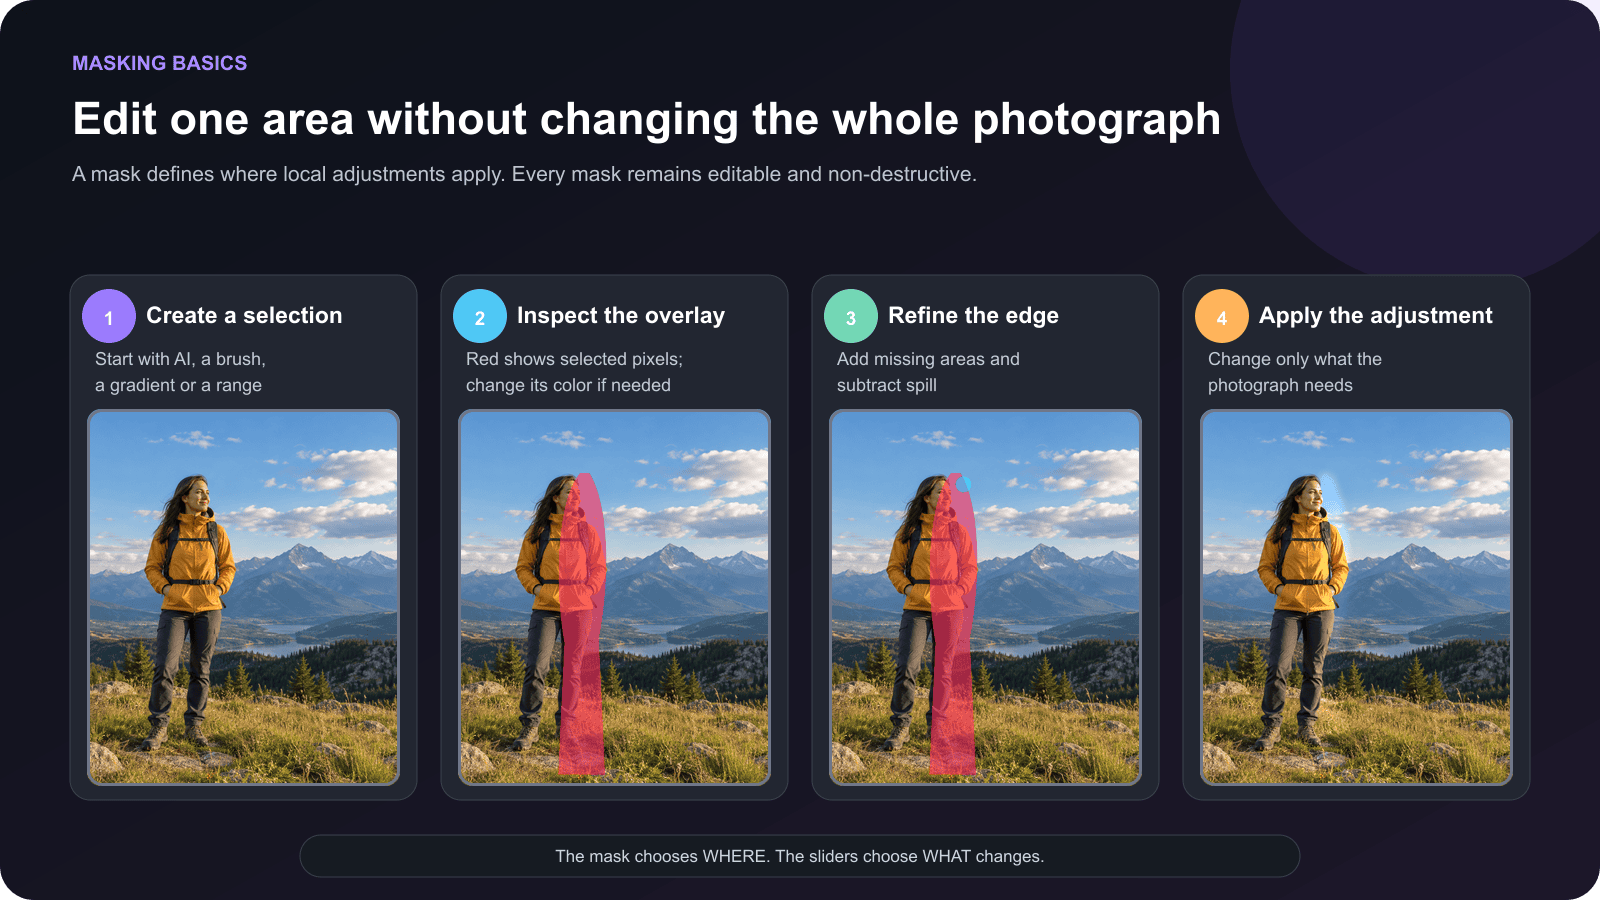
That distinction is important:
- The mask controls the area.
- The adjustment sliders control the result.
- The overlay is a temporary visualization of the selected area.
- Add, Subtract, Invert and Intersect change the mask’s logic.
The red overlay is not the edit. It is only a map. You can change its color, opacity and display mode when red is difficult to see against the photograph.
When the mask is active, Lightroom provides local controls for exposure, contrast, highlights, shadows, whites, blacks, temperature, tint, saturation, hue, texture, clarity, Dehaze, sharpness and noise reduction. The exact list varies slightly by Lightroom surface and file type, but the principle is the same: only selected pixels receive those local adjustments.
What changed in Lightroom masking during 2026?
Lightroom masking is mature, but Adobe continued refining it in 2026. The most relevant Lightroom Classic changes are:
| Lightroom Classic release | Masking change | Why it matters |
|---|---|---|
| Version 15.4, June 2026 | Improved subject detection and selection | Subjects separate more accurately from busy backgrounds |
| Version 15.5, August 2026 | New Feather and Edge mask controls | You can soften a transition and move the effective boundary more precisely |
| Version 15.6, September 2026 | Check All and Check None for People and Landscape mask options | Selecting or clearing several detected parts is faster |
Select Landscape, introduced earlier, also remains important in the current workflow. It can identify elements such as sky, mountains, architecture, vegetation, water, snow, natural ground, and artificial ground when those elements exist in the photograph.
These improvements do not remove the need to inspect a mask. AI selection is a strong starting point, but hair, transparent fabric, reflections, gaps between limbs, motion blur, and similar-colored areas can still produce imperfect edges.
Lightroom masking tools explained
Lightroom’s masking tools fall into four practical groups.
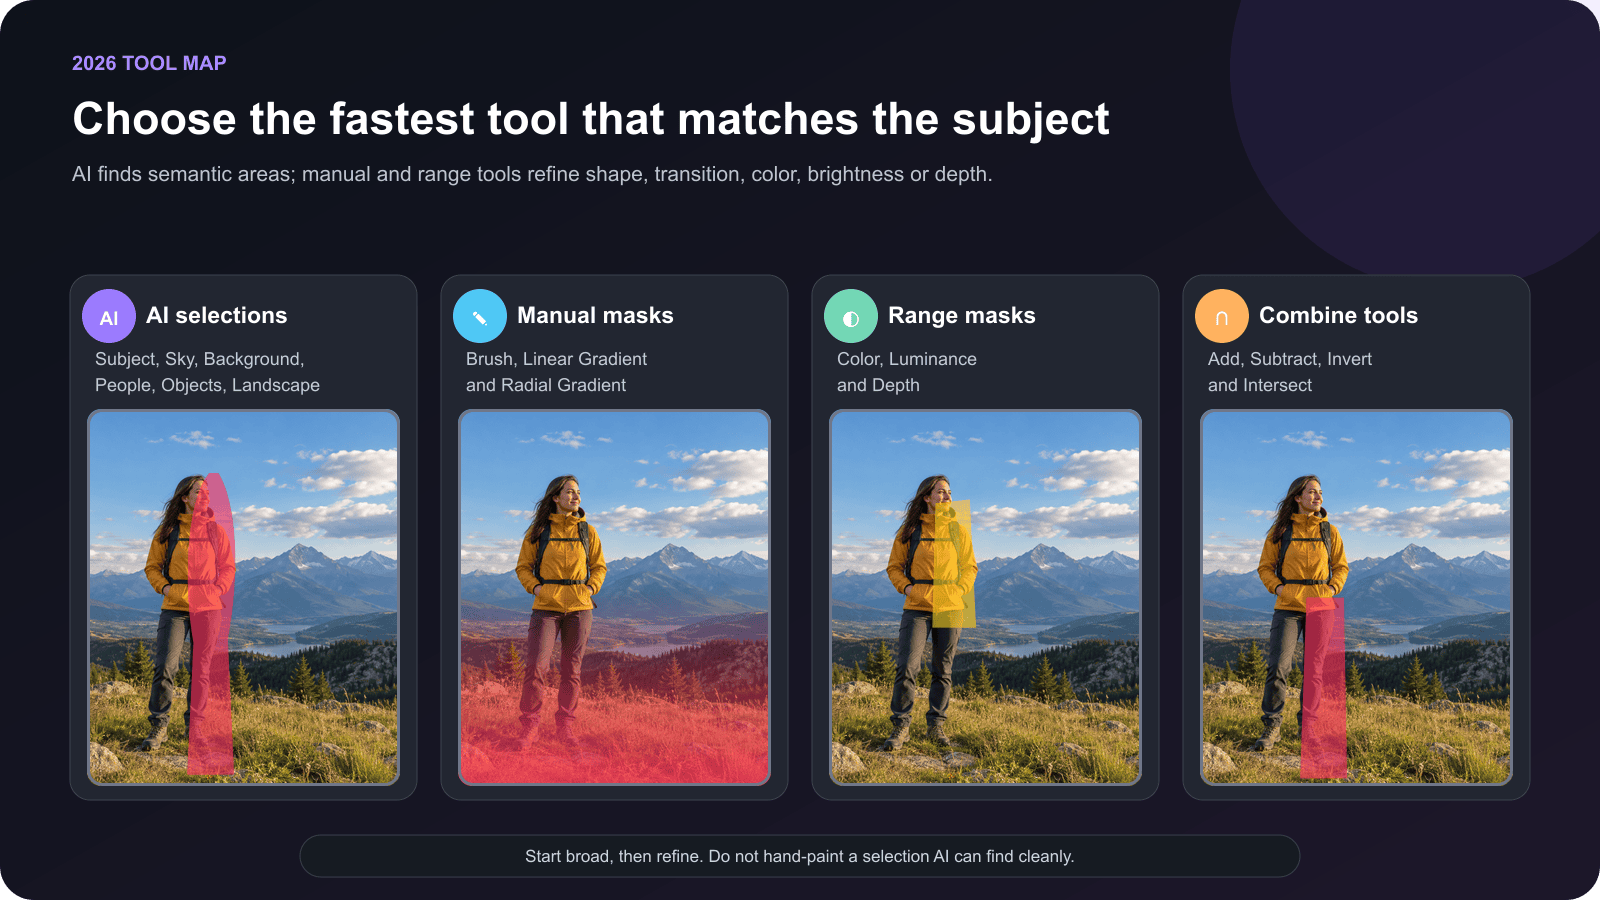
AI-powered selections
- Subject: finds the most prominent subject, including people, animals and foreground objects.
- Sky: identifies the sky around an irregular horizon.
- Background: selects the scene behind the main subject.
- People: detects individuals and, when possible, lets you choose facial skin, body skin, hair, eyes, teeth, lips, clothes and other features.
- Objects: selects a specific object after you brush over it or draw a rectangle around it.
- Landscape: detects individual landscape elements such as mountains, water or vegetation.
Manual masks
- Brush: paints an irregular selection directly.
- Linear Gradient: creates a straight, gradual transition.
- Radial Gradient: creates an oval or circular transition.
Range masks
- Color Range: targets similar colors.
- Luminance Range: targets selected brightness values.
- Depth Range: targets distance from the camera when the file contains compatible depth information.
Mask operations
- Add: includes another selection in the current mask.
- Subtract: removes another selection from it.
- Invert: selects the opposite area.
- Duplicate and Invert: creates an inverse copy while preserving the original.
- Intersect: keeps only the area shared by the current mask and a second selection.
How to open the Masking panel
Lightroom Classic
- Open the photograph in the Develop module.
- Select the Masking icon in the tool strip below the Histogram.
- Or press Shift + W.
- Choose a masking tool.
Lightroom Desktop
- Open the photograph in Detail view.
- Open Edit.
- Select Masking.
- Choose Create New Mask, then select a tool.
Lightroom Mobile
- Open the photograph in Detail view.
- Select Masking.
- Select Add or Create New Mask.
- Choose an available AI, manual or range tool.
Lightroom on the web
- Open a photograph from All Photos.
- Select Masking.
- Select Create New Mask.
- Choose the required selection tool and create the mask.
Interface names may change as Adobe updates Lightroom. If a tool doesn’t appear, confirm the app is up to date and that the photo or device supports the feature. For example, Depth Range requires suitable depth data, and some AI features are unavailable on older mobile hardware.
How to use Select Subject in Lightroom
Select Subject is usually the best first choice when one person, animal, vehicle, or foreground object clearly dominates the composition.
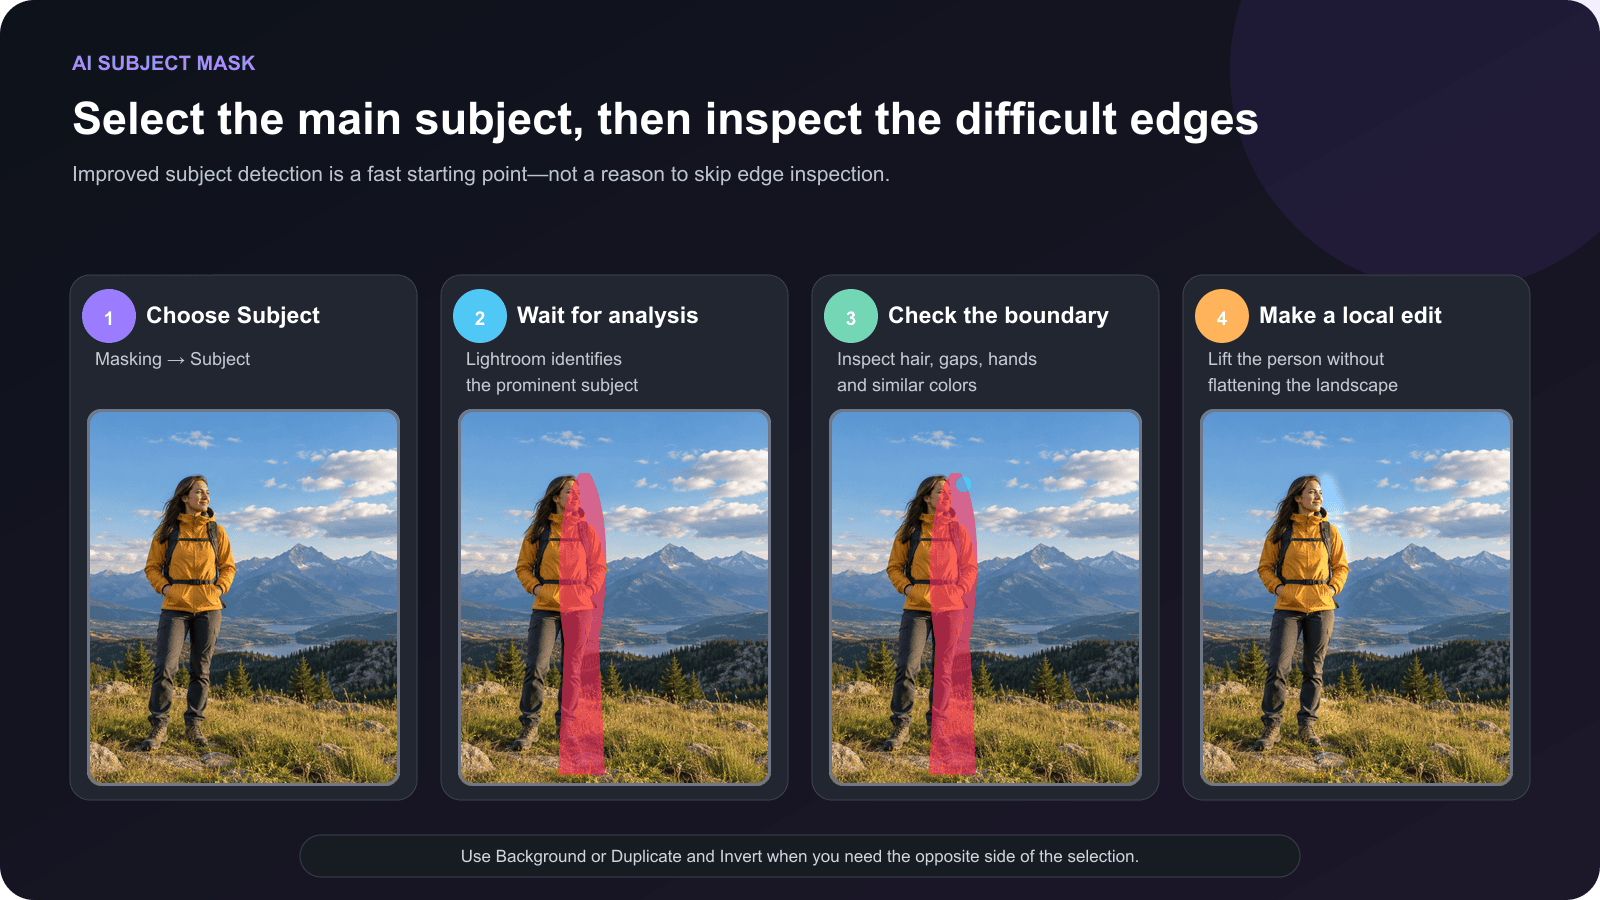
Step-by-step Subject mask
- Open Masking and choose Subject.
- Wait while Lightroom analyzes the photograph.
- Turn on the overlay if it is not already visible.
- Zoom in around hair, clothing edges, fingers, straps and gaps between limbs.
- Select Add and use the Brush if Lightroom missed part of the subject.
- Select Subtract if the mask spills into the background.
- Move the local adjustment sliders.
- Rename the mask based on its purpose, such as Subject lift or Jacket color.
The best adjustment is normally smaller than beginners expect. If the subject is slightly dark, try a modest Exposure or Shadows increase. Avoid lifting the person until they appear pasted onto the scene. The light on the subject must still make sense beside the background.
When Select Subject fails
Subject detection can struggle when:
- the subject is very small;
- several objects compete for attention;
- hair blends into a similar background;
- motion blur hides the outline;
- fog, glass or reflections obscure the subject;
- the subject is partly outside the frame.
In those cases, try Objects for a specific item, People for a clearly visible person, or combine Subject with Add/Subtract Brush strokes.
How to use Select Sky in Lightroom
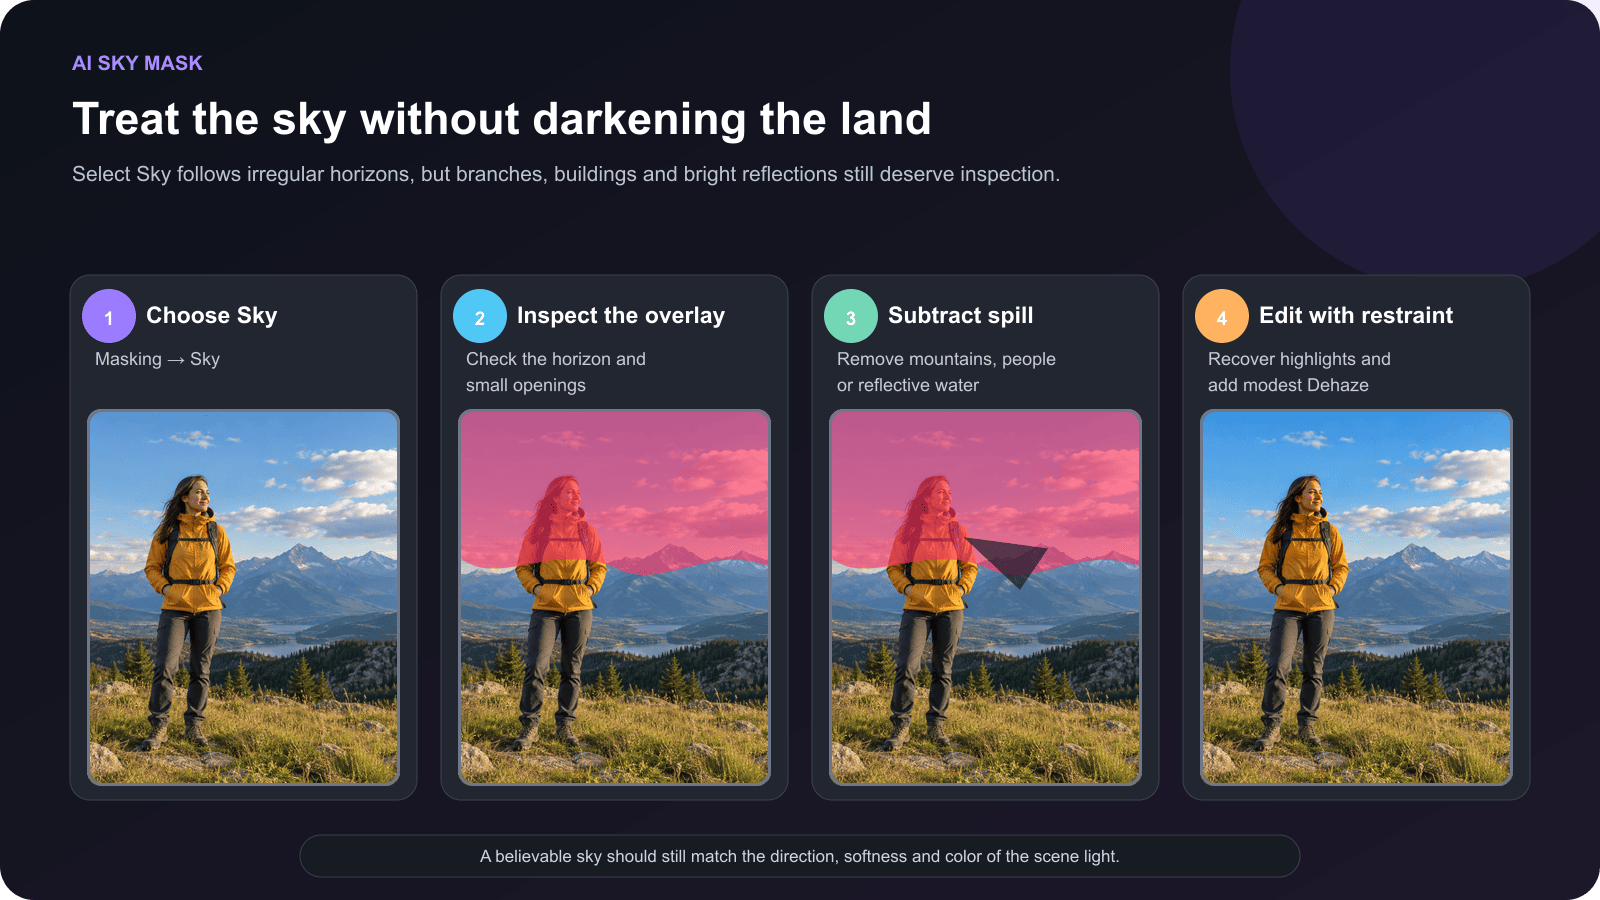
Select Sky is useful for recovering highlights, balancing color temperature, increasing modest atmospheric contrast or adding a controlled amount of Dehaze.
Step-by-step Sky mask
- Open Masking and choose Sky.
- Let Lightroom analyze the frame.
- Inspect the red overlay along the horizon.
- Look through tree branches, railings, architecture and other small gaps.
- Use Subtract → Brush to remove any foreground spill.
- If the selection includes bright water, glass or snow, refine it with a Brush or Luminance Range.
- Adjust Highlights, Exposure, Temp, Saturation or Dehaze carefully.
- Toggle the mask off and on at Fit view.
A common mistake is dragging Dehaze until every cloud edge becomes hard and the blue becomes unnaturally saturated. A sky should belong to the light in the rest of the photograph. If the land is softly lit, an extremely dramatic sky will usually feel disconnected.
Sky mask versus Linear Gradient
Use Sky when the horizon is irregular or the selection needs to wrap around buildings, trees and mountains. Use a Linear Gradient when the adjustment should fade gradually from the top or bottom of the frame.
For the most natural result, you can combine them. Create a Sky mask, then intersect it with a Linear Gradient so the effect is strongest at the top and fades toward the horizon.
How to use People masks in Lightroom
People masking is more precise than Select Subject when your goal is to edit a person—or one part of that person—rather than every element Lightroom considers part of the main subject.
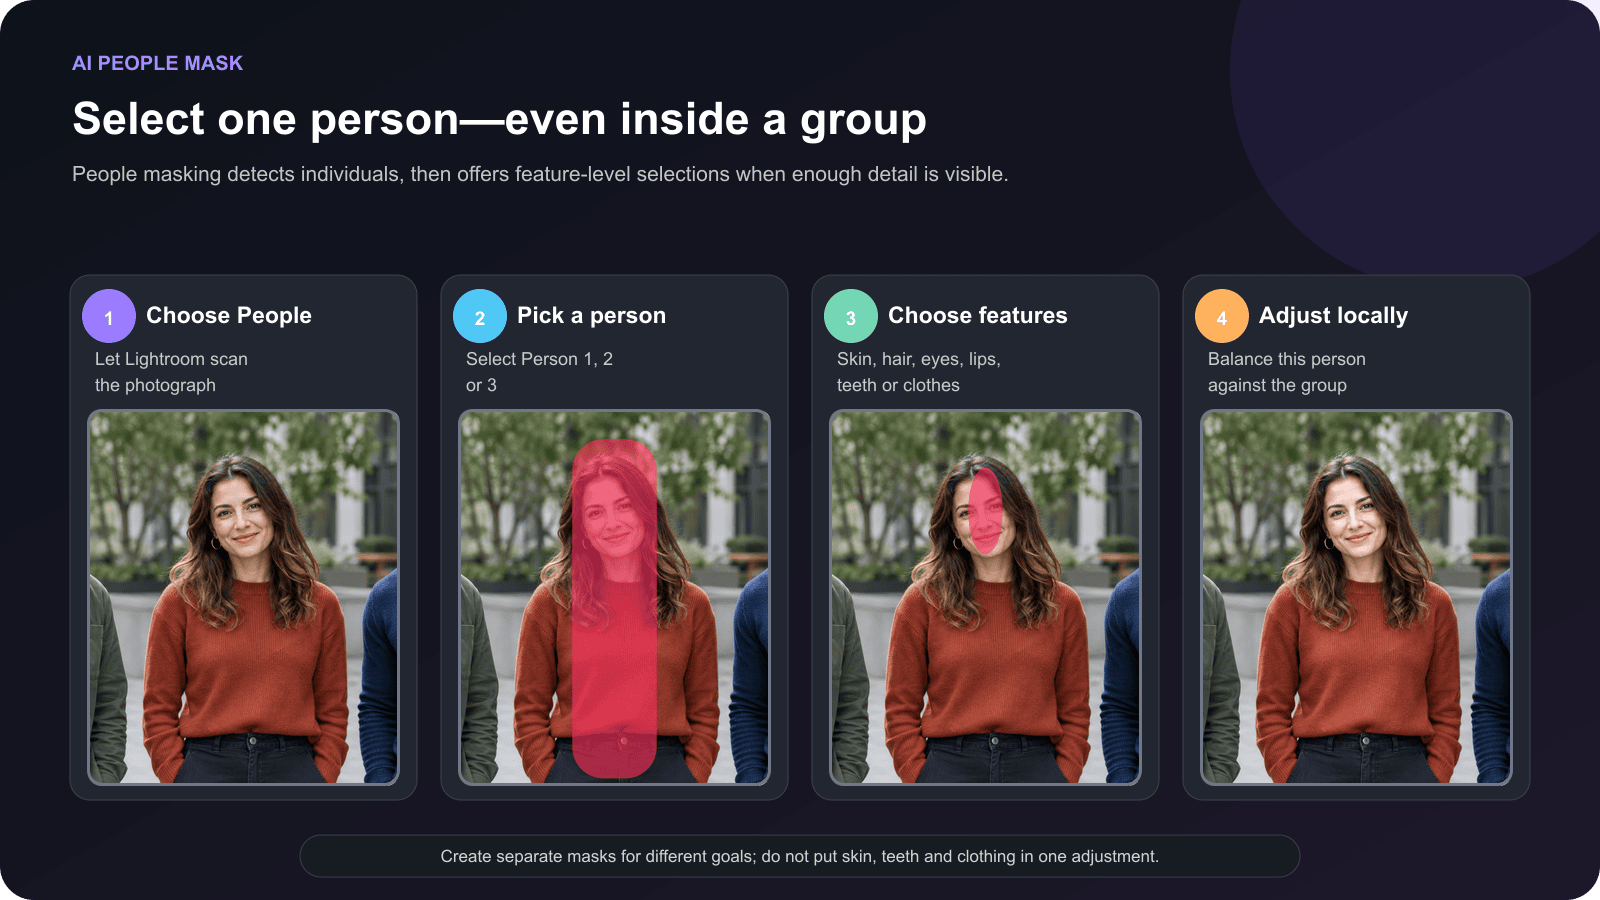
Step-by-step People mask
- Open Masking and choose People.
- Wait while Lightroom detects the people in the photograph.
- Select Person 1, Person 2 or the relevant thumbnail.
- Choose the required features. Depending on detection, these can include facial skin, body skin, eyebrows, eye sclera, iris and pupil, lips, teeth, hair, facial hair or clothes.
- Select Create Mask.
- Inspect the overlay around the selected feature.
- Add or subtract areas when necessary.
- Apply a restrained local adjustment and rename the mask.
Which People feature should you select?
| Editing goal | Best starting selection | Useful adjustments | Common danger |
|---|---|---|---|
| Balance a face | Facial Skin | Exposure, Shadows, Temp, Tint | Face becomes brighter than the neck |
| Reduce excessive skin texture | Facial Skin | Small negative Texture | Plastic, detail-free skin |
| Recover dark hair | Hair | Shadows, Blacks, Texture | Gray, flat hair |
| Improve eye catchlights | Iris/Pupil or Eye Sclera | Small Exposure or Whites increase | Glowing or unnaturally white eyes |
| Reduce yellow teeth | Teeth | Small Saturation and Temp decrease | Blue-gray teeth |
| Correct a shirt | Clothes | Temp, Tint, Hue, Saturation | Color spill onto skin or background |
Do not combine skin, teeth, eyes and clothes into one mask just because Lightroom allows multiple feature boxes. Each area normally needs a different adjustment. Separate, named masks are easier to review and safer to copy.
Background, Objects and Landscape masks
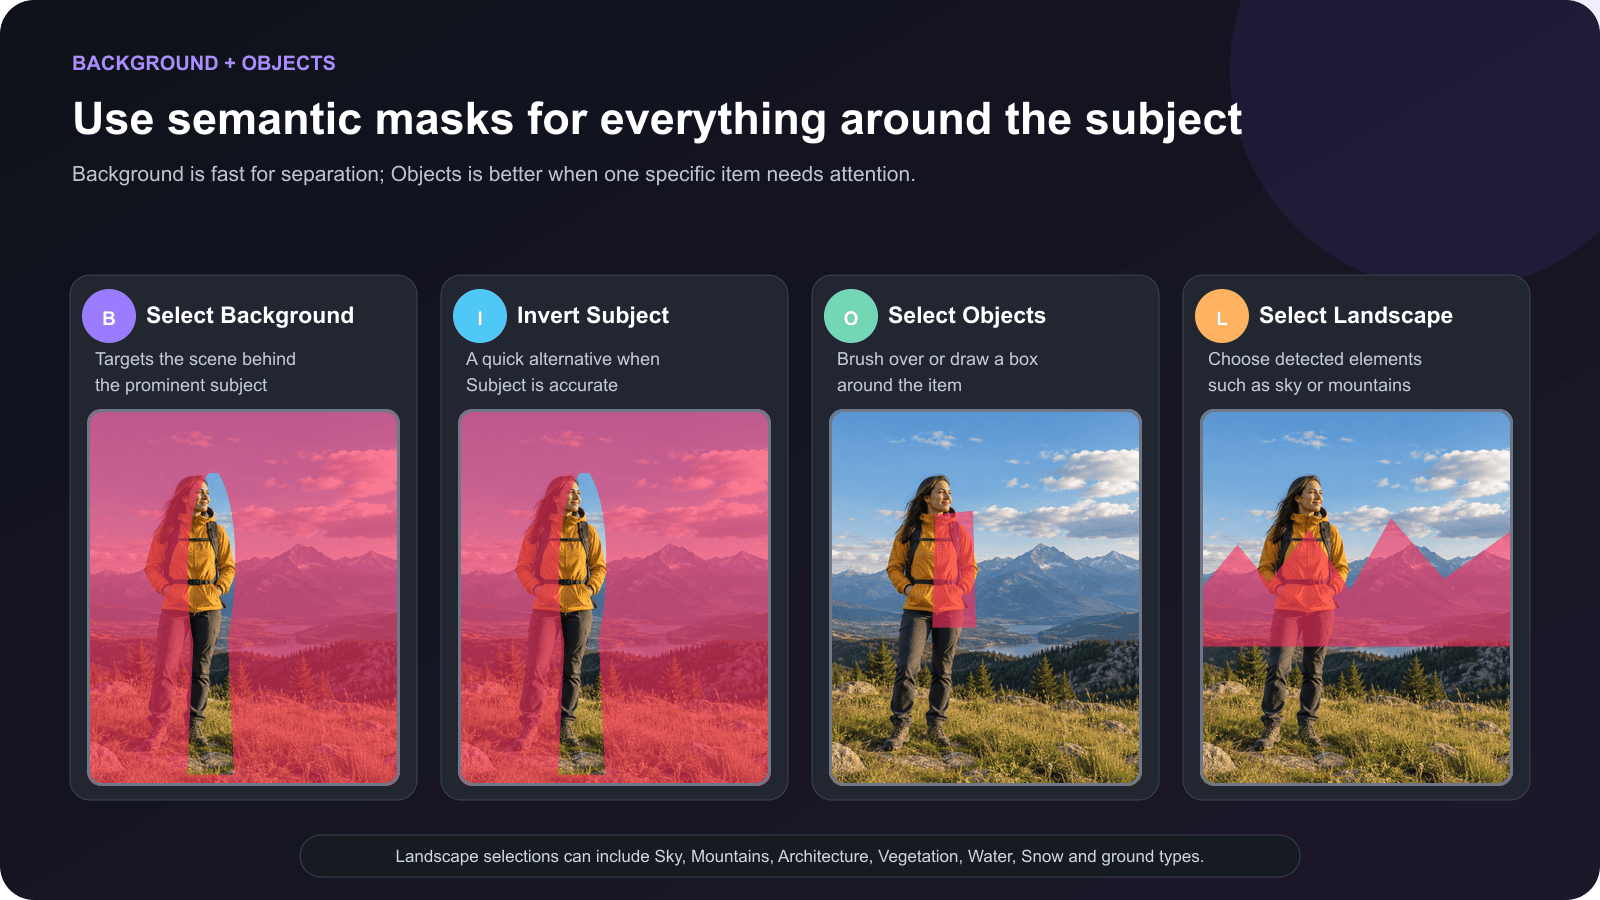
Select Background
Background analyzes the scene behind the prominent subject. It is useful for reducing distraction, cooling a warm backdrop or lowering background exposure slightly.
Do not automatically blur or darken every background. The subject must remain inside the same world. Large negative Sharpness, Clarity or Texture changes can create a synthetic cutout.
Invert a Subject mask
If Select Subject is accurate, Duplicate and Invert can create a background selection quickly. The advantage is that you keep both complementary masks and can edit them independently.
Select Objects
Objects works well when the photograph contains a specific item that is not necessarily the main subject: a bag, vehicle, flower, product, building detail or piece of clothing.
Choose Objects, then either:
- brush roughly over the object; or
- draw a rectangle around it.
Lightroom analyzes the indicated region and attempts to follow the object boundary. Inspect the overlay and refine it like any other AI mask.
Select Landscape
Select Landscape can identify up to eight kinds of landscape elements in current Lightroom documentation: Sky, Mountains, Architecture, Vegetation, Water, Snow, Natural Ground, and Artificial Ground.
Choose only the elements needed for the edit. In Lightroom Classic 15.6, Check All and Check None make it faster to select or clear multiple Landscape or People options.
Add, Subtract, Invert and Intersect explained
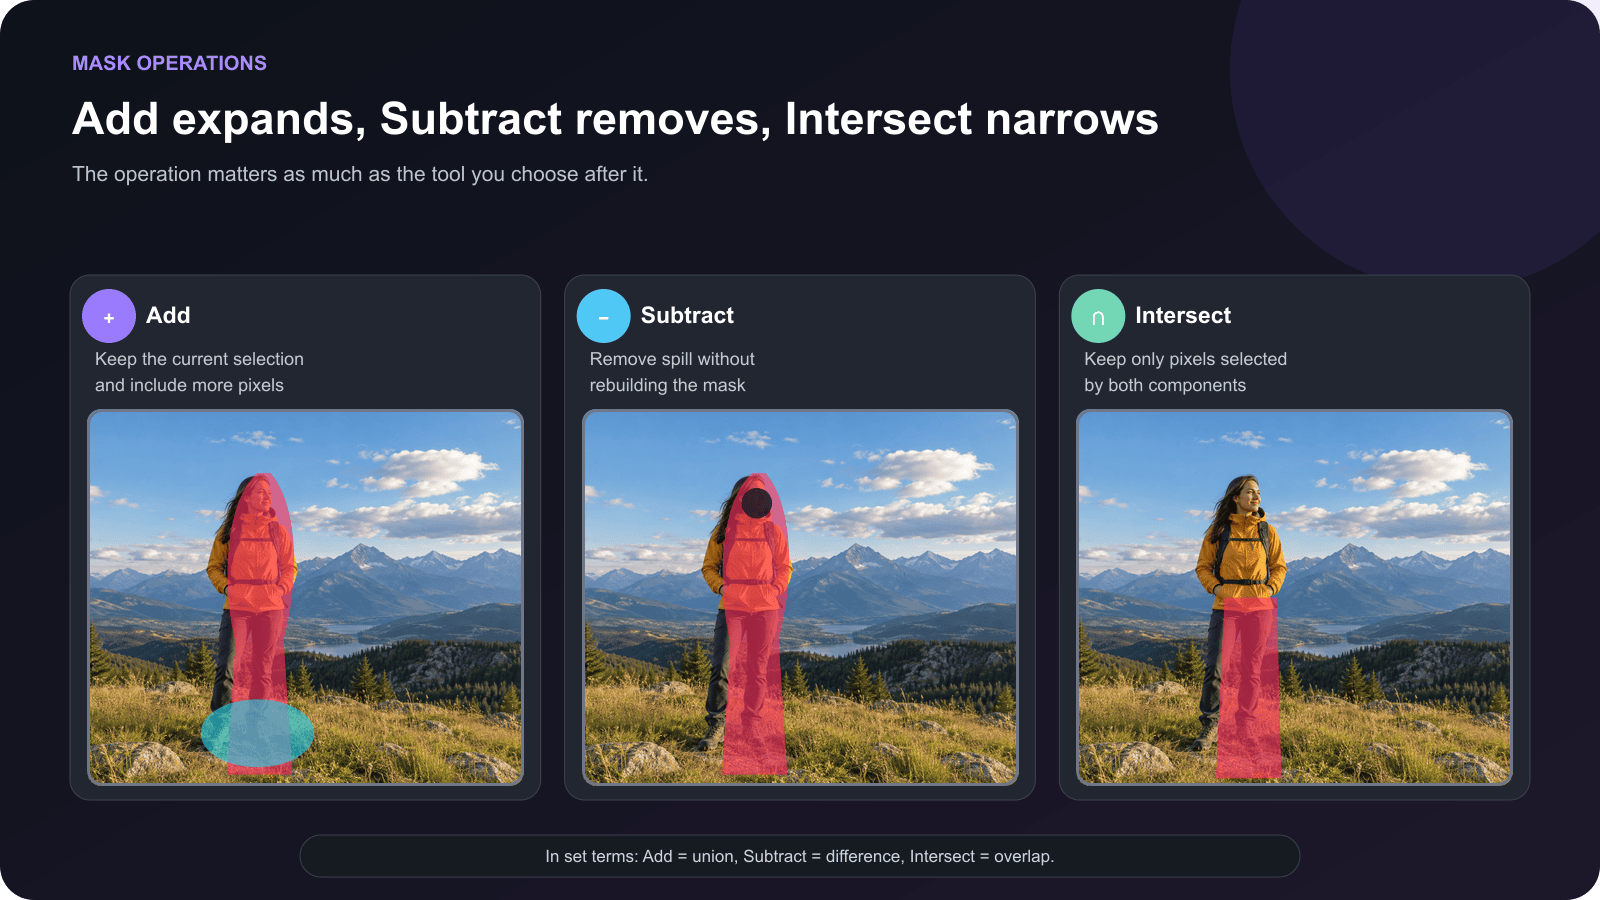
Think of a mask as a shape on transparent paper.
Add
Add keeps everything already selected and includes a second area.
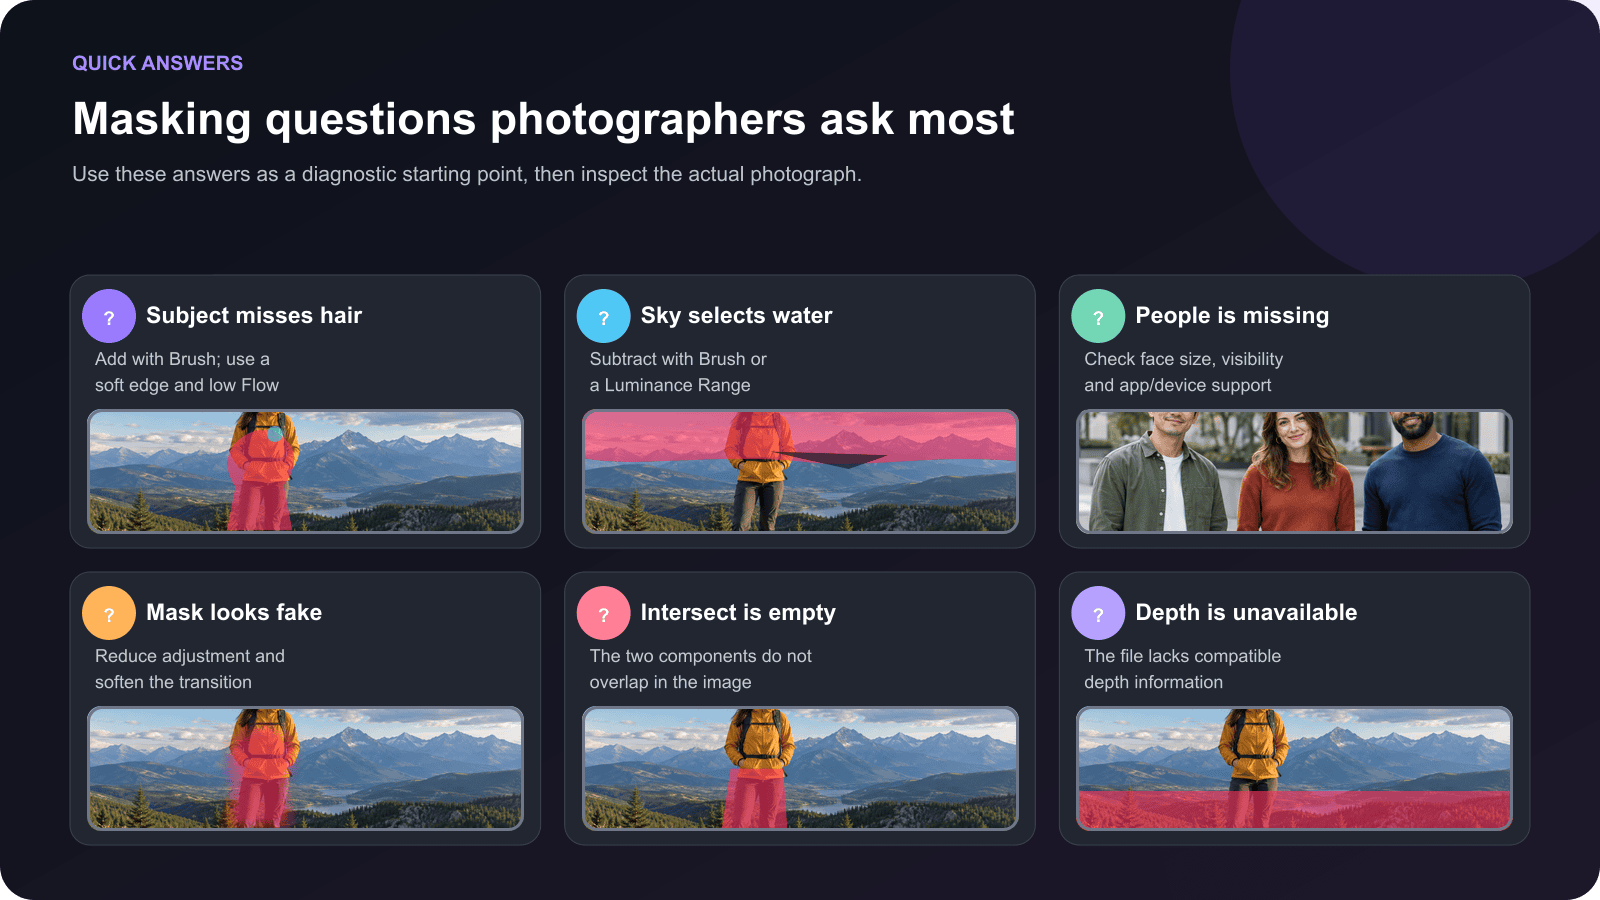
Example: Subject misses part of a hat. Choose Add → Brush and paint the missing hat. The result contains the original Subject selection plus the brush strokes.
Subtract
Subtract removes the second selection from the current mask.
Example: Sky includes part of a bright mountain. Choose Subtract → Brush or Subtract → Luminance Range and remove the spill.
Invert
Invert selects everything outside the current selection.
Example: a clean Subject mask can be inverted to create a quick background mask.
Intersect
Intersect keeps only pixels selected by both the existing mask and a second tool.
Example: Subject selects the entire person. A Linear Gradient covers the lower half of the frame. Intersecting them selects only the part of the person that overlaps the gradient. The rest of the gradient does not affect the landscape.
How to create an Intersect mask
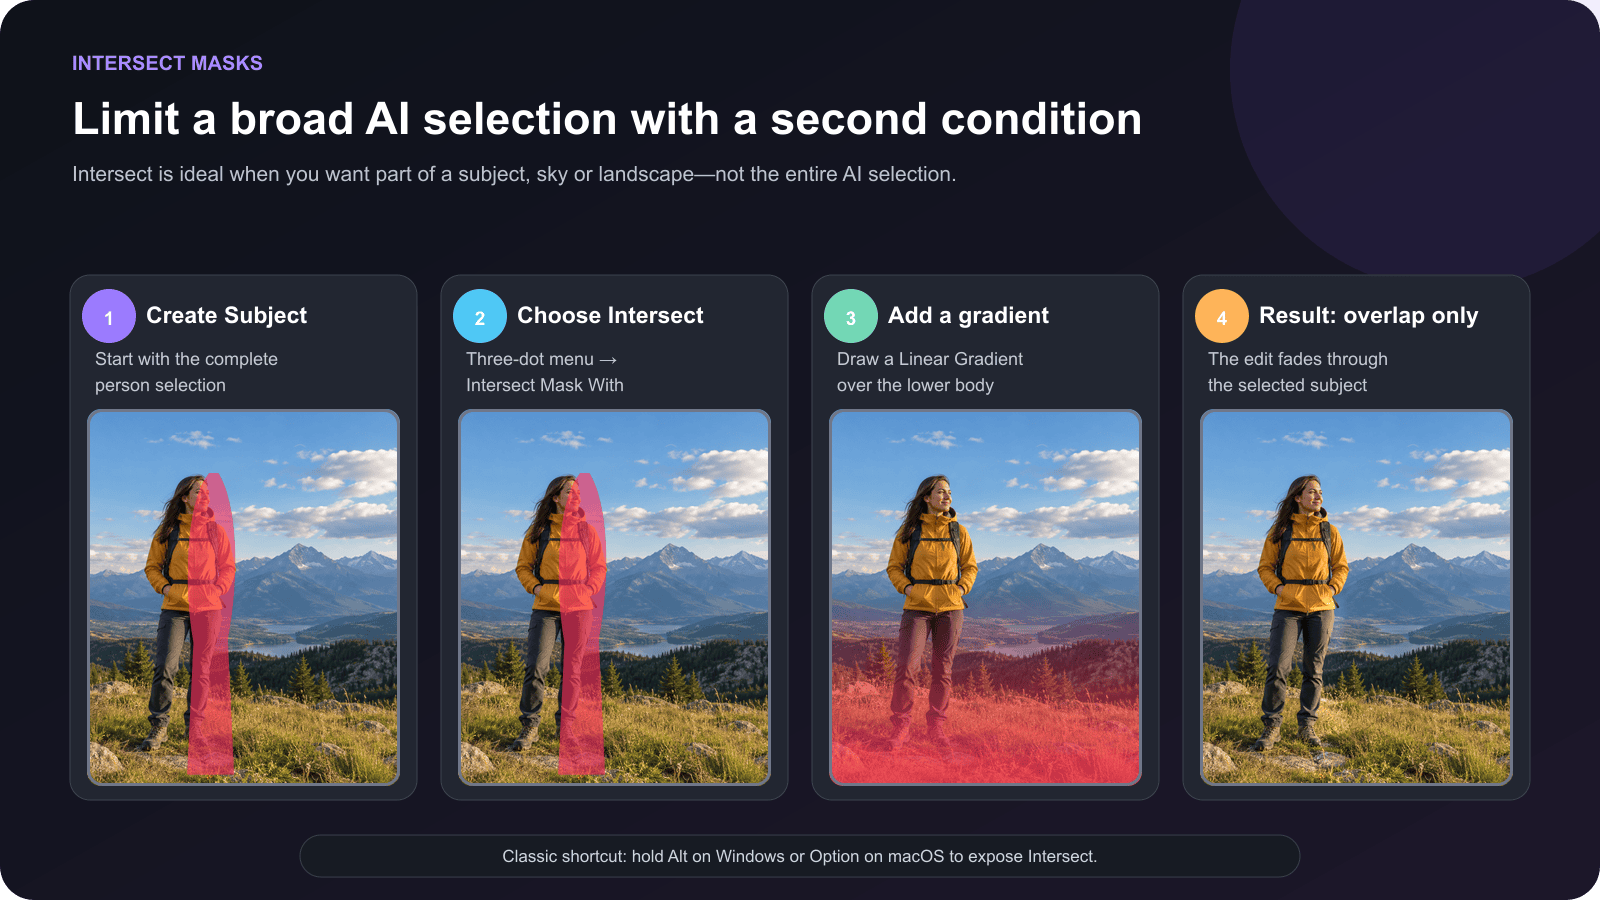
Lightroom Classic
- Create the first mask—for example, Subject.
- In the Masks panel, select the three-dot menu beside the mask or its component.
- Choose Intersect Mask With.
- Choose the second tool, such as Linear Gradient, Brush, Color Range or Luminance Range.
- Draw or configure the second selection.
- Inspect the resulting overlap.
You can also hold Alt on Windows or Option on macOS to expose the Intersect option in the Masks panel.
Lightroom Desktop
- Create and select the first mask.
- Open its three-dot menu.
- Choose Intersect with Mask using.
- Select the second masking tool.
- Define the second selection and review the overlap.
Lightroom Mobile note
Adobe’s current mobile masking documentation clearly describes Add, Subtract, Invert and Duplicate & Invert. It does not document the same Intersect menu described for Lightroom Classic and Desktop. On mobile, build the required shape with Add/Subtract/Invert where possible, or finish a complex Intersect workflow on Classic/Desktop. Tool availability can change by app version and device.
Useful Intersect combinations
| First mask | Intersect with | Result |
|---|---|---|
| Subject | Linear Gradient | A gradual adjustment limited to the subject |
| Sky | Linear Gradient | Stronger adjustment at the top, fading toward the horizon |
| People → Facial Skin | Luminance Range | Skin selection limited to selected tonal values |
| Landscape → Vegetation | Color Range | Only selected greens within detected vegetation |
| Background | Radial Gradient | A background adjustment concentrated around a region |
If an Intersect mask becomes empty, the two components probably don’t overlap, or one component was unexpectedly inverted.
Color, Luminance and Depth Range masks
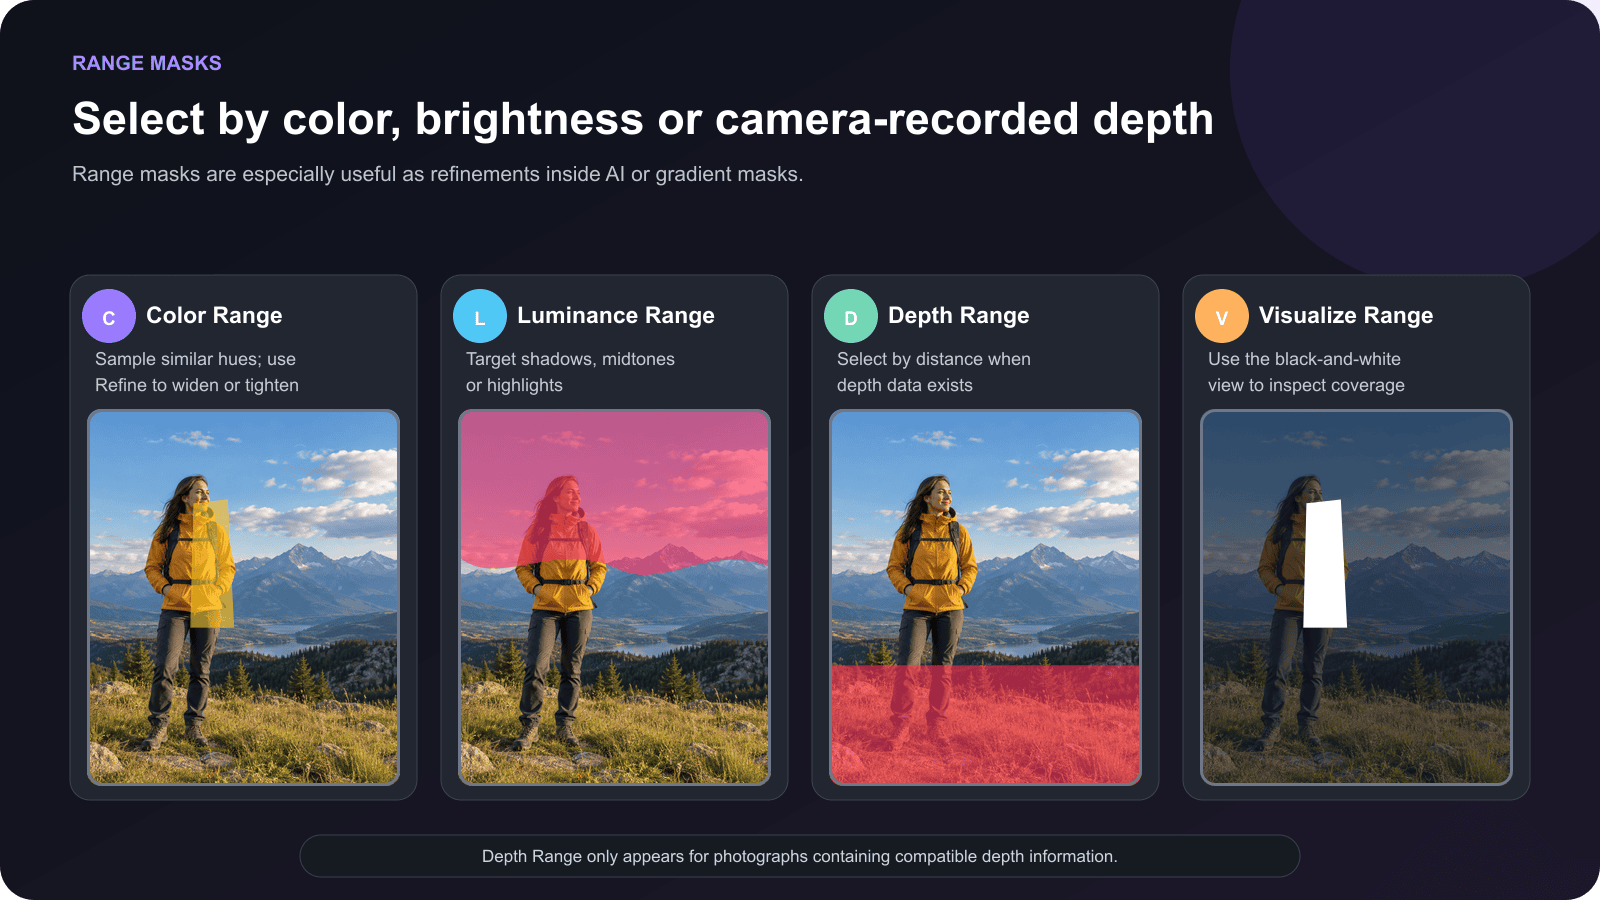
Color Range
Color Range is useful for foliage, clothing, painted surfaces and any area with a reasonably distinct hue.
- Choose Color Range.
- Sample the required color in the photograph.
- Drag across an area to include a wider sample when needed.
- Adjust Refine to tighten or broaden the selected colors.
- Inspect the overlay for unrelated areas with the same hue.
Color Range does not understand objects. If a yellow jacket and yellow flowers share the same color, both may be selected. Intersect Color Range with Subject or subtract the unwanted area.
Luminance Range
Luminance Range selects pixels according to brightness. It is useful for recovering bright clouds, opening selected shadows or limiting an effect to midtones.
Use the range and smoothness/refinement controls to avoid abrupt tonal edges. A perfectly hard luminance selection can produce halos when pushed strongly.
Depth Range
Depth Range selects areas according to their distance from the camera. It appears only for photographs containing compatible depth information. If the tool is missing, the file probably lacks the required depth map.
Brush, Linear Gradient and Radial Gradient masks
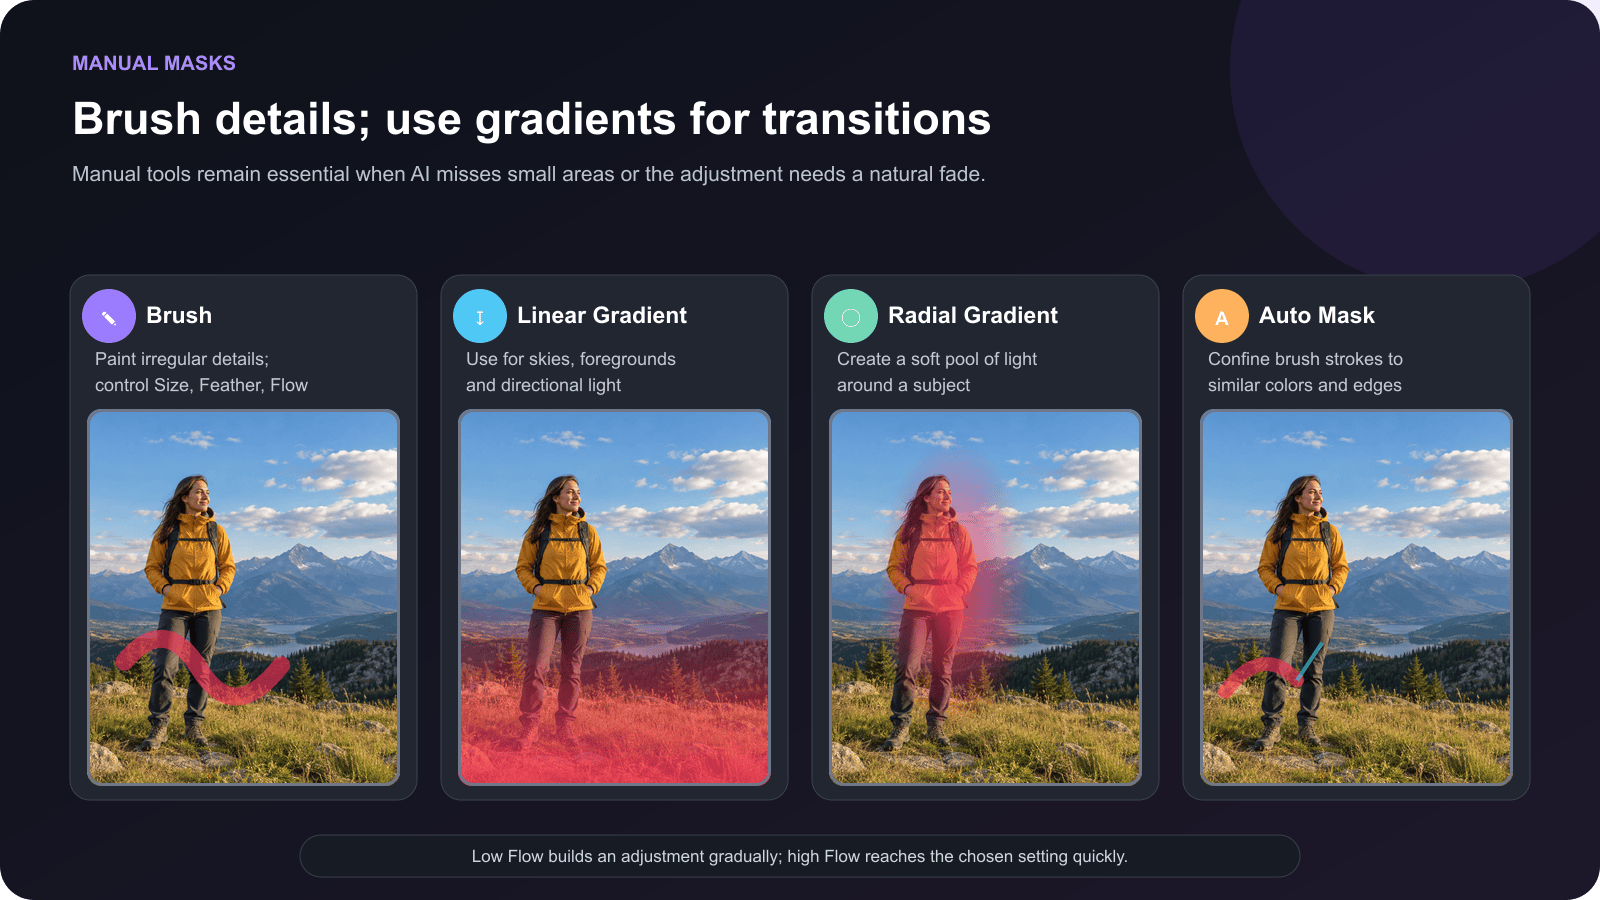
Brush
The Brush is best for repairing a selection, painting small local corrections and handling areas AI cannot describe.
- Size controls the brush diameter.
- Feather controls edge softness.
- Flow controls how quickly the mask builds as you paint.
- Density limits the maximum strength of the brush mask where available.
- Auto Mask attempts to confine strokes to similar color and edge regions.
Use a lower Flow when dodging or burning. Several light passes are normally easier to control than one heavy stroke.
Linear Gradient
Use a Linear Gradient for skies, foregrounds, walls, windows, and directional light. Widen the transition for a soft fade; narrow it for a more concentrated change.
Radial Gradient
Use a Radial Gradient to create a soft pool of light, control a face or product area, or reduce distraction around an off-center subject. Large, heavily feathered radial masks usually look more natural than small, obvious spotlights.
How to refine mask edges in Lightroom
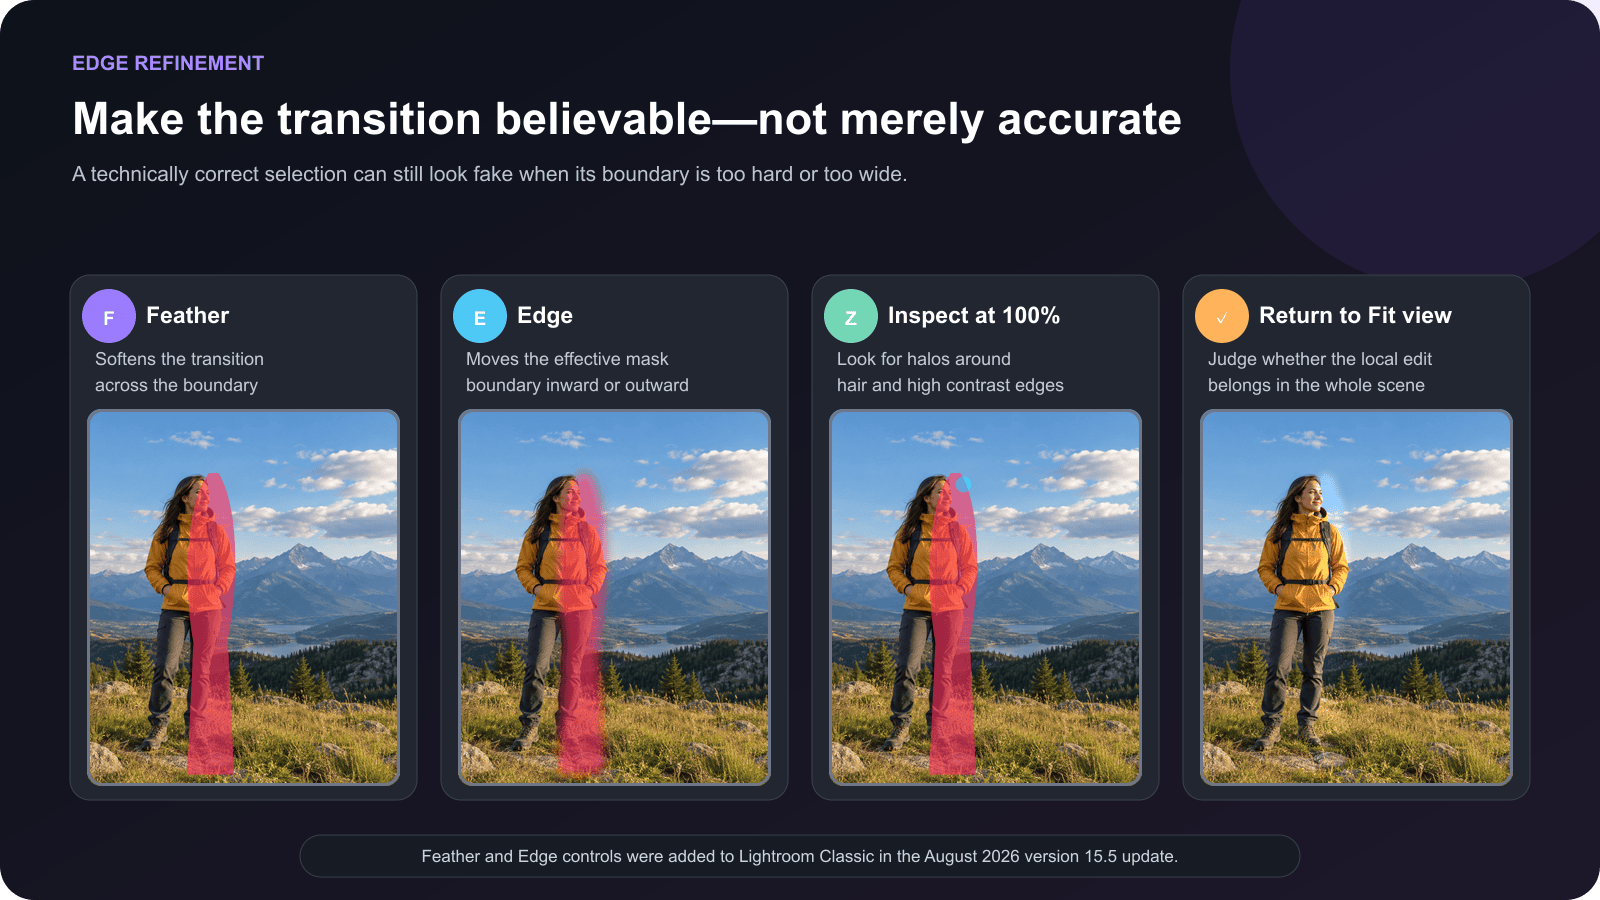
Inspect difficult edges at 100% zoom, but always return to Fit view before deciding whether the edit looks natural.
Feather
Feather softens the transition across a mask boundary. Increase it when an adjustment creates a visible cutout or halo. Do not apply maximum Feather automatically; excessive softness can spill the correction beyond the intended subject.
Edge
The Edge control moves the effective boundary inward or outward. Use it when a mask consistently sits just inside the subject or leaks past the edge.
Lightroom Classic added Feather and Edge controls in the August 2026 version 15.5 release. If you don’t see them, check your installed Classic version.
Overlay display modes
If red doesn’t clearly reveal the selection, change the overlay color or mode. Depending on the Lightroom surface, options can include:
- Color Overlay;
- Color Overlay on Black and White;
- Image on Black;
- Image on White;
- White on Black;
- Unaffected Areas.
The best overlay is the one that makes missed pixels and spill easiest to see.
Which sliders can you use inside a mask?
All mask types use the same families of local adjustment controls. The most useful ones are:
| Group | Controls | Best use |
|---|---|---|
| Light | Exposure, Contrast, Highlights, Shadows, Whites, Blacks | Local dodging, burning and tonal balance |
| Color | Temp, Tint, Hue, Saturation and Color/Colorize | Mixed light, clothing and regional color correction |
| Effects | Texture, Clarity, Dehaze and—in supported Lightroom surfaces—Grain | Texture and atmosphere |
| Detail | Sharpness and Noise Reduction | Local detail or shadow-noise control |
| Optics | Moiré and Defringe | Fabric patterns and high-contrast color fringes |
Make one purposeful adjustment at a time. If a mask changes Exposure, Temp, Tint, Saturation, Texture, Clarity and Sharpness simultaneously, it becomes difficult to diagnose later.
A practical portrait masking workflow
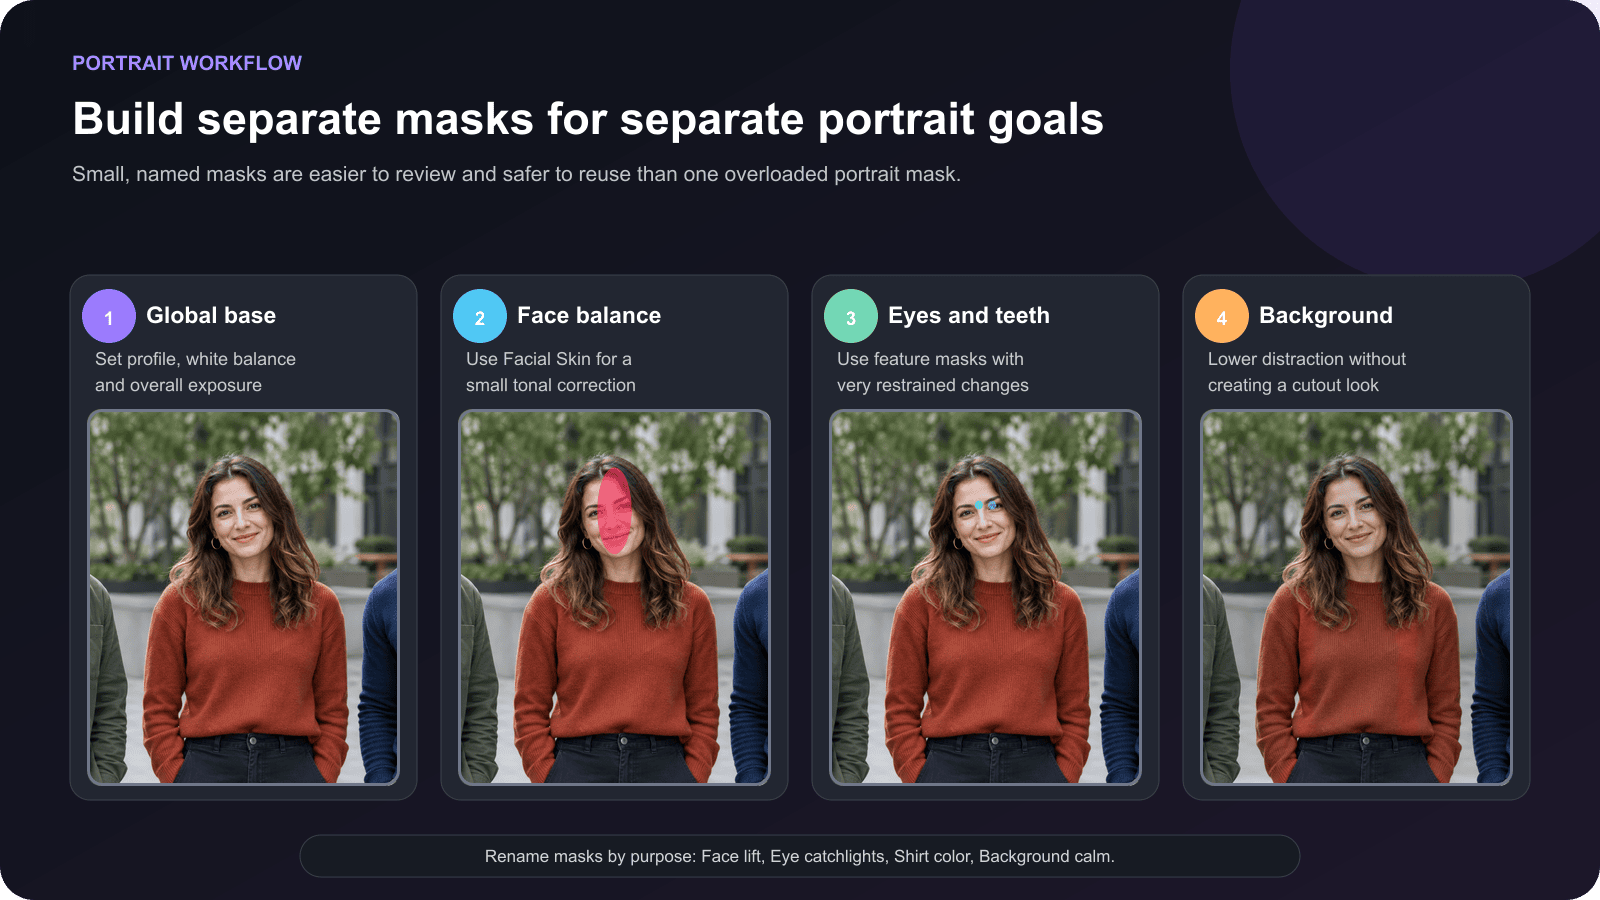
- Finish the global foundation. Choose the profile, correct white balance and set the overall exposure before creating masks.
- Balance the face. Use People → Facial Skin for a small tonal or color correction.
- Check the neck and body. The face should not become brighter or warmer than the rest of the person without a lighting reason.
- Treat eyes and teeth separately. Use very small adjustments. Natural sclera and teeth are not pure white.
- Correct clothing independently. A wardrobe-color fix should not alter skin.
- Reduce background distraction gently. Use Background or an inverted Subject mask, then make a modest change.
- Rename every mask. Useful names include Face balance, Eye catchlights, Shirt color and Background calm.
- Toggle the masks. Confirm that the portrait still looks like the person and the original scene.
A practical landscape masking workflow
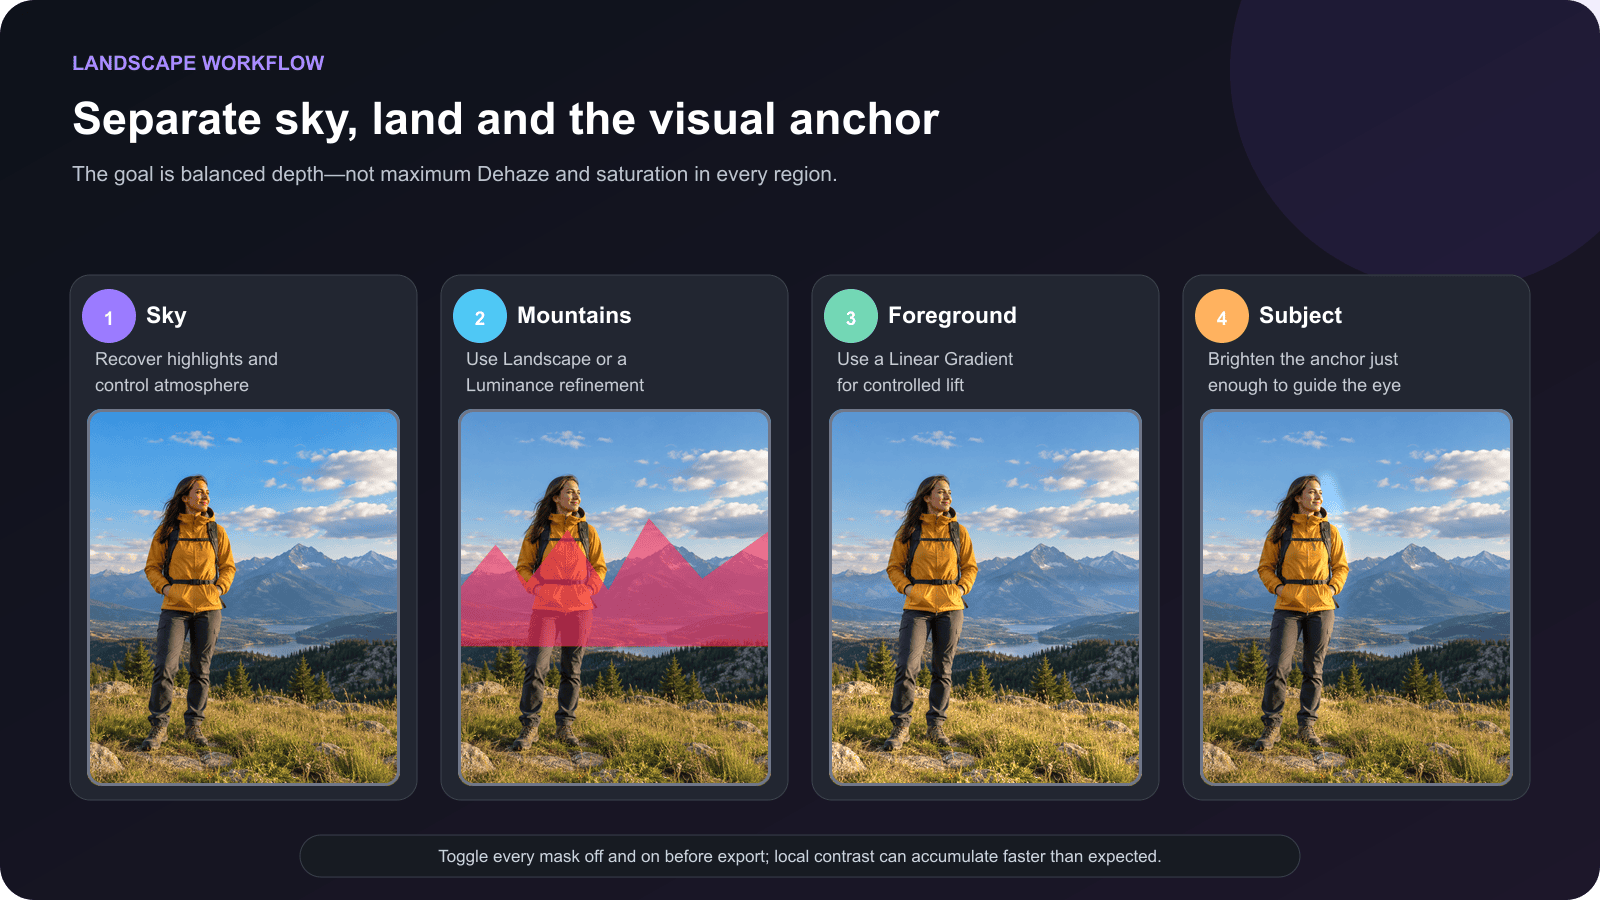
- Set global white balance and exposure.
- Use Sky to recover highlights and control atmosphere.
- Use Landscape → Mountains, or a Luminance refinement, for distant detail.
- Use a broad Linear Gradient to lift or darken the foreground gradually.
- Use Subject or Objects for the visual anchor.
- Check transitions along the horizon and reflective water.
- Toggle every mask off and on before export.
Local contrast builds quickly. If the sky, mountains, foreground and subject all receive positive Clarity or Dehaze, the combined result can look harsher than any individual mask suggests.
Masking in Lightroom Classic, Desktop, Mobile and Web
| Feature | Lightroom Classic | Lightroom Desktop | Lightroom Mobile | Lightroom Web |
|---|---|---|---|---|
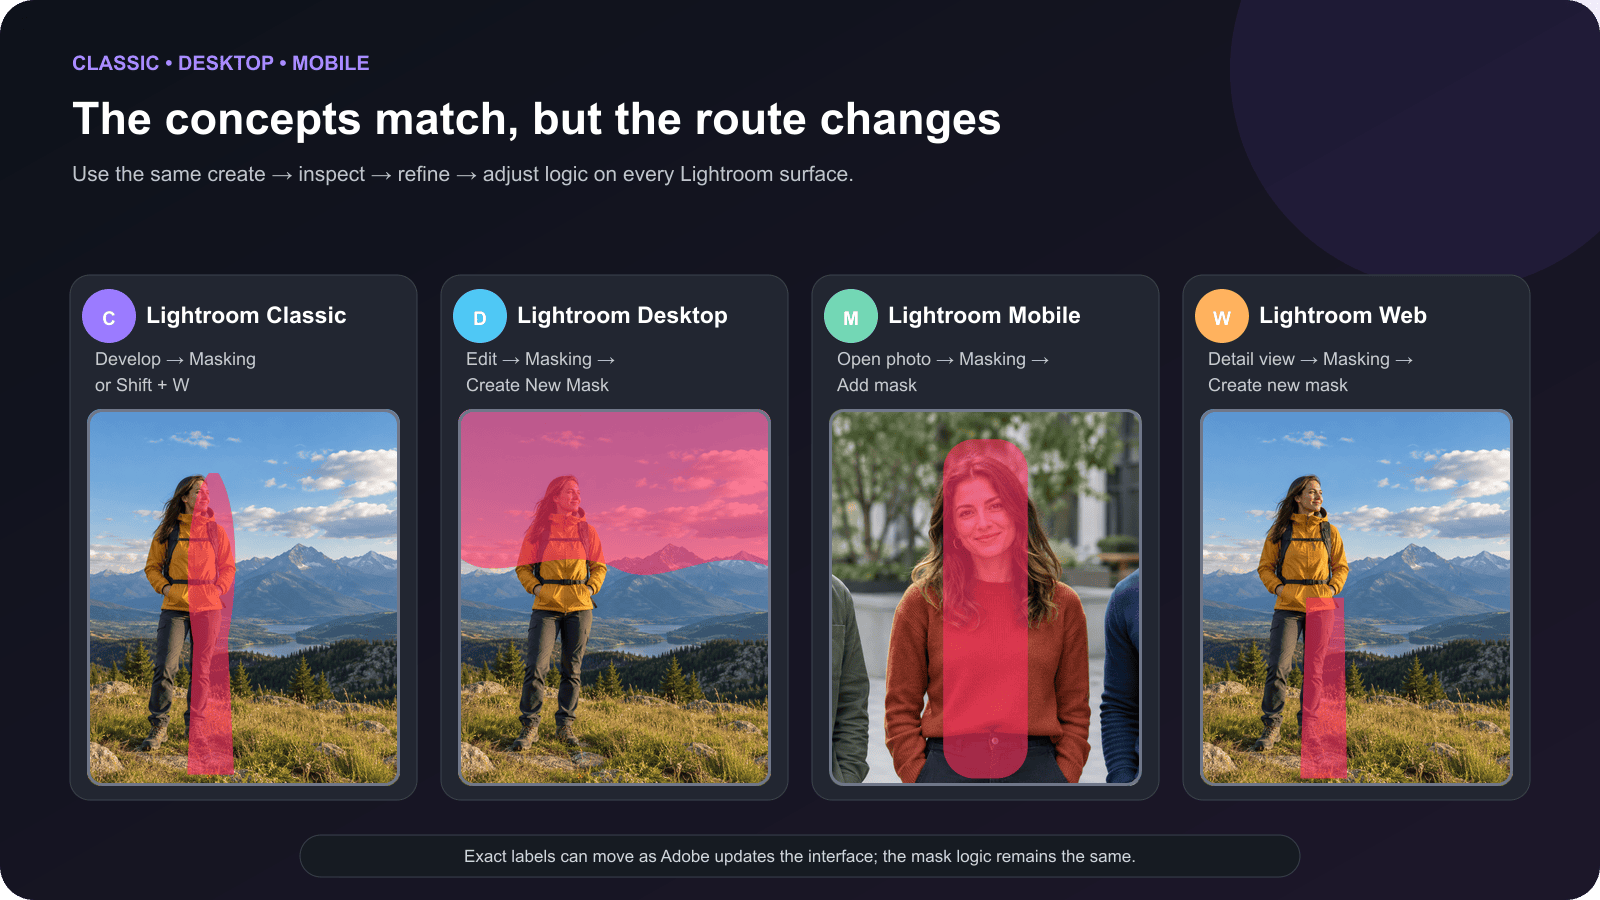
| Main masking access | Develop → Masking or Shift + W | Edit → Masking | Detail view → Masking | Detail view → Masking |
| Subject/Sky/Background | Yes | Yes | Supported on compatible devices | |
| People and Objects | Yes | Yes | Availability varies by version/device | Adobe documents People and Objects |
| Landscape | Yes | Yes | Availability varies | Adobe documents Landscape |
| Add/Subtract/Invert | Yes | Yes | Yes | Yes |
| Intersect | Documented | Documented | Not described in Adobe’s current mobile masking-management guide | Check the current interface |
| Batch AI mask workflow | Copy/Paste, Sync, Auto Sync, Previous | Presets/copy workflows vary | Preset and sync behavior varies | Limited compared with Classic |
If you move between apps, do not assume every menu is identical. The safest approach is to understand the selection logic rather than memorize one button location.
Copying and syncing AI masks
Lightroom Classic can include AI masks in Copy/Paste, Sync, Auto Sync and Previous workflows.
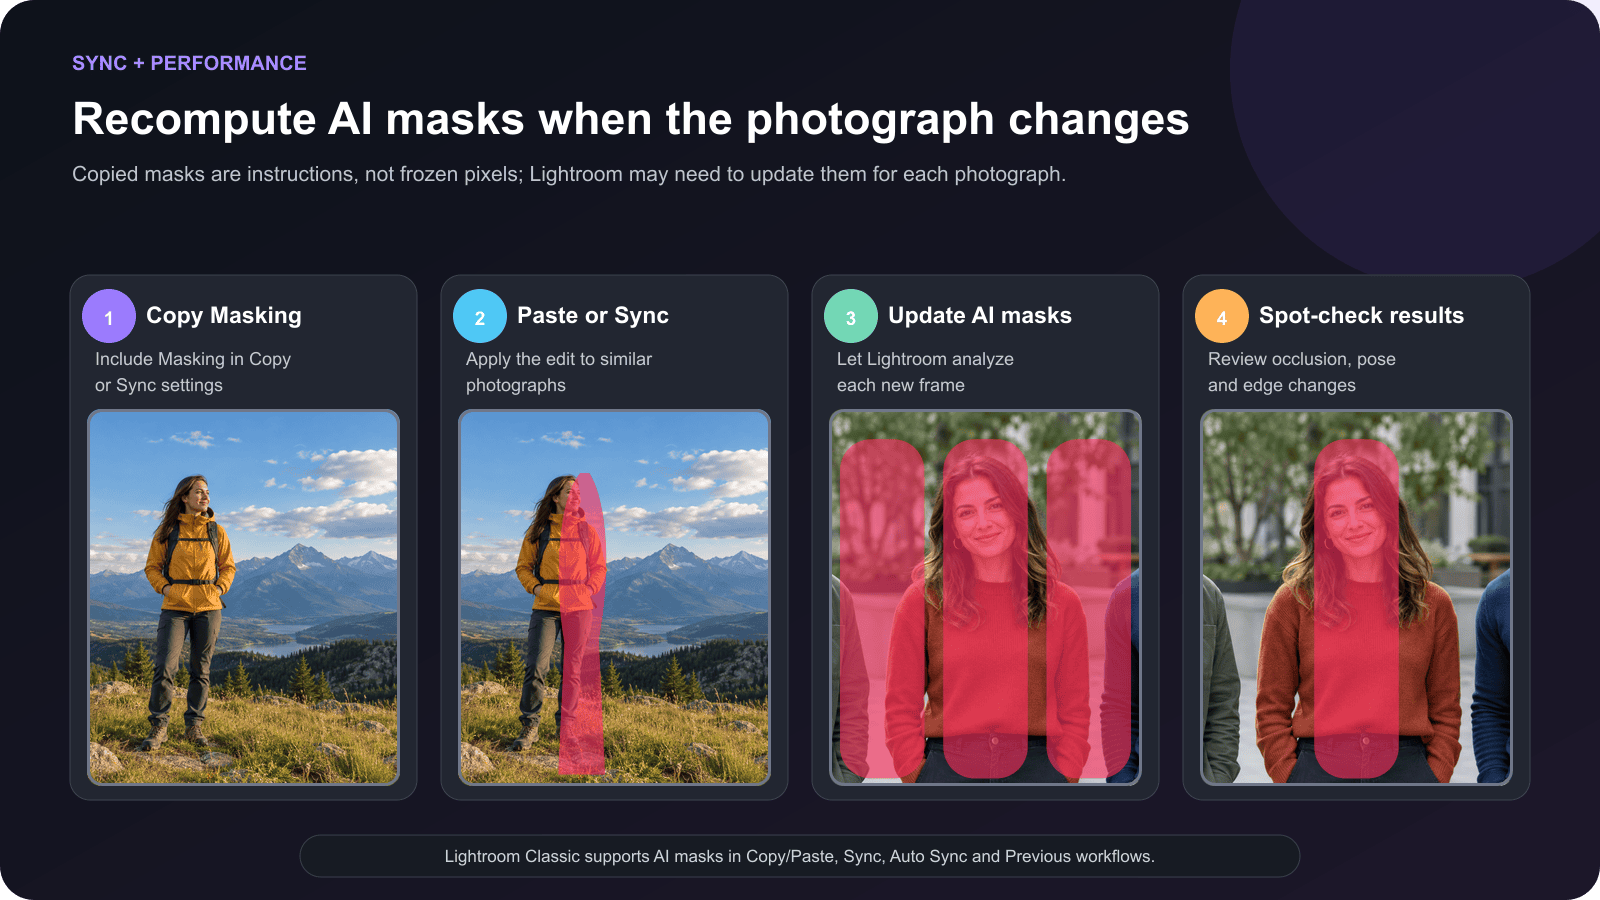
- Finish one representative image.
- Select Copy Settings and include Masking.
- Paste or sync the settings to similar photographs.
- Let Lightroom update or recompute AI masks for each frame.
- Spot-check changes in pose, occlusion, crop, clothing and background.
An AI mask is not a frozen shape that should land in the same pixel coordinates on every photograph. Lightroom analyzes the new frame and rebuilds the selection. That is powerful, but it still requires review.
For a large set, test the preset or synced settings on several different frames before applying it to the full shoot.
Common Lightroom masking mistakes
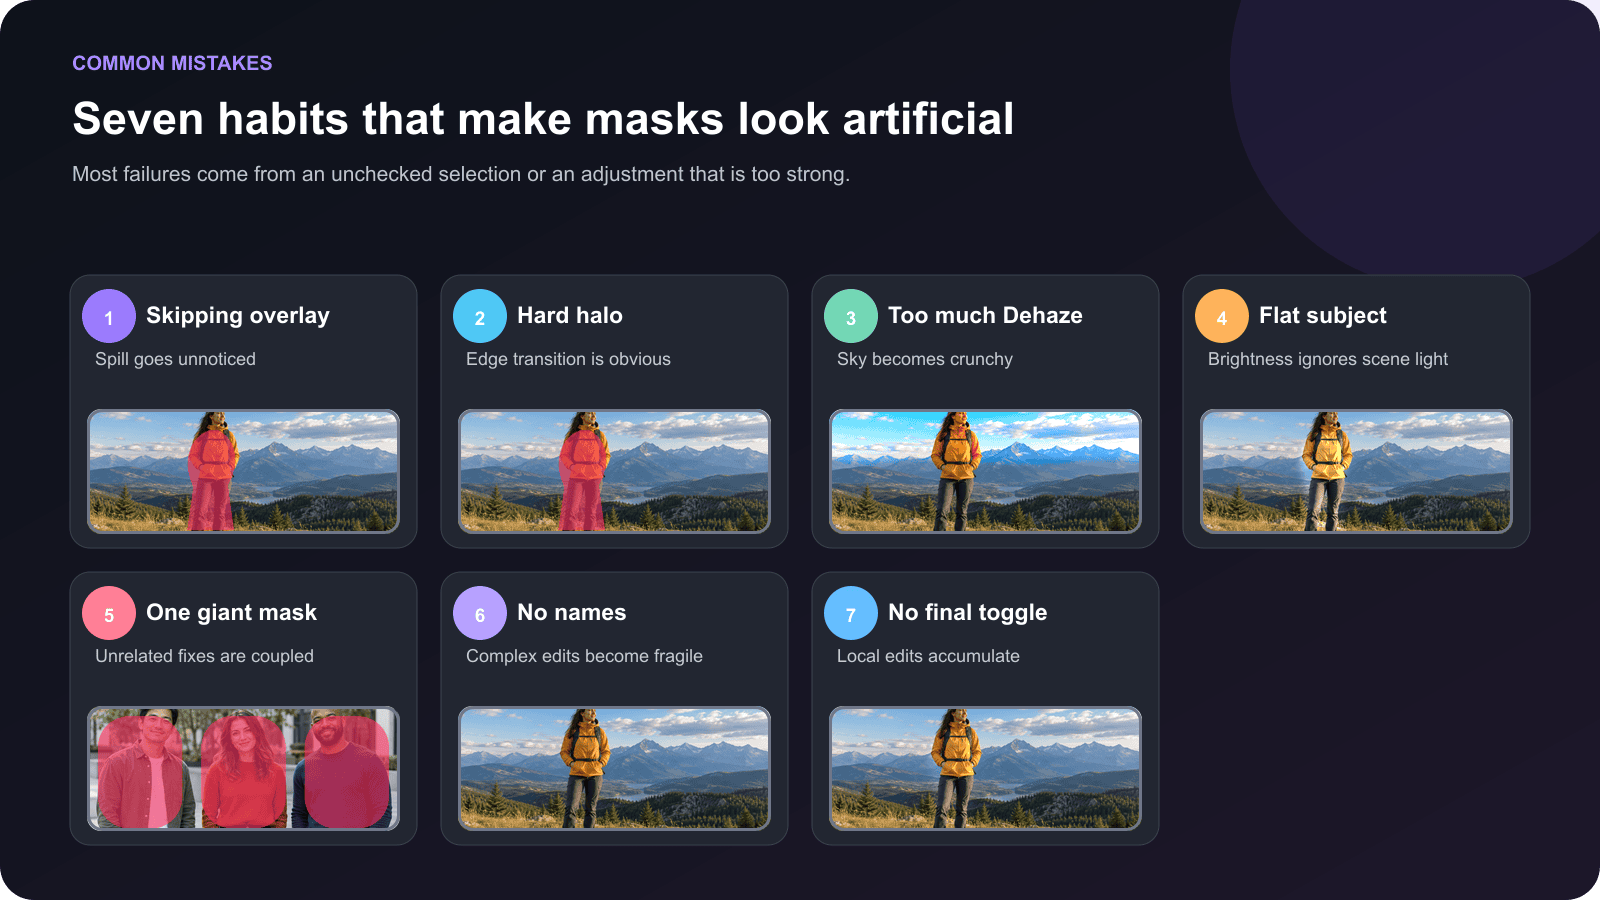
- Trusting AI without checking the overlay
AI can miss hair, fingers, gaps, transparent fabric and similar-colored edges. Inspect the selection before moving sliders.
2. Creating a hard halo
A mask can be accurate but still obvious. Reduce the adjustment, increase Feather or move the Edge boundary.
3. Overusing Dehaze on the sky
Excessive Dehaze exaggerates noise, color and edge contrast. Use it after correcting Exposure and Highlights, not as the first response to every flat sky.
4. Making the subject brighter than the scene allows
The subject should still reflect the direction and intensity of the environmental light.
5. Putting unrelated corrections in one mask
Skin, teeth, eyes, hair and clothes need different adjustments. Separate them.
6. Leaving every mask named “Mask 1”
Complex edits become difficult to troubleshoot. Rename masks by purpose.
7. Never toggling the final edit
When several subtle masks accumulate, the total effect may be strong. Disable and enable them before export.
Frequently asked questions
Final Lightroom masking checklist
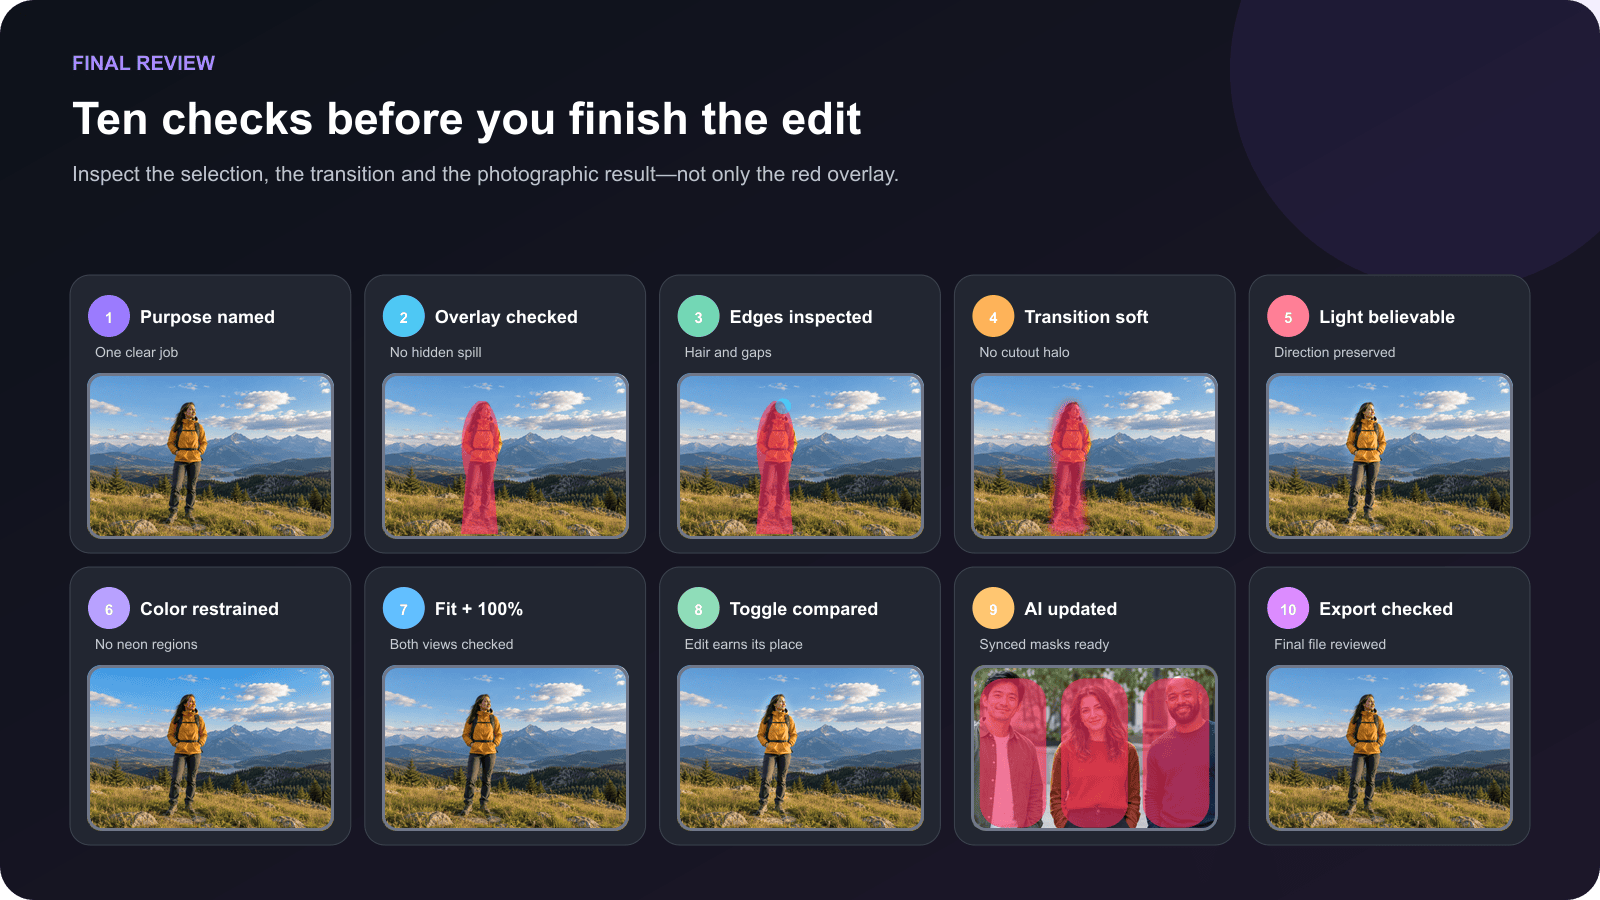
- Give each mask one clear purpose.
- Rename important masks.
- Inspect the colored overlay.
- Check hair, hands, gaps, horizons and reflective surfaces.
- Use Add or Subtract to repair obvious errors.
- Soften or move the boundary when a halo appears.
- Judge the edit at both Fit view and 100% zoom.
- Confirm that local brightness follows the scene light.
- Toggle every mask off and on.
- Recompute and spot-check copied AI masks.
- Inspect the exported file outside Lightroom.
Masking is most powerful when it becomes almost invisible. The viewer should notice the subject, the light and the atmosphere—not the outline of your selection.
Begin with the tool that best describes the area. Let AI do the broad selection, inspect its work, refine only what needs refinement and keep the slider movement restrained. Use Intersect when one selection is correct but too broad. Use separate masks for separate goals. That workflow is faster, cleaner and easier to revise than painting every correction by hand.
More Similar Article:
How to Get Natural Skin Tones in Lightroom: Fix Orange, Red & Gray Skin
How to Batch Edit Photos in Lightroom: Classic, Desktop & Mobile
Best Lightroom Export Settings for Instagram
Lightroom Classic Vs Lightroom CC