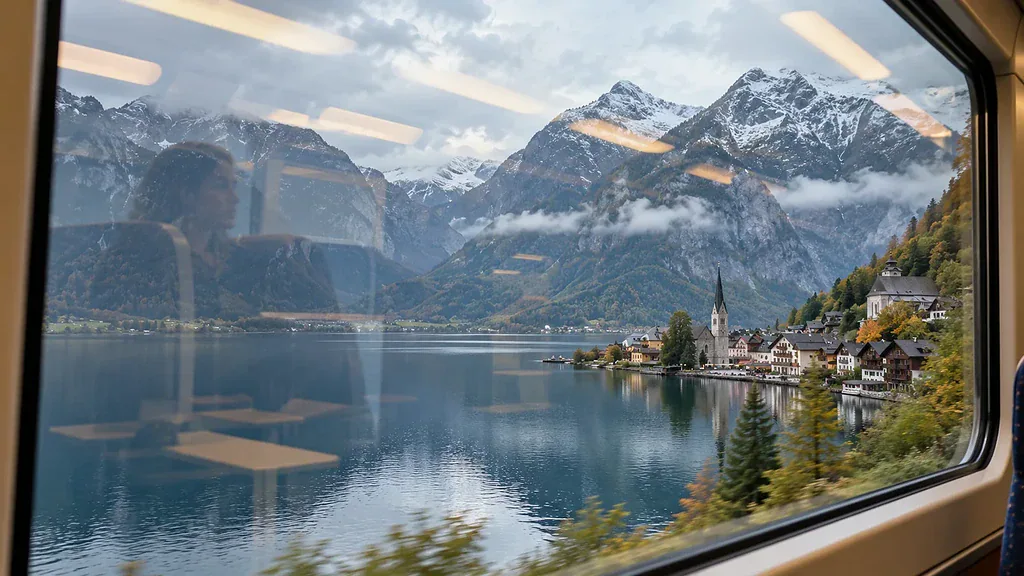
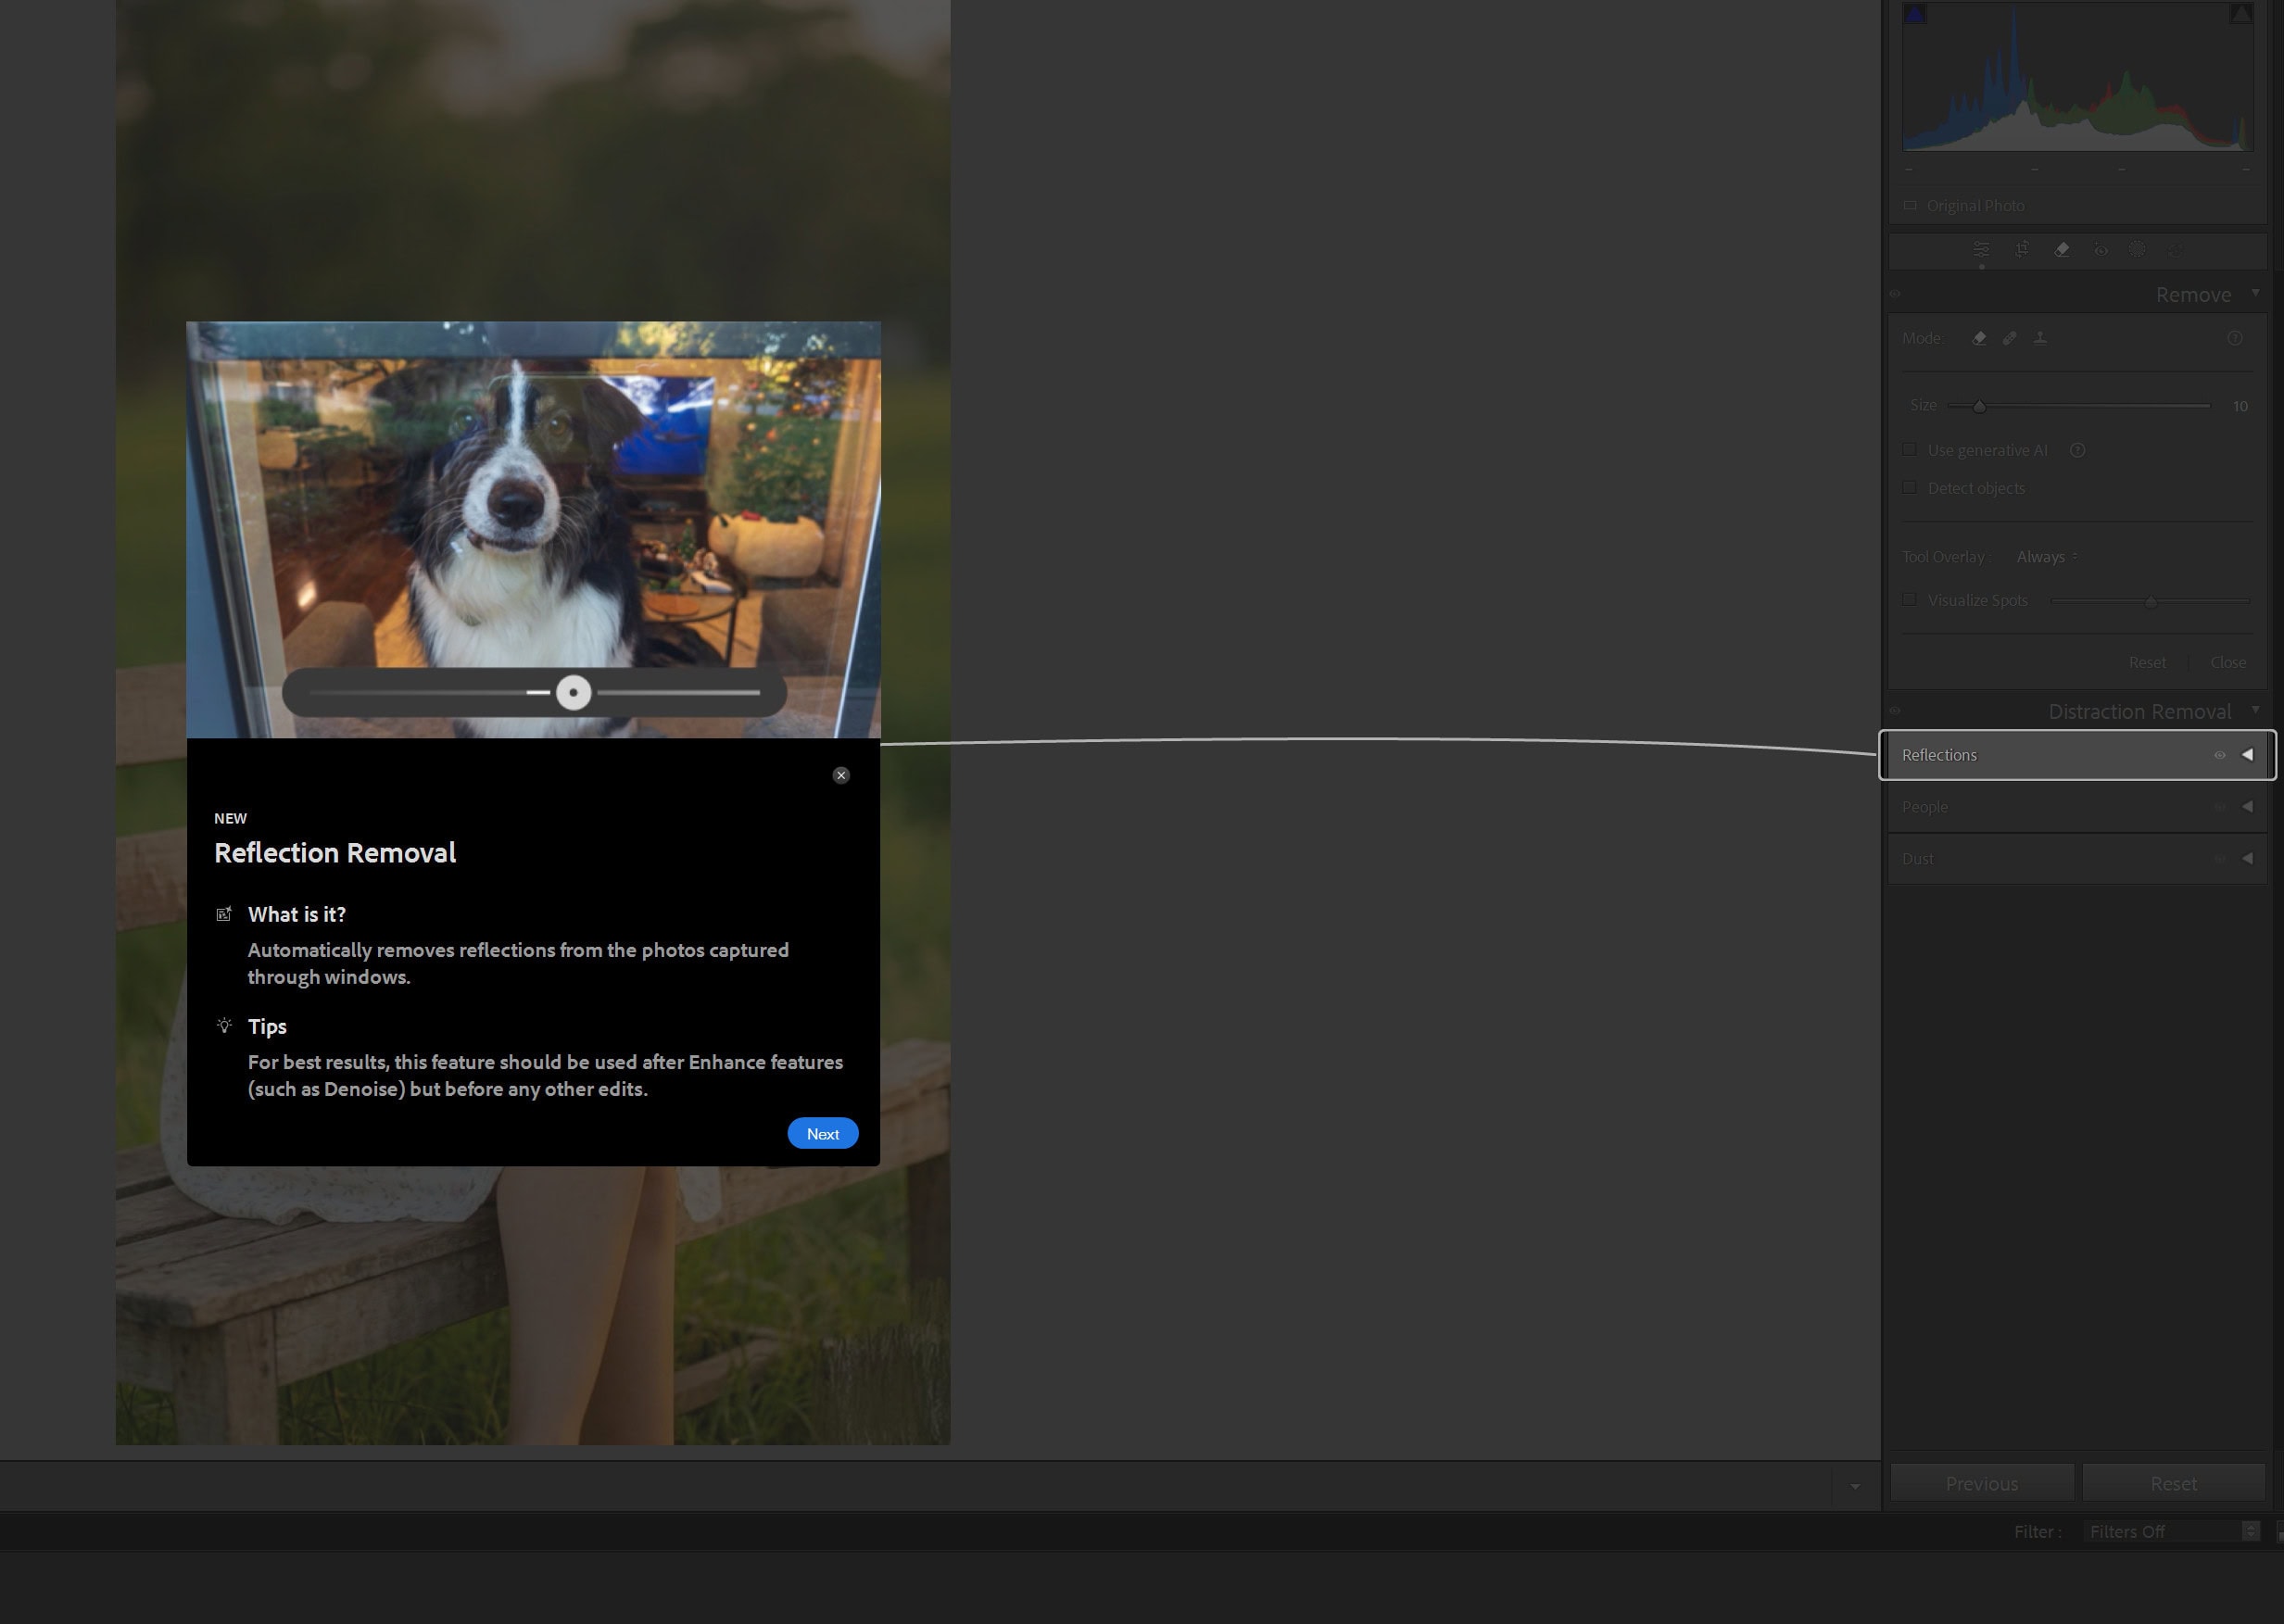
You take the photograph through a train window because the view lasts only a few seconds. The mountains look beautiful on the camera screen. Back home, you notice a pale face floating over the lake and a row of ceiling lights crossing the clouds. The photograph shows the outdoor scene and a second, faint image of the carriage behind you.
Cloning each streak is slow, and standard exposure adjustments darken both layers. Lightroom’s AI-powered Reflections tool is designed for layered glass reflections like this. In the September 2026 updates, Adobe also reported cleaner results on windows, other glass surfaces, and water, with fewer smudges and ghosting artifacts. The dedicated help instructions still use a window photograph as the main example, so a water image deserves an especially close review. Adobe’s Lightroom Classic release notes and Reflections help page.
This guide shows you exactly where the tool lives in Lightroom Classic and Lightroom Desktop, how to use its unusual Amount slider, which Quality setting to choose, and what to do when a reflection stays visible or the result looks unnatural. It also explains when to leave a water reflection alone.
Quick answer: In Lightroom Classic, open the photo in Develop, choose Remove → Distraction Removal → Reflections, and select Apply. In Lightroom Desktop, open the photo in Detail view and use Remove → Distraction Removal → Apply. After processing, compare Amount +100 with 0 and lower strengths. If +100 displays the reflection instead of the scene, try the negative side. Inspect the result at 100% zoom and choose Best quality before a full-size final export. Adobe Classic instructions; Adobe Desktop instructions.
Which kind of reflection are you trying to remove?
“Reflection” describes several different photographic problems. They do not all need the same edit.

| What you see | First tool to try | What to protect |
|---|---|---|
| A passenger, room light, or photographer reflected in a window | Reflections | The scene photographed through the glass |
| A faint interior reflected in museum, storefront or vehicle glass | Reflections | Fine details, signs, faces and the glass frame |
| A narrow bright glint on water | Reflections as a test; then local Remove or Masking if needed | Natural ripples and the broader scenic reflection |
| A boat or person reflected in water | Local Remove with careful review | Plausible water texture and the object itself, if it remains |
| White glare with no visible detail beneath it | A limited local repair may help | A believable result; lost detail may not be recoverable |
The Reflections tool analyzes the picture and attempts to separate image layers. It can remove broad interference that would be tedious to clone. Generative Remove, Heal, and Clone are different tools: they replace or borrow pixels in a selected area. A Mask changes tone or color in a selected area. Choosing the correct tool saves time and prevents a patchy result.
What changed in Lightroom Reflection Removal in 2026?
Adobe’s September 2026 release notes for Lightroom Classic 15.6 and Lightroom Desktop 9.6 describe improved Reflection Removal on windows, glass, and water. The notes say it renders more cleanly, with fewer smudges and ghosting artifacts. This is a feature improvement, not a guarantee that it can separate every bright patch perfectly. Classic release notes; Desktop release notes.
Current Adobe help says the dedicated Reflections feature accepts raw and non-raw files. It also warns that the Reflections option in Lightroom Classic is currently unavailable on Windows ARM machines. If you do not see the control, check your Lightroom version and computer platform before assuming your photograph is the problem. Adobe’s Lightroom Classic Reflections guide.
Remove window reflections in Lightroom Classic: step by step
Step 1: Open the original photograph in Develop
Choose the raw file if you have it, though the current Reflections feature also supports non-raw formats. Look at the photograph before processing: where are the reflected lights, silhouettes, or room objects? Which parts of the scene behind the glass must remain intact?
If you already applied a strong grade, consider reviewing the reflection on a clean starting edit first. Adobe recommends adjusting reflections before the rest of the image. That order helps you judge whether an apparent color or contrast problem comes from the scene or the reflected layer. Adobe’s recommended order.
Step 2: Open the Reflections control
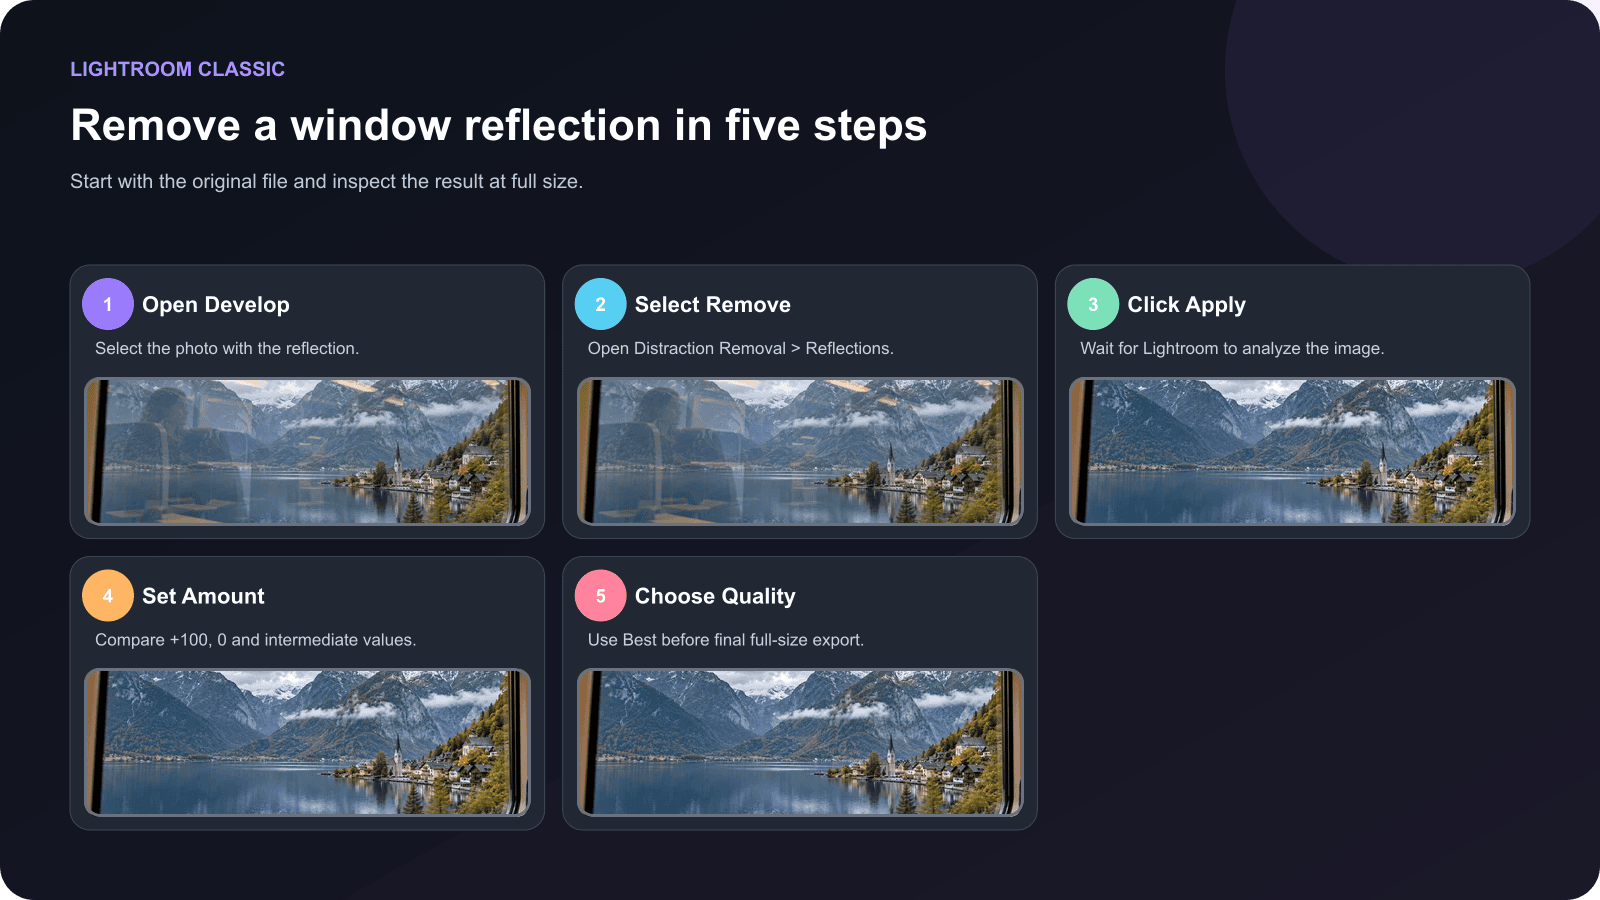
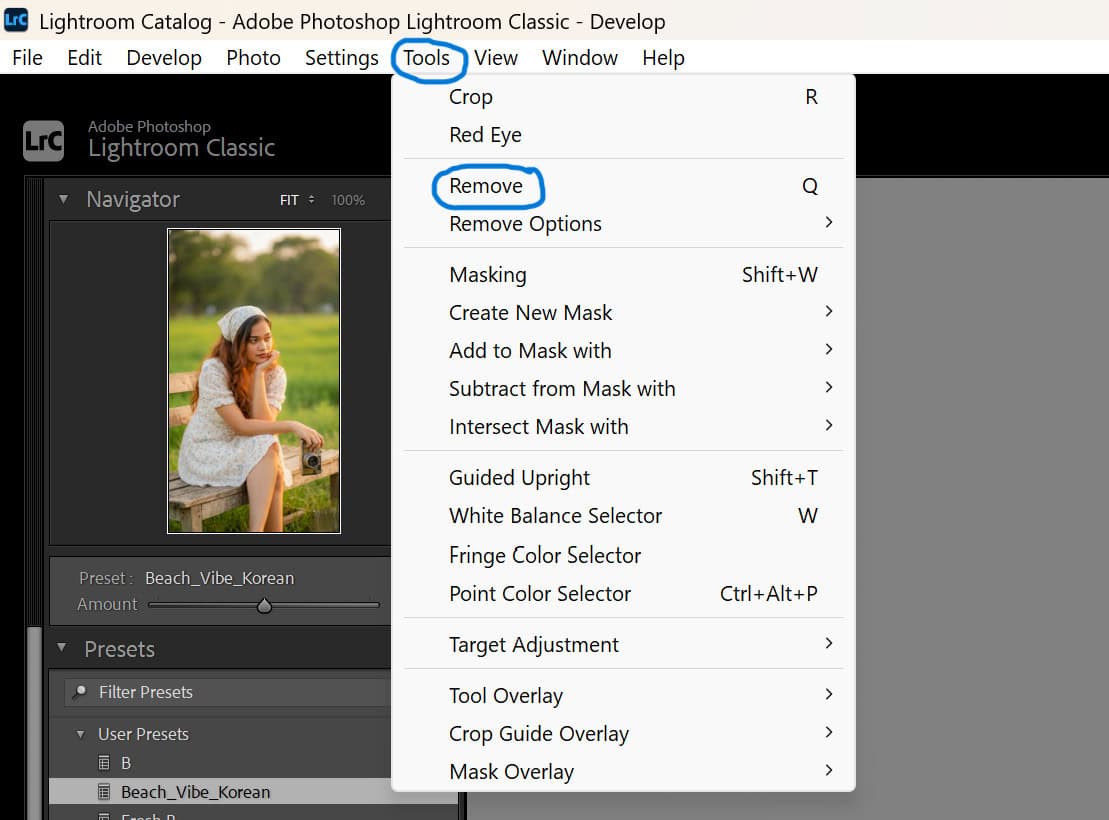
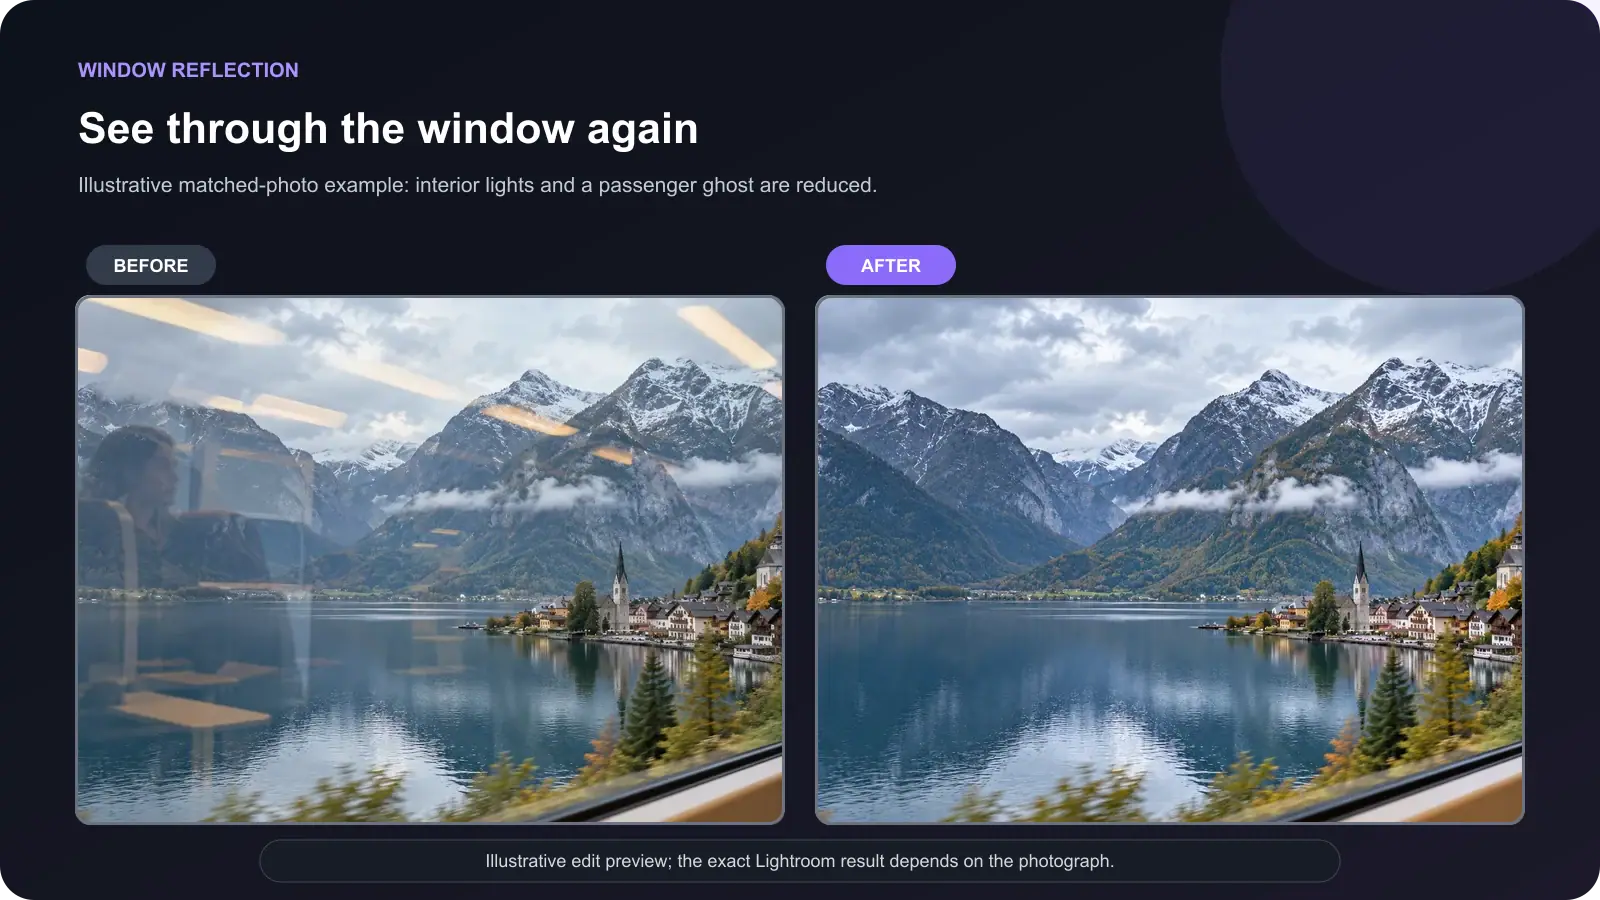
In the Develop module, choose Remove. Open Distraction Removal, then find Reflections. Select Apply.
Lightroom analyzes the full photograph. Processing time varies with the image, your computer, and the chosen quality. Wait for processing to finish before judging the slider.
Step 3: Compare the processed scene with the original
At first, inspect the image at Fit view. Did the obvious passenger ghost or lamp streak disappear? Does the outside view still look like the same place?
Then zoom to 100% and inspect high-contrast boundaries: mountain edges, rooflines, tree branches, lettering, faces, and the glass frame. AI can clean the broad reflection and still leave a soft patch or duplicate edge in a small area.
Step 4: Set Amount by looking at the image
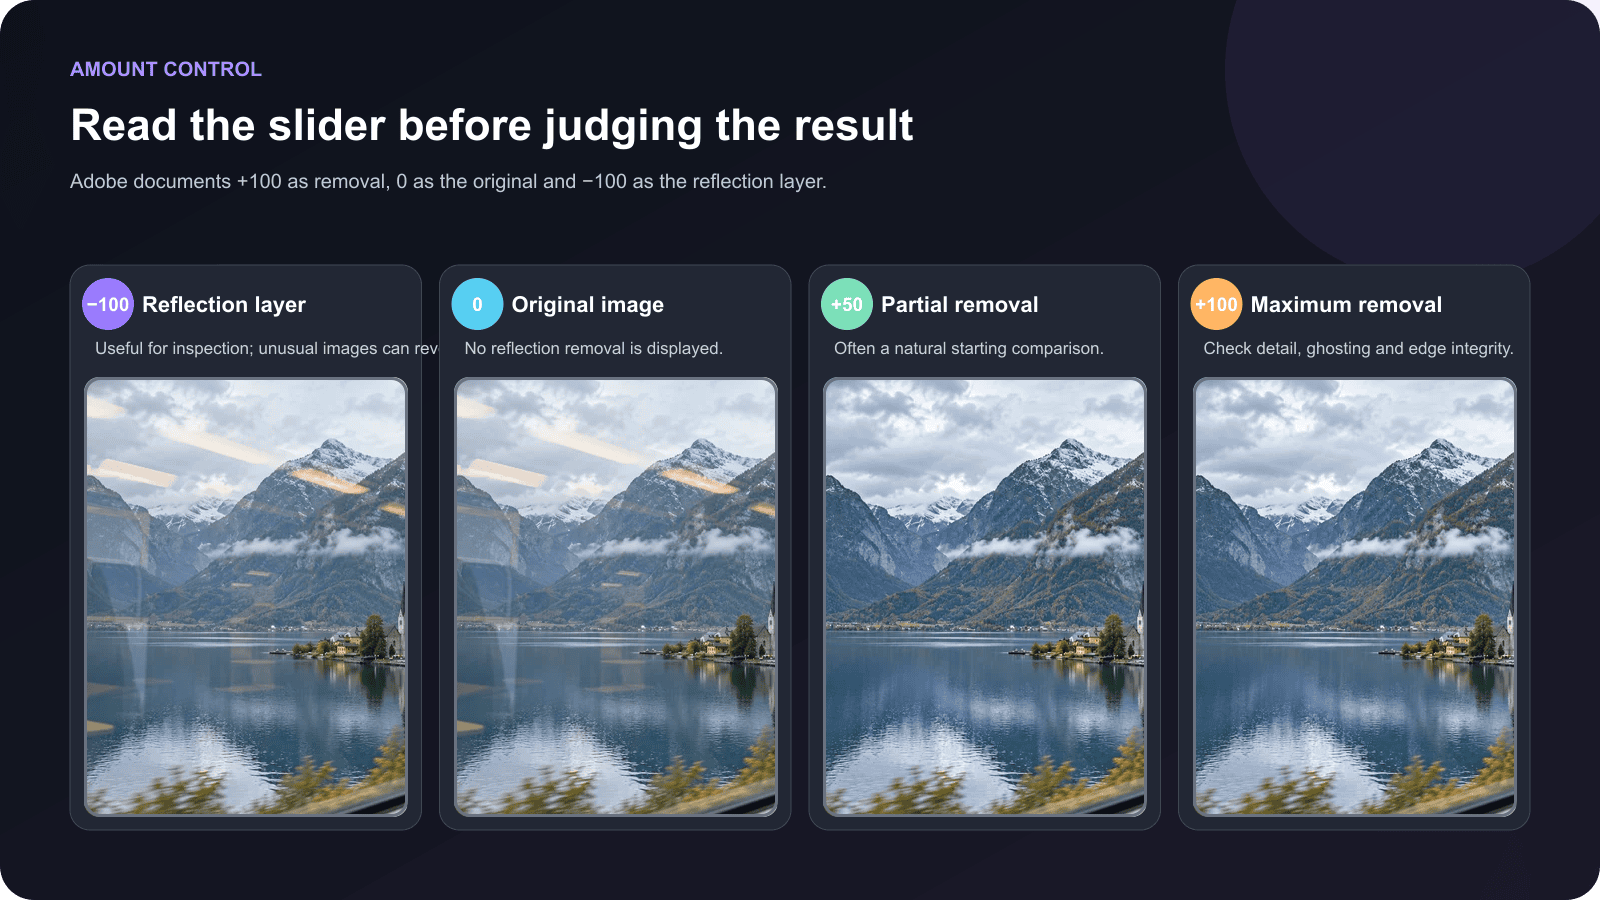
Adobe documents +100 as the removed-reflection view, 0 as the original, and −100 as the isolated reflection layer. On some images, the positive side may show the reflection instead; Adobe advises trying −100 when that happens. Use what you see on the photograph rather than trusting the sign alone. Adobe’s Amount explanation.
If a fully cleaned window looks oddly flat or contains smears, pull Amount toward the center. A partial correction can look more believable than removing it completely.
Step 5: Choose Quality and finish the edit
Use Preview while exploring, Standard for ordinary screen review, and Best for full-resolution inspection and the final full-size image. Best takes longer. Once you’ve controlled the reflection, move on to white balance, exposure, masks, and color. Inspect the exported file, not just Lightroom’s editing preview.
Remove reflections in Lightroom Desktop
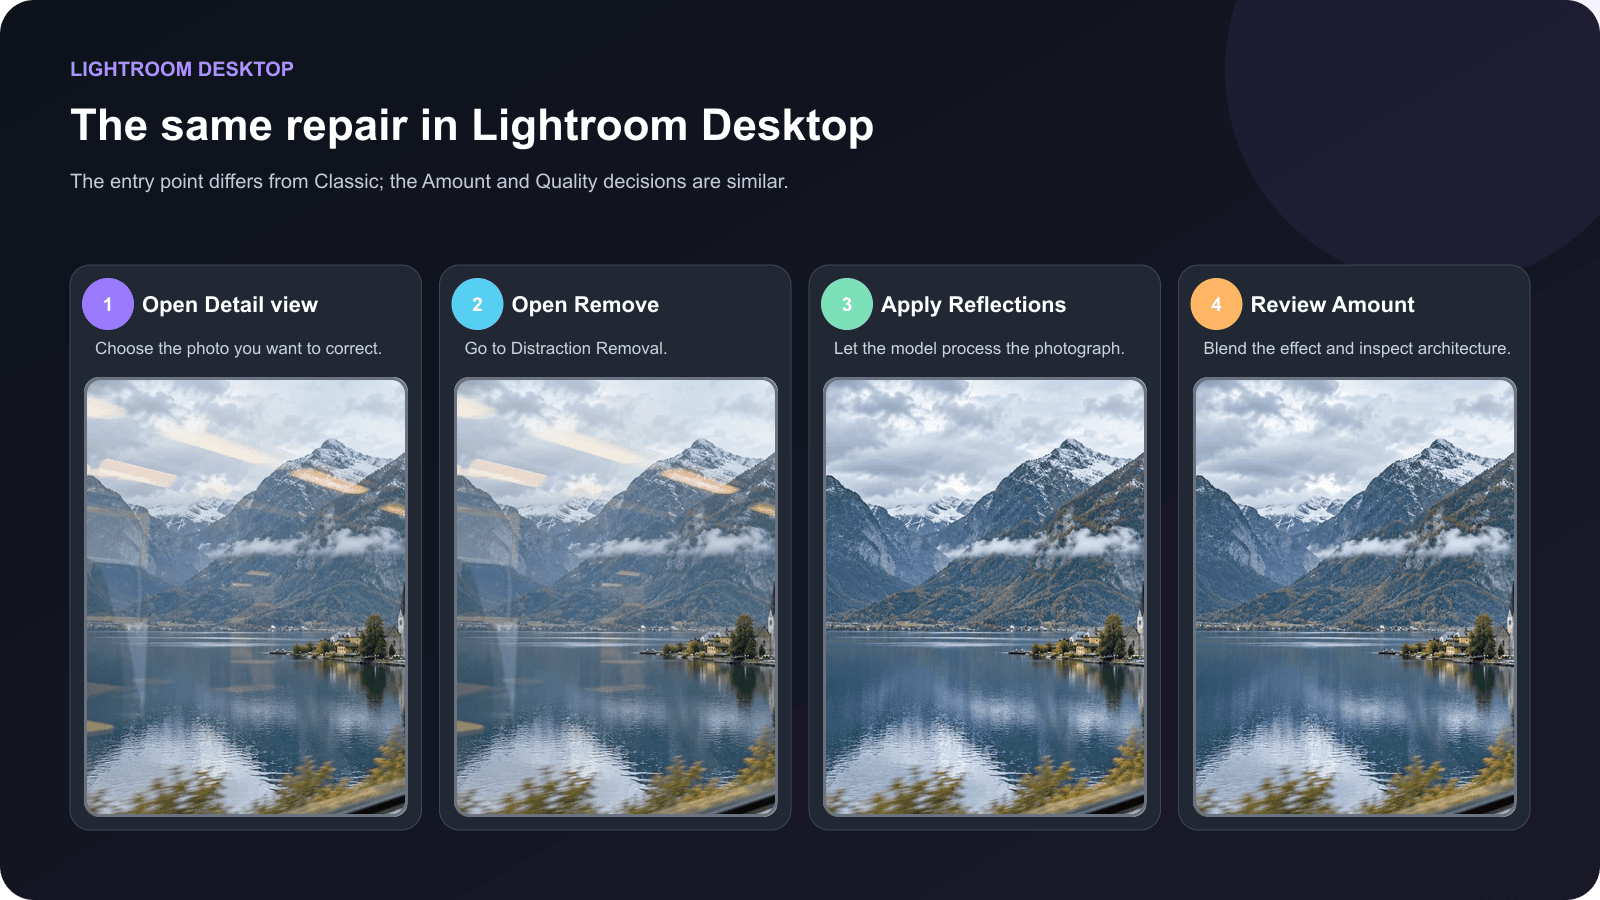
- Open the photograph in Detail view.
- Select Remove → Distraction Removal.
- In Reflections, select Apply and wait for Lightroom to process the image.
- Adjust Amount. Compare the original, the positive side, and, if needed, the negative side.
- Select a suitable Quality mode and inspect the result closely.
Adobe’s Desktop instructions also describe copying Reflection Removal edit settings to another photo through Edit options → Copy Edit Settings, followed by Paste Edit Settings. You can apply copied settings to several selected photographs, then review each result. Adobe’s Lightroom Desktop guide.
What about Lightroom Mobile?
Adobe currently documents this dedicated Reflections workflow on the Lightroom Classic and Desktop help pages. Lightroom Mobile offers Remove tools, including Detect Objects and Generative Remove on supported devices, but that is a different workflow. If you don’t see the dedicated Reflections panel on your phone, clean up layers in Classic or Desktop; when available, use Mobile Remove or masking for small local distractions. Adobe’s mobile release notes.
Understanding the Reflections Amount slider
The slider can feel backward at first. Think of it as moving between versions of the same photograph:
| Amount | Adobe’s documented view | Use it for |
|---|---|---|
| 0 | Original photograph | Your baseline comparison |
| +100 | Reflection removed | Testing the strongest standard result |
| Between 0 and +100 | Partial blend | Keeping a little natural glass character or hiding artifacts |
| −100 | Isolated reflection layer | Inspecting what Lightroom identified as the reflection |
There is an exception: Adobe says some photographs display the reflection at +100. In that case, move toward −100 to find the cleaned view. This can happen because the separation has effectively chosen the opposite layer. Adobe’s Amount guidance.
The “best setting” is the value that improves the specific photograph. There is no universal Amount number. A broad passenger reflection over a train view may need a stronger setting than a faint warm streak over a storefront.
Preview, Standard, or Best: Which quality should you choose?
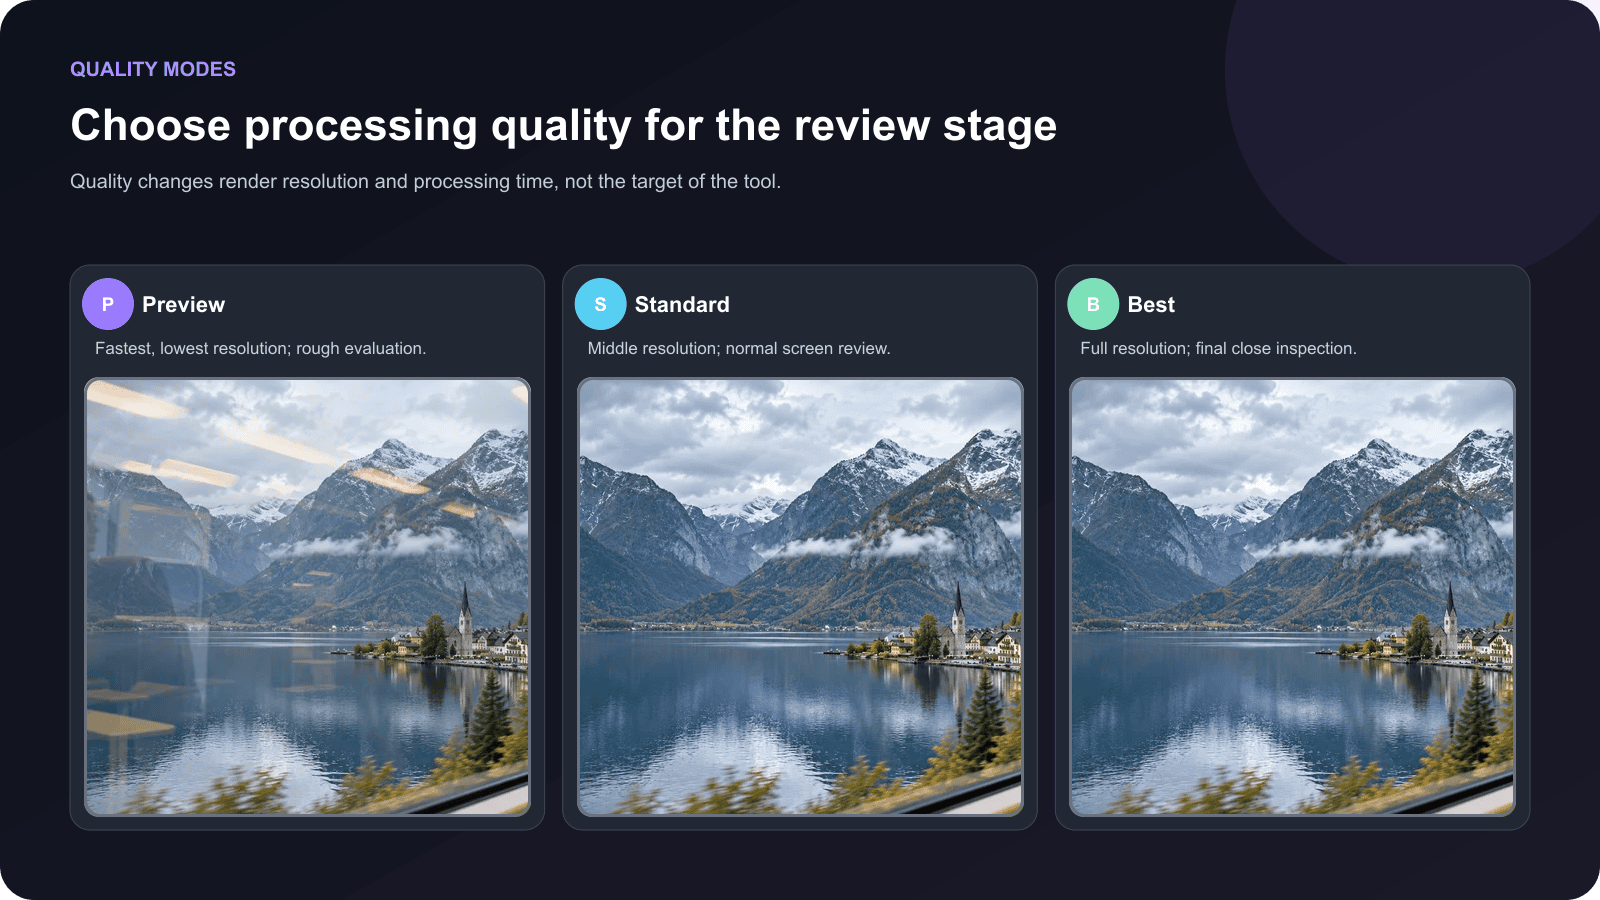
Adobe describes the three modes this way:
- Preview: lowest resolution and fastest processing.
- Standard: intermediate resolution for normal screen viewing.
- Best: full-resolution result, with the longest processing time.
Start with Preview or Standard while you decide if the tool is useful. Switch to Best when the photograph is worth keeping, and you need to inspect fine detail. Best cannot invent information completely hidden by a blown-out highlight; it just gives you the highest-resolution version of what’s available. Adobe’s Quality guidance.
At 100% zoom, check the exact areas you would notice in a print: text, straight window frames, faces, roof tiles, tree branches, and areas with repetitive patterns. If the result looks smeared, reduce Amount and decide whether a small manual repair is justified.
Window and glass reflections: what usually works
Reflections are easiest to judge when the photograph still shows the exterior through the glass. A faint interior light across a mountain can often be separated more naturally than a huge white patch that fully hides the mountain.
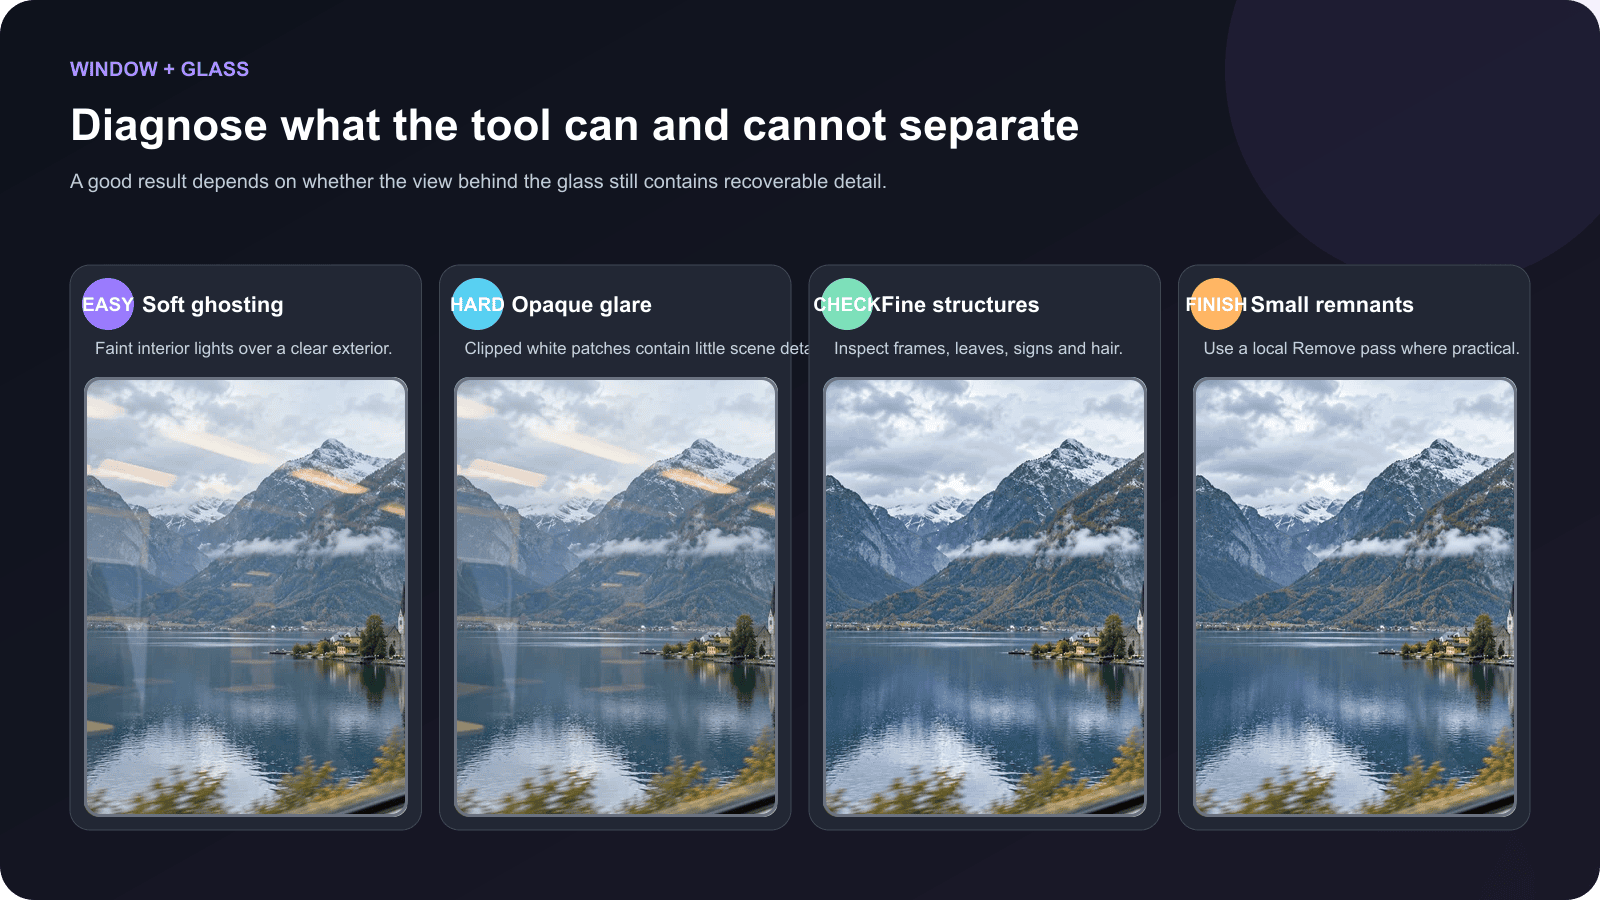
For a train or car window, inspect the glass frame and scenery near the edge. Curved glass, motion blur, and an angled window can make the reflected layer change shape across the frame.
For a storefront, check signs, lettering, merchandise edges, and the border between objects inside and the street reflected outside. A clean-looking thumbnail can conceal damaged letters at full size.
For a museum display, decide whether the reflected room is actually the problem. The protective glass may have a subtle sheen that communicates the setting. Removing every trace can make the exhibit look strangely detached.
For eyeglasses or a tiny specular highlight, test the feature, but expect to use a more targeted edit if the global analysis affects unrelated areas. The main Adobe tutorial is built around photographs through windows, not every reflective surface.
How to fix a water reflection or bright glare
Water needs a different question: what exactly do you want gone?
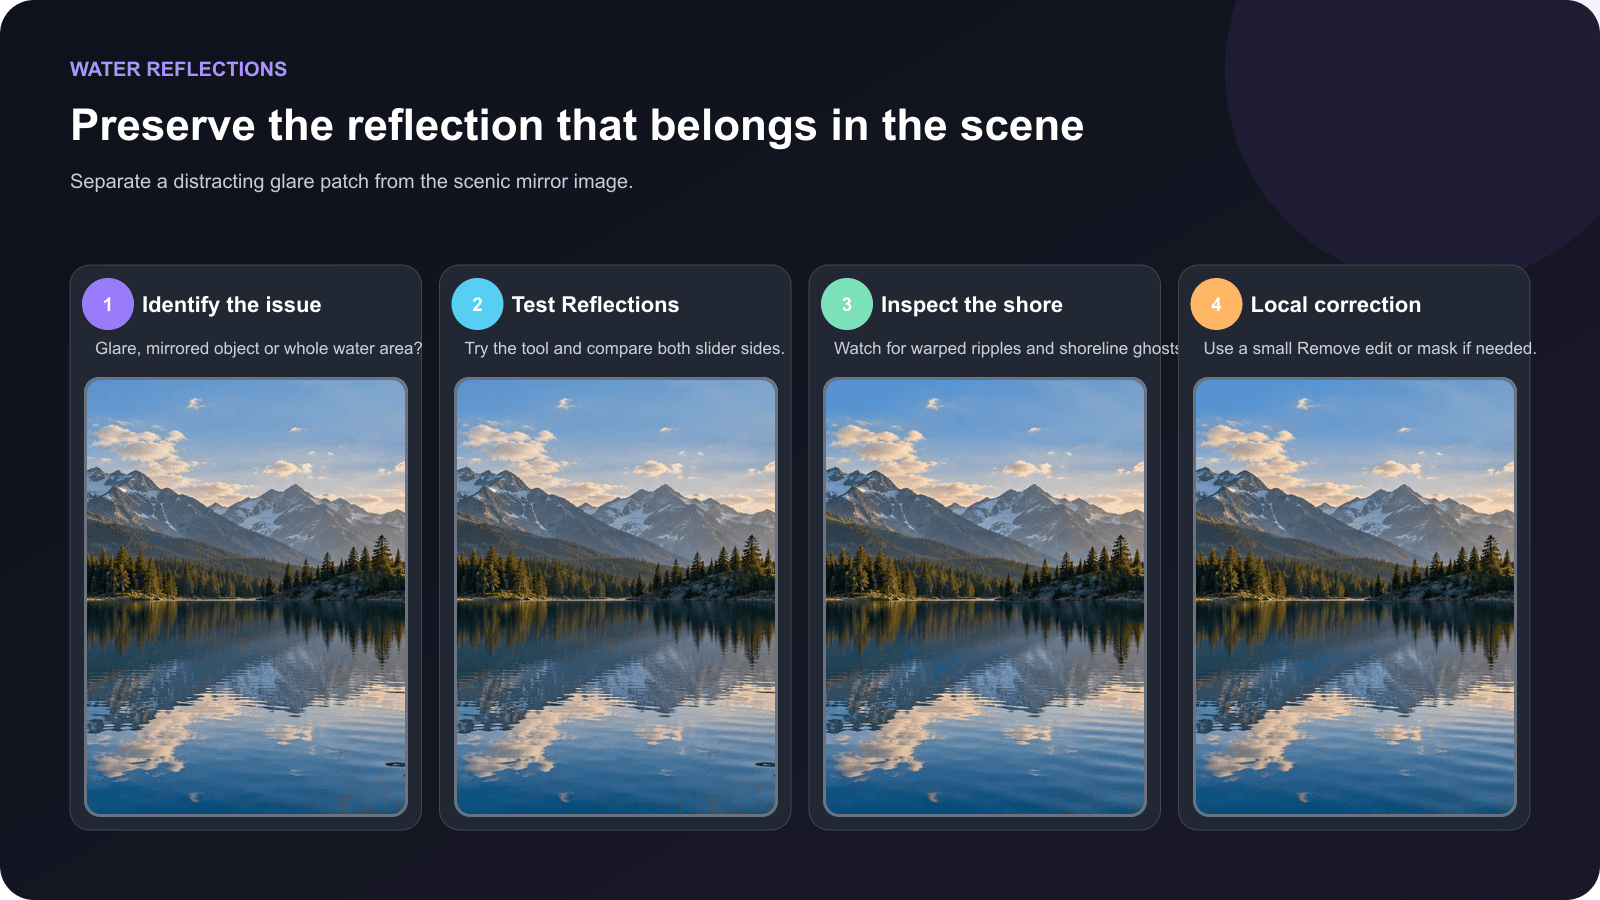
In a landscape, the mirrored mountain may be what makes the composition work. Removing it would damage the image. The real problem could be a bright sun glint in one corner, a reflected sign, or a small distracting object on the shore. Adobe’s September 2026 release notes say Reflection Removal improved on water, so it is reasonable to test the tool. The result still needs careful judgment because the dedicated help page explains the feature through window photography. Adobe’s 2026 release notes.
A safe water workflow
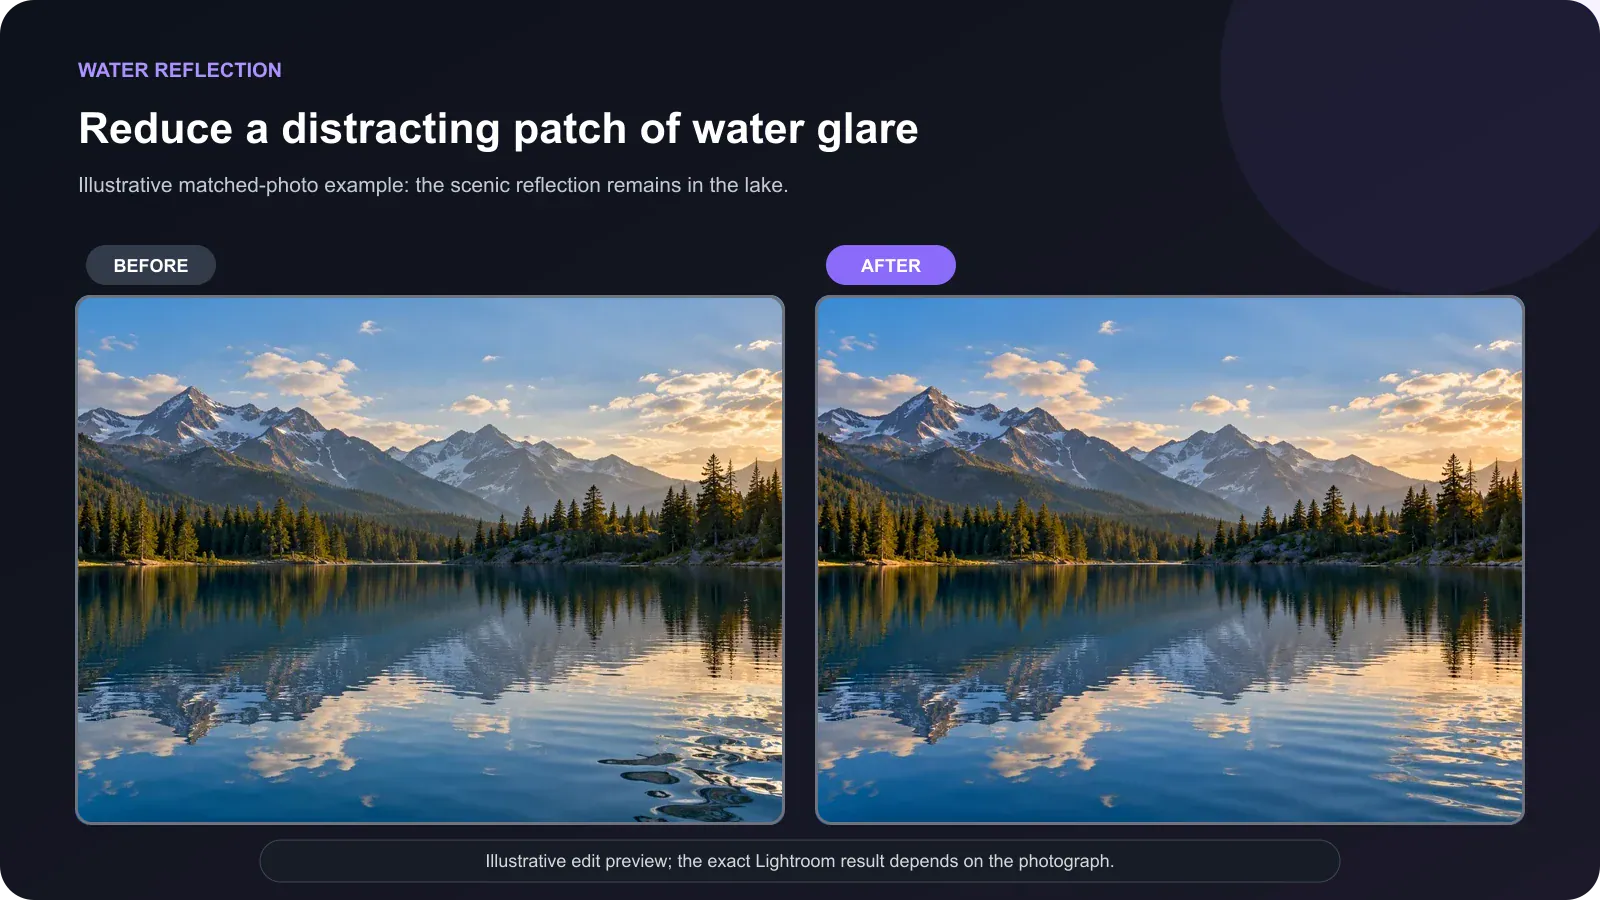
- Make a virtual copy or use Lightroom’s before/after comparison so you can judge the experiment.
- Apply Reflections and compare both slider directions.
- Look at the shoreline, repeating ripples and reflected trees at 100%.
- If the meaningful mirror image disappears or the water looks smeared, return Amount toward 0.
- For a small bright spot, try a local Mask with a slight reduction in Highlights or Exposure. This can reduce brightness, though it cannot restore clipped detail.
- If a small object and its reflection must disappear, try Remove with a carefully sized selection and review the replacement texture. Adobe documents that Detect Objects can include an object’s shadow or reflection in its selection. Adobe’s Remove-tool guide.
If the water reflection is aesthetically useful, you may not need to fix anything. A reflective lake is not the same problem as a passenger ghost in a window.
Reflections versus Generative Remove, Heal, Clone and Masking
Use the tool according to the job:
| Tool | What it does | Best use here |
|---|---|---|
| Reflections | Analyzes and separates broad reflected image layers | A room, person or lights reflected over a view through glass |
| Generative Remove | Replaces a selected area with generated content | A small distracting reflected object or patch after evaluating the overall image |
| Heal | Blends borrowed texture and tone | Small blemishes on a relatively simple surface |
| Clone | Copies pixels from a chosen source | A controlled repair when matching texture exists nearby |
| Masking | Changes tone or color only in a selection | Taming a local glare or reflection brightness without replacing pixels |
Lightroom’s Remove tool can also detect an object with its associated shadow or reflection when you enable Detect Objects. That feature is especially relevant when the unwanted reflection belongs to a particular removable object. This doesn’t mean every reflection across a large window should be treated as an object-removal job.
For a deeper explanation of local selections, see our Lightroom masking guide.
Best editing order for a clean result
Adobe recommends working on reflections early, before making other edits. A practical sequence is:
- Import the original image and check its basic sharpness.
- Run Reflections.
- Find the useful Amount direction and strength.
- Choose an appropriate Quality mode.
- Inspect edges and repair small remaining problems if needed.
- Correct overall exposure, white balance and color.
- Add local masks only where the scene still needs them.
- Export and inspect the actual exported file.
This order makes it easier to see whether a warm tint comes from the landscape light or from a reflected carriage lamp. For the last two steps, the Lightroom masking guide and our Instagram export guide provide more detail.
Batch remove reflections from several photos
If a series was shot through the same window, process one representative frame first. In Lightroom Classic, right-click the edited image and choose Settings → Copy Settings. Under Remove, include Reflections. Paste those settings onto the other photographs, or use Sync or Auto Sync. Adobe also says you can create a preset containing Reflection Removal. Adobe’s Classic batch instructions.
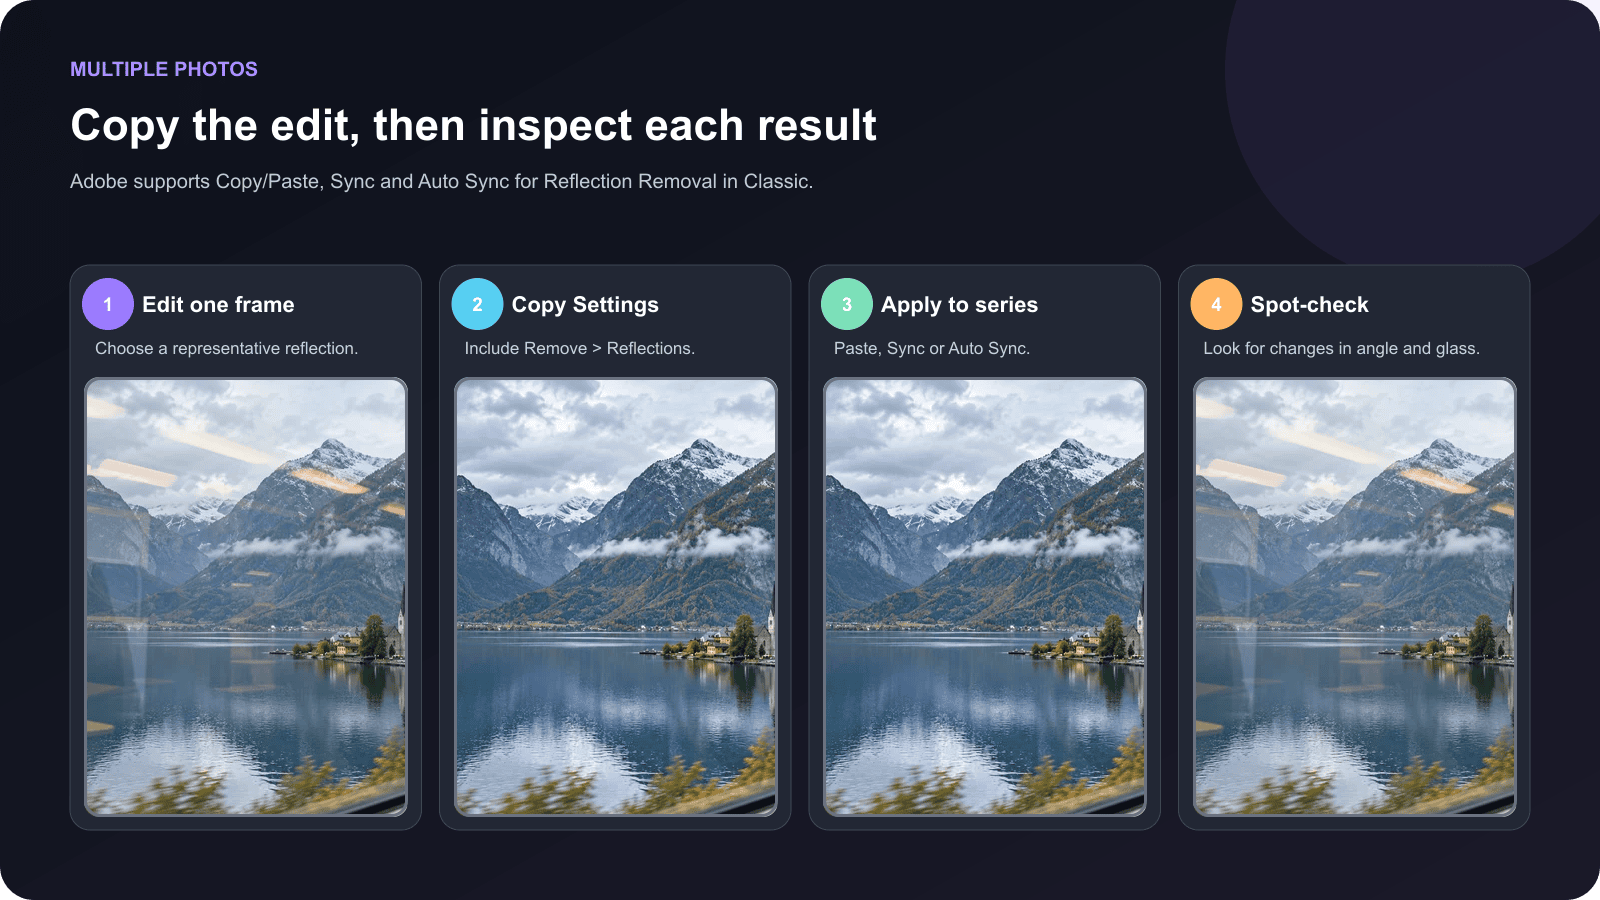
In Lightroom Desktop, use Edit options → Copy Edit Settings and Paste Edit Settings. You can select multiple photos to apply the copied settings together.
Do not judge a batch by the first frame alone. Your angle to the glass may have changed, the reflected passenger may have moved, and one frame may have an opaque patch that another does not. Review representative frames across the series at 100% before delivery. Our batch editing guide covers the broader copy and sync workflow.
Reflection Removal not working? Check these first
The tool is missing
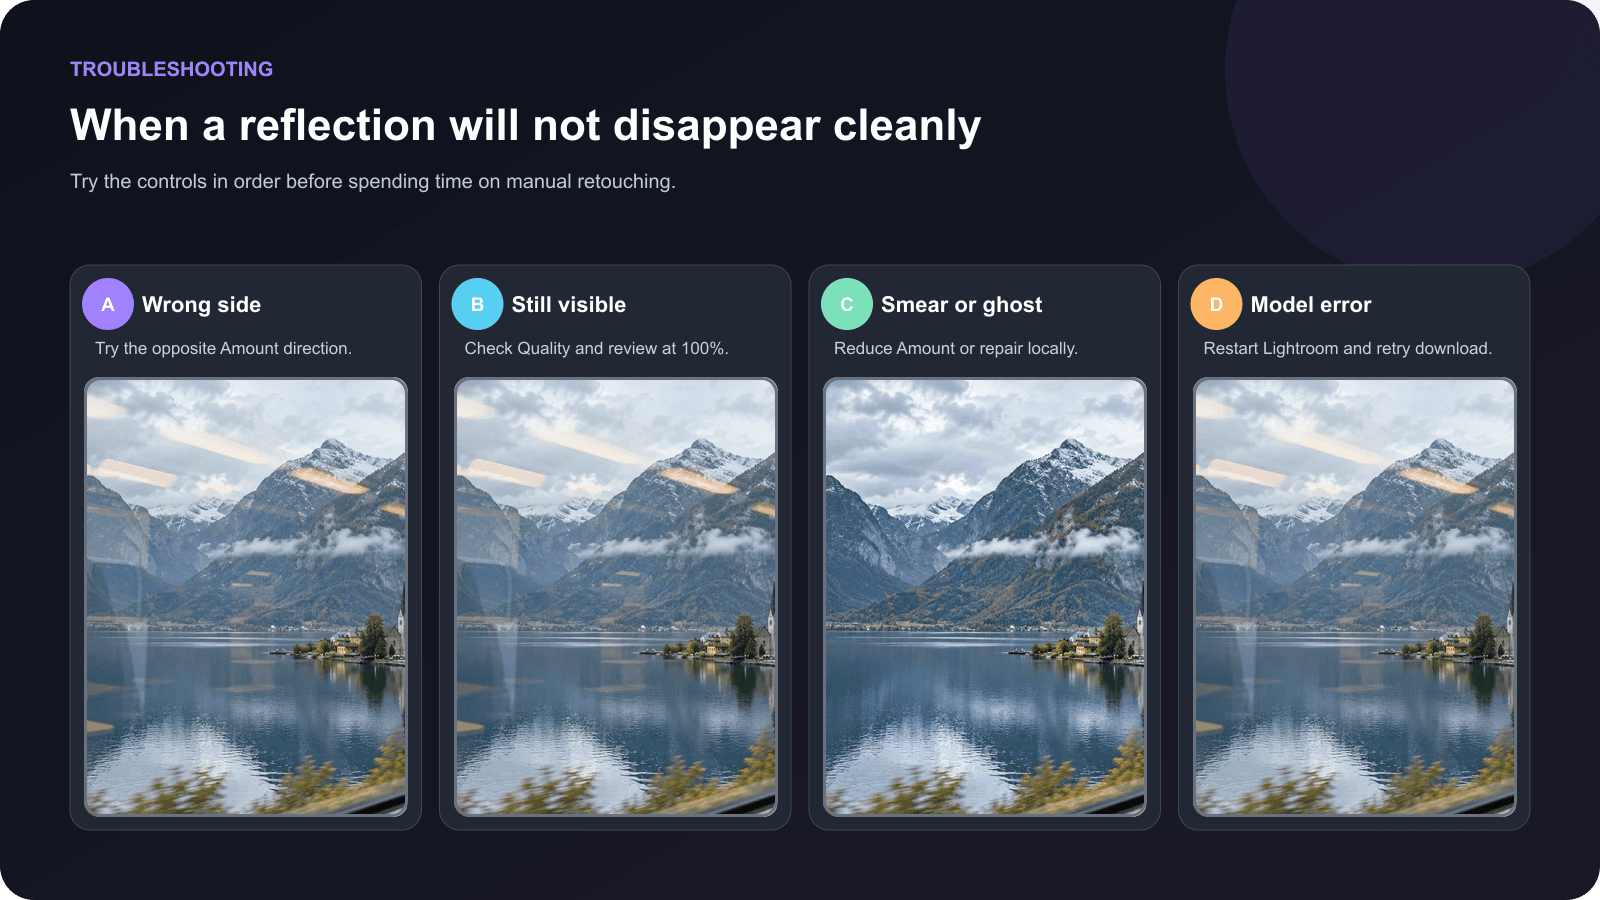
Update Lightroom Classic or Lightroom Desktop and check Remove → Distraction Removal. Adobe currently notes that Reflections is unavailable on Windows ARM in Lightroom Classic. Don’t assume a missing control on Mobile is the same feature; Adobe’s dedicated instructions apply to Classic and Desktop. Adobe Classic documentation.
+100 shows the reflection instead of removing it
Try the negative side. Adobe explicitly documents this exception. Then choose the direction and strength that reveal the intended subject.
The reflection is still visible
Confirm that processing finished. Compare 0 with both ends of the Amount scale. Switch from Preview to Best for a full-resolution evaluation. If the reflection covers most of the scene with opaque glare, the image may not contain enough visible information for a convincing separation.
The result has smears or ghost outlines
Reduce Amount and inspect at 100%. Try a small Remove Repair on a simple area. If a person’s face, lettering, or intricate architecture is distorted, preserve the original detail rather than forcing a complete cleanup.
The AI model failed to download
Adobe’s current Classic help page says to close and restart Lightroom Classic, then retry, when you see “Some AI models failed to download. Please try again later.” Check that the application can reach Adobe’s services. Adobe troubleshooting note.
The water looks unnatural
Return Amount toward 0. Decide whether you wanted to remove a glare patch, a mirrored object, or the entire reflection. Use a targeted Mask or Remove pass for a small distraction, and keep the reflection that describes the landscape.
Prevent reflections while taking the photograph
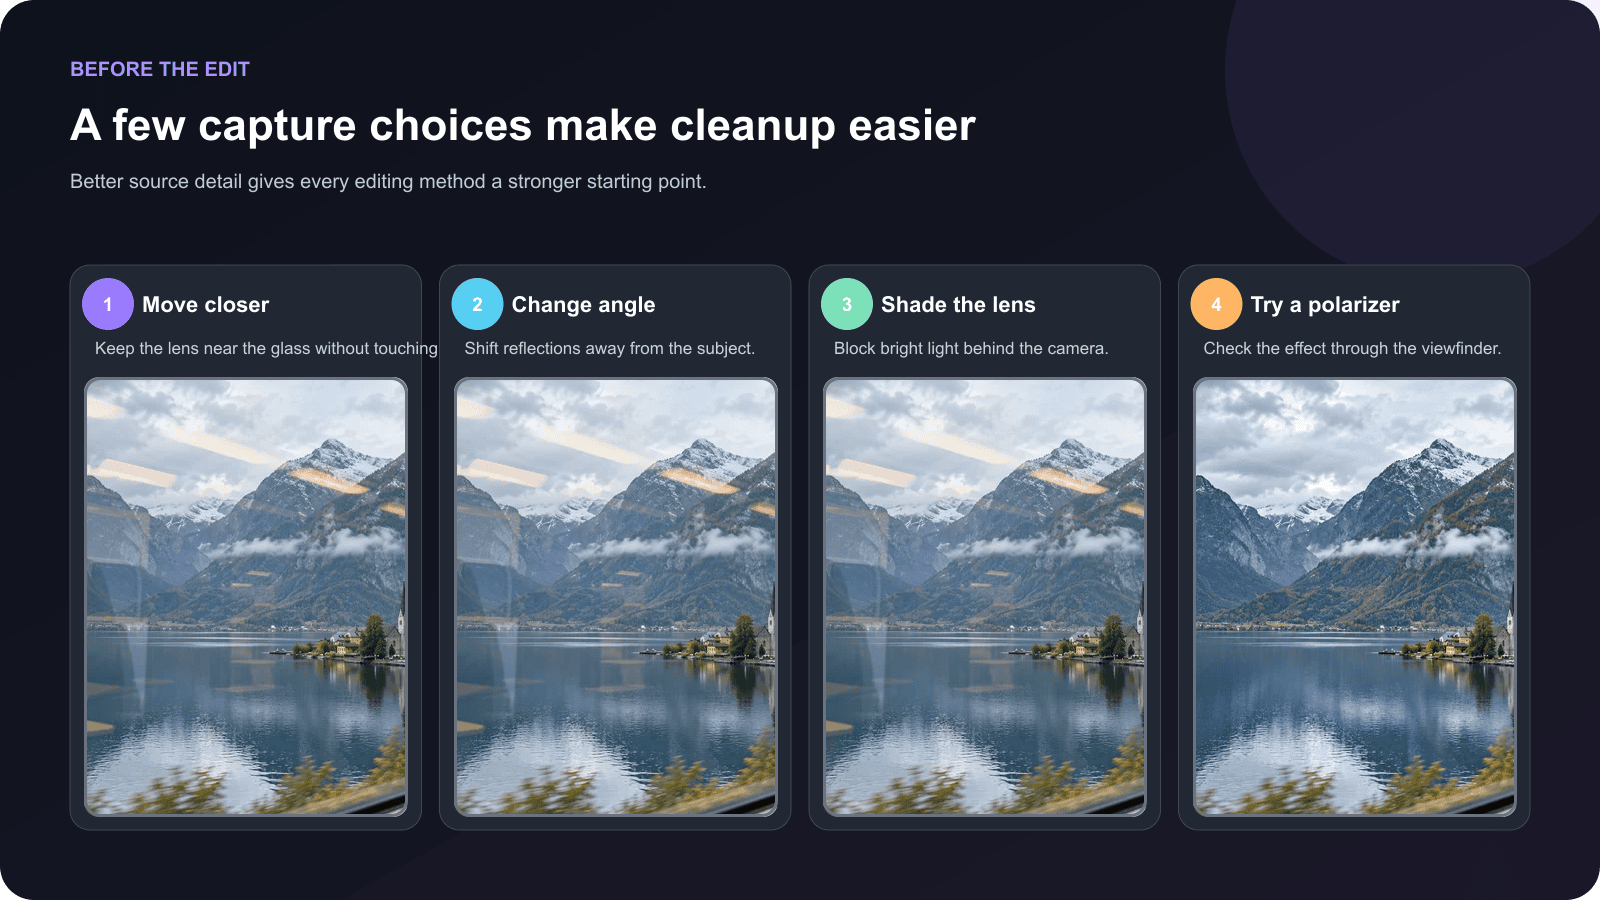
When you have control of the scene, a few physical adjustments help:
- Move the lens closer to the glass without pressing it against a moving or delicate surface.
- Shift your camera angle so bright interior lights or your own silhouette move away from the subject.
- Shade the area around the lens from lights behind you; a dark jacket or lens hood can help.
- Try a circular polarizer and rotate it while watching the live view. Its effect varies with the angle and glass type, and it may also darken parts of the scene.
- Clean accessible glass when permitted and safe.
- Capture a second frame from a slightly different position. Even a small shift can give you a cleaner version of a critical detail.
You will not always have these options on a train, in a museum, or behind a barrier. That is exactly when Reflections is most useful.
Frequently asked questions
Final reflection-removal checklist
The edit is finished when the subject reads clearly and the image still looks plausible.
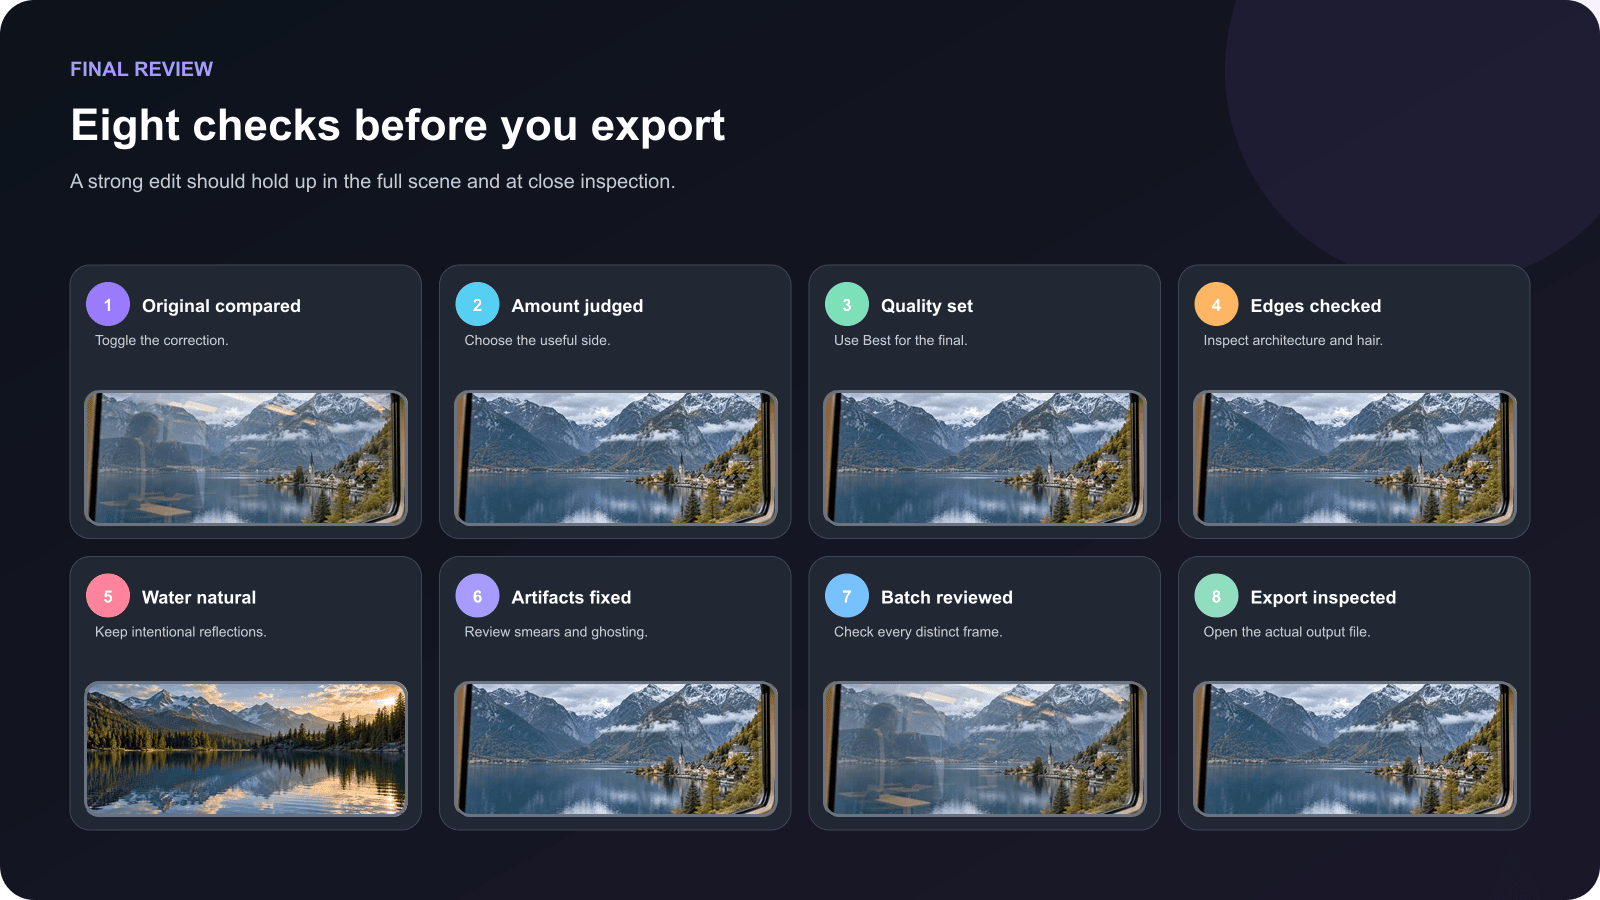
- Compare the corrected photograph with the original.
- Check both ends of Amount if the result seems reversed.
- Use the strength that looks natural in the full composition.
- Select Best quality for full-resolution final inspection.
- Examine fine details at 100% for smearing or doubled edges.
- Preserve intentional reflections in water and glass.
- Review every distinct photograph after copying the setting.
- Open the exported file and confirm the final result.
The most useful correction often leaves a little evidence of the surface. A clean view through glass can be beautiful, but a perfectly erased window isn’t required in every travel photograph. Let the subject come forward, keep the scene believable, and stop when the reflection no longer competes with the image.