You just downloaded a bunch of Lightroom presets, unzipped the folder, and now you’re staring at two mystery folders: one labeled DNG and one labeled XMP with absolutely no idea what to do next!
Sound familiar? Don’t worry, literally every photographer has been there. These two file formats are the source of so much confusion in the Lightroom community, and we’re putting that confusion to rest once and for all.
By the end of this guide, you’ll know exactly what DNG and XMP presets are, how they work, which one to use for mobile vs. desktop editing, and how to install both of them like a pro. Let’s get into it!
What Are Lightroom Presets?
Before we dive into the DNG vs. XMP debate, let’s do a super-quick refresher on what presets actually are, because understanding the foundation makes everything else click.
A Lightroom preset is essentially a saved recipe of editing settings. Think of it like a filter, but smarter. Instead of a basic one-click Instagram-style filter, a preset stores all your Lightroom sliders: exposure, contrast, highlights, shadows, color grading, HSL, sharpening, noise reduction, and more. So you can instantly apply a consistent look to your photos.
Professional photographers use presets to maintain a consistent aesthetic across their entire portfolio. Travel bloggers use them to get that moody golden-hour look with one click. Portrait photographers use them to nail skin tones every time. They’re basically the secret weapon of the editing world. Now, the way these settings are stored and delivered is where DNG and XMP come in. They’re just two different containers for the same kind of recipe.
What Is a DNG Preset?
DNG stands for Digital Negative, which is actually Adobe’s open-source RAW image format. Here’s the clever bit: a DNG preset is essentially a photo file with its preset settings baked right in.
When someone took a plain test photo (usually something neutral like a gray card or a simple scene), edited it with all the presets’ settings, and saved the whole thing as a DNG image file. The photo and the editing instructions are bundled together in one file.
This design was a clever workaround, especially in the early days of Lightroom Mobile. Since the mobile app couldn’t directly import .xmp preset files back then, developers figured out a neat trick: package the preset as a DNG image file instead. The user imports it like any normal photo, then saves the settings as a new preset.
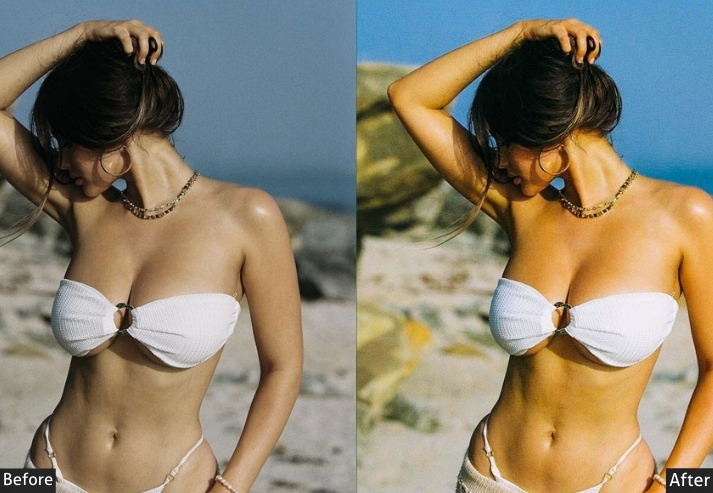
✅ Pros of DNG Presets
- ✔ Great for mobile-only users: works directly in the Lightroom Mobile app without a desktop.
- ✔ Instant visual preview: you can literally see the effect before applying it.
- ✔ Easy to share: just send it like any image file.
- ✔ No Creative Cloud subscription needed: for basic mobile use.
- ✔ Contains all image data: great for maintaining full quality in mobile workflows.
❌ Cons of DNG Presets
- ✘ Clutters your photo library: DNG files show up in your photo roll alongside actual photos.
- ✘ Larger file sizes: they carry image data you don’t really need.
- ✘ More steps to use on desktop: you have to import → open → manually save as a new preset.
- ✘ Not directly importable: to Lightroom Classic’s preset panel.
What Is an XMP Preset?
XMP stands for Extensible Metadata Platform. Unlike DNG, an XMP preset is a tiny text-based file that contains only the editing instructions: no image data whatsoever.
Adobe introduced XMP as the new standard preset format back in 2018 (with Lightroom Classic 7.3 and Lightroom CC 1.3). Before that, the format was .lrtemplate. The whole point of switching to XMP was to make presets work consistently across Lightroom Classic, Lightroom CC, and even Adobe Camera Raw and Photoshop.
XMP files are incredibly lightweight. We’re talking a few kilobytes compared to DNG files that can be several megabytes. They slot neatly into Lightroom’s Preset panel and can be organized into folders, shared with colleagues, easily backed up, and imported in bulk.
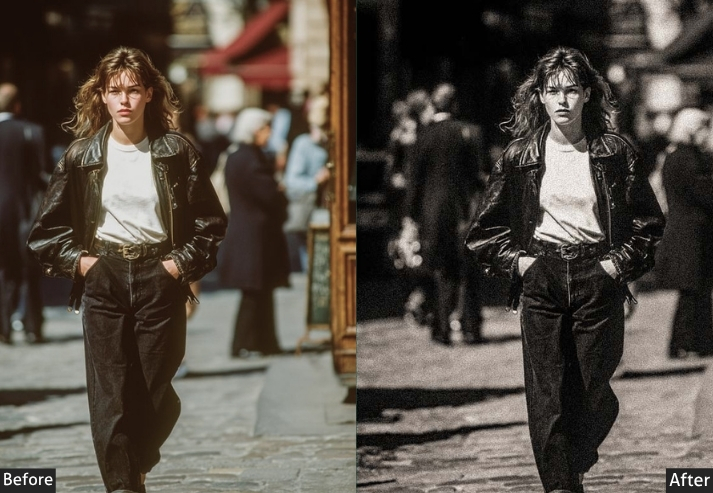
✅ Pros of XMP Presets
- ✔ Industry standard format: works across Lightroom Classic, Lightroom CC, Photoshop & Camera Raw.
- ✔ Lightweight: tiny file sizes, easy to manage large preset collections.
- ✔ Organized neatly in the Presets panel: no photo library clutter.
- ✔ Bulk import: drop in an entire preset pack at once.
- ✔ Auto-syncs: to Lightroom Mobile via Creative Cloud.
- ✔ Future-proof: the long-term standard Adobe is pushing.
❌ Cons of XMP Presets
- ✘ Requires desktop Lightroom: for the cleanest mobile workflow (via cloud sync).
- ✘ Can’t install directly: on Lightroom Mobile without a Creative Cloud desktop sync.
- ✘ No visual preview during import: you pick them by name only.
DNG vs XMP: Side-by-Side Comparison
Alright, let’s lay it all out on the table. Here’s the full head-to-head breakdown:
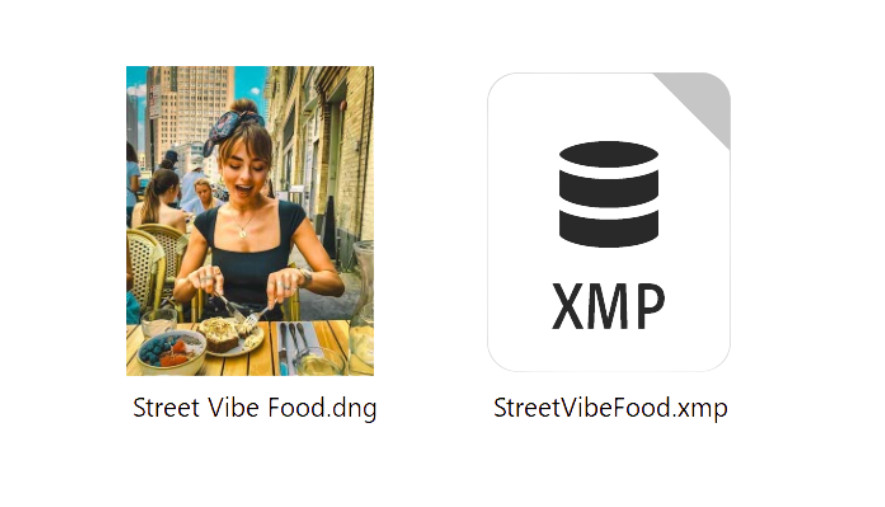
.DNG (Digital Negative Preset)
- Mobile-first format.
- Image + settings combined.
- Visible in the photo library.
- No subscription needed.
- Great for sharing looks.
- Works without a desktop.
.XMP (Extensible Metadata Preset)
- Desktop + mobile via sync.
- Settings only (tiny file).
- Lives in Presets panel.
- Needs Creative Cloud sync.
- Industry standard format.
- Better for bulk workflows.
| Feature | DNG Preset | XMP Preset |
|---|---|---|
| File Type | Image + Settings | Settings Only |
| File Size | 1–10 MB | 1–10 KB |
| Lightroom Mobile | ✓ Native (direct install) | Via Cloud Sync |
| Lightroom Classic | ✗ Not direct | ✓ Native |
| Lightroom CC (Desktop) | ✗ Not direct | ✓ Native |
| Adobe Camera Raw | ✗ No | ✓ Yes |
| Photo Library Clutter | ✗ Yes | ✓ No |
| Bulk Import | ✗ One at a time | ✓ Yes |
| Creative Cloud Needed | ✓ Not required | For mobile sync |
| Best For | Mobile-only editors, beginners | Desktop users, pros, bulk workflows |
How to Install DNG Presets in Lightroom Mobile?
No desktop? No problem. Here’s exactly how to get DNG presets working on your phone or tablet, whether you’re on iPhone or Android.
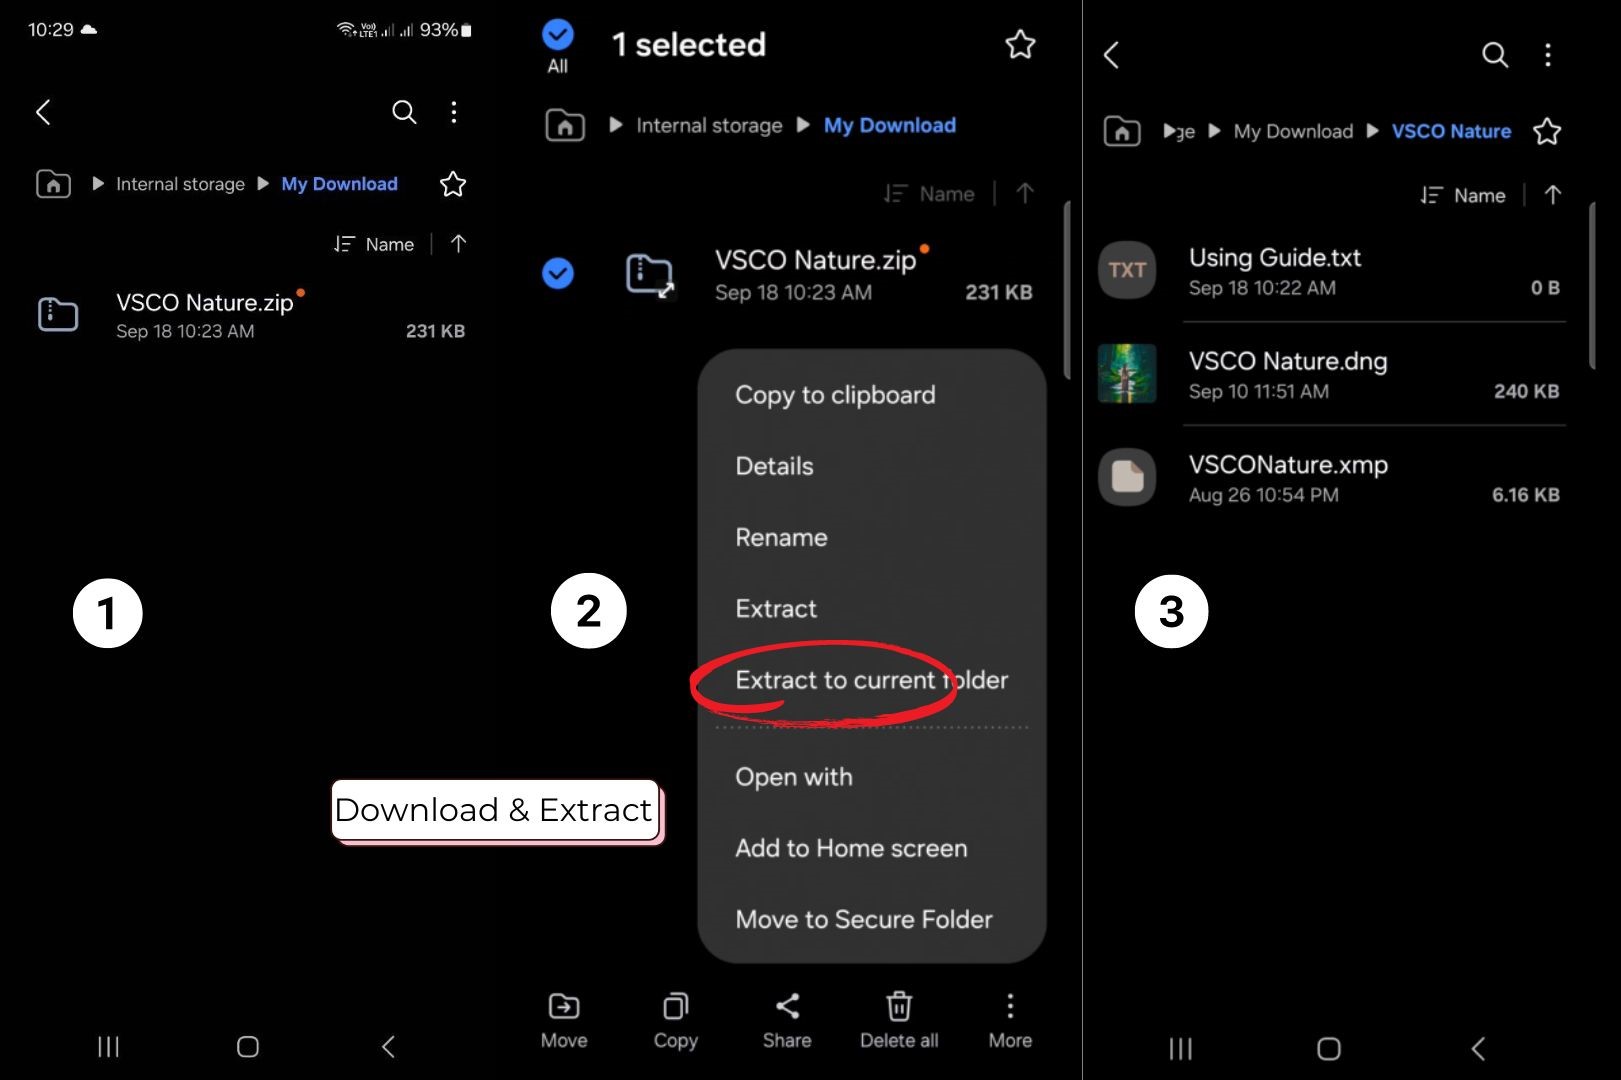
Download your preset pack
You’ll usually get a .zip file. Unzip it to reveal the individual .dng files. On iPhone, use the Files app. On Android, use your built-in file manager or a free app like ZArchiver.
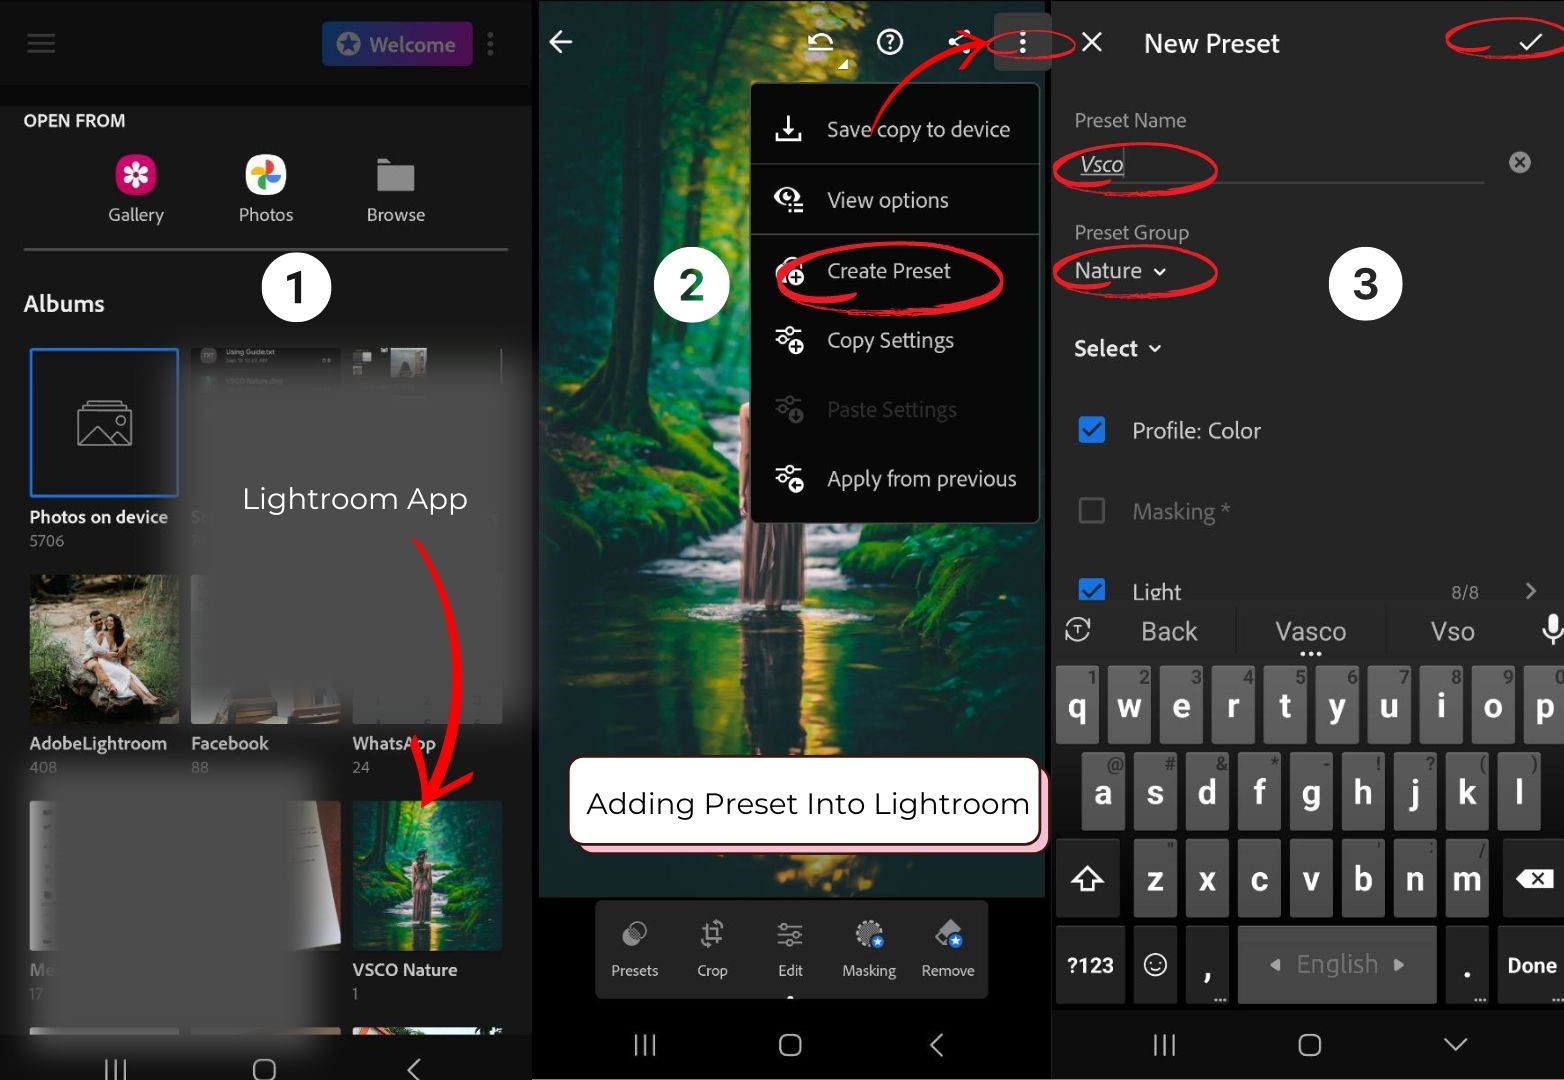
Open Lightroom Mobile
Launch the app and tap the “+” (Add Photos) button to import the DNG files. Treat them exactly like regular photos because technically, they are!
Open one DNG preset image
Tap on the imported DNG file to open it in the editor. You’ll see the presets’ look already applied to the image.
Tap the three dots (⋯) → Create Preset
This is the magic step! Tap the “…” icon in the top-right corner, then choose “Create Preset.” Give it a name and choose a group/folder to save it in.
Apply to your photos!
Head back to your library, pick any of your own photos, open it in the editor, and find your newly saved preset in the Presets panel. One tap and you’re done!
How to Install XMP Presets (Desktop & Mobile)
XMP presets have the slickest installation experience on desktop. Here’s how to do it in both Lightroom Classic and Lightroom CC.
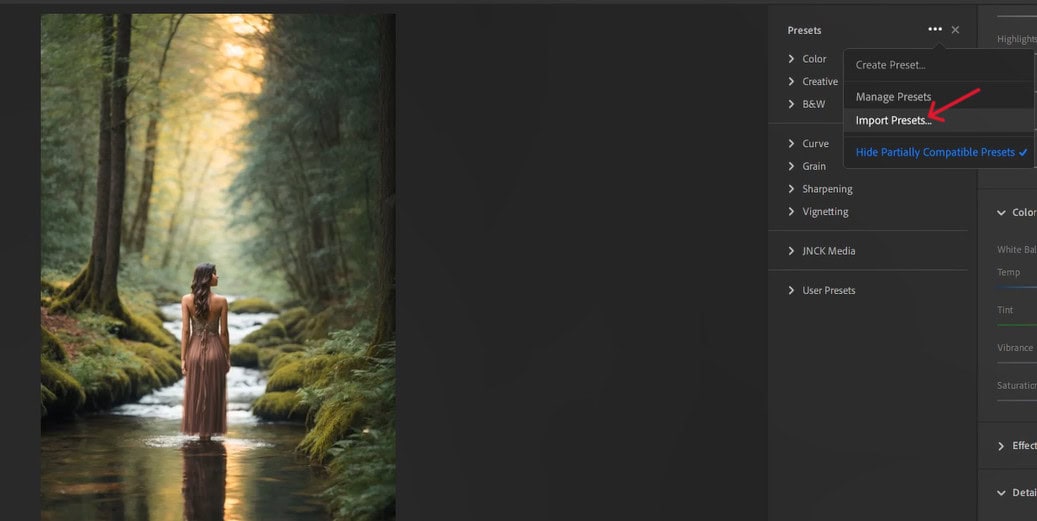
For Lightroom Classic (The Fast Way)
Unzip your preset pack: Extract the ZIP file to see your .xmp files organized in folders.
Go to the Develop module: Open Lightroom Classic and head to Develop. Find the Presets panel on the left side.
Click the “+” icon → Import Presets: Hit the small “+” icon at the top right of the Presets panel and select “Import Presets.”
Select your XMP files or ZIP: Go to your preset files, select them (or the whole ZIP), and click Import. Done! Your presets appear instantly, organized into their folders.
For Lightroom CC (Cloud Version)
Open Lightroom and click any image: Open the desktop app (just called “Lightroom,” not Classic) and select a photo to enter the edit view.
Open the Presets panel (right side): Find the Presets panel on the right sidebar and click the “…” (three dots) menu.
Choose “Import Presets”: Select your XMP files or folder and click Import. Your presets are saved to the cloud!
They sync to mobile automatically: Because Lightroom CC is cloud-based, your imported presets will automatically appear in the Lightroom Mobile app on your phone, with no extra steps needed.
Pro Tip: If you use Lightroom CC on desktop AND Lightroom Mobile, this cloud sync method is the cleanest way to manage all your presets. Install once on the desktop, and get them on all your devices instantly.
If you want details, then check: Lightroom Presets Settings and Installing Guide
Which One Should You Actually Use?
I get this question so much, and honestly, the answer depends on your workflow. Let me break it down by who you are:
DNG: Mobile-only photographers who edit exclusively in Lightroom Mobile, don’t have a Creative Cloud subscription, or want the quickest preset setup on their phone without a desktop involved.
XMP: Desktop editors using Lightroom Classic or CC, or anyone who edits on both desktop and mobile. XMP is the future-proof, industry-standard format that works everywhere cleanly.
BOTH: Most photographers honestly benefit from having both formats. Use DNG for quick sharing and mobile experimentation. Use XMP as your main organized preset library for serious editing.
Bottom line: XMP is the professional standard. DNG is the mobile shortcut. Smart photographers keep both in their toolkit.
How to Convert DNG Presets to XMP?
Got a bunch of DNG presets, but your workflow is entirely on desktop? Or found some great XMP presets, but only have your phone? No worries! You can convert between the two formats!
DNG to XMP: The Lightroom Method
Import the DNG file into Lightroom – Add the DNG preset file to your Lightroom catalog like a regular photo.
Open it in the Develop module – You’ll see all the editing settings already applied to the image.
Click the “+” icon → Create Preset – Name it, choose a group, select the settings you want to save, and hit Create. This saves it as an XMP preset in your Presets panel!
Want to Convert DNG to XMP in Seconds?
Skip the manual Lightroom steps! Our free online tool instantly converts DNG presets to XMP format! No software installation required.
Final Thoughts
Let’s wrap this up with the no-nonsense summary you came for:
DNG presets exist because mobile Lightroom needed a workaround for preset sharing. They’re clever, convenient for mobile users, and great for beginners who just want to drag and drop a cool look onto their photos. But they’re basically a hack: a photo file used as a preset delivery vehicle.
XMP presets are the real deal. They’re what Adobe designed presets to be: lightweight, organized, cross-platform, and future-proof. If you’re serious about your editing workflow and use Lightroom on desktop (or plan to), XMP is the format to build your preset library around.
Happy editing! Now go out there and make some gorgeous photos.
Check more:
Free Vs Paid Lightroom Presets
Lightroom Presets Not Working? Easy Fixes That Actually Work
Lightroom Presets Settings With Color Grading Guide