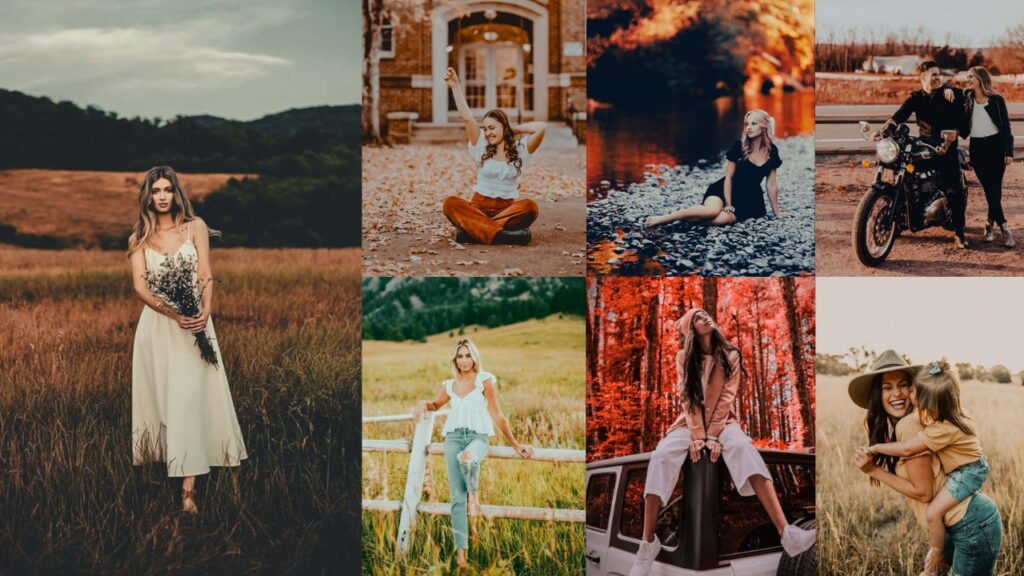
Street photography has a way of turning a split second into a timeless story: a stranger crossing rain-soaked pavement, neon signs reflected in puddles, the blur of a city that never slows down. But even the best raw files sometimes need a helping hand in post-processing to match what your eye actually saw.
That’s why we’ve put together this collection of 100+ free street Lightroom presets, hand-picked and tested across a range of urban shooting conditions. Whether you shoot gritty midnight alleyways, sun-drenched afternoon markets, or the moody blue-grey of an overcast city morning, there’s a preset here that fits.
Each preset below comes with recommended settings to fine-tune for your specific shot, and honest notes on what it works best for. No fluff, just practical tools to speed up your editing so you can spend more time out on the streets shooting.

Pauline Jackson
I’ve spent the past 8 years documenting city life across Asia, Europe, and the Americas. I curate Presetpedia’s free preset collections and personally test every preset on real-world street photography shots before publishing.
100 Street Lightroom Presets Free Download
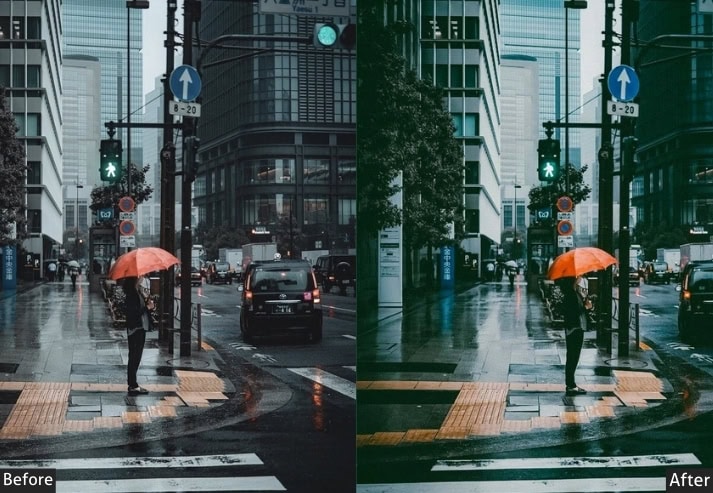
Sometimes, your photos don’t quite capture the intensity of that moment. But with the right preset? Boom! You get those deep contrasts, sharp details, and muted or bold tones that make the city feel alive in your photos. It’s like adding a layer of storytelling that brings out the true character of the streets.
You can instantly fix underexposed areas, enhance the textures of weathered buildings, or bring out the highlights in neon signs. Basically, they help you unlock the potential of every shot with minimal effort. One click, and suddenly, that “ugly” photo looks like it belongs in a magazine. It’s like having a whole bag of tricks to perfectly match the mood of your photos.
Apply a preset, make a few tweaks, and you’re good to go. You get to spend less time behind the screen and more time out on the streets, doing what you love, shooting! Ready to elevate your street photography game and make those city moments memorable? Let’s get editing!
- Pauline Jackson
- 1. Urban Grit Dark Street Presets
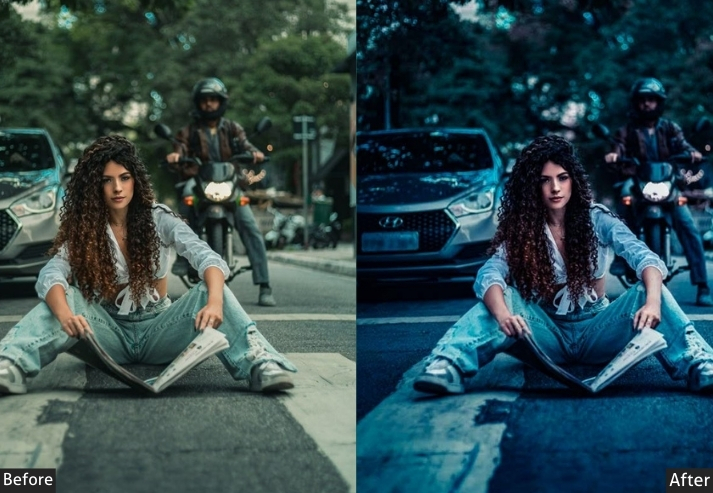
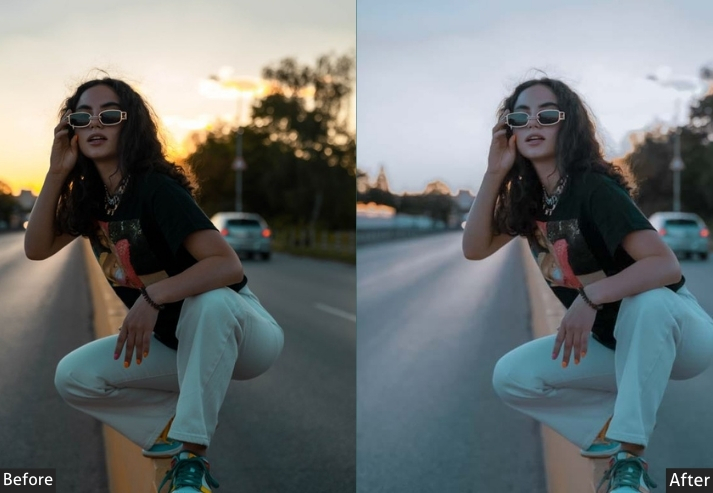
- 2. Moody Street Preset
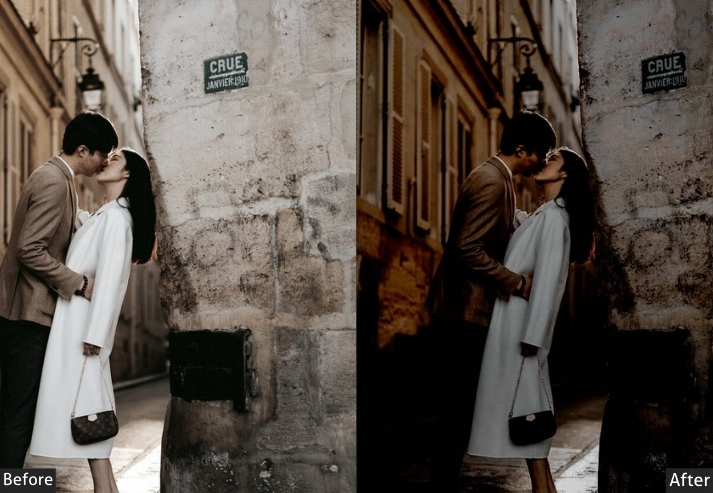
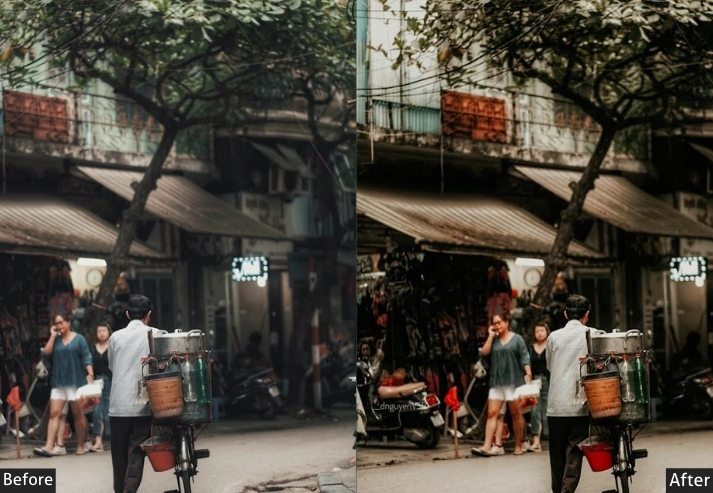
- 3. Vintage Street Preset
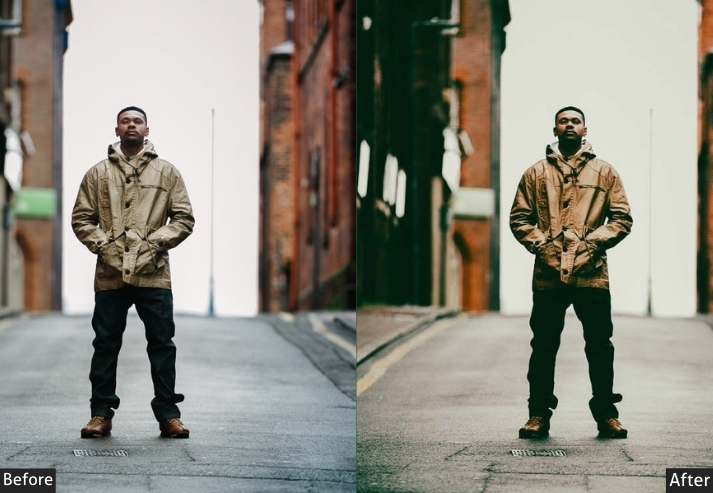
- 4. High Contrast Street Preset
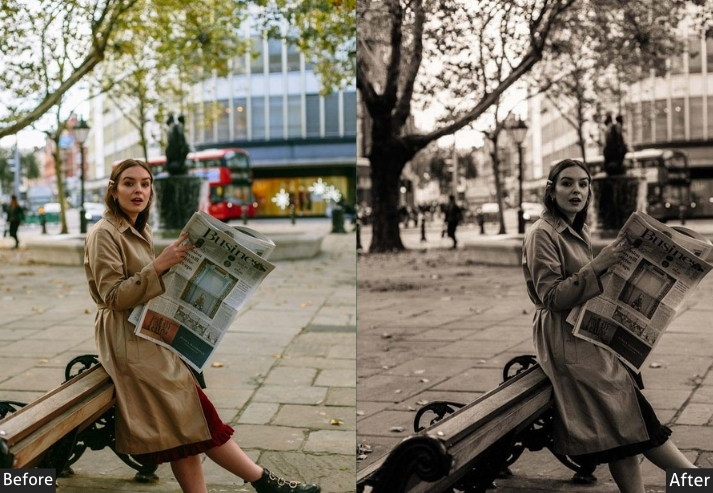
- 5. Black & White Street Preset
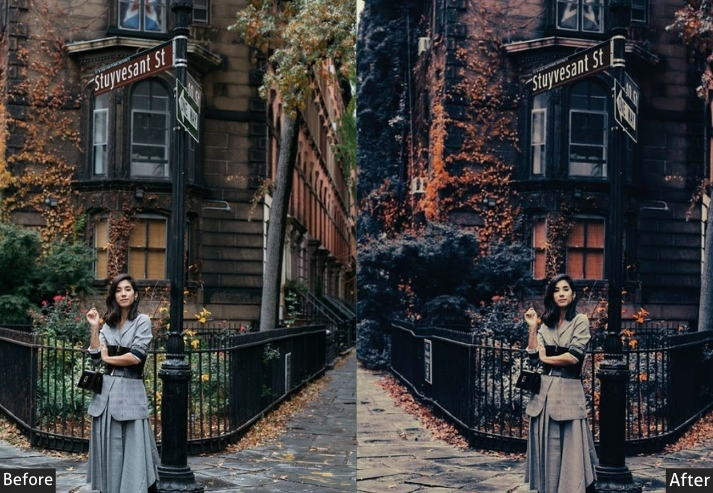
- 6. Urban Decay Street Preset
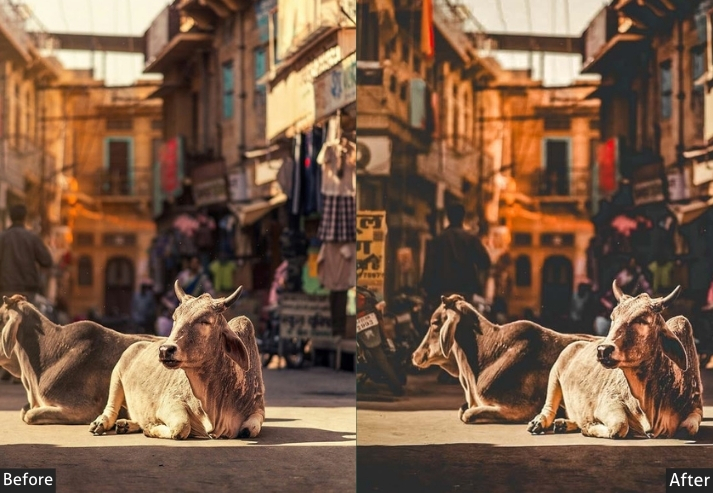
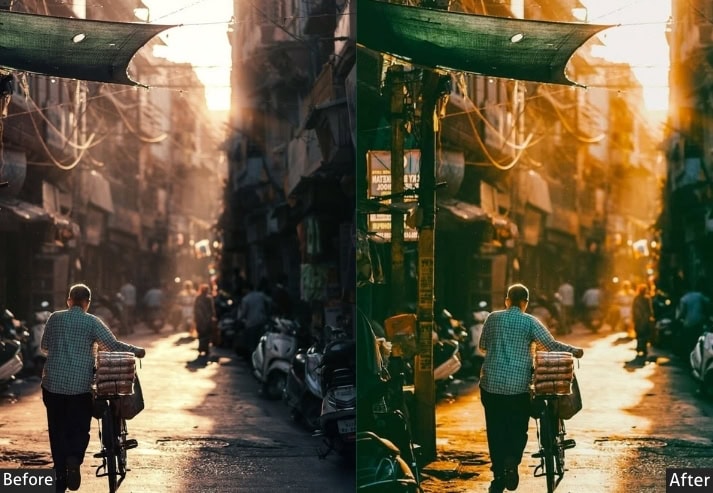
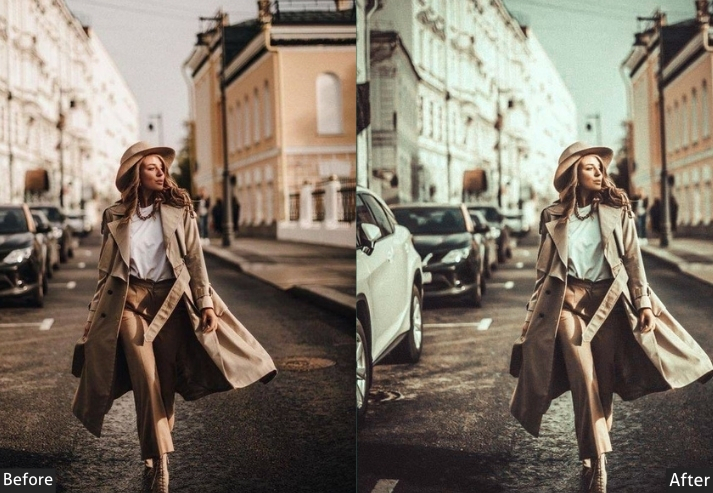
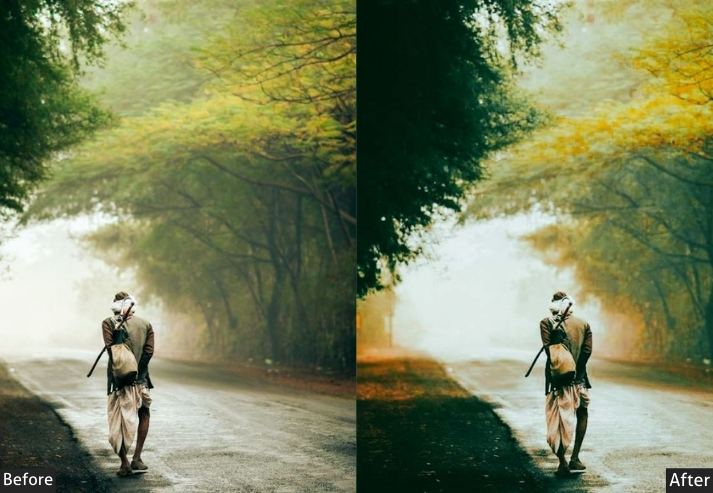
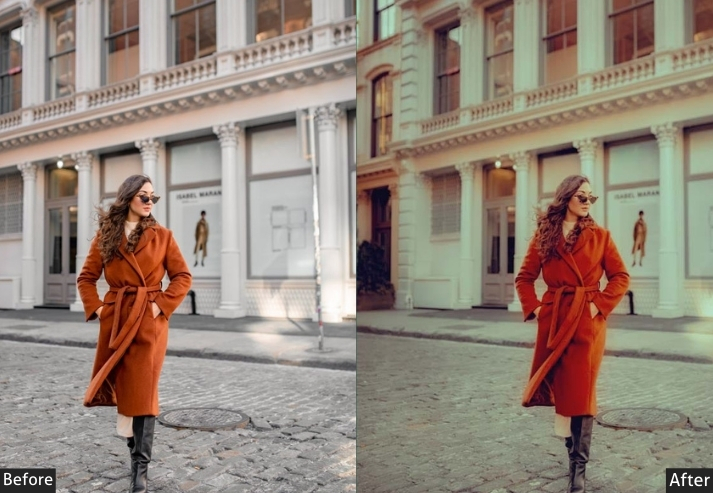
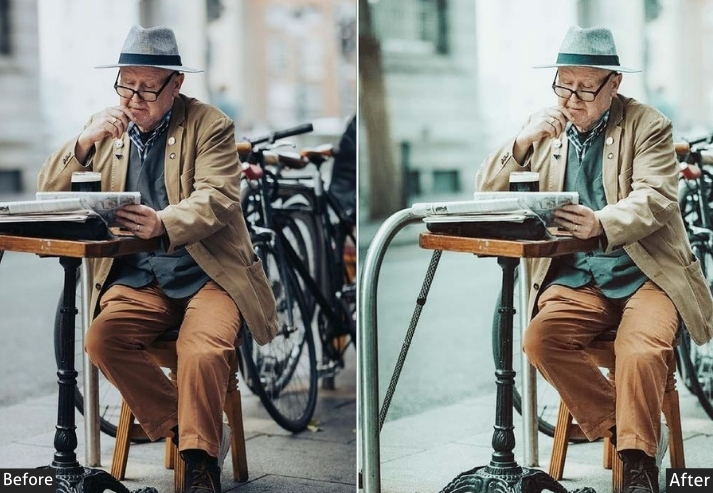
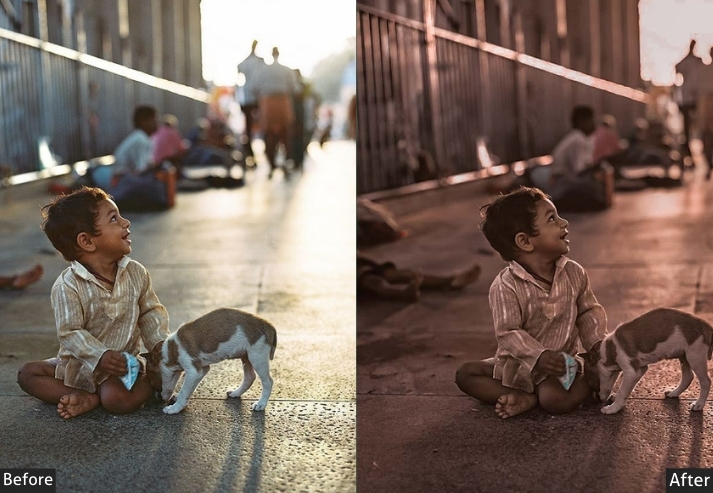
- 7. Warm Street Preset
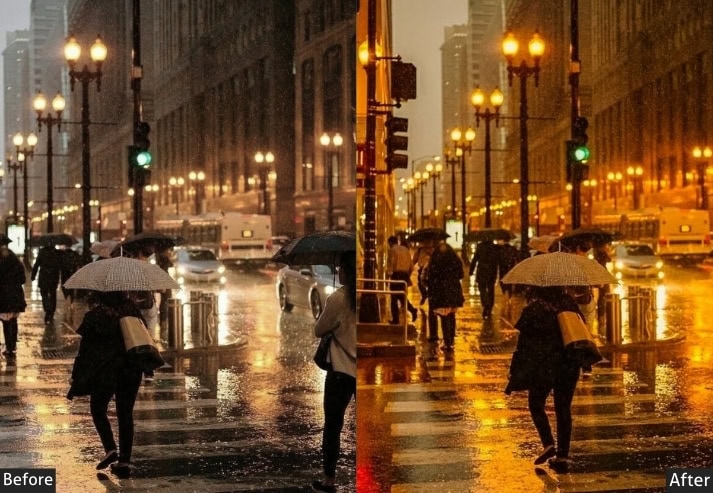
- 8. Neon Night Street Preset
- 9. Film Noir/Cinematic Street Preset
- 10. Vivid Street Preset
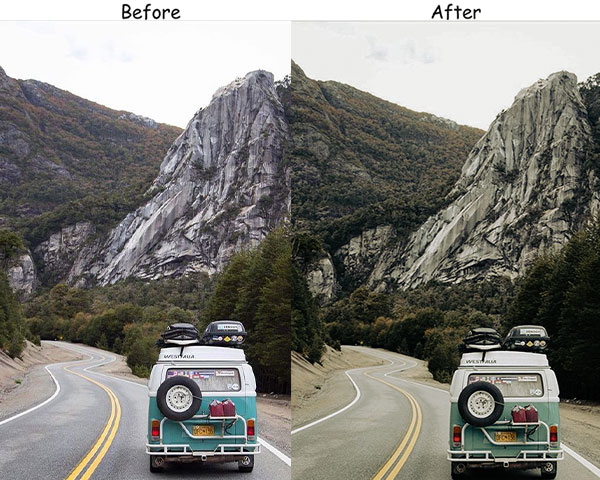
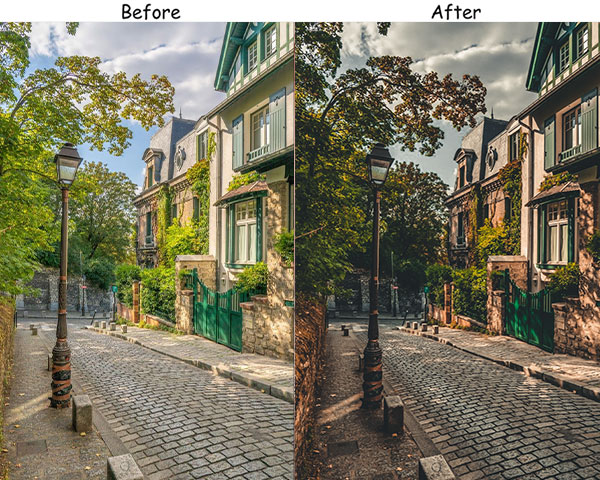
- 11. Landscape Street Presets
- 12. Dark/Black/Night Street Presets
- 13. Night Street Presets
- 14. Desaturated Street Presets
- 15. Saturated Street Presets
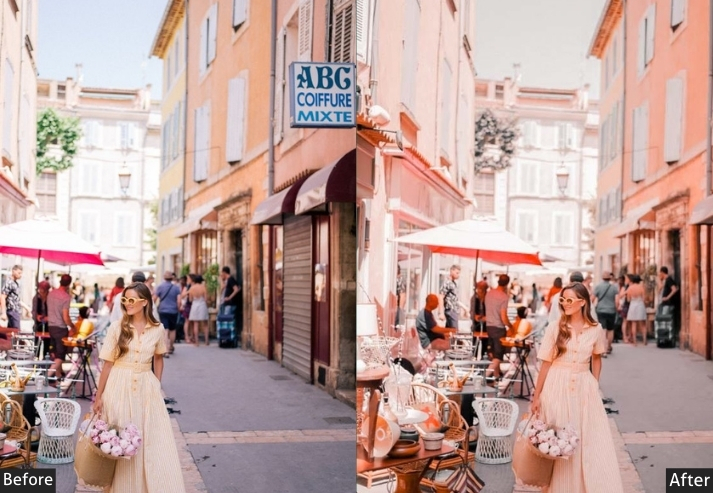
- 16. Vibrant Warm Street Presets
- 17. Cold Street Presets
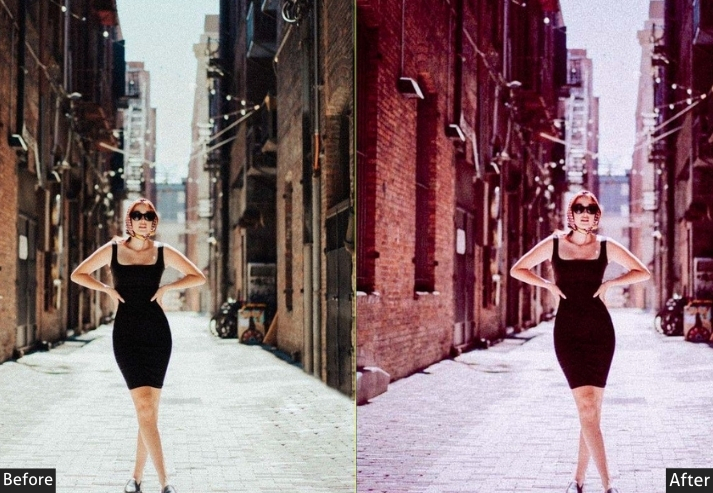
- 18. Retro Street Presets
- 19. Pastel Street Presets
- 20. Orange & Teal Street Presets
- Colorful Street Presets
- Lightroom Mobile (iPhone & Android) – DNG Method
- Lightroom Classic / Lightroom CC (Desktop) – XMP Method
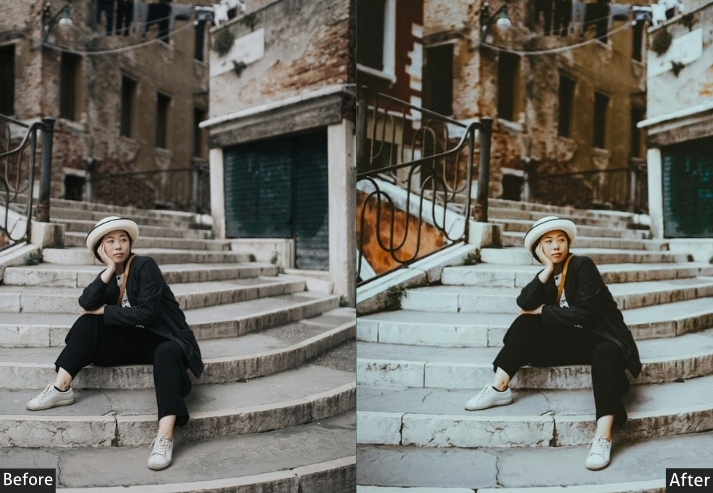
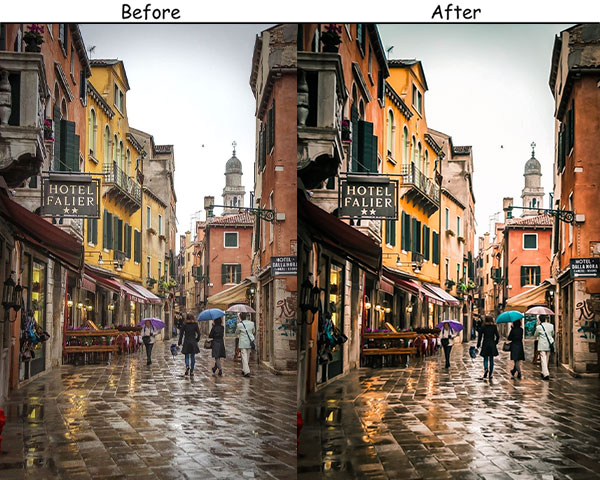
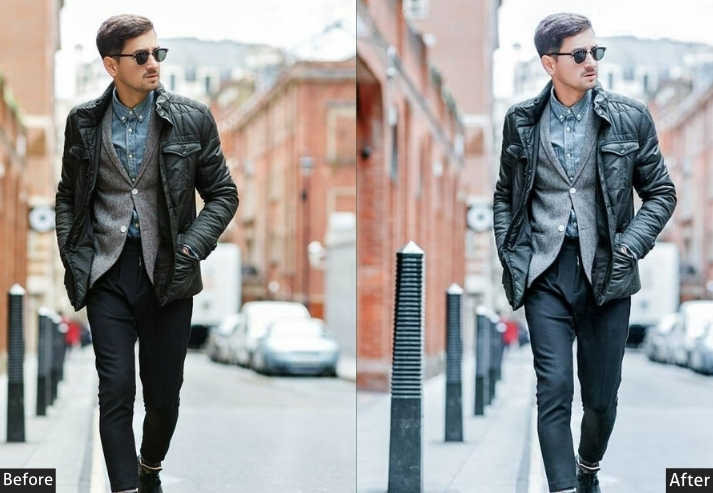
1. Urban Grit Dark Street Presets
This is the one you reach for when a scene has real texture, but your camera flattened it. Urban Grit pulls out the rough edges: cracked concrete, peeling paint, the lines on a stranger’s face, and gives them weight. The contrast is deliberate and punchy without going nuclear, and the slightly cooled temperature keeps everything feeling authentically street rather than stylized.
Light Panel: Contrast +25% | Exposure +10% | Highlights −15%.
Color Panel: Saturation −10% | Vibrance +15% | Temp −5% (cool).
Effects Panel: Vignette +15%.
Detail Panel: Sharpening +25%.
Purpose: gritty, detailed street photos.
Best For: Urban landscapes, portraits with character.
Usage: textured elements of city life.
Style: Bold, detailed, and textured.
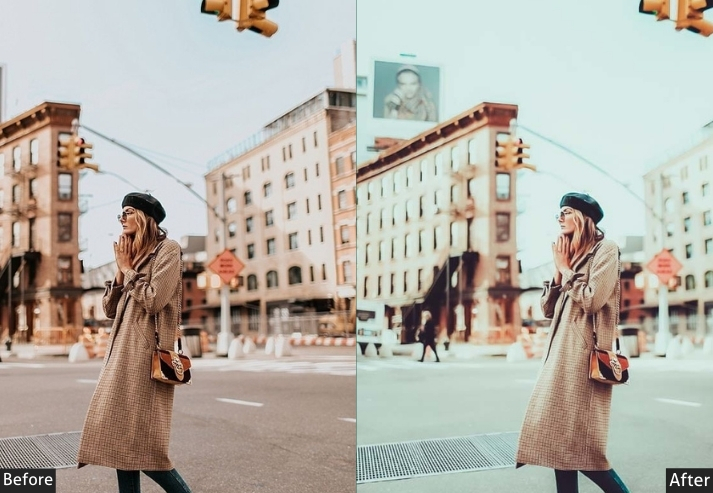
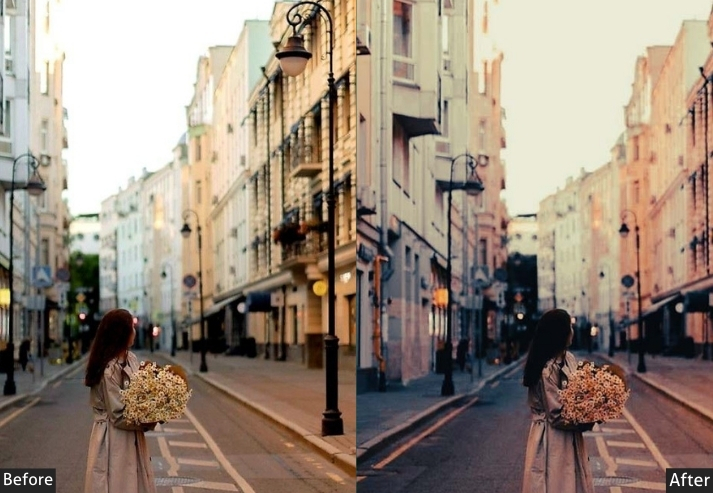
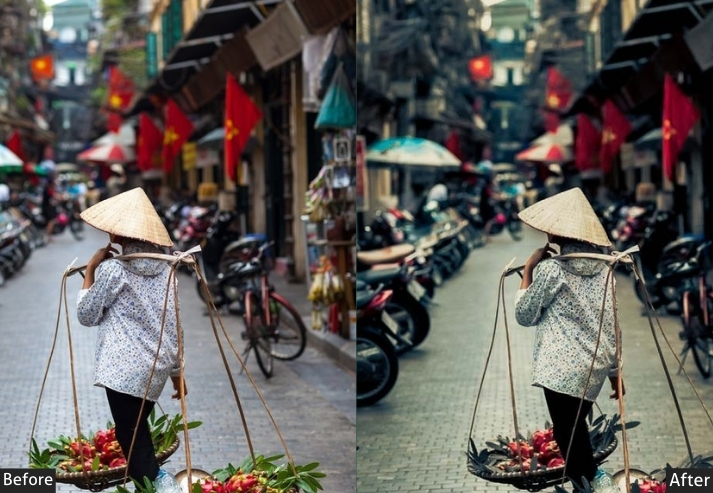
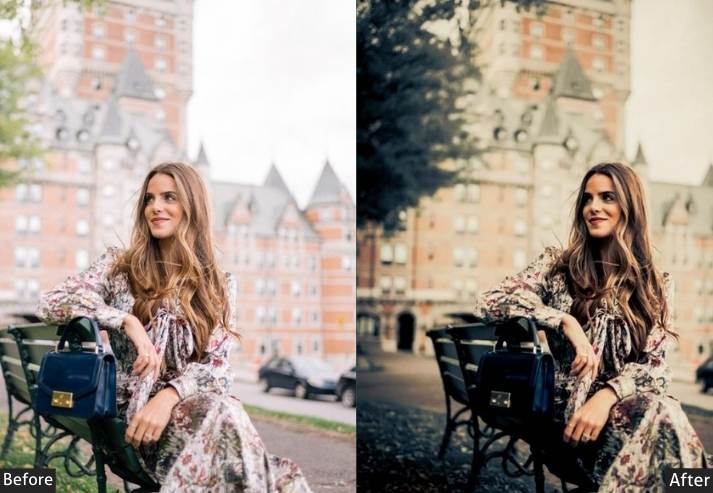
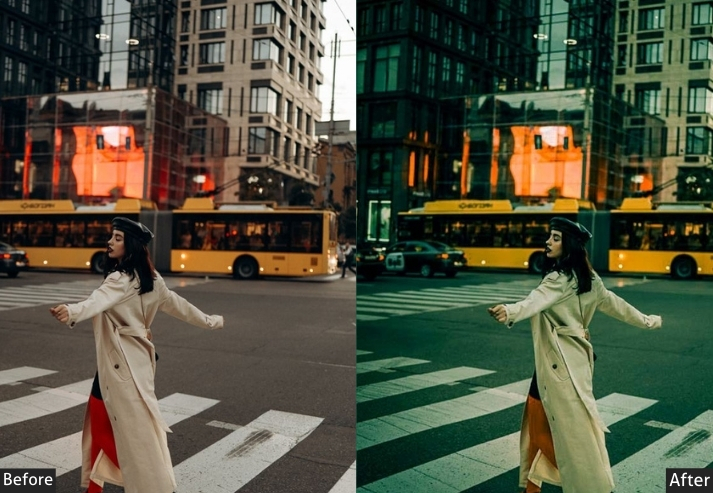
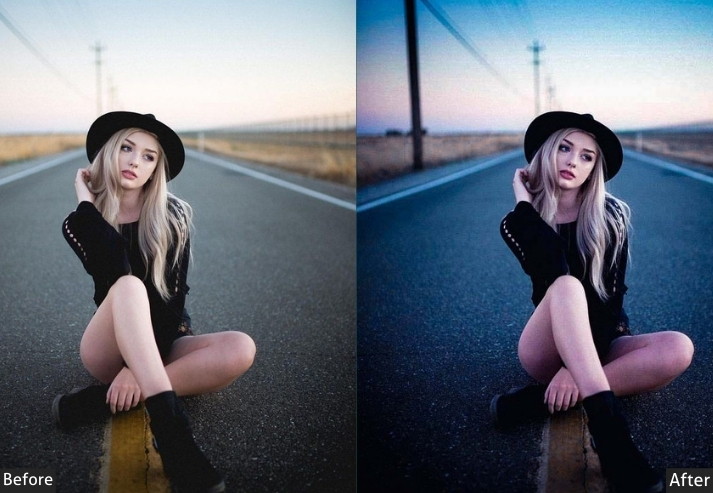
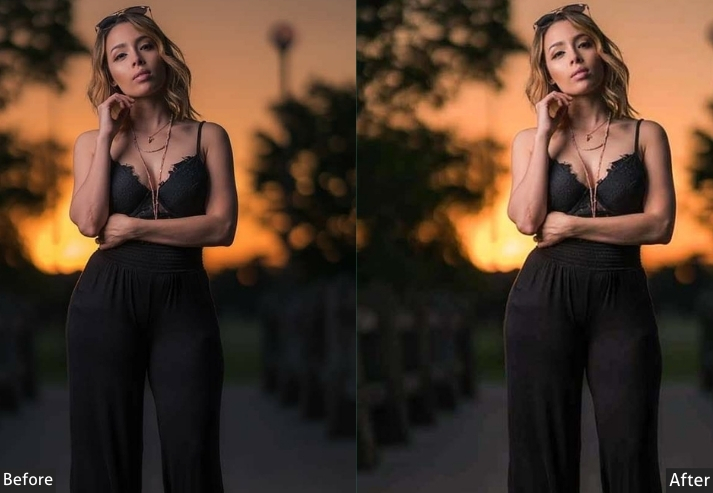
2. Moody Street Preset
There’s a particular feeling to a deserted street at dusk. something between lonely and beautiful. The Moody preset captures exactly that. It darkens the atmosphere, deepens shadows into genuine blacks, and adds a cool blue undertone that makes everything feel more cinematic. This isn’t a dramatic effect for its own sake. It’s a tool for making quiet moments feel like they mean something.
Light Panel: Exposure −15% | Contrast +20% | Highlights −10%.
Color Panel: Temp −10% (cool) | Saturation −10% | Vibrance +5%.
Effects Panel: Vignette +20%.
Detail Panel: Sharpening +20%.
Purpose: dark, moody street photos.
Best For: Nighttime photography, urban scenes with deep shadows.
Usage: the mysterious, dramatic side of the streets.
Style: Dark, intense, and moody.
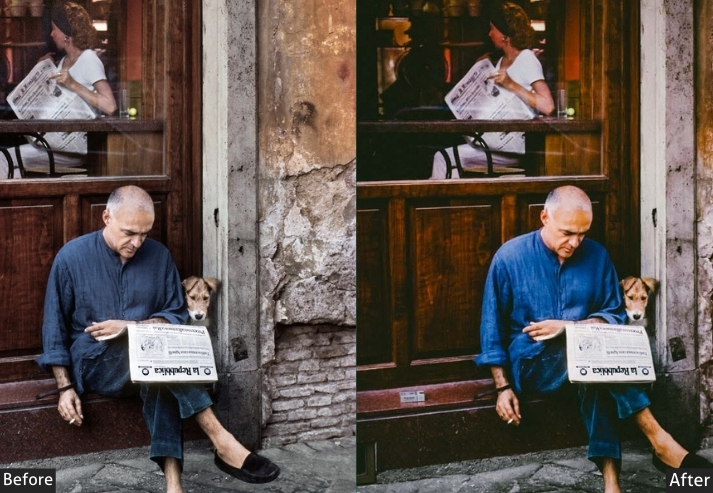
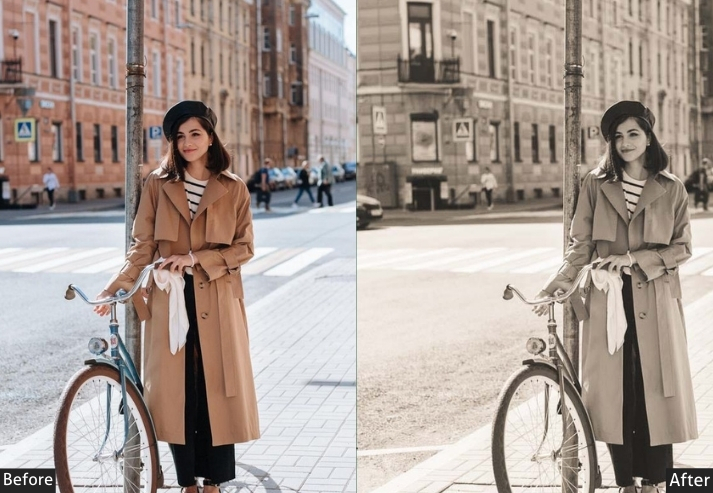
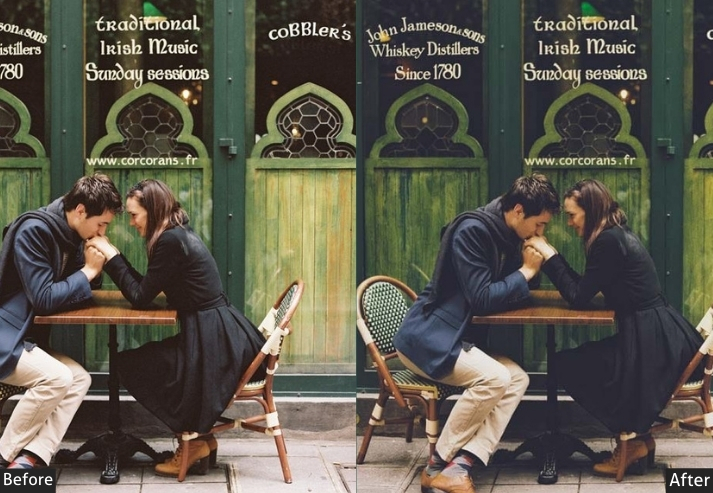
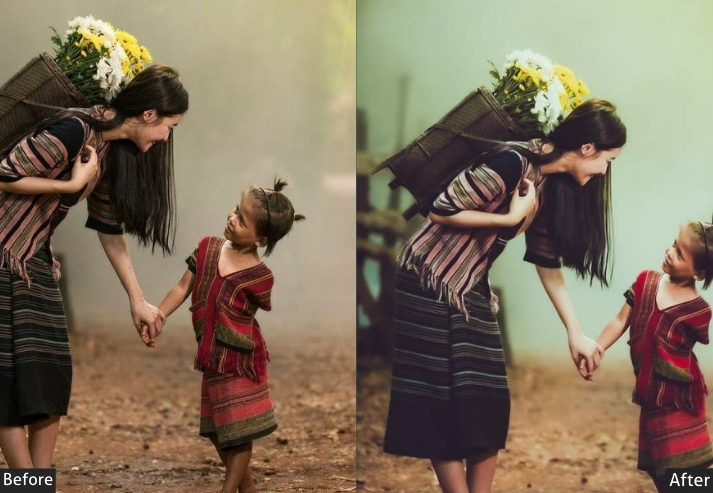
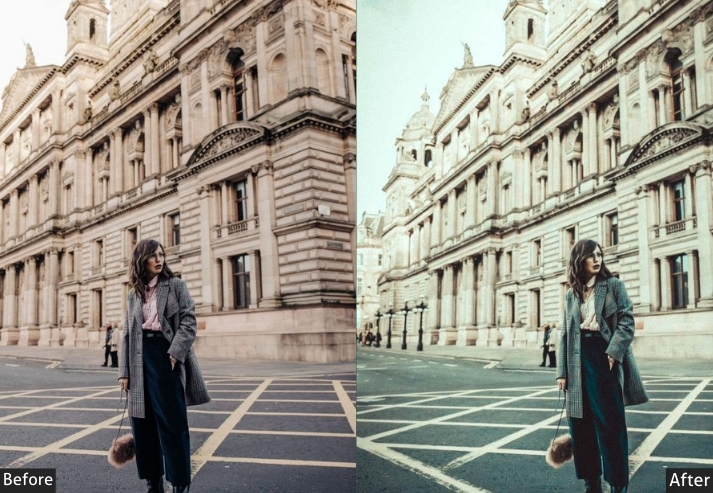
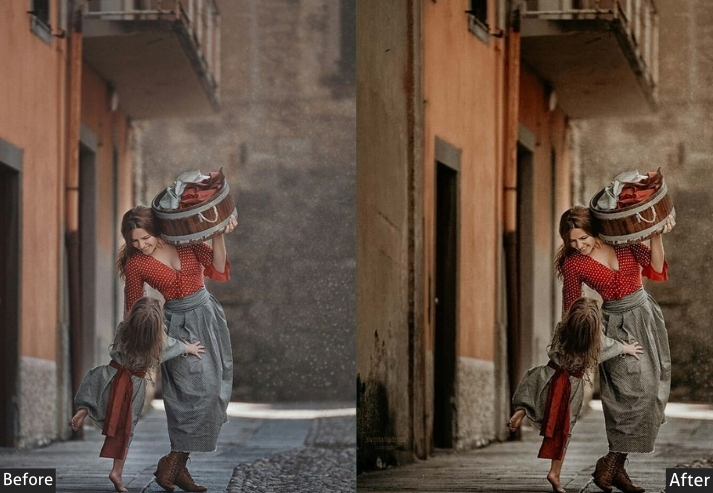
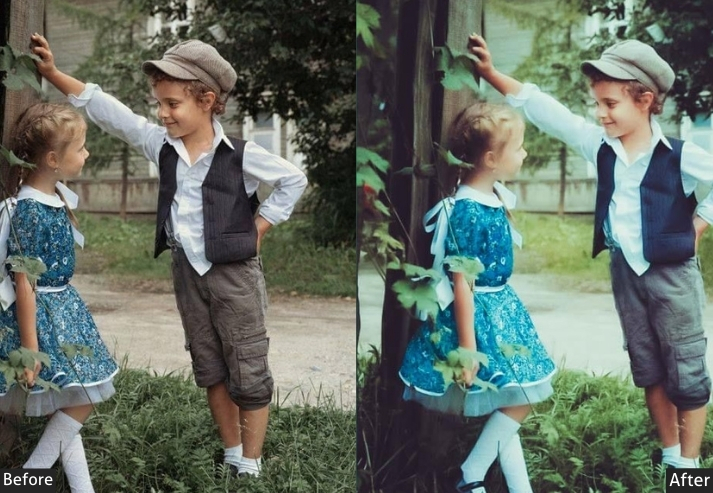
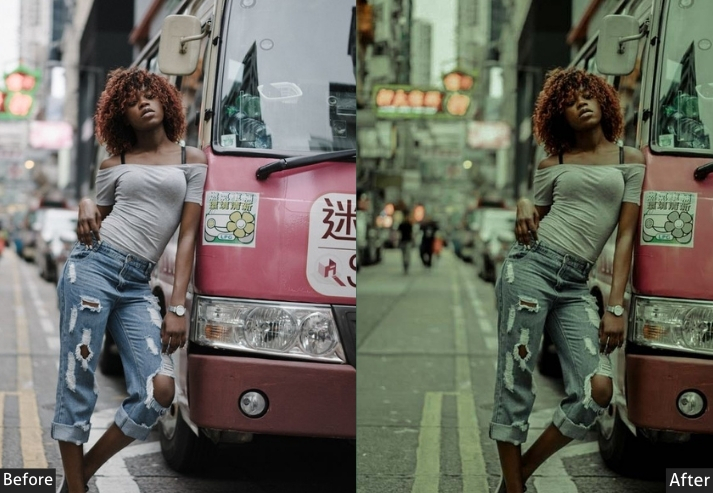
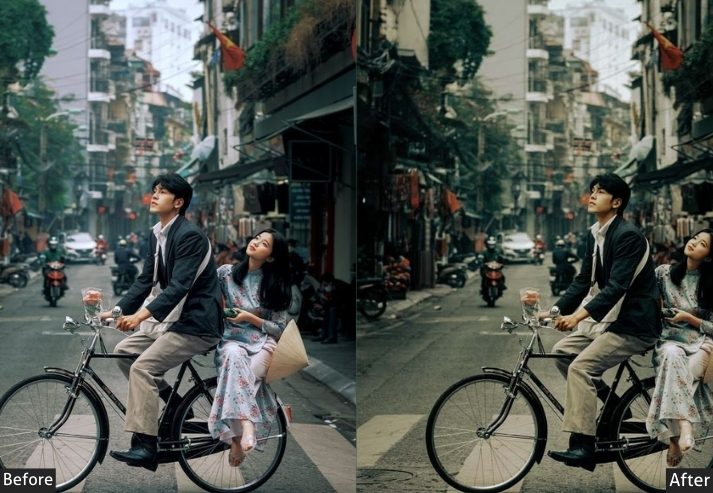
3. Vintage Street Preset
Shot on a modern mirrorless, but want it to feel like it was pulled from a 1970s contact sheet? The Vintage preset does the heavy lifting. It warms the tones, softens the contrast, and adds just enough grain to make the image feel aged without looking like a filter. The result is a timeless quality that doesn’t scream “vintage effect”. It simply feels lived-in.
Light Panel: Exposure +10% | Contrast −15% | Highlights −10%.
Color Panel: Temp +15% (warm vintage tone) | Saturation −15% | Vibrance +5%.
Effects Panel: Vignette +10% | Grain +10%.
Detail Panel: Sharpening +10%.
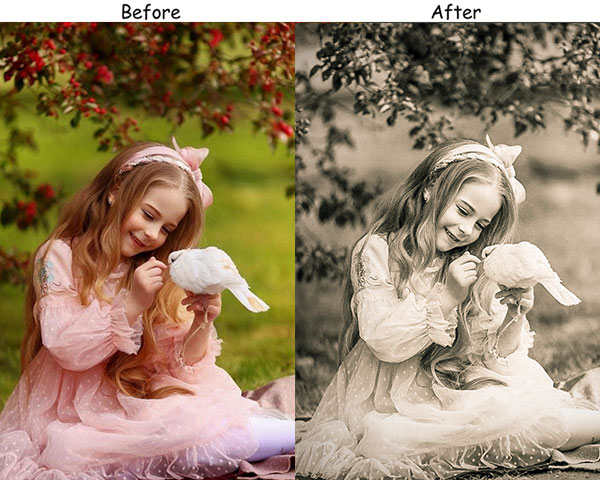
Purpose: timeless, nostalgic look.
Best For: Street portraits, architecture, and everyday scenes.
Usage: a touch of the past to your photos.
Style: Warm, soft, and classic.
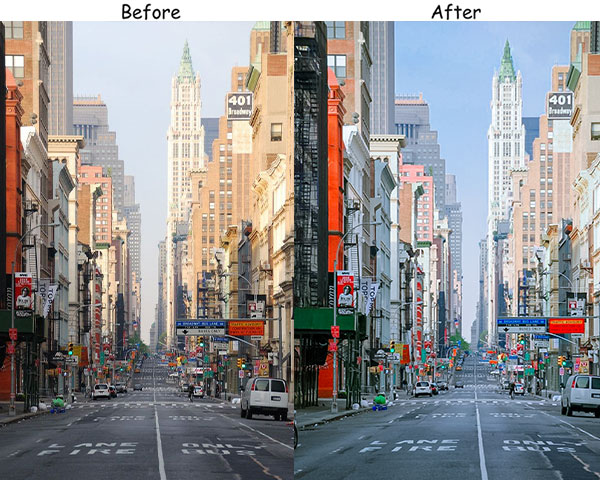
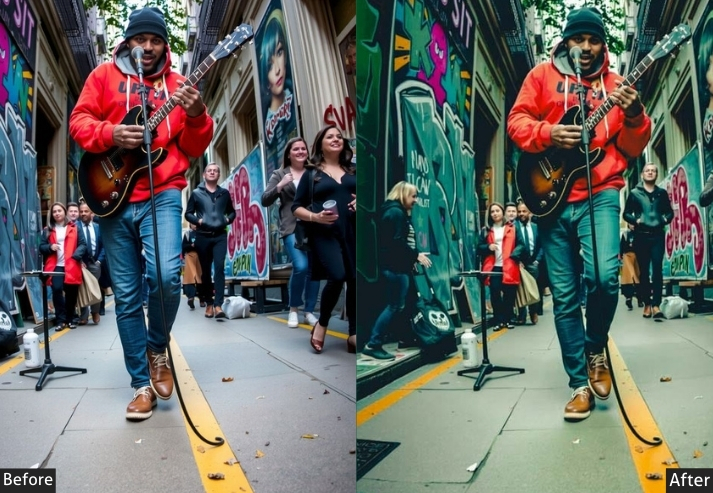
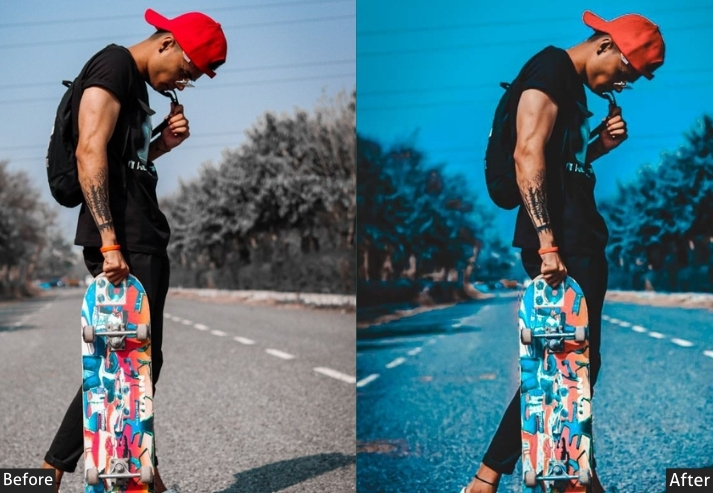
4. High Contrast Street Preset
When subtlety is not the point. High Contrast is for photos that demand attention: street murals, crowded markets, architecture with strong lines, or any scene where color and drama are the main characters. Push this too far on the wrong photo, and it looks harsh. Use it on the right one, and it looks like a magazine cover.
Light Panel: Contrast +30% | Exposure +10% | Shadows −20%.
Color Panel: Vibrance +25% | Saturation +15% | Temp balanced.
Effects Panel: Vignette +10%.
Detail Panel: Sharpening +25%.
Purpose: bold, vibrant street photos.
Best For: Street art, graffiti, and urban landscapes.
Usage: color and contrast.
Style: Bold, vibrant, and dynamic.
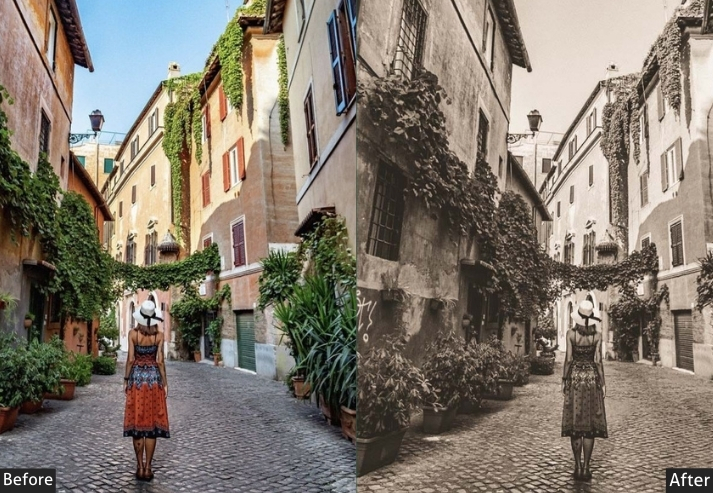
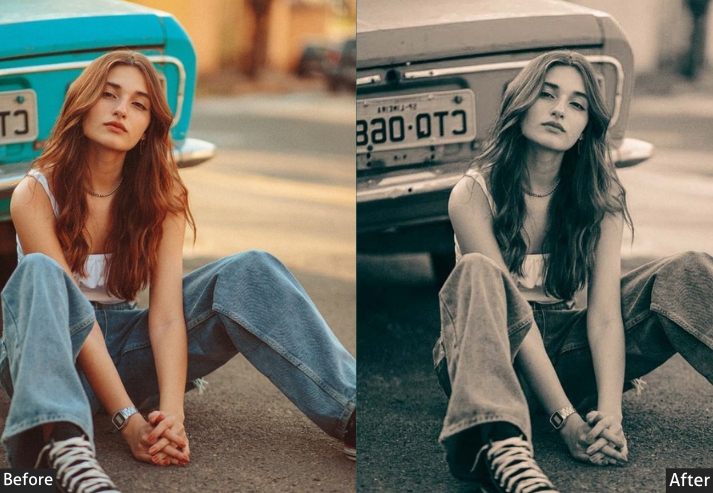
5. Black & White Street Preset
Stripping out color forces the viewer to look at light, shape, and expression, which is often exactly what makes a street photo great. This B&W preset leans into strong contrast, making shadows genuinely black rather than grey, which gives the whole image a sense of weight. The significant sharpening is there for a reason: without color to carry detail, sharpness has to do the work.
Light Panel: Contrast +20% | Exposure (adjust as needed) | Shadows −10%.
Color Panel: Saturation −100% (B&W) | Vibrance +5%.
Effects Panel: Grain +15%.
Detail Panel: Sharpening +30%.
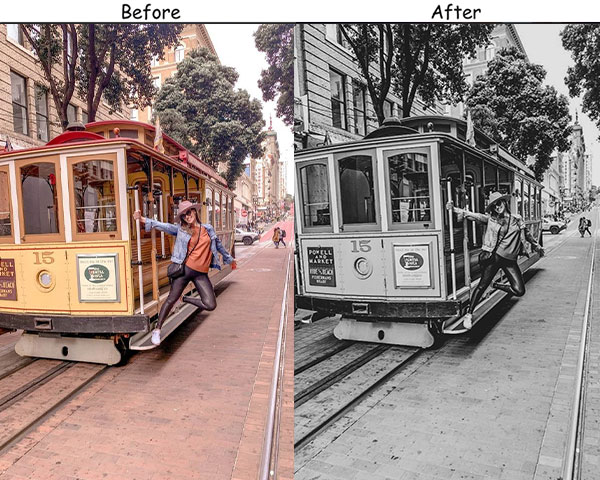

Purpose: timeless, classic black-and-white photos.
Best For: Portraits, architectural shots, and street scenes.
Usage: The composition and emotion of a scene.
Style: Classic, bold, and timeless.
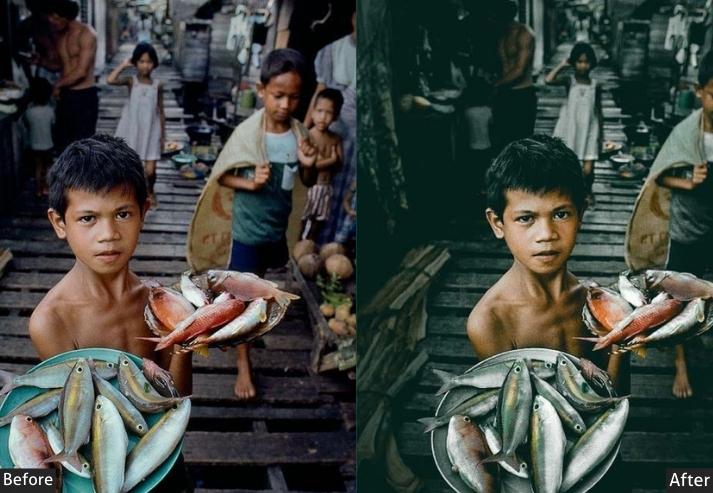
6. Urban Decay Street Preset
Abandoned buildings, rusted shutters, faded paint. There’s a kind of beauty in what cities leave behind. This preset leans into those muted, worn-out tones by desaturating the colors and cooling the temperature just enough to make everything feel slightly forgotten. The strong vignette is deliberate: it frames the decay like a spotlight on a theatre stage.
Light Panel: Exposure −10% | Contrast +15% | Highlights −10%.
Color Panel: Saturation −20% | Temp −5% (cool) | Vibrance +10%.
Effects Panel: Vignette +20%.
Detail Panel: Sharpening +20%.
Purpose: the beauty in urban decay and abandonment.
Best For: Old buildings, graffiti, and worn-out urban scenes.
Usage: the gritty, textured elements of decay.
Style: Gritty, muted, and textured.
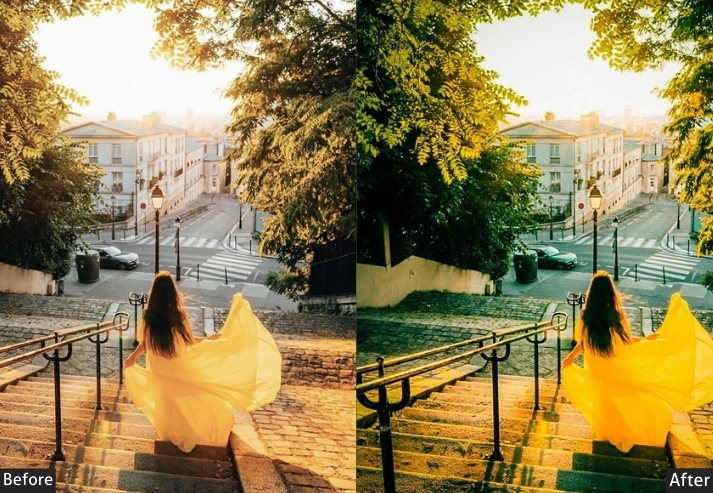
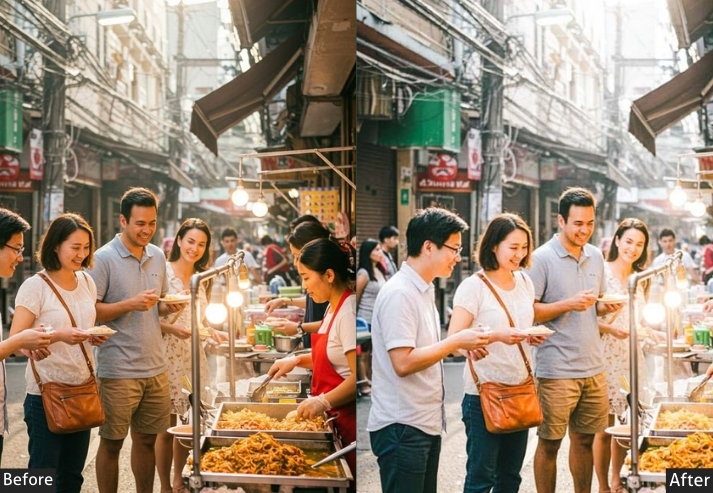
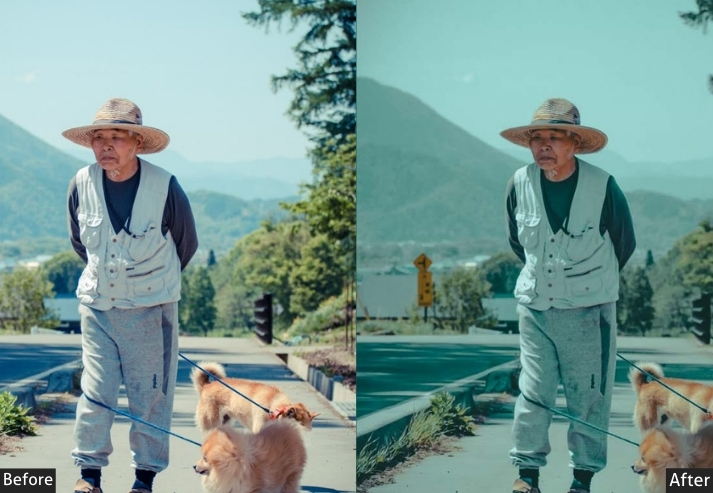
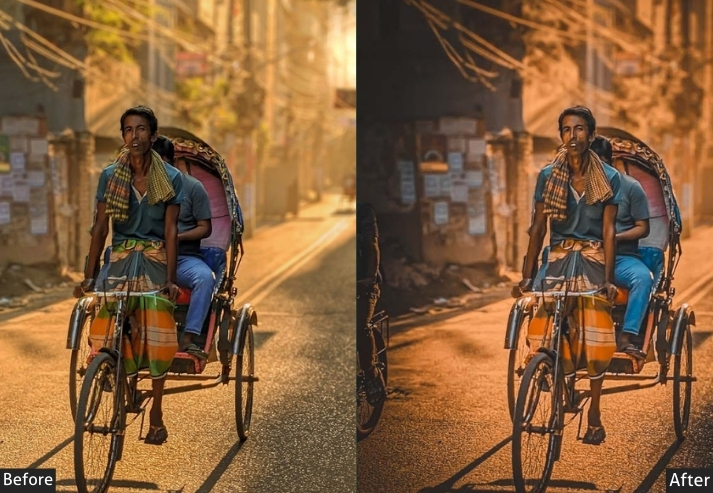
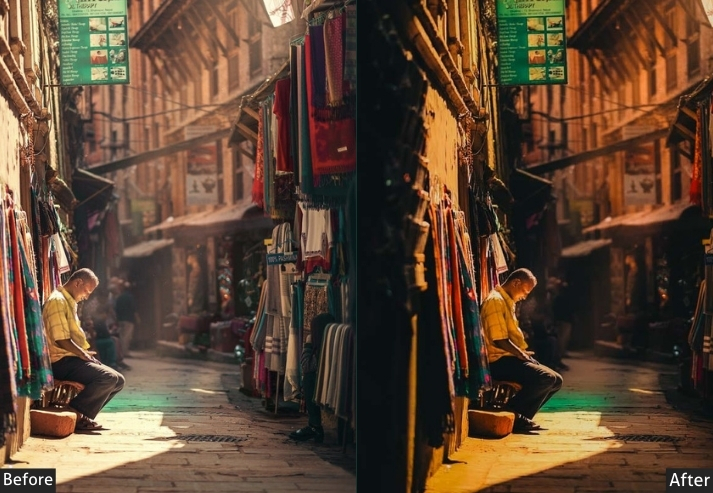
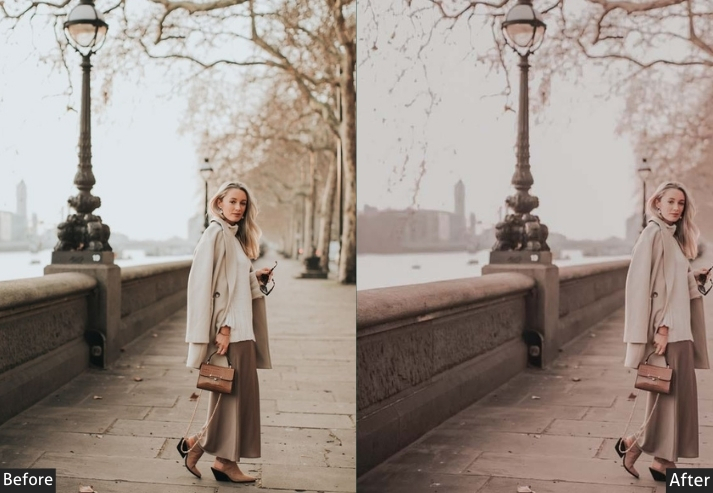
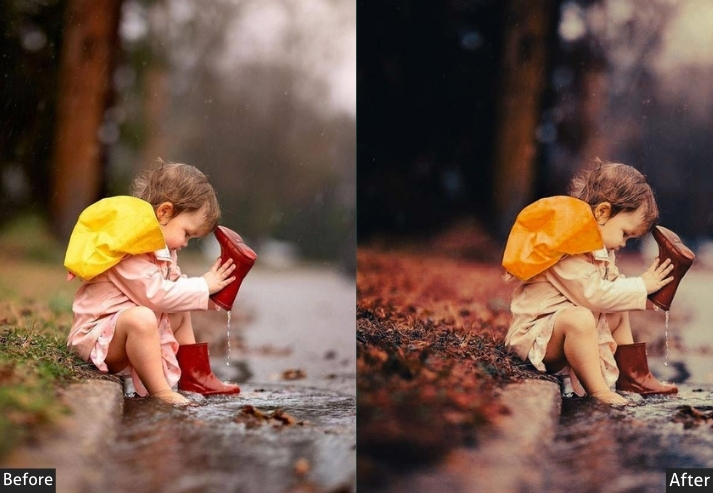
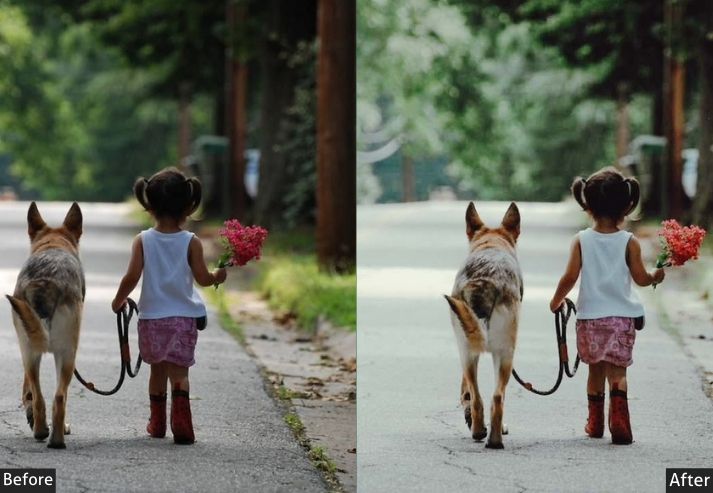
7. Warm Street Preset
Golden hour light is something every street photographer chases. This preset captures that warmth even in shots that missed the timing. It gently lifts the shadows, adds a golden base tone, and softens the whole image, making cityscapes feel welcoming rather than harsh. Works equally well on people shots. skin tones look natural and flattering.
Light Panel: Exposure +15% | Contrast −10% | Shadows +15%.
Color Panel: Temp +20% (warm golden tone) | Vibrance +10% | Saturation −5%.
Effects Panel: Vignette +10%.
Detail Panel: Sharpening +15%.
Purpose: warm, inviting street photos.
Best For: Golden hour shots, outdoor portraits, and urban landscapes.
Usage: the warmth and coziness of a scene.
Style: Warm, soft, and inviting.
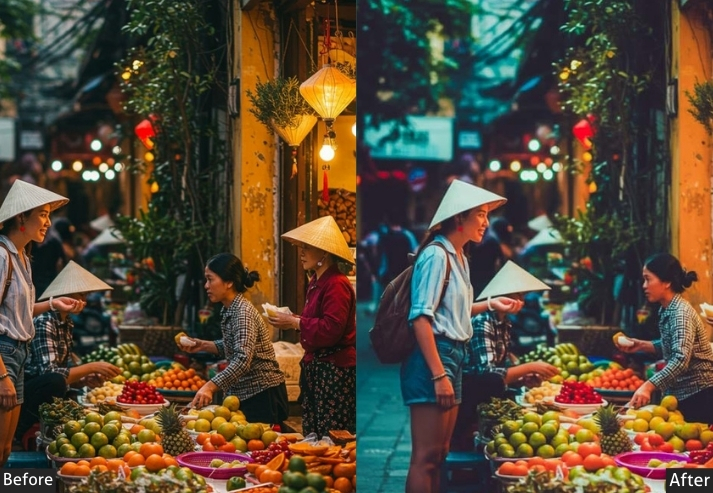
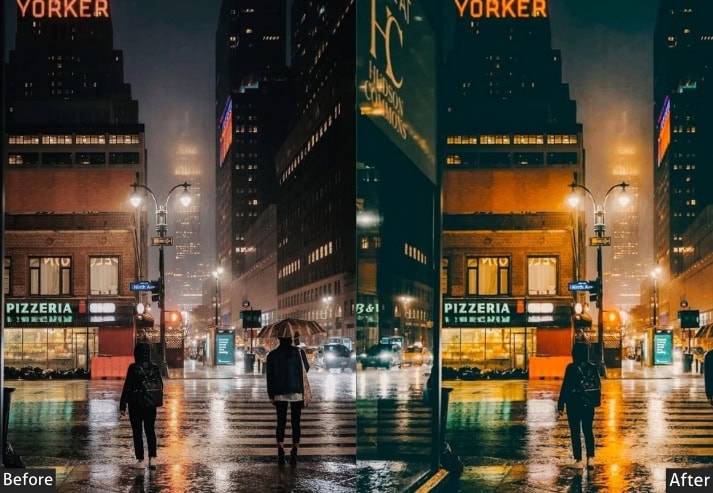
8. Neon Night Street Preset
City centers at night are a present designer’s dream. The problem is getting Lightroom to match what your eyes saw when the neon signs were actually glowing. This preset cranks up vibrance specifically to supercharge those electric blues, purples, and reds while keeping the blacks genuinely dark. The result looks less like a phone filter and more like a still from a cyberpunk film.
Light Panel: Contrast +20% | Exposure +10% | Highlights −10%.
Color Panel: Vibrance +25% | Saturation +15% | Temp −10% (cool).
Effects Panel: Vignette +10%.
Detail Panel: Sharpening +25%.


Purpose: vibrant, neon-lit night photos.
Best For: Nighttime photography, urban scenes with neon lights.
Usage: The electric energy of the city at night.
Style: Vibrant, electric, and sharp.
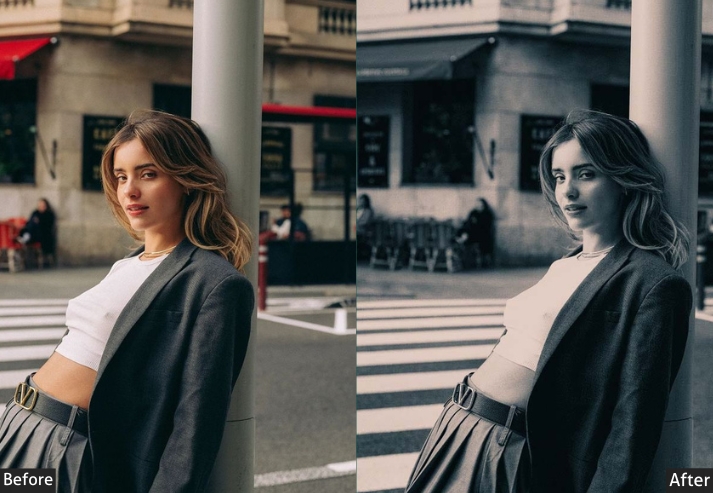
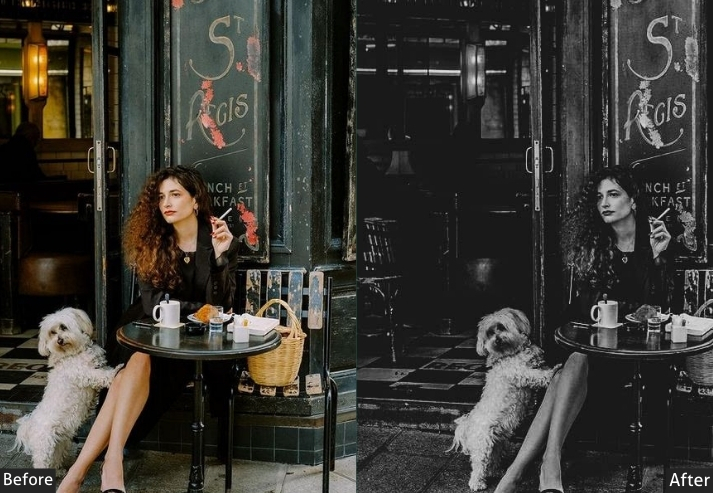
9. Film Noir/Cinematic Street Preset
Black-and-white with attitude. Where the standard B&W preset is documentary, Film Noir is theatrical. Deeper shadows, stronger grain, and a dramatic vignette that feels like a 1940s detective novel. This is the preset for a solitary figure under a street lamp, a rain-slicked alley, or an empty bar at 2 am. If the image has a story, this preset tells it in the darkest possible way.
Light Panel: Exposure −10% | Contrast +25% | Shadows −20%.
Color Panel: Saturation −100% (B&W) | Vibrance +5%.
Effects Panel: Grain +20%.
Detail Panel: Sharpening +30%.

Purpose: moody, dramatic black-and-white photos.
Best For: Portraits, urban night scenes, and architectural shots.
Usage: The mystery and drama of classic film noir.
Style: Dark, dramatic, and cinematic.
10. Vivid Street Preset
Some scenes are already full of color: busy markets, festival streets, walls covered in flags. The Vivid preset doesn’t try to reinvent those scenes. It just turns the dial up to where your brain already wants the colors to be. Apply with care on portraits (it can be too much on skin tones), but on cityscapes, it’s a reliable crowd-pleaser.
Light Panel: Exposure +15% | Contrast +20% | Shadows +10%.
Color Panel: Vibrance +30% | Saturation +20% | Temp +10% (warm).
Effects Panel: Vignette +10%.
Detail Panel: Sharpening +20%.

Purpose: bright, vibrant street photos.
Best For: Markets, festivals, and urban landscapes with lots of color.
Usage: All types of Street photos.
Style: Bright, colorful, and lively.
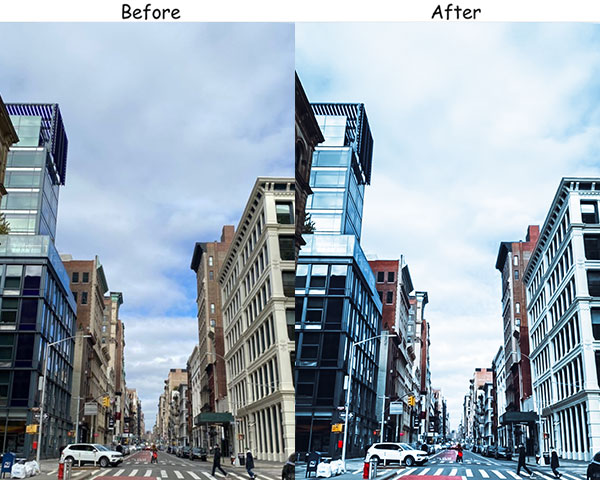
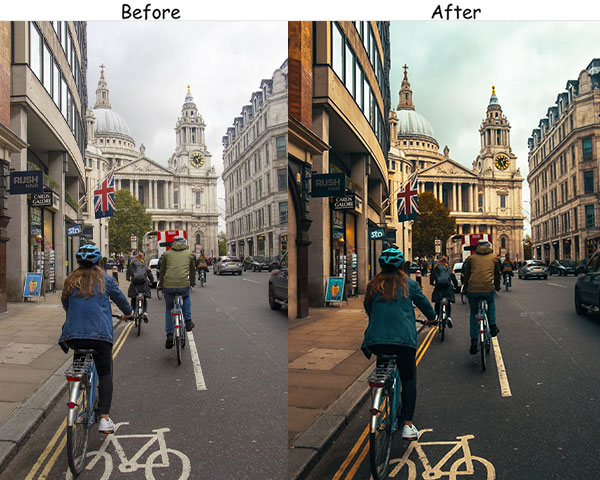
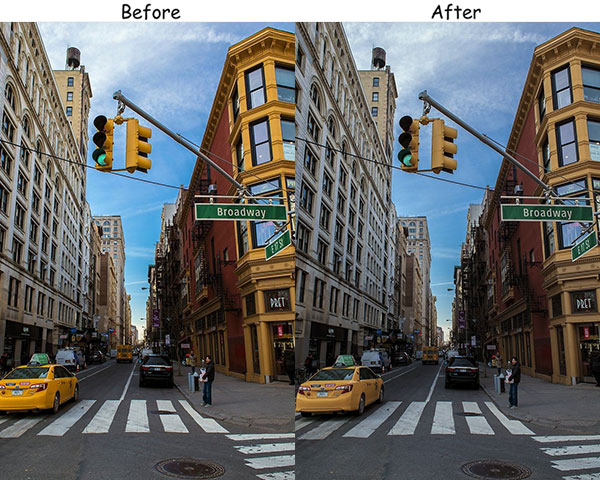
11. Landscape Street Presets
Not all street photography is close and personal. Sometimes you’re on a rooftop or a bridge, looking down at the grid of the city, trying to capture something vast. The Landscape Street preset is built for those wider, more expansive frames. It boosts vibrance, making the sky and buildings feel alive, and a moderate vignette keeps wide shots from feeling formless.
Light Panel: Exposure +20% | Contrast +15% | Highlights −10%.
Color Panel: Temp +10% (warm sunlight) | Vibrance +20% | Saturation −5%.
Effects Panel: Vignette +15%.
Detail Panel: Sharpening +25%.
Purpose: the grandeur of urban landscapes with vivid clarity.
Best For: City skylines, wide-angle street shots, and urban parks.
Style: Bold, vibrant, and expansive.
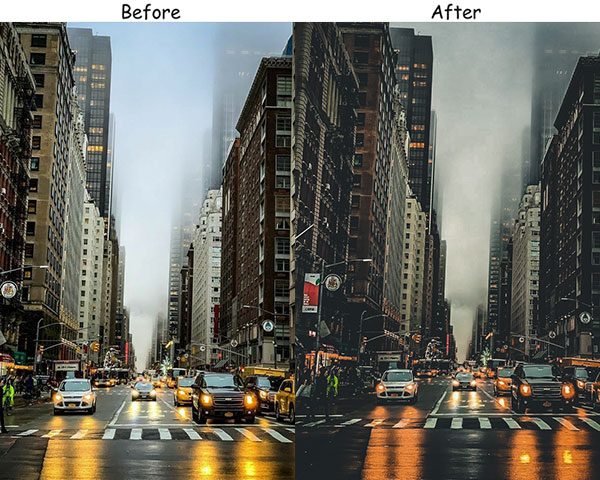
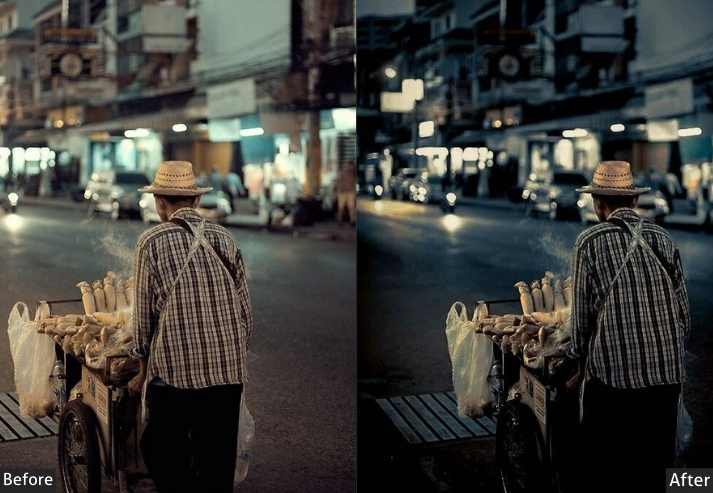
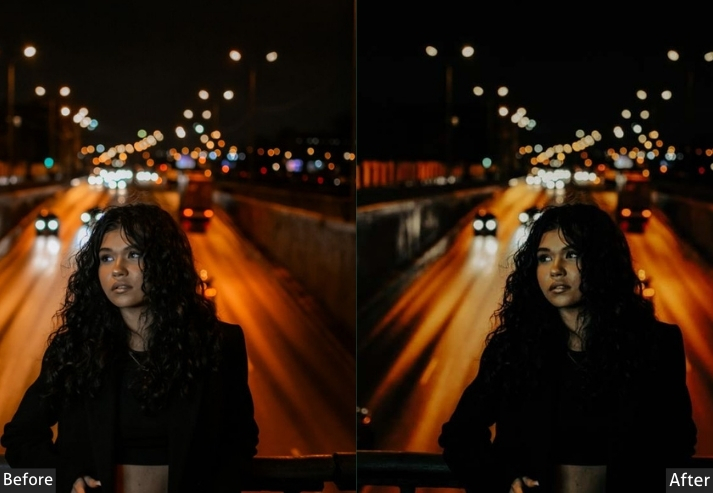
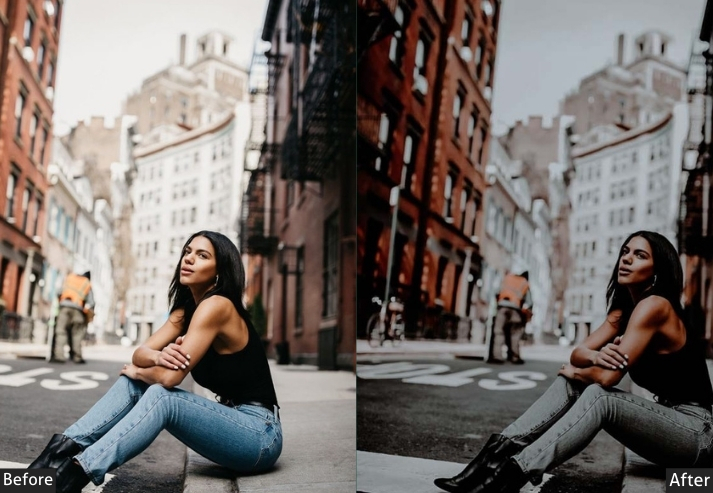
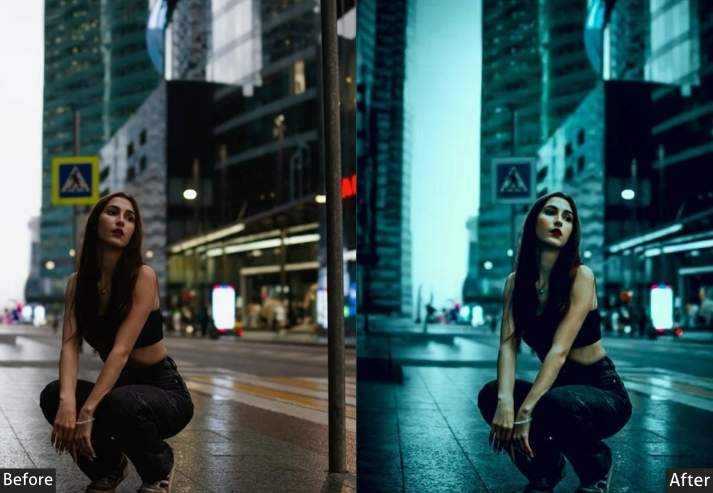
12. Dark/Black/Night Street Presets
This preset is for photographers who aren’t afraid of the dark. Where the Moody preset softens, this one commits. Exposure drops significantly, shadows go deep, and the strong vignette creates a frame within a frame that pulls your eye inward. Use it in night scenes with minimal ambient light, or in daytime shots where you want to deliberately create an after-dark feeling.
Light Panel: Exposure −15% | Contrast +25% | Highlights −20%.
Color Panel: Temp −10% (cool) | Saturation −15% | Vibrance +10%.
Effects Panel: Vignette +25%.
Detail Panel: Sharpening +20%.
Purpose: drama and depth to urban street scenes.
Best For: Night photography, urban exploration, and moody portraits.
Style: Dark, intense, and mysterious.
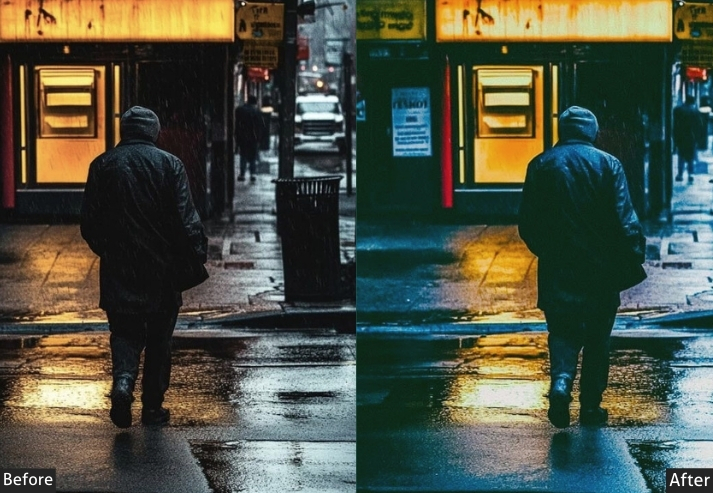
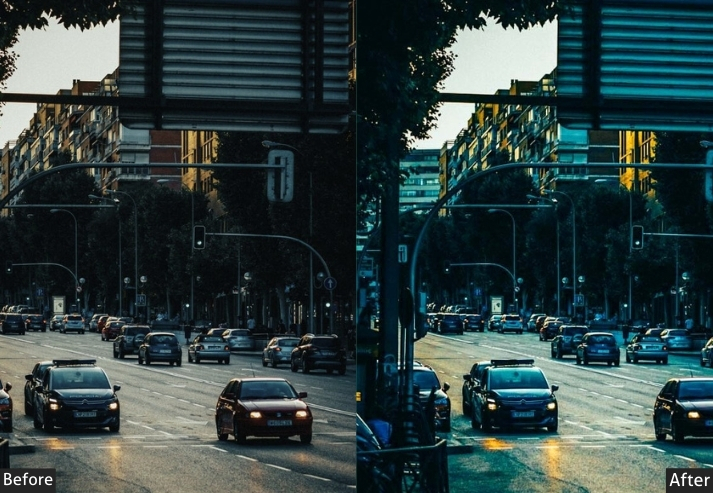
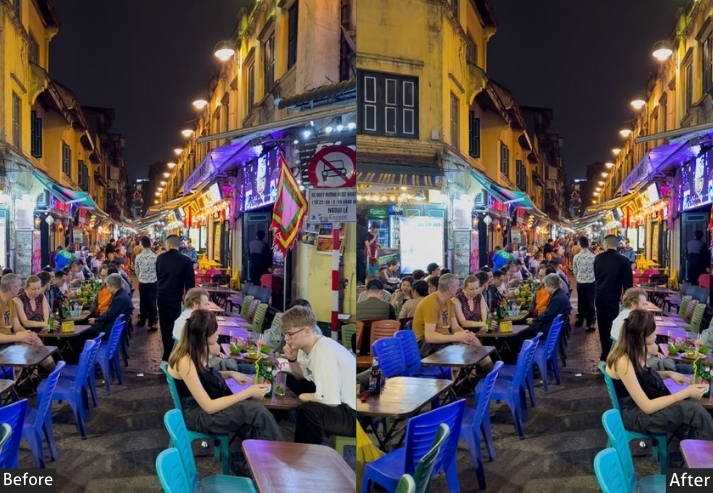
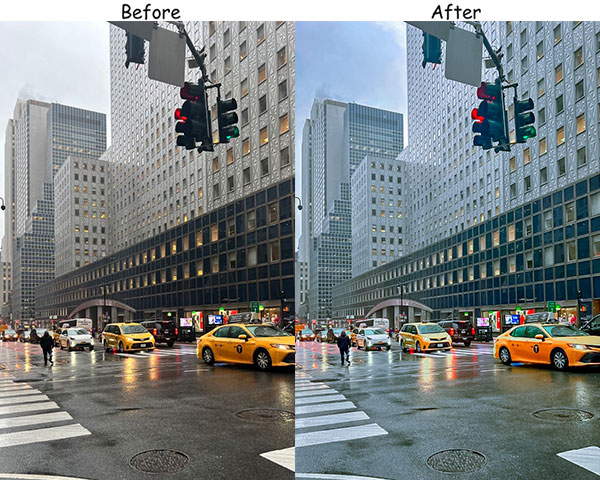
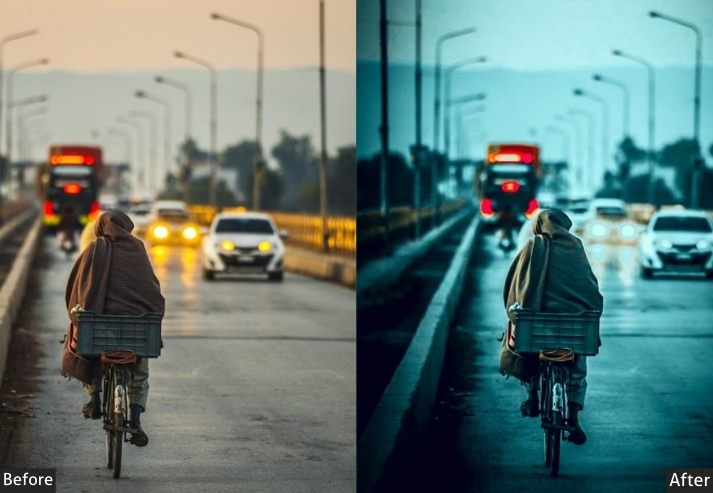
13. Night Street Presets
Different from the Dark preset. This one is for the city that’s actually lit up. Think glowing shopfronts, headlight trails, illuminated windows, and the warm/cool contrast you get from mixed street lighting. It balances the vibrancy needed to represent those lights without overexposing them, and the slight warming plays nicely against the natural blue of the night sky.
Light Panel: Contrast +20% | Exposure (adjust for balance) | Highlights −15%.
Color Panel: Temp +5% (warm glow) | Vibrance +25% | Saturation −10%.
Effects Panel: Vignette +10%.
Detail Panel: Sharpening +25%.

Purpose: the vibrant, glowing energy of the city at night.
Best For: Neon lights, bustling streets, and night markets.
Style: Vibrant, glowing, and electric.
14. Desaturated Street Presets
Less is sometimes more. This preset is for photographers who think in terms of form and light rather than color, where a strong composition is stronger without the distraction of reds and greens competing for attention. The desaturation here is heavy but not full black-and-white, leaving just enough color to remind you the world is real.
Light Panel: Exposure −5% | Contrast −10% | Highlights −10%.
Color Panel: Saturation −30% | Vibrance +5% | Temp −5% (cool).
Effects Panel: Vignette +10%.
Detail Panel: Sharpening +15%.
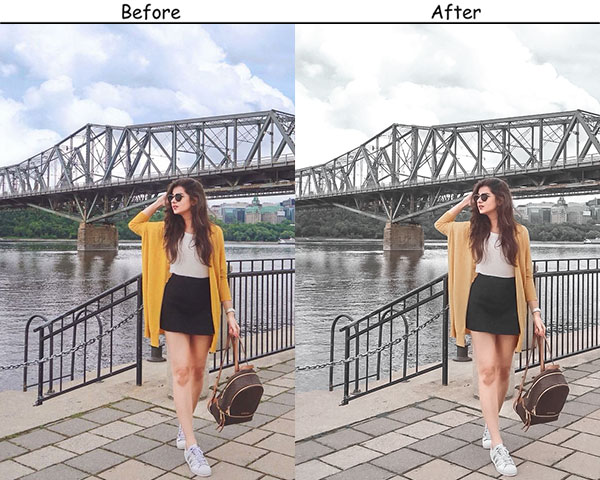

Purpose: clean, understated images that focus on form and composition.
Best For: Architecture, minimalist street scenes, and portraits.
Style: Simple, clean, and powerful.
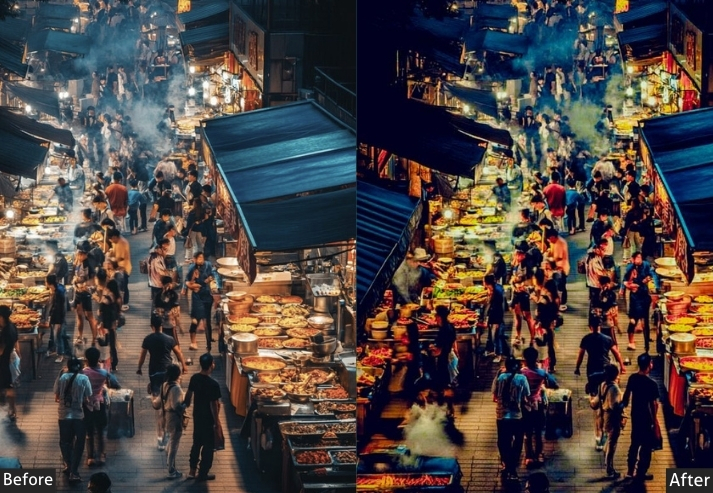
15. Saturated Street Presets
If your city has color, this preset celebrates it. Markets in India, street food stalls in Bangkok, murals in Havana. The Saturated preset was made for scenes where the color itself is the subject. It’s unapologetically vivid, and that’s the whole point. Apply it to grey, overcast scenes, and it’ll feel excessive; apply it to the right scene, and it looks like a painting.
Light Panel: Exposure +10% | Contrast +20% | Shadows +10%.
Color Panel: Vibrance +30% | Saturation +20% | Temp +10% (warm).
Effects Panel: Vignette +10%.
Detail Panel: Sharpening +20%.
Purpose: vibrant, dynamic images with bold colors.
Best For: Street art, markets, festivals, and colorful urban scenes.
Style: Bold, lively, and artistic.
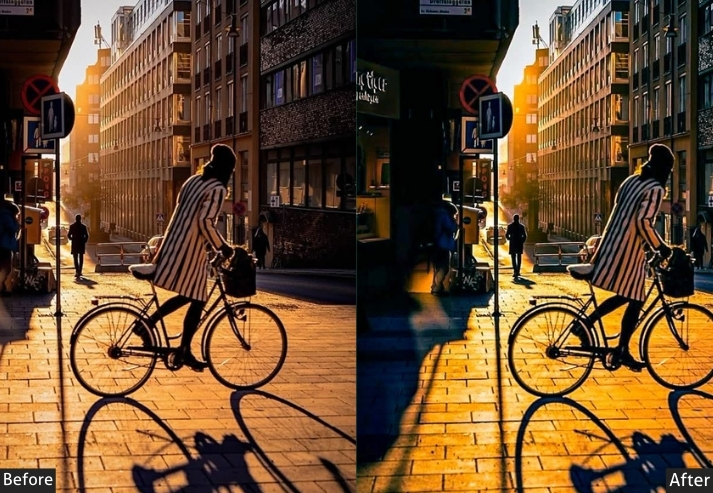
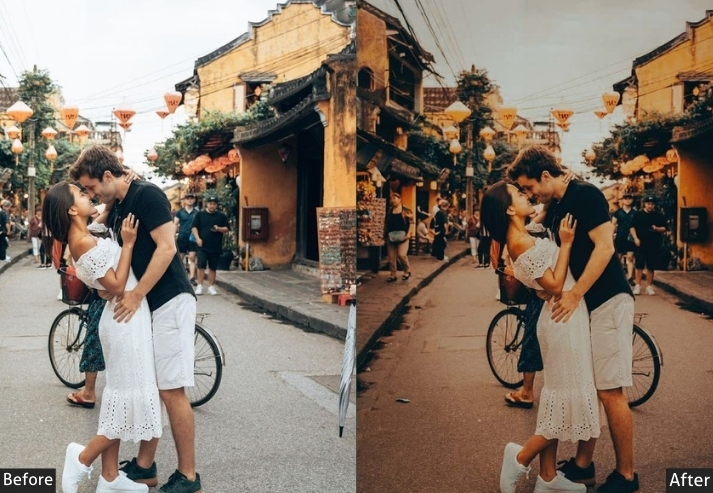
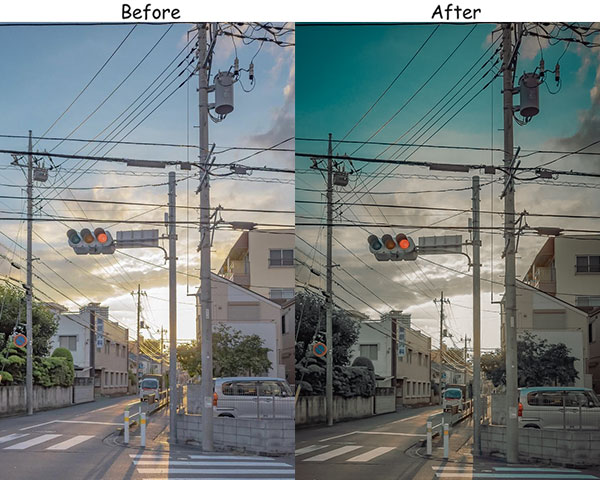
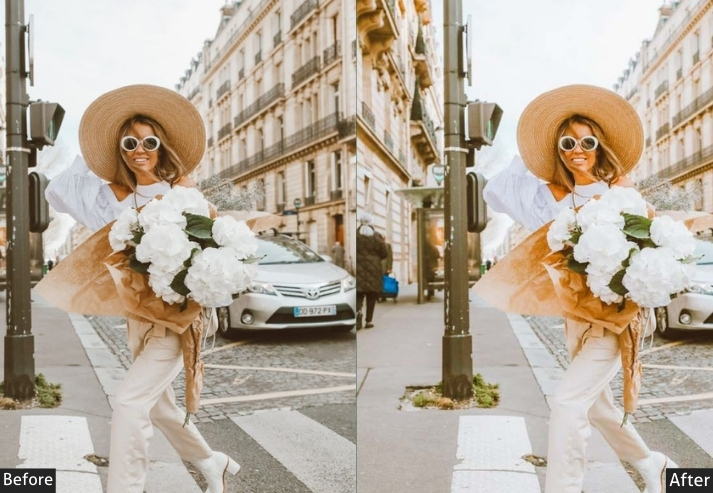
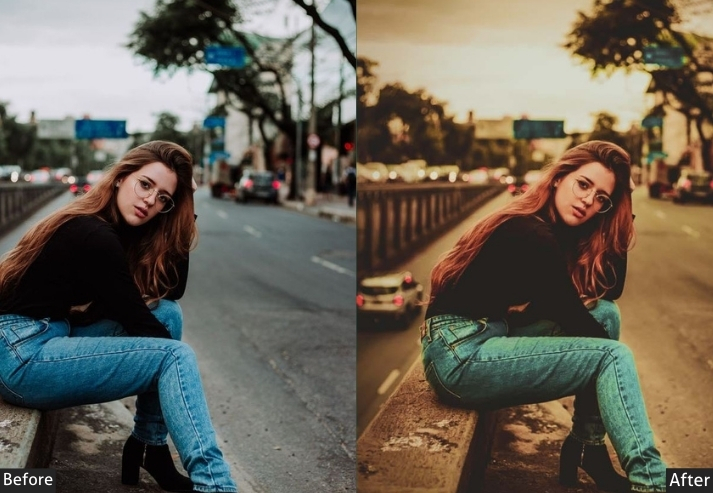
16. Vibrant Warm Street Presets
Think golden hour but turned up. This is for those late-afternoon shots where the sun hits the buildings at an angle, and everything glows. The warm temperature base is aggressive (+25), so it works best on scenes with genuine warmth to amplify. It won’t manufacture sunshine that wasn’t there, but it will make the sunshine that was there feel extraordinary.
Light Panel: Exposure +15% | Contrast −10% | Shadows +20%.
Color Panel: Temp +25% (golden glow) | Vibrance +20% | Saturation −5%.
Effects Panel: Vignette +10%.
Detail Panel: Sharpening +15%.


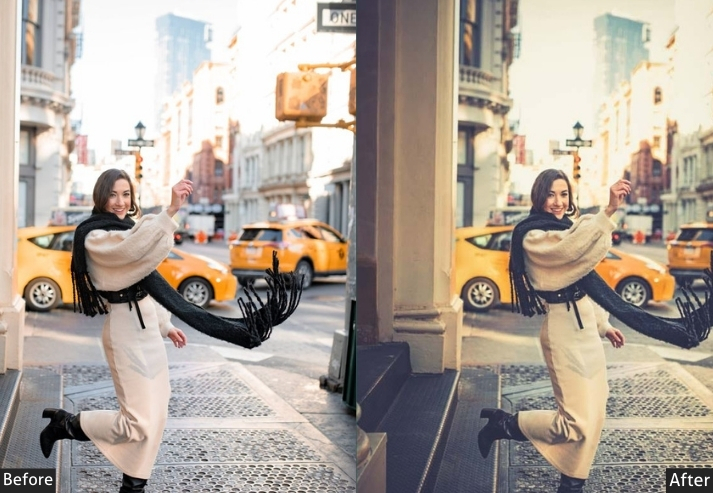
Purpose: warm, inviting images with a golden glow.
Best For: Golden hour portraits, urban landscapes, and cozy street scenes.
Style: Warm, vibrant, and inviting.
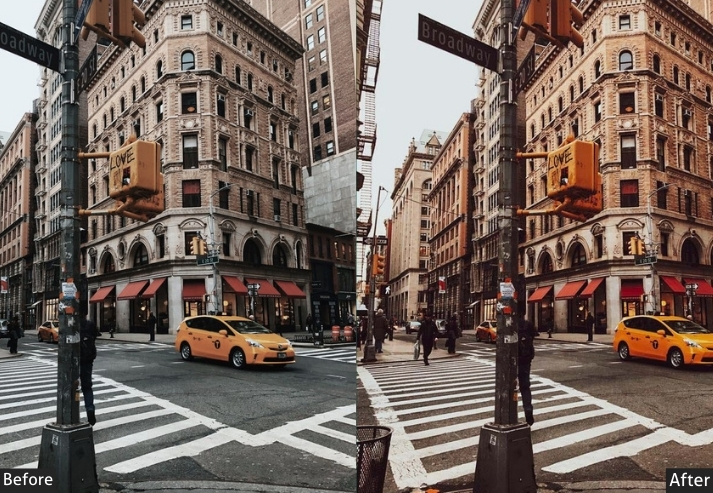
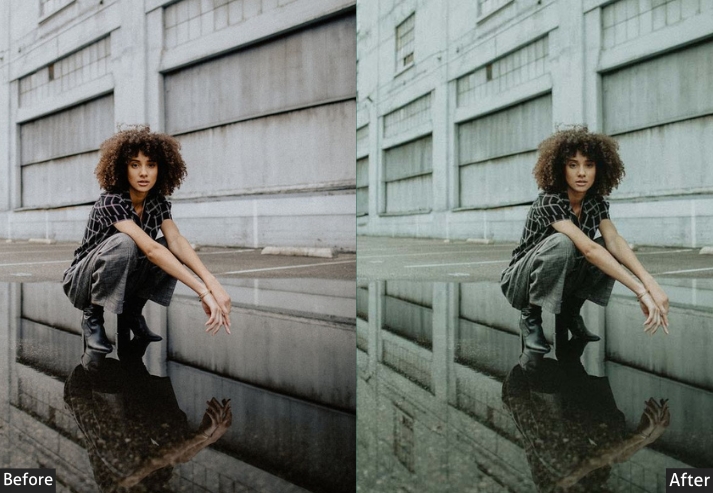
17. Cold Street Presets
Winter mornings. Overcast skies. Empty streets before the city wakes up. The Cold preset is for scenes that are already cool in-camera but need that coolness pushed further to feel intentional. At −20 temperature, it’s a significant shift, but the increased vibrance keeps the image from going flat. The blues stay vivid rather than grey.
Light Panel: Exposure −5% | Contrast +15% | Highlights −10%.
Color Panel: Temp −20% (cool) | Vibrance +10% | Saturation −10%.
Effects Panel: Vignette +15%.
Detail Panel: Sharpening +20%.
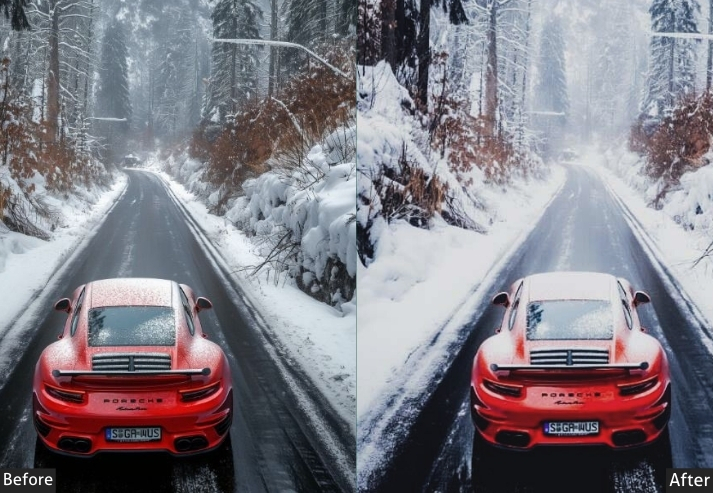

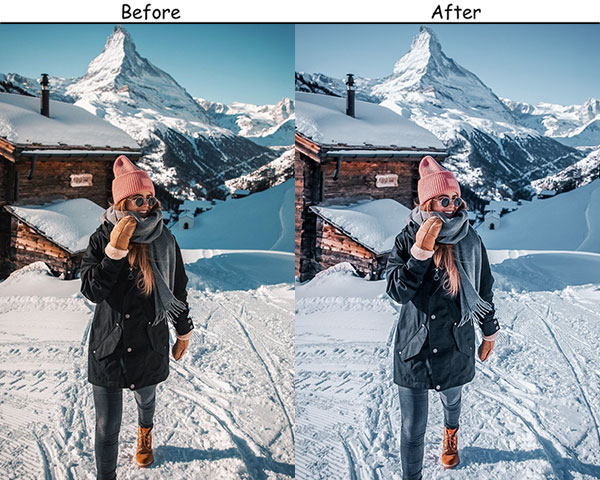
Purpose: the crisp, cool tones of urban scenes.
Best For: Early morning shots, winter scenes, and blue-hour photography.
Style: Cool, crisp, and refreshing.
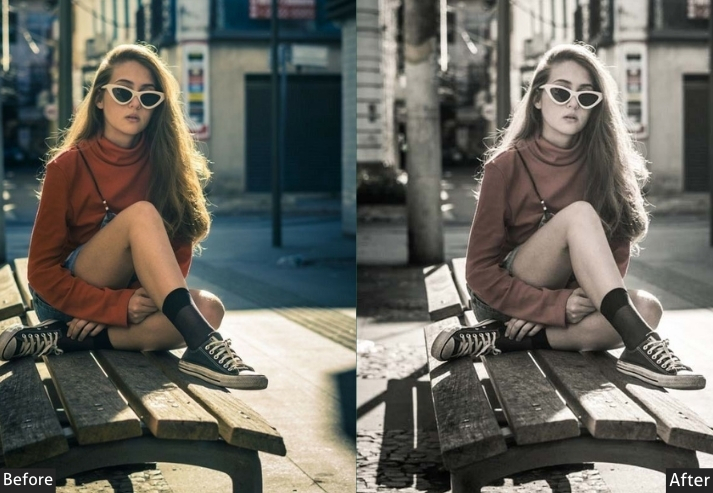
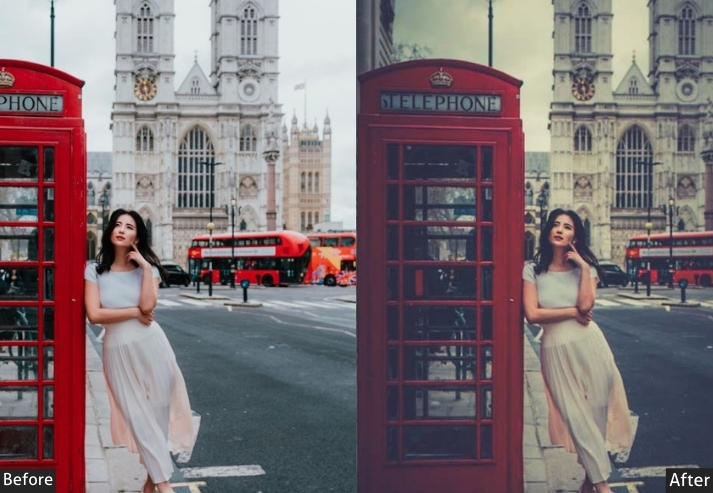
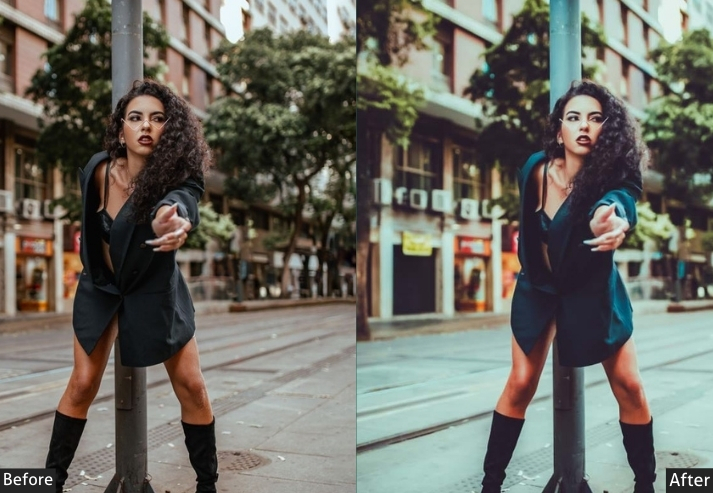
18. Retro Street Presets
There’s a specific quality to photos taken in the 1970s and 80s. colors that have faded toward yellow-orange, a grain that feels organic rather than digital, and a contrast that’s soft enough to look like the emulsion was always slightly fogged. The Retro preset recreates that without going fully vintage. It’s subtler than the Vintage preset, more Instagram nostalgia than actual archive photograph.
Light Panel: Exposure +5% | Contrast −15% | Highlights −10%.
Color Panel: Temp +15% (retro warm) | Saturation −20% | Vibrance +10%.
Effects Panel: Grain +15% | Vignette +10%.
Detail Panel: Sharpening +10%.
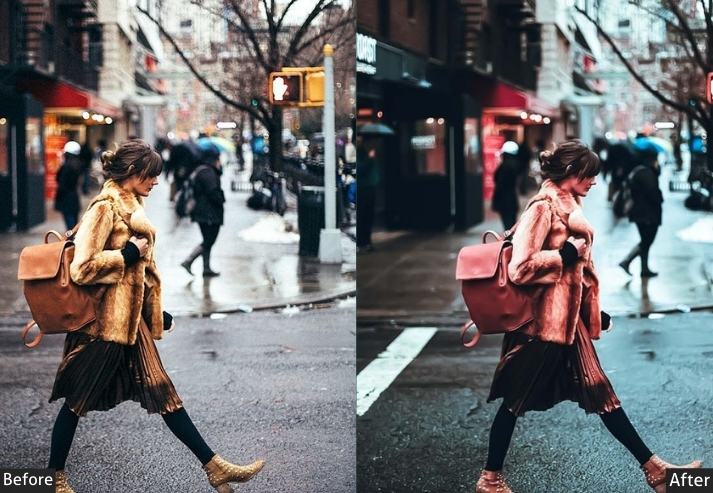

Purpose: nostalgic, vintage-style images.
Best For: Portraits, street scenes, and retro-themed photography.
Style: Warm, faded, and nostalgic.
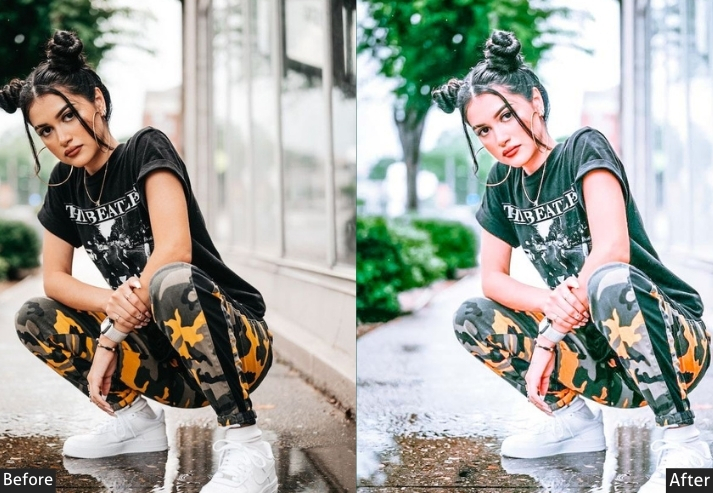
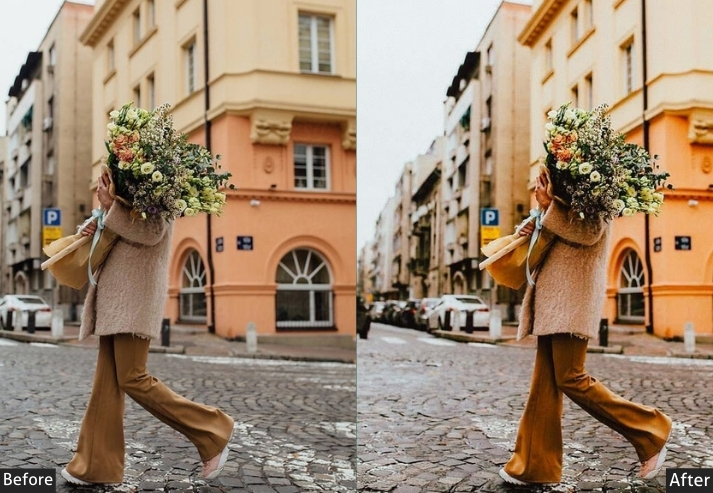
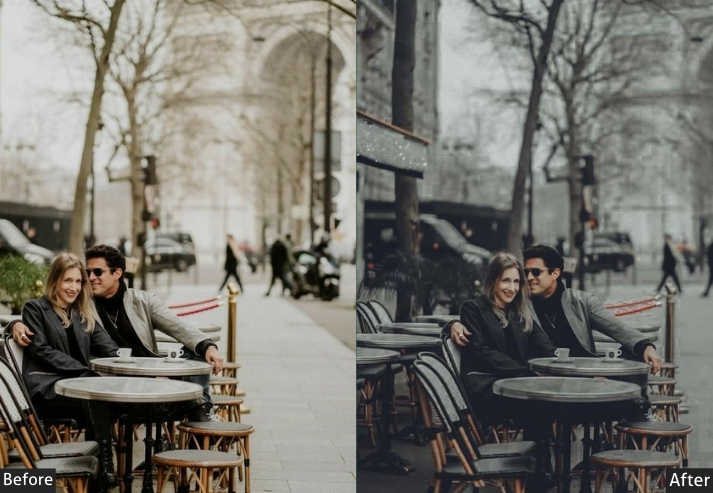
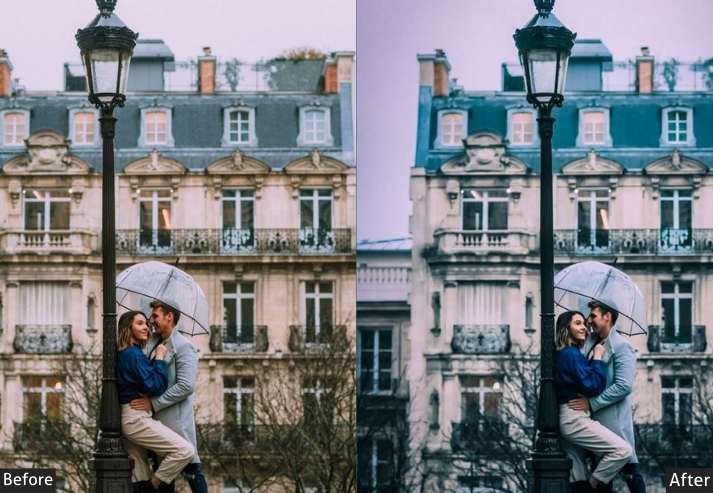
19. Pastel Street Presets
Not every city photo needs to feel tough. Pastel is for the quieter moments. a café terrace in soft morning light, a flower stall on a cobbled street, someone reading on a bench. The heavy shadow lifting (+20) creates that airy feeling where nothing feels oppressive, and the partial desaturation pushes all the colors toward their softer, milkier versions without making them disappear.
Light Panel: Exposure +15% | Contrast −10% | Shadows +20%.
Color Panel: Saturation −20% | Vibrance +10% | Temp +5% (warm).
Effects Panel: Vignette +10%.
Detail Panel: Sharpening +10%.
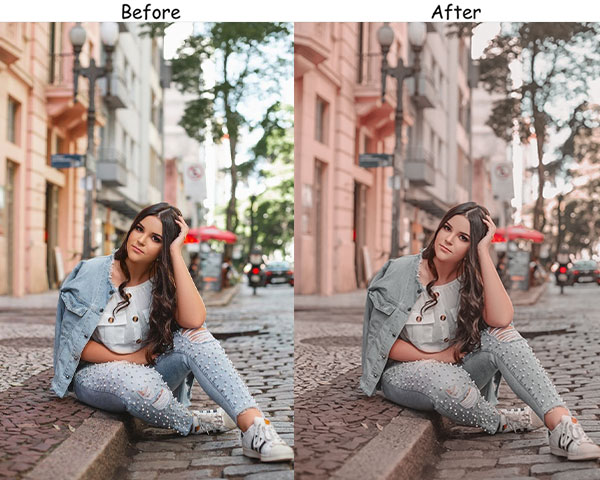
Purpose: light, airy street photos with soft pastel tones.
Best For: Quiet urban scenes, soft portraits, and dreamy street shots.
Style: Soft, muted, and whimsical.
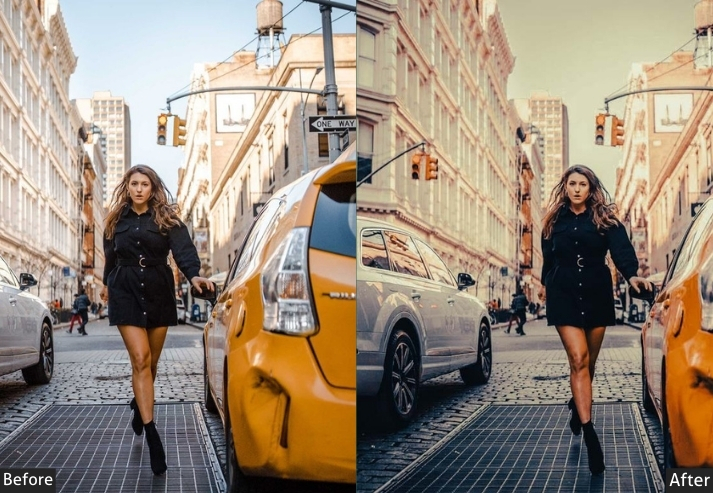
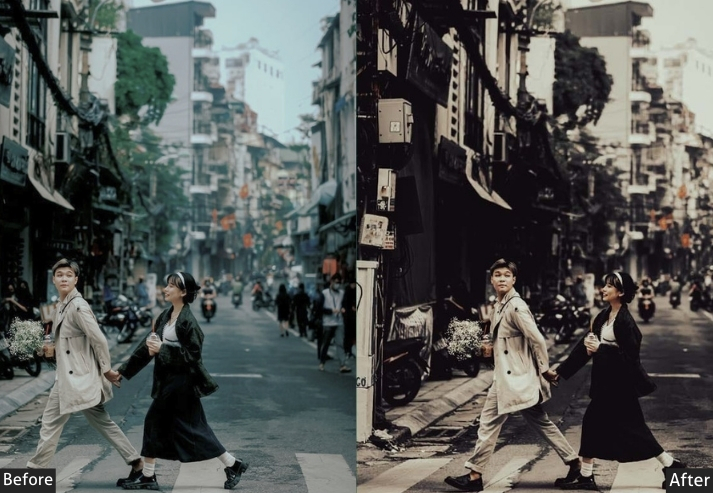
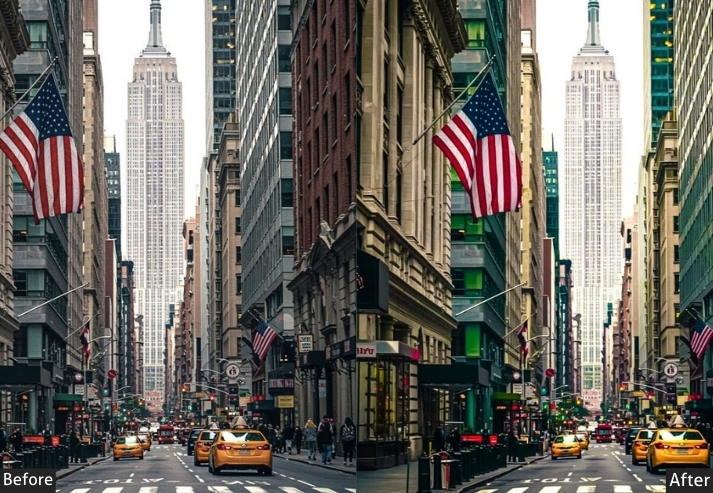
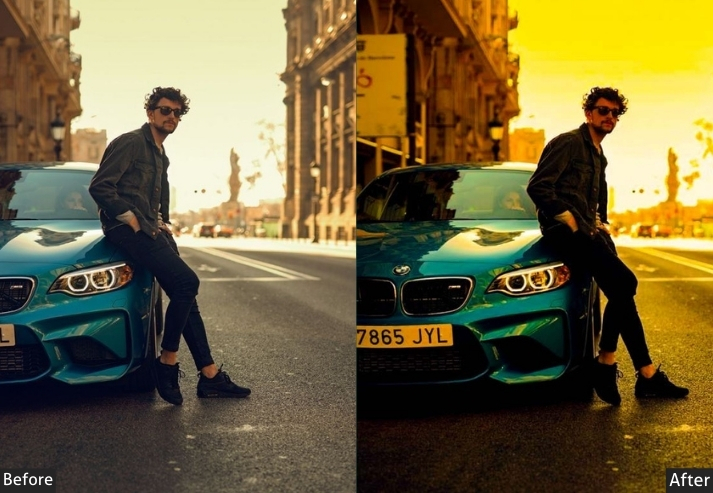
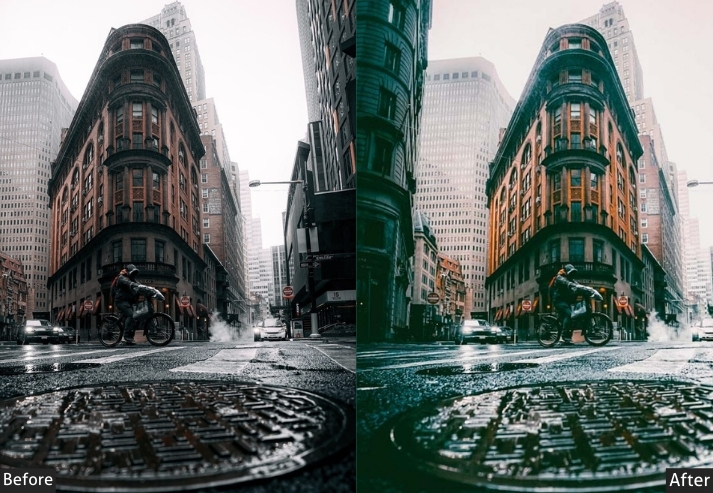
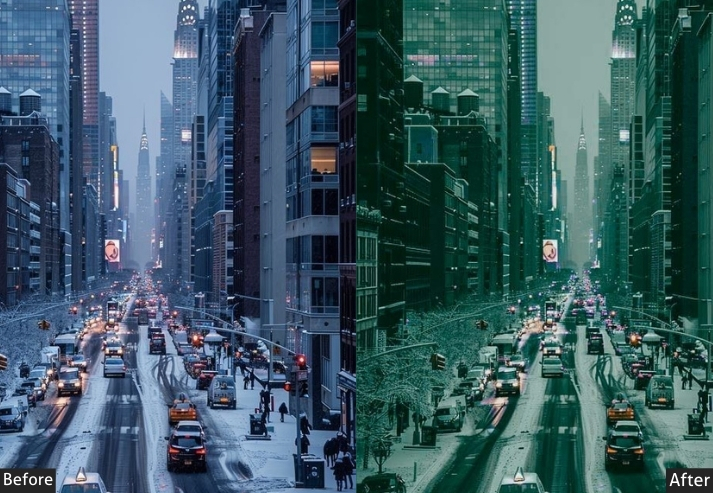
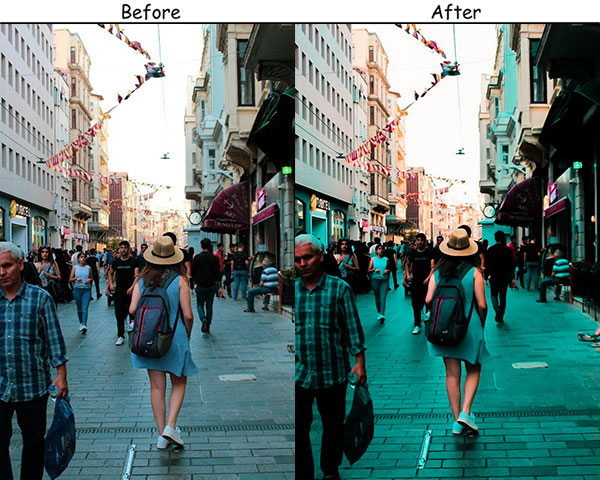
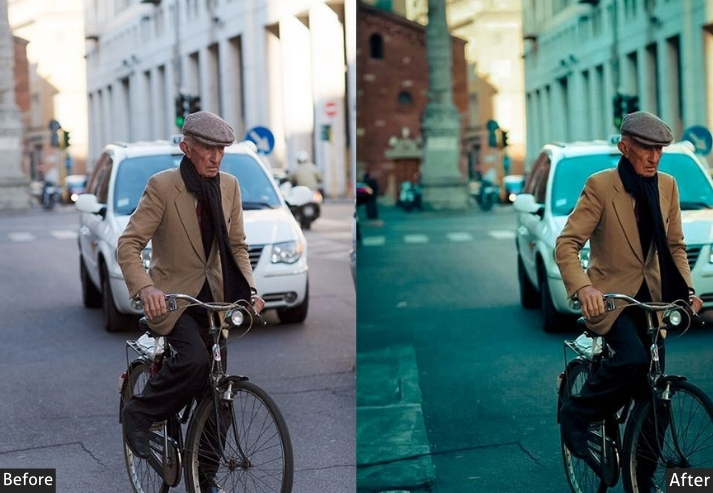
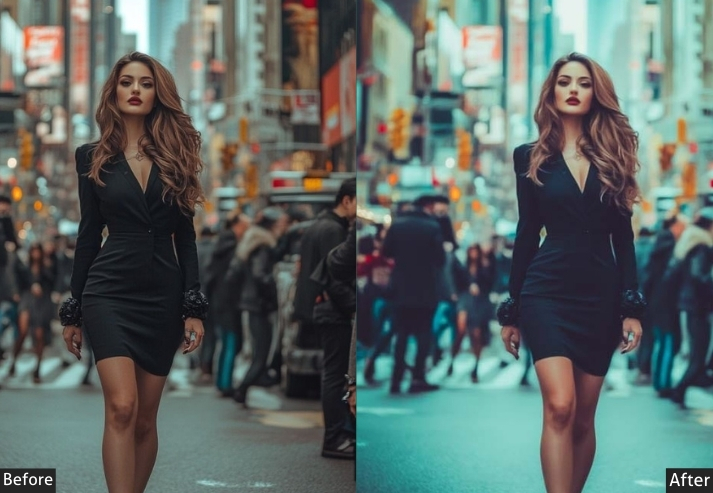
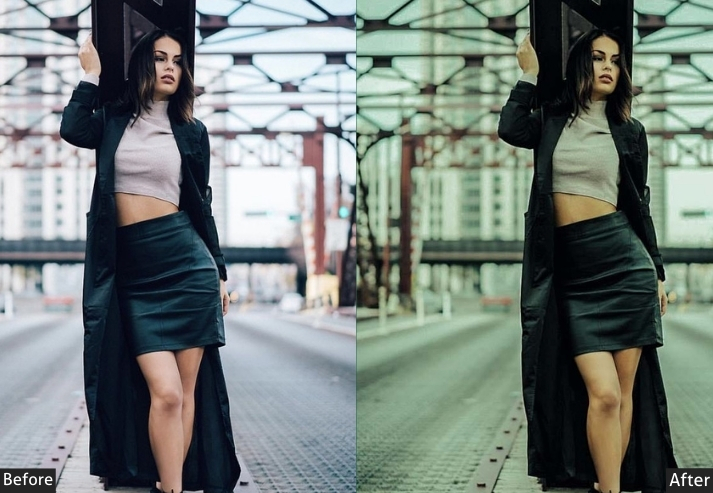
20. Orange & Teal Street Presets
The Orange & Teal grade is arguably the most recognizable color treatment in modern photography. You’ve seen it in every Hollywood blockbuster for a reason. The warm orange skin tones against cool teal shadows create a contrast that feels simultaneously natural and cinematic. On street photography, it works best on scenes that already have a mix of warm and cool elements: a warm-lit street against a cool night sky, or a golden shopfront against a blue-tinted alleyway.
Light Panel: Contrast +25% | Exposure +10% | Highlights −10%.
Color Panel: Blue → Teal +25% | Orange +20% | Vibrance +30%.
Effects Panel: Vignette +10%.
Detail Panel: Sharpening +25%.
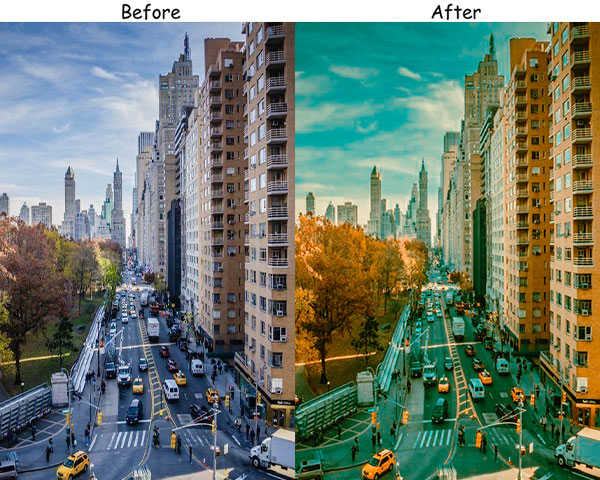
Purpose: striking, high-contrast street photos with a cinematic look.
Best For: Urban landscapes, portraits, and dynamic street scenes.
Style: Bold, vibrant, and cinematic.
Colorful Street Presets
How to Install Street Lightroom Presets?
Installing Lightroom presets takes less than two minutes. Here’s how to do it on both mobile and desktop.
Lightroom Mobile (iPhone & Android) – DNG Method
- Download the .DNG file from the link above and save it to your phone’s camera roll or Files app.
- Open Adobe Lightroom Mobile and tap the + icon to add a photo. Import the DNG file from your camera roll.
- Open the imported DNG file. Tap the three dots (⋯) in the top right and select “Copy Settings.”
- Go back to your library, select the photo you want to edit, open it, tap the three dots again, and select “Paste Settings.”
- The preset is now applied. Adjust Exposure if needed for your specific photo.
Lightroom Classic / Lightroom CC (Desktop) – XMP Method
- Download the .XMP file and unzip it if needed.
- In Lightroom Classic, go to the Develop module and find the Presets panel on the left side.
- Click the + icon next to “Presets” and choose “Import Presets.”
- Navigate to the downloaded XMP file and click Import.
- The preset will appear in your Presets panel. Click it to apply.
More Details: Lightroom Installing, Import & Export Settings.
💡 Pro Tip: Always shoot in RAW format when possible. RAW files retain far more detail and dynamic range, giving presets more to work with and consistently producing better results than applying presets to JPEGs.
Few Words
You now have popular preset styles covering everything from neon-lit nights to soft pastel mornings. The best way to find what works for you is to pick 3-4 that match your usual shooting conditions and test them on your last 10 photos. You’ll quickly discover which ones feel natural to your eye. Have a specific shooting style and can’t find the right preset? Drop a comment below, and we’ll point you to the closest match in the collection.
100 Free Cinematic Lightroom Presets Download
150 Free Wedding Lightroom Presets Download