You’ve got your camera set up. The light is perfect. Your subject is standing in front of you, smiling politely, and then she asks the question that makes every photographer’s soul leave their body for a second: “So… what do I do?”
Cue the awkward silence. Cue the flailing hands that don’t know if they’re pockets-people or hips-people. Cue the 400 photos you’ll take that all look like a hostage negotiation. I’ve been there. Every photographer has been there, whether you’re shooting your best friend for her LinkedIn photo, a bride on her wedding day, or a full editorial campaign. Posing is the single most requested skill in photography, and it’s also the one nobody really teaches properly. Lighting has YouTube tutorials coming out of your ears. Posing? Mostly vague advice like “just make her feel comfortable” 🙃 … thanks, very helpful.
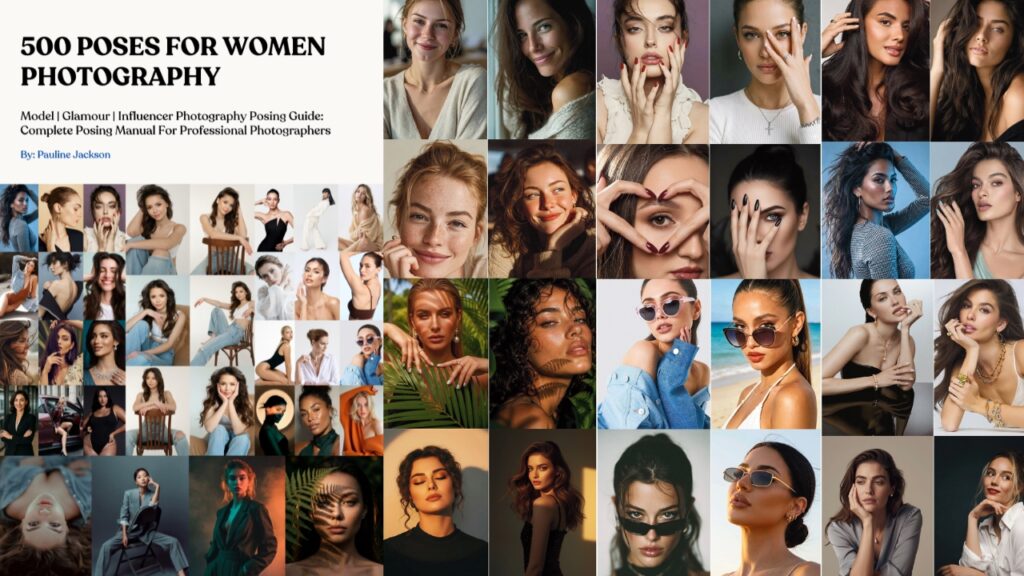
So I built the guide I actually needed: real, usable poses for photographing women, each one broken into exactly two things you need in the moment: what to tell your model to do, and what you, the photographer, should be doing with your camera, angle, and settings to nail the shot. No fluff. No vague “just feel it out.” Just a sourcebook you can flip open mid-shoot and steal a pose from in five seconds flat.
Think of this as the posing equivalent of a chef’s recipe box, except instead of “a pinch of salt,” you get “chin forward and down, weight on the back foot, shoot from a slightly elevated angle.” Let’s build your posing vocabulary from the ground up.
Pauline Jackson
My whole approach to posing comes down to one belief: it should feel like a conversation, not a performance. The best portraits I’ve ever taken happened after my client forgot the camera was even there, which only ever happens when she feels safe, comfortable, and genuinely in on the plan rather than just following orders. Comfort before composition, every time. It’s the one rule in this entire book I’ve never once regretted following.
- Pauline Jackson
- Chapter 1: Standing Poses
- Chapter 2: Sitting Poses
- Chapter 3: Walking & Movement Poses
- Chapter 4: Lying Down Poses
- Chapter 5: Close-Up & Headshot Poses
- Chapter 6: Hand, Arm & Hair Poses
- Chapter 7: Poses Using Props & Furniture
- Chapter 8: Poses Using Walls, Stairs & Architecture
- Chapter 9: Outdoor & Nature Poses
- Chapter 10: Studio & Backdrop Poses
- Chapter 11: Candid & Laughing Poses
- Chapter 12: Silhouette & Backlit Poses
- Chapter 13: Fashion & Editorial Poses
- Chapter 14: Flattering Poses for Curvy & Plus-Size Women
- Chapter 15: Professional Headshot & LinkedIn Poses
- Table 1: Camera Settings Quick Reference
- Table 2: Common Posing Problems & Quick Fixes
- Table 3: Quick-Find Pose Directory
Posing Fundamentals: The Rules Before the Rules
Before you flip to Chapter 1, let’s talk about the handful of principles that quietly run underneath every single one of these poses. Learn these five things, and you’ll be able to invent your own poses on the fly forever.
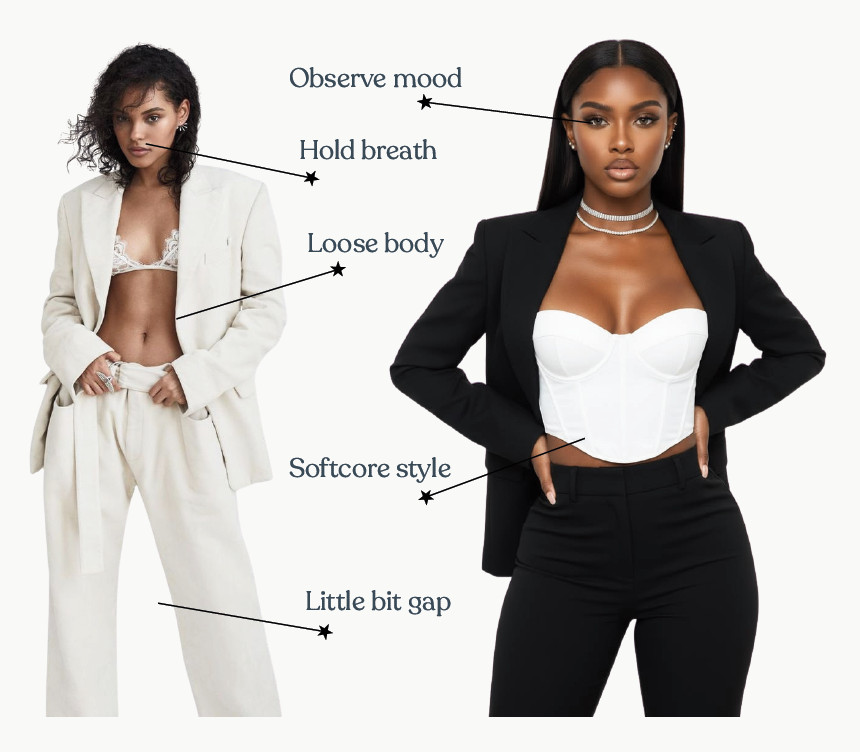
1. Weight shift is everything. A person standing with their weight evenly split on both feet looks like a mugshot. Shift the weight onto one leg (usually the back leg, angled slightly away from the camera), and the whole body relaxes into a soft, natural curve. This is the secret behind almost every “flattering” pose you’ve ever admired.
2. Camera height changes the story. Shoot from slightly above eye level to soften features and slim the frame, flattering for most portrait work. Shoot from below eye level to instantly add power, height, and drama. Neither is “better”. They’re just different tools. Pick the one that matches the mood you’re going for.
3. Give the hands a job. Hands with nothing to do go stiff, clenched, or disappear awkwardly into fists. Give them a task: resting on a hip, holding a jacket lapel, brushing hair back, holding a prop, and they instantly look natural again.
4. Chin forward and down, not up. Tilting the chin up photographs the underside of the jaw and nose (nobody’s favorite angle). Instead, cue your model to bring her chin slightly forward and down, like she’s “pointing” it toward the lens. This single tweak does more for a flattering jawline than any amount of editing.
5. Bent is beautiful, straight is stiff. Straight arms and straight legs, held rigidly against the body, flatten a photo and hide curves. Bent elbows, bent knees, and a little space between the arm and torso (photographers call this the “arm window”) create shape, depth, and visual interest.
💡 Pro Tip: Shoot in short bursts (3–5 frames) on every pose, especially anything involving movement or expression. The “real” moment: the one with the genuine smile or perfect hair flick is almost never the first frame.
Got it? Good! But before you flip to Chapter 1, run through the checklist below. It takes five minutes and saves you from the classic “wait, where’s my second battery” scramble mid-session.
Pre-Shoot Checklist
Print this page. Tape it inside your camera bag. Use it every single time until it’s muscle memory.
Before the Shoot
- Confirm wardrobe options and comfort level with your client in advance.
- Share a short mood board or reference images so expectations match.
- Confirm location, timing, and a backup plan for weather (if shooting outdoors).
- Send a model release/image usage agreement ahead of time.
- Charge all batteries and format memory cards the night before.
Gear Bag
- Camera body + backup body or phone, if available.
- Primary lens (50mm or 85mm) plus a second lens option.
- Extra batteries (at least one full backup).
- Memory cards, formatted, with spares on hand.
- Reflector and/or a small portable light.
- Lens cloth.
- Prop bag (see Appendix C for a full gear list).
Day of the Shoot
- Arrive early to scout light and background.
- Take a test shot and check exposure, focus, and background before your subject arrives.
- Walk your client through the session plan so nothing feels like a surprise.
- Point out the nearest restroom or changing area if wardrobe changes are planned.
During the Session
- Start with a low-pressure warm-up pose (see Chapter 1 or Chapter 2).
- Check in verbally every few poses, comfort first, always.
- Shoot in short bursts rather than single frames.
- Review a few shots on the back of the camera with your client partway through to build trust.
After the Shoot
- Back up all files to two separate locations before formatting your cards.
- Cull down to your strongest selects before editing.
- Confirm delivery timeline and format with your client.
- Send a thank-you note. Happy clients are your best source of referrals.
Chapter 1: Standing Poses
Standing poses are the backbone of almost every portrait session. They’re the ones you’ll lean on when you’re warming up a nervous subject, wrapping up a session, or need something reliable between more creative shots. Master this chapter, and you’ll never freeze up at the start of a shoot again.
⚠️ Common Mistake to Avoid: Feet planted flat, shoulder-width apart, facing the camera dead-on. It’s the pose our bodies default to when we’re nervous and it reads as stiff every time. Always angle the body at least slightly away from the lens.
The Confident Stance
Model Instruction: Stand with your feet a few inches apart, weight settled on your back foot, shoulders relaxed and rolled slightly down and back.
Photographer Instruction: Shoot at eye level with a 50mm or 85mm lens to keep the perspective natural and flattering. Watch for tension in the shoulders and reshoot if they creep up toward the ears.
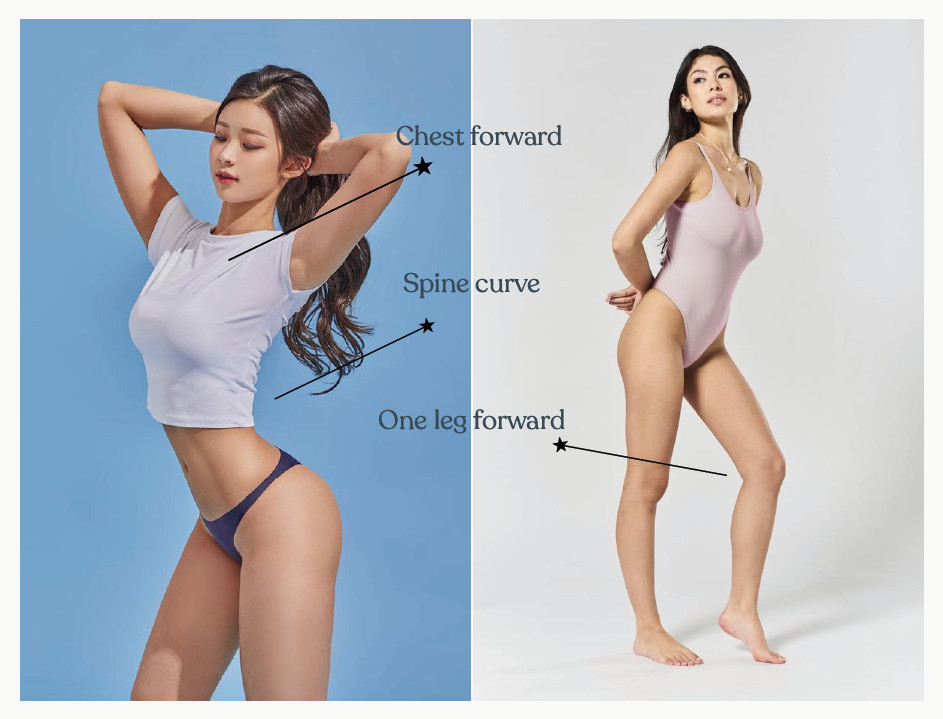
The Classic S-Curve
Model Instruction: Shift your weight onto one hip, letting your spine curve gently like a soft “S” from shoulder to hip to knee.
Photographer Instruction: Position yourself slightly off to the side rather than dead center to emphasize the curve. A three-quarter body angle sells this pose best.
The Hip Pop
Model Instruction: Plant one foot, then pop the opposite hip out and up, like you’re about to say something sassy.
Photographer Instruction: Frame from mid-thigh up for fashion-forward shots. A slightly lower camera angle exaggerates the hip line beautifully.
One Leg Forward Step
Model Instruction: Step one leg forward as if caught mid-motion, keeping your back straight and shoulders open.
Photographer Instruction: Great for catalog or lifestyle brand shoots. Use a faster shutter speed (1/250s or quicker) to keep the “step” crisp.
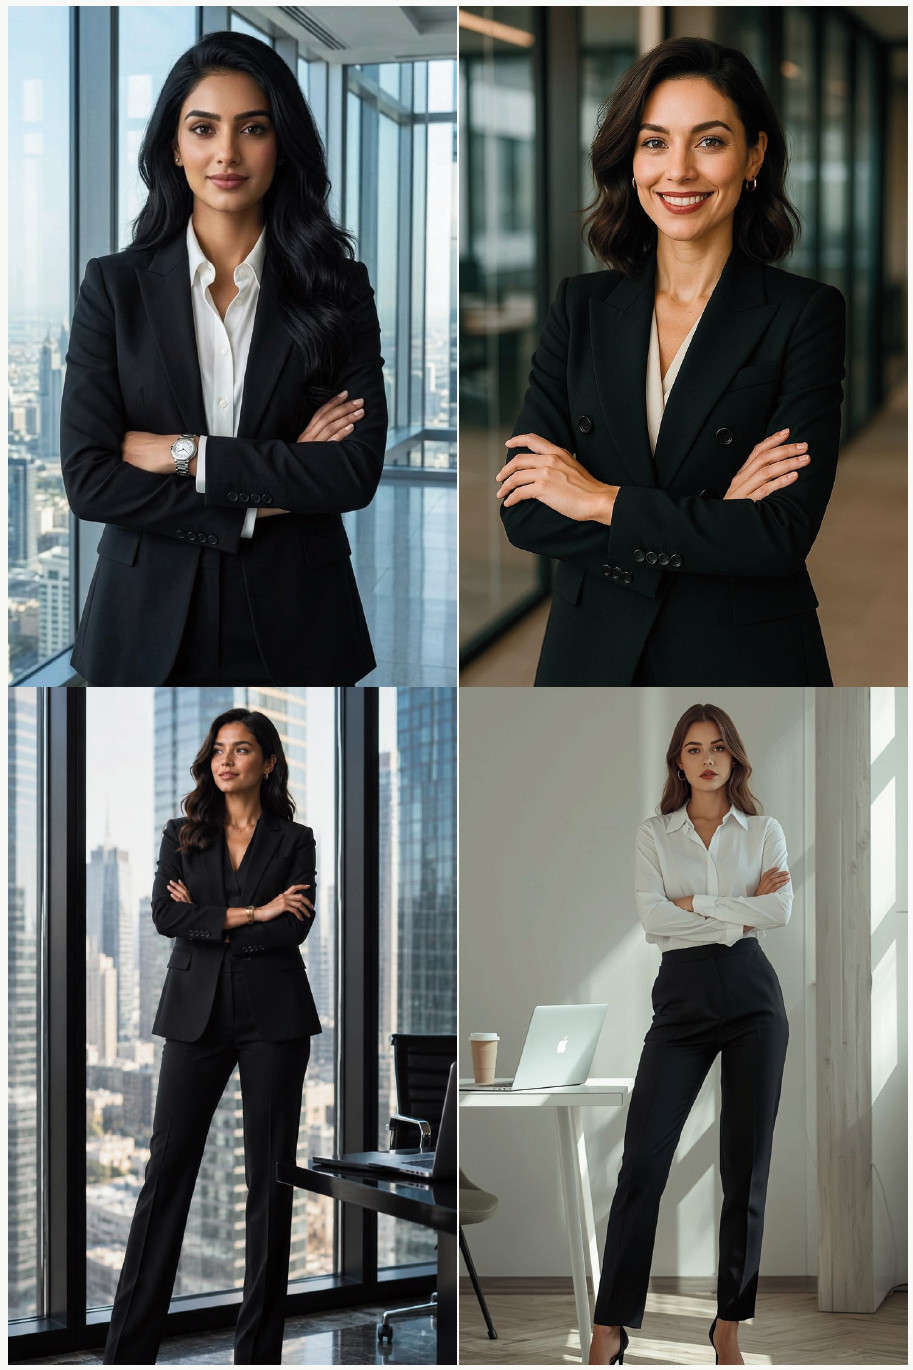
Arms Crossed, Confident
Model Instruction: Cross your arms loosely across your body, keeping shoulders relaxed rather than hunched.
Photographer Instruction: Perfect for headshots or branding photos. Shoot at a 45-degree body angle so the crossed arms create a diagonal line rather than a flat block.
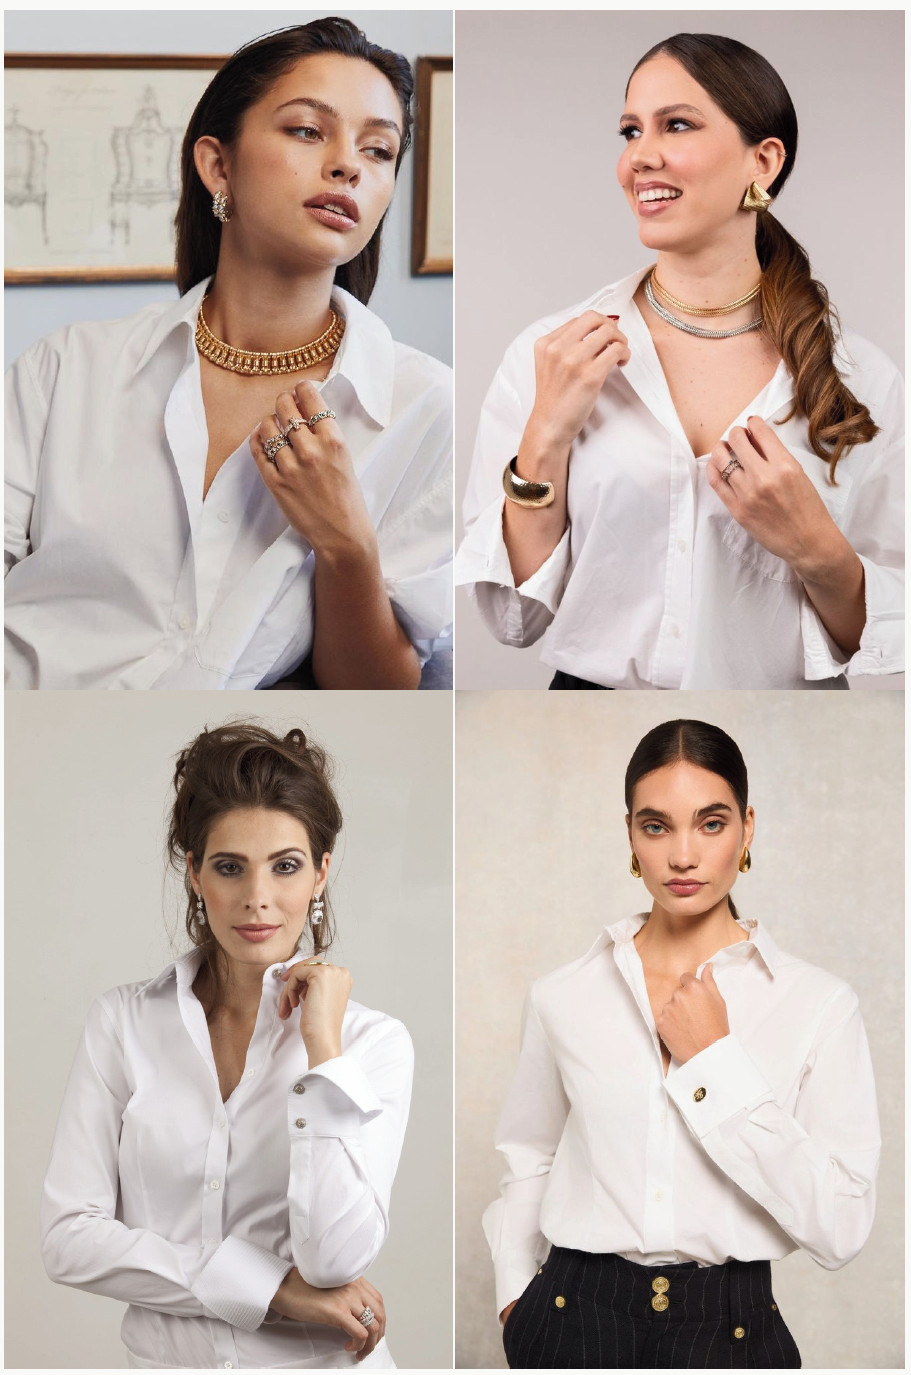
Hand on Collarbone
Model Instruction: Rest your fingertips gently just below your collarbone, elbow relaxed, not pinned to your side.
Photographer Instruction: A soft, thoughtful pose works beautifully for close three-quarter shots. Keep the hand relaxed, not clenched.
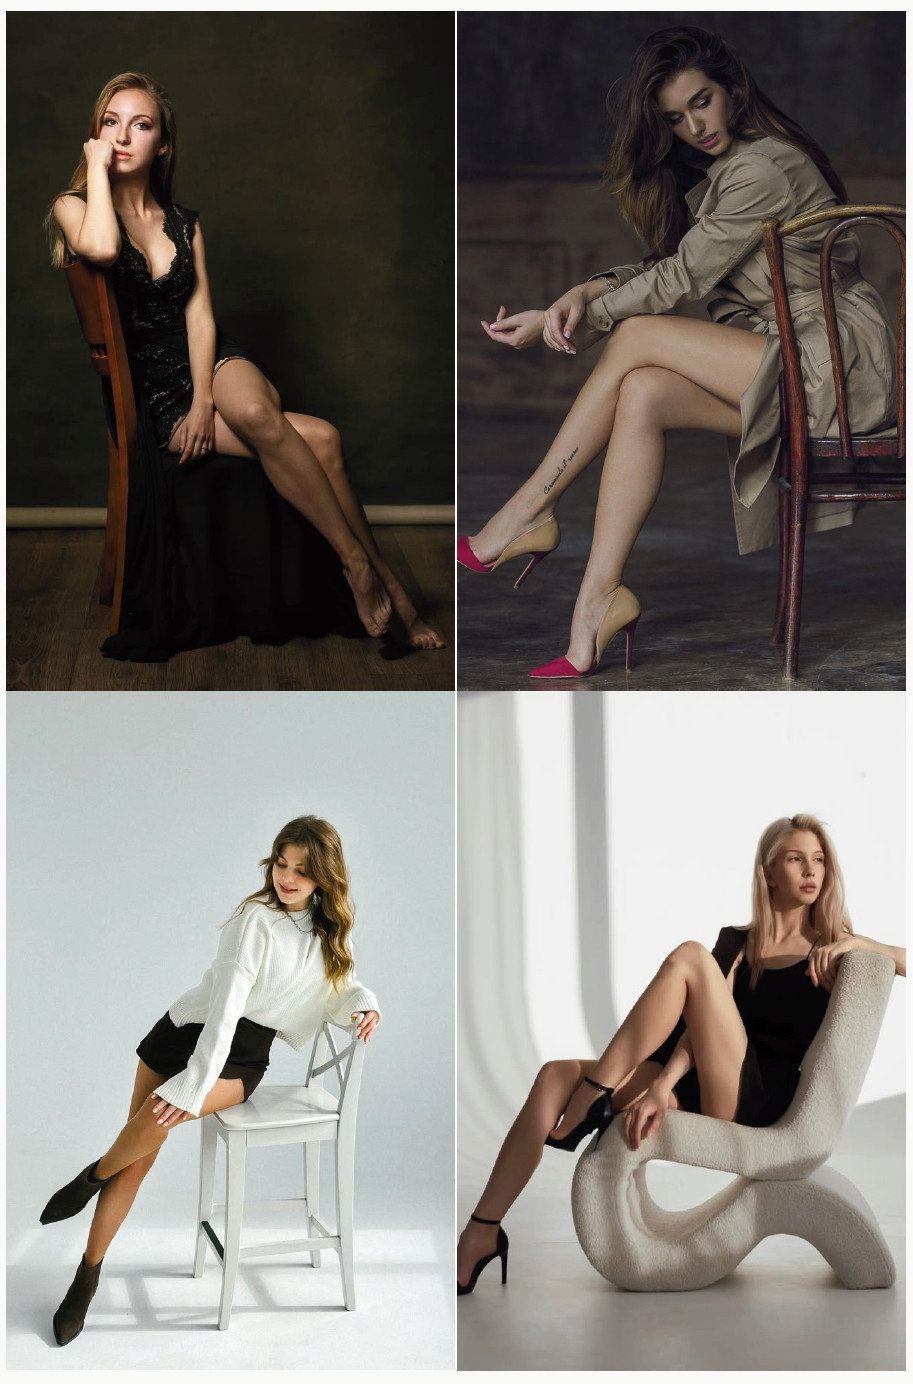
Chapter 2: Sitting Poses
Sitting poses are the unsung heroes of a photoshoot. They slow everything down. They’re incredibly forgiving for nervous subjects (there’s something about having a chair, step, or floor beneath you that melts tension right out of the shoulders), and they open up angles standing poses just can’t touch. This is also where headshot sessions quietly live and die. So pay close attention here.
⚠️ Common Mistake to Avoid: Shooting straight-on at eye level with a seated subject almost always creates unflattering compression around the midsection. Get up on a stool, stand, or shoot from slightly above whenever someone is seated. it’s an instant win.
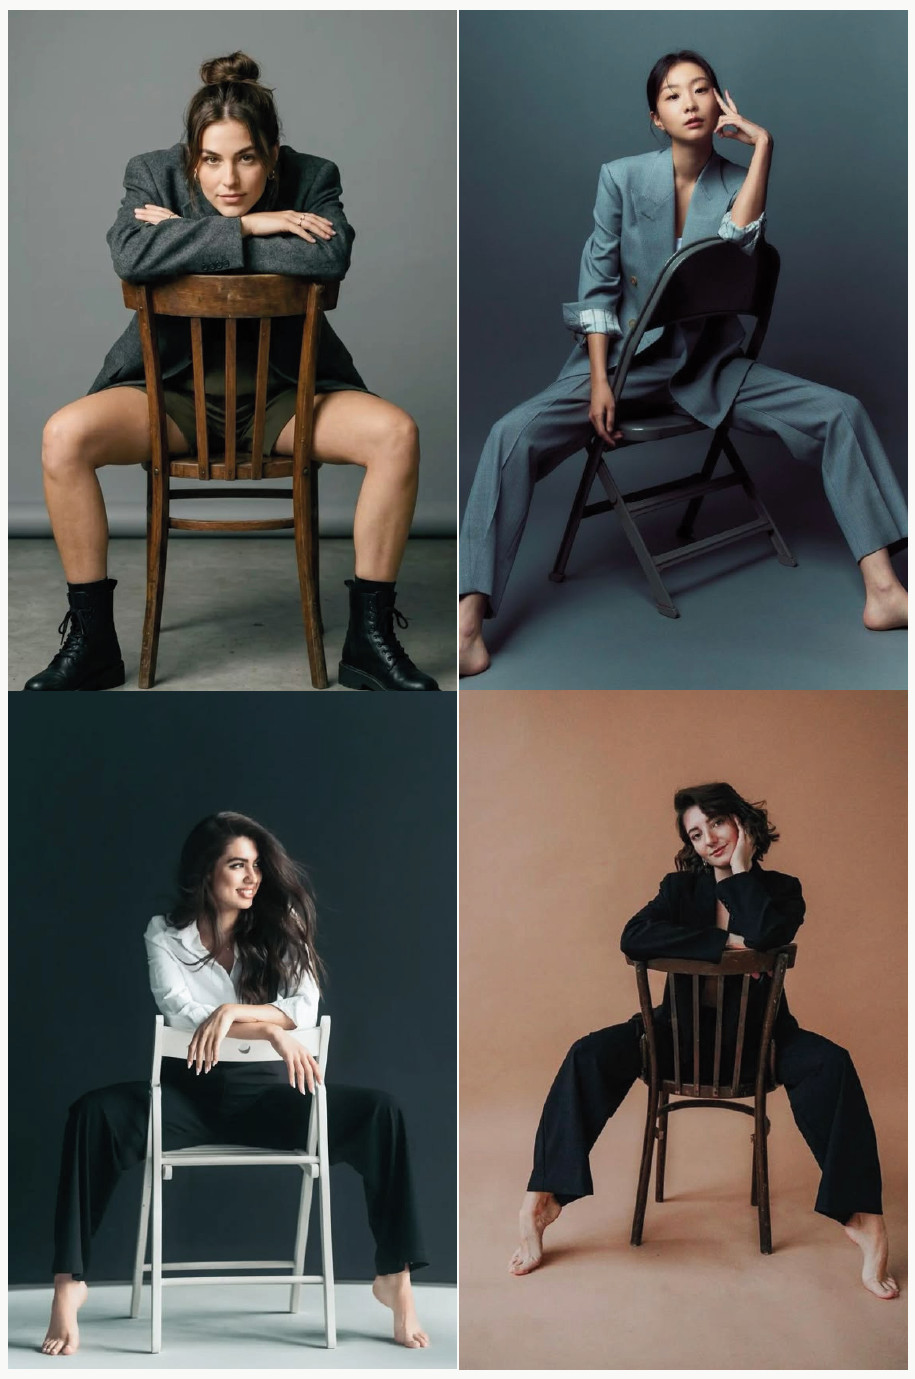
Chair Straddle
Model Instruction: Turn the chair around and sit facing the backrest, arms folded on top of it.
Photographer Instruction: Great for editorial or confident-brand shoots. Shoot at a slight angle rather than straight-on to add depth.
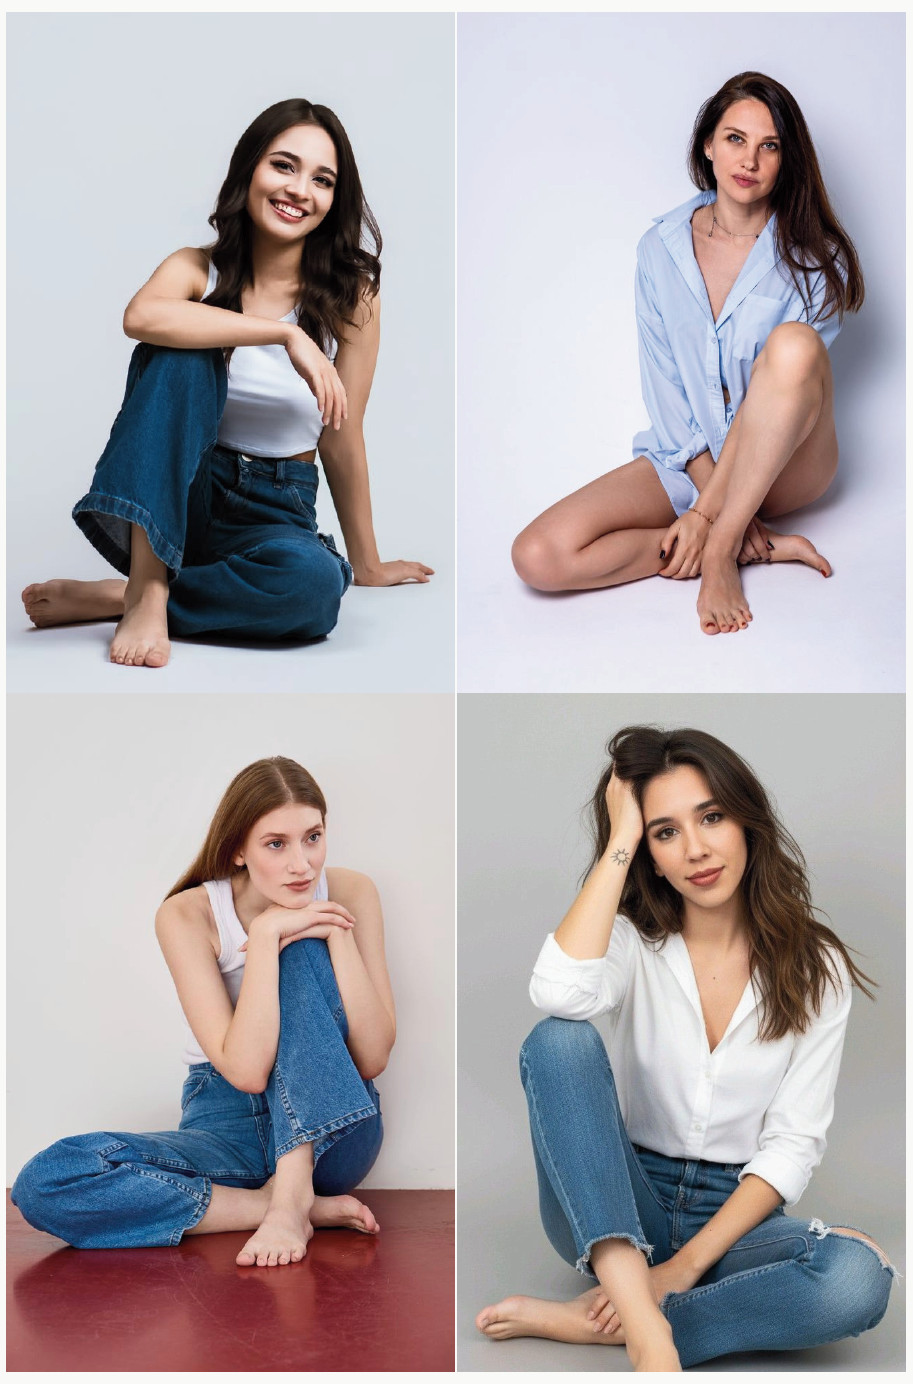
Cross-Legged Floor Sit
Model Instruction: Sit on the floor with your legs loosely crossed, hands resting on your knees or in your lap.
Photographer Instruction: Works on studio floors, grass, or sand alike. Get down to her eye level for an intimate feel.
Side-Saddle Chair Sit
Model Instruction: Sit sideways on the chair with both legs together, angled off to one side, torso turned gently toward the camera.
Photographer Instruction: A polished, formal option. Keep her spine tall and shoot at a three-quarter angle.
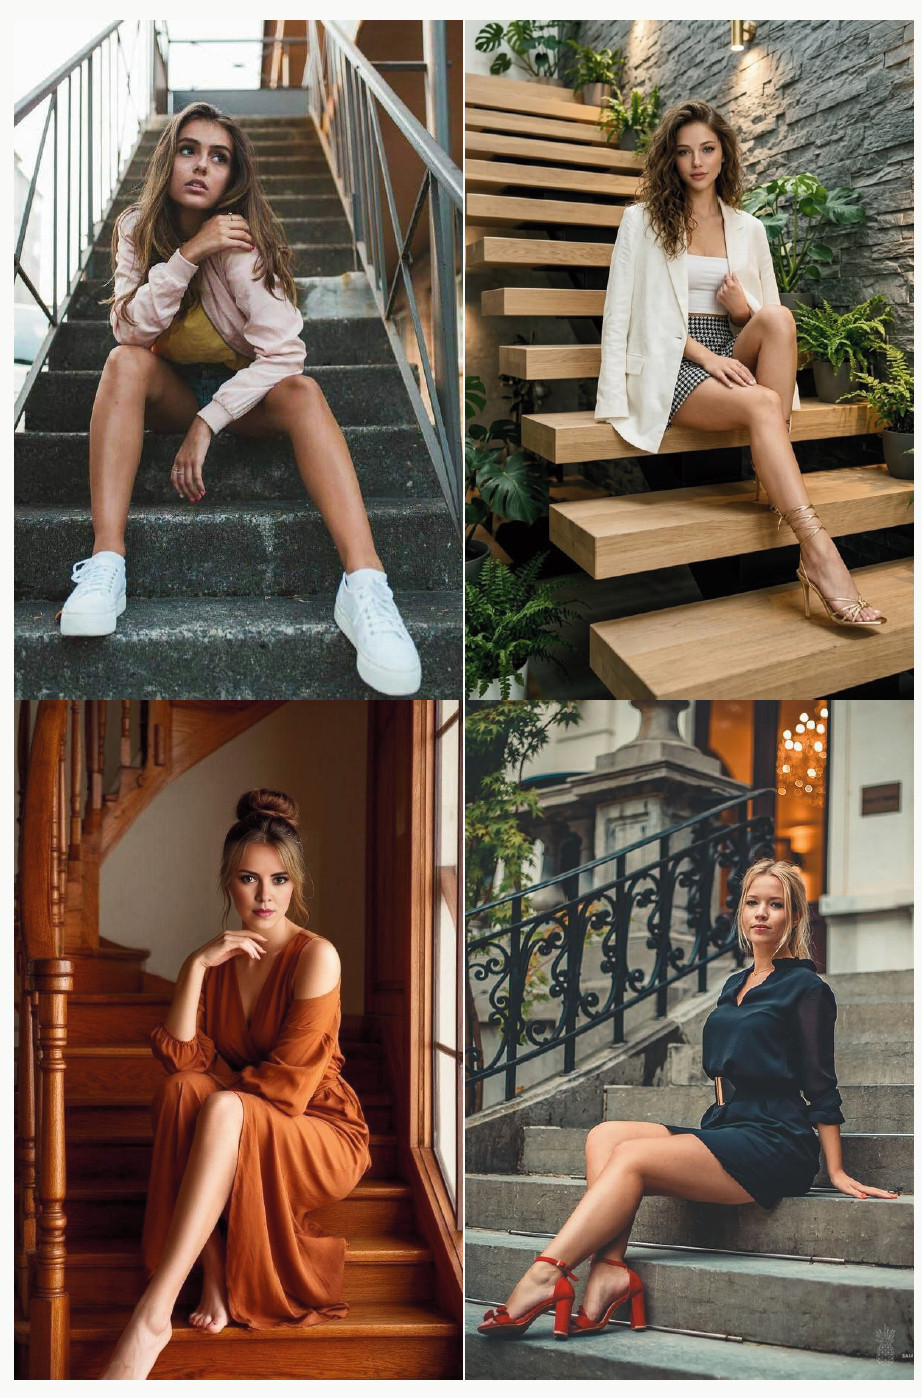
Sitting on Stairs
Model Instruction: Sit a few steps up, legs extended down the staircase, leaning back gently on one arm.
Photographer Instruction: Shoot from a few steps below for a flattering upward angle, using the stair lines as natural leading lines.
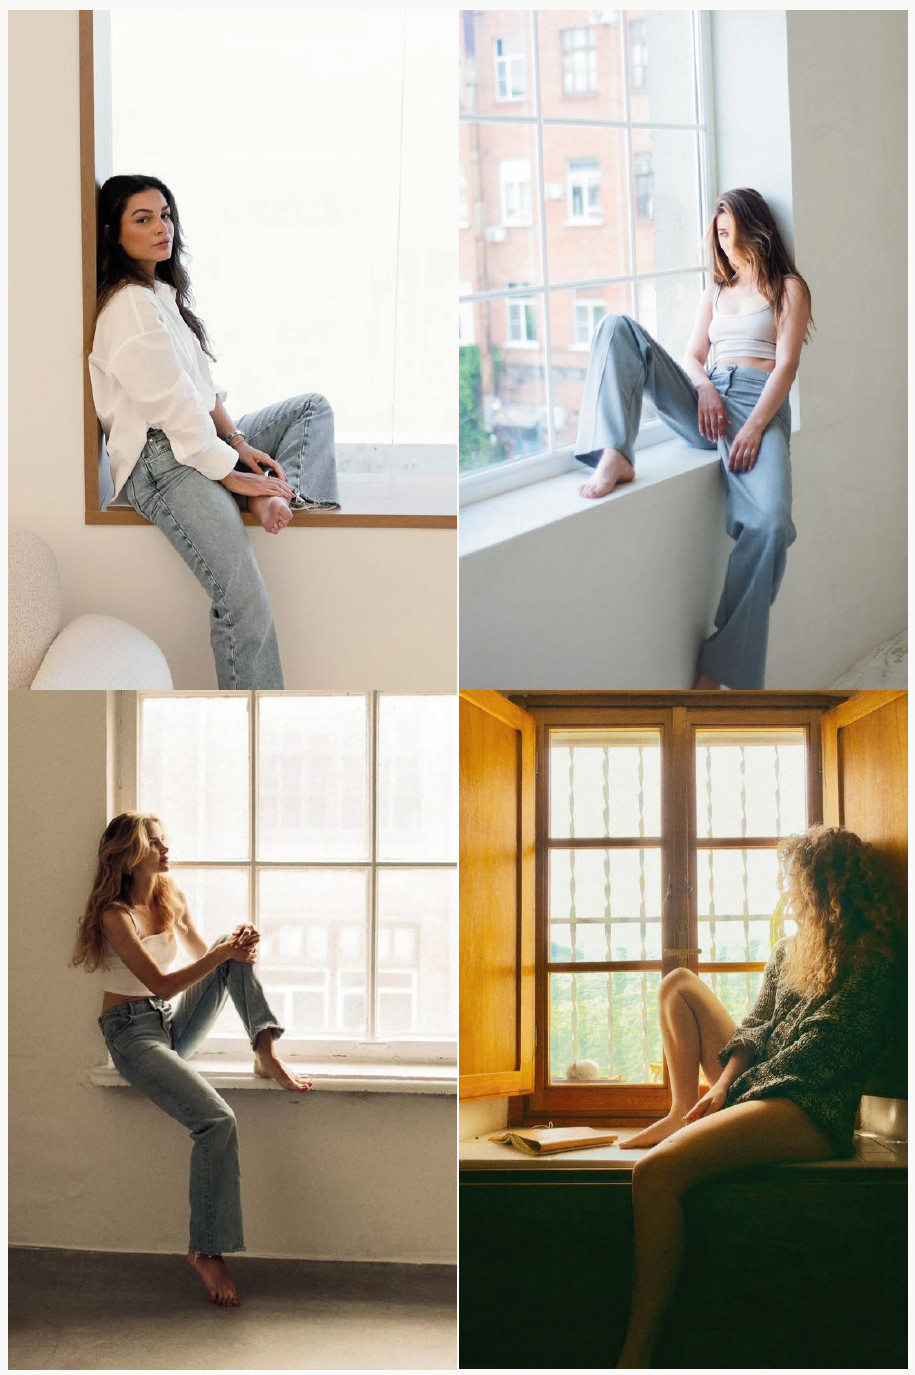
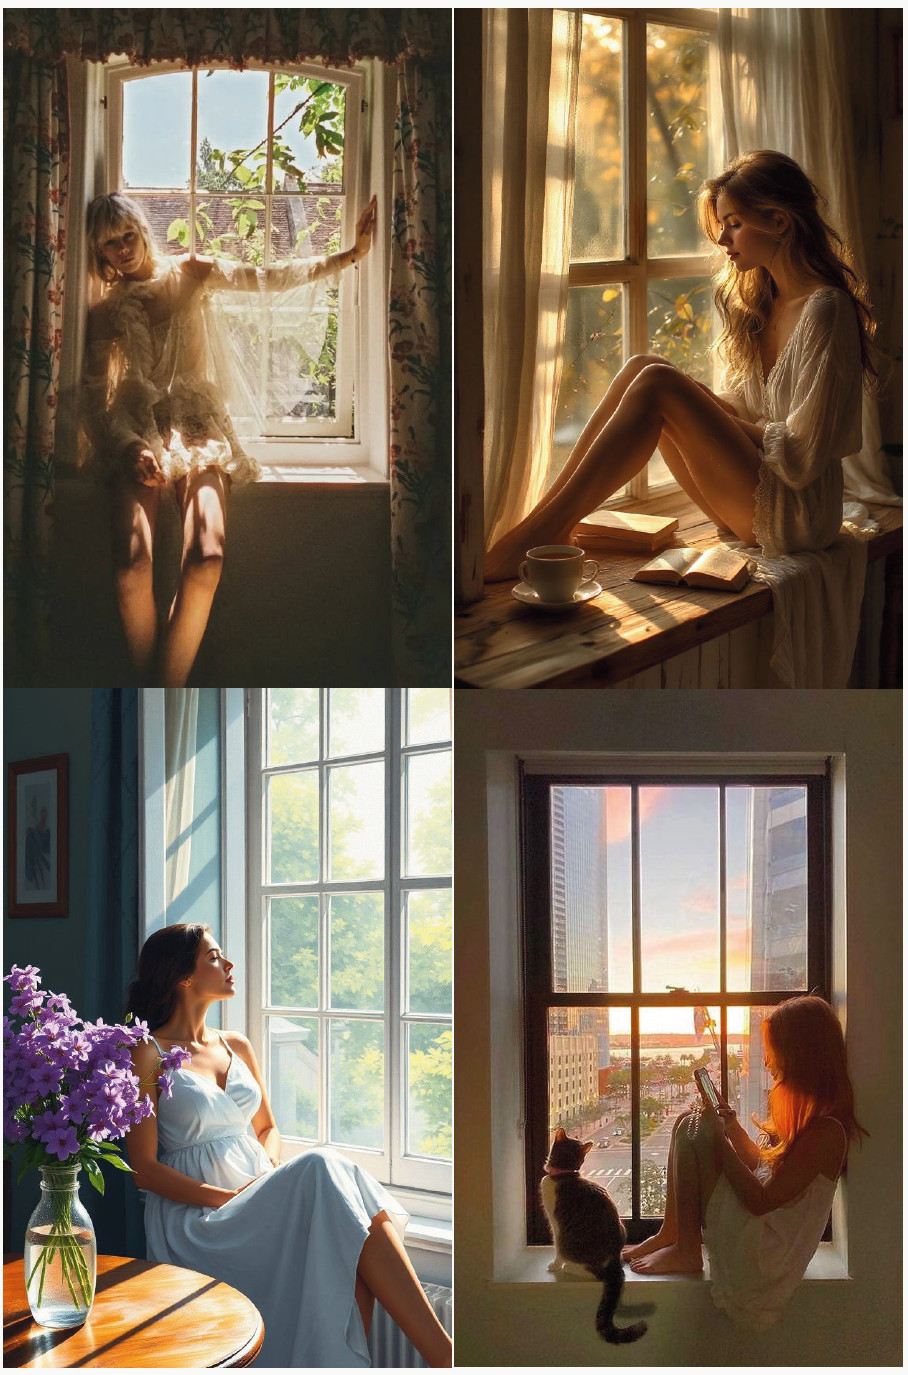
Sitting on a Windowsill
Model Instruction: Sit sideways in the window frame, one leg bent up, the other resting down, hand resting on the sill.
Photographer Instruction: Meter for the window light rather than the room to avoid a blown-out background. A dreamy, editorial favorite.
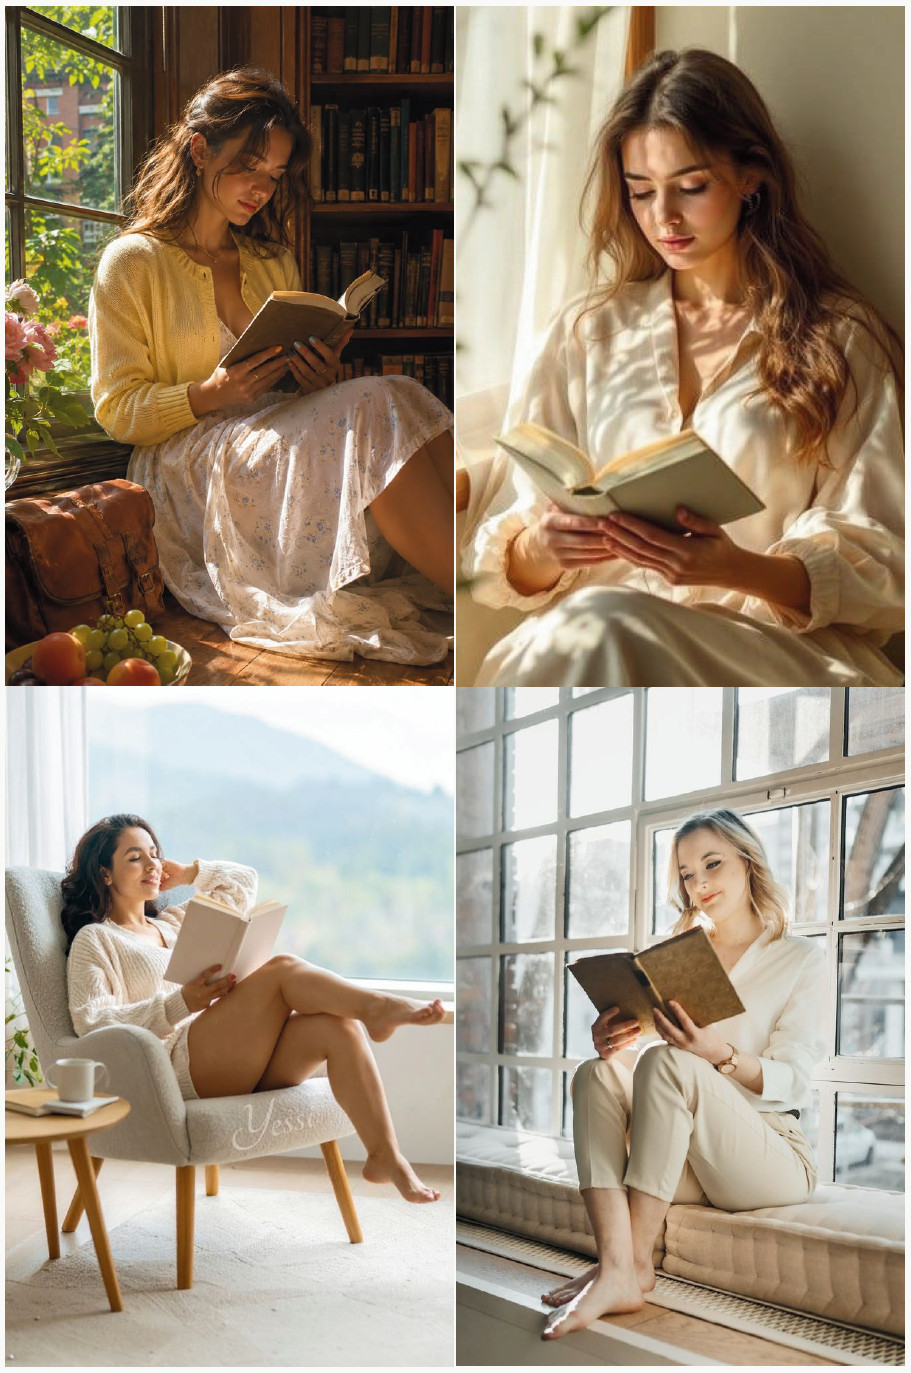
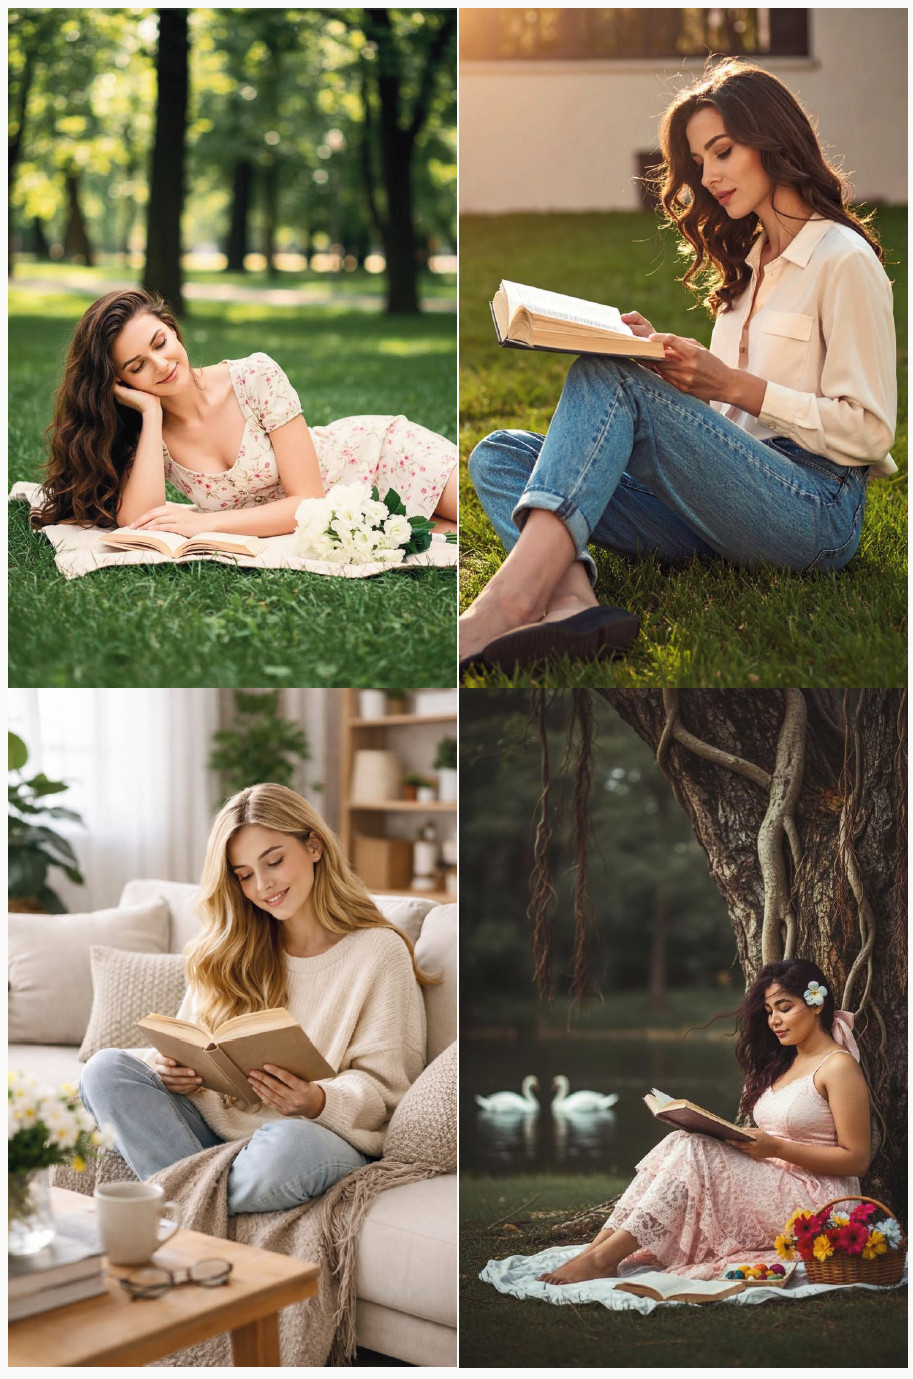
Sitting, Reading a Book
Model Instruction: Sit comfortably with a book held slightly angled toward your chest, eyes down on the page.
Photographer Instruction: Let this one feel candid rather than posed. Shoot a series as she “reads” for natural microexpressions.
Chapter 3: Walking & Movement Poses
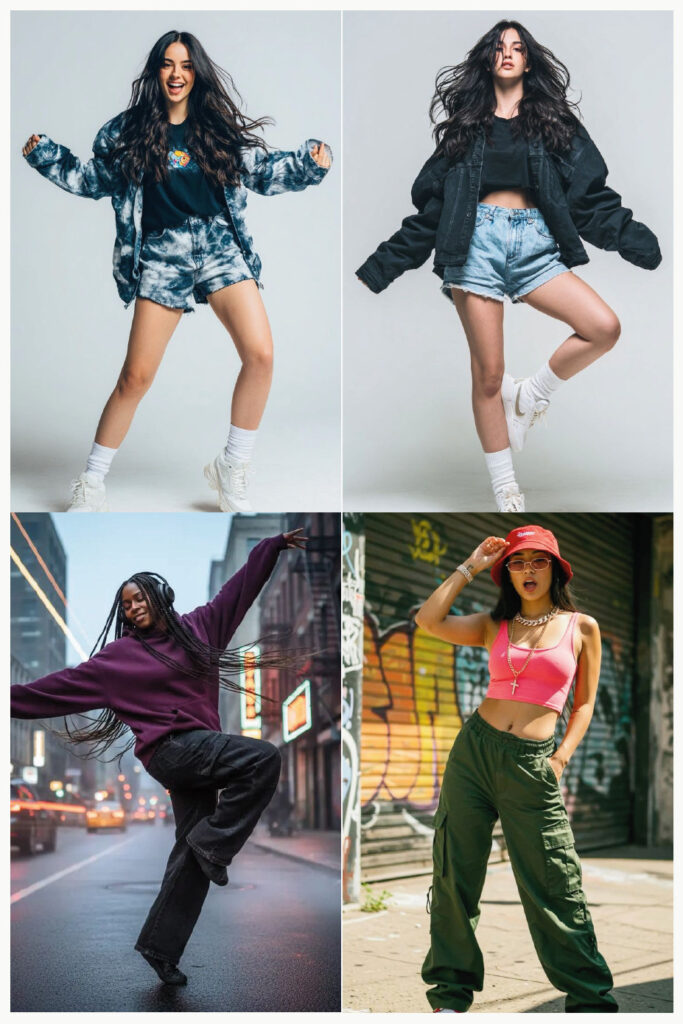
If standing poses are your backbone, movement poses are your secret weapon. Nothing kills the “posed” look faster than a little bit of real motion: hair swinging, fabric flowing, arms mid-swing. These poses take a little more choreography to direct, but they pay off with images that feel alive.
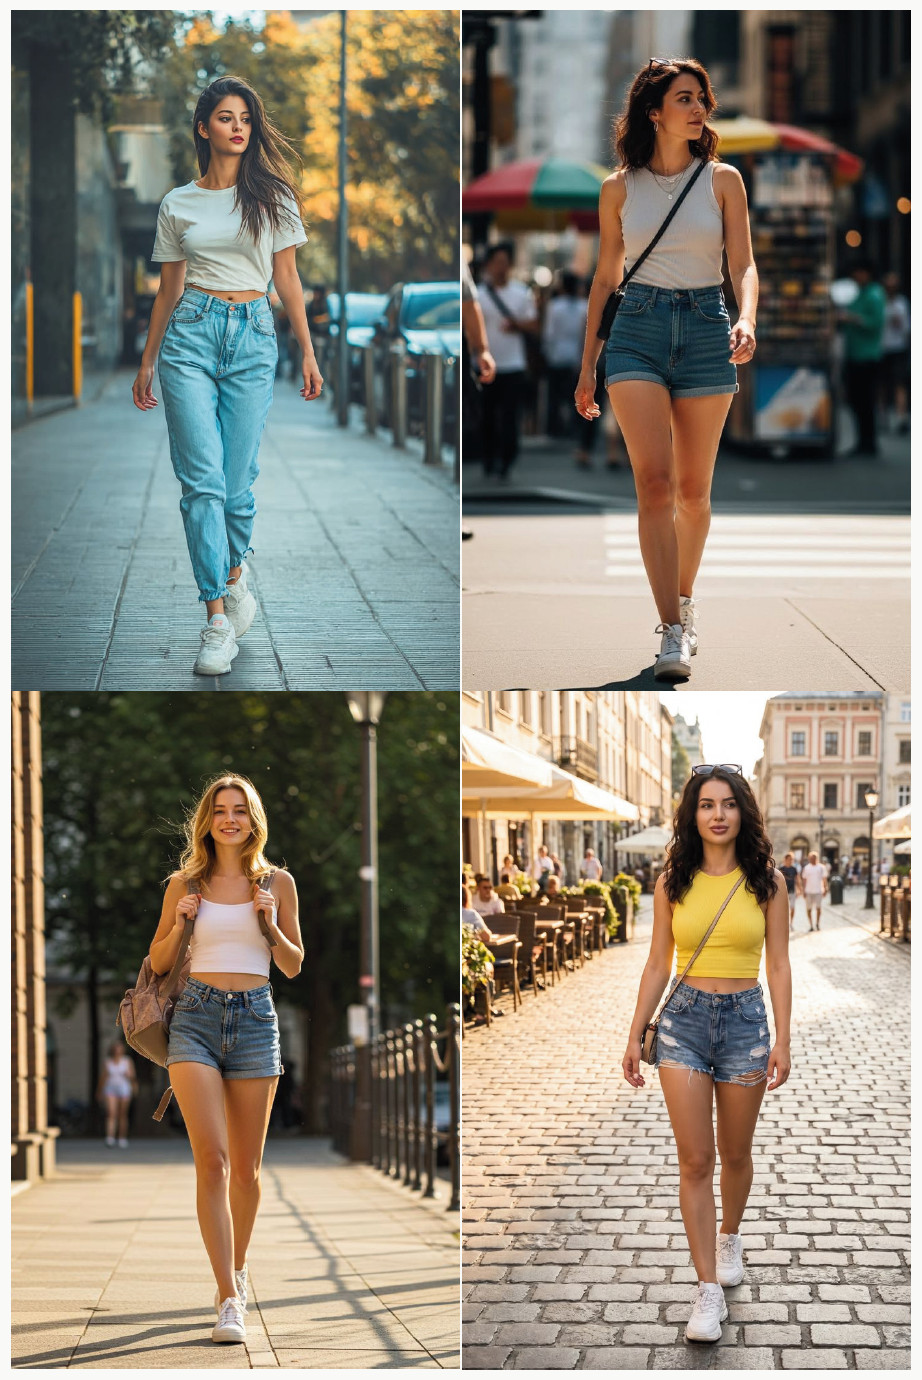
⚠️ Common Mistake to Avoid: Asking someone to “just walk naturally” almost always produces a stiff, self-conscious shuffle. Give a specific, repeatable action instead (“walk toward that tree and stop when you reach it”) – a task removes the self-consciousness.
Walk and Glance Back
Model Instruction: Walk away from the camera for a few steps, then glance back over your shoulder on my cue.
Photographer Instruction: Call out “look back” right before you want the shot. The split-second reaction reads far more natural than a held pose.
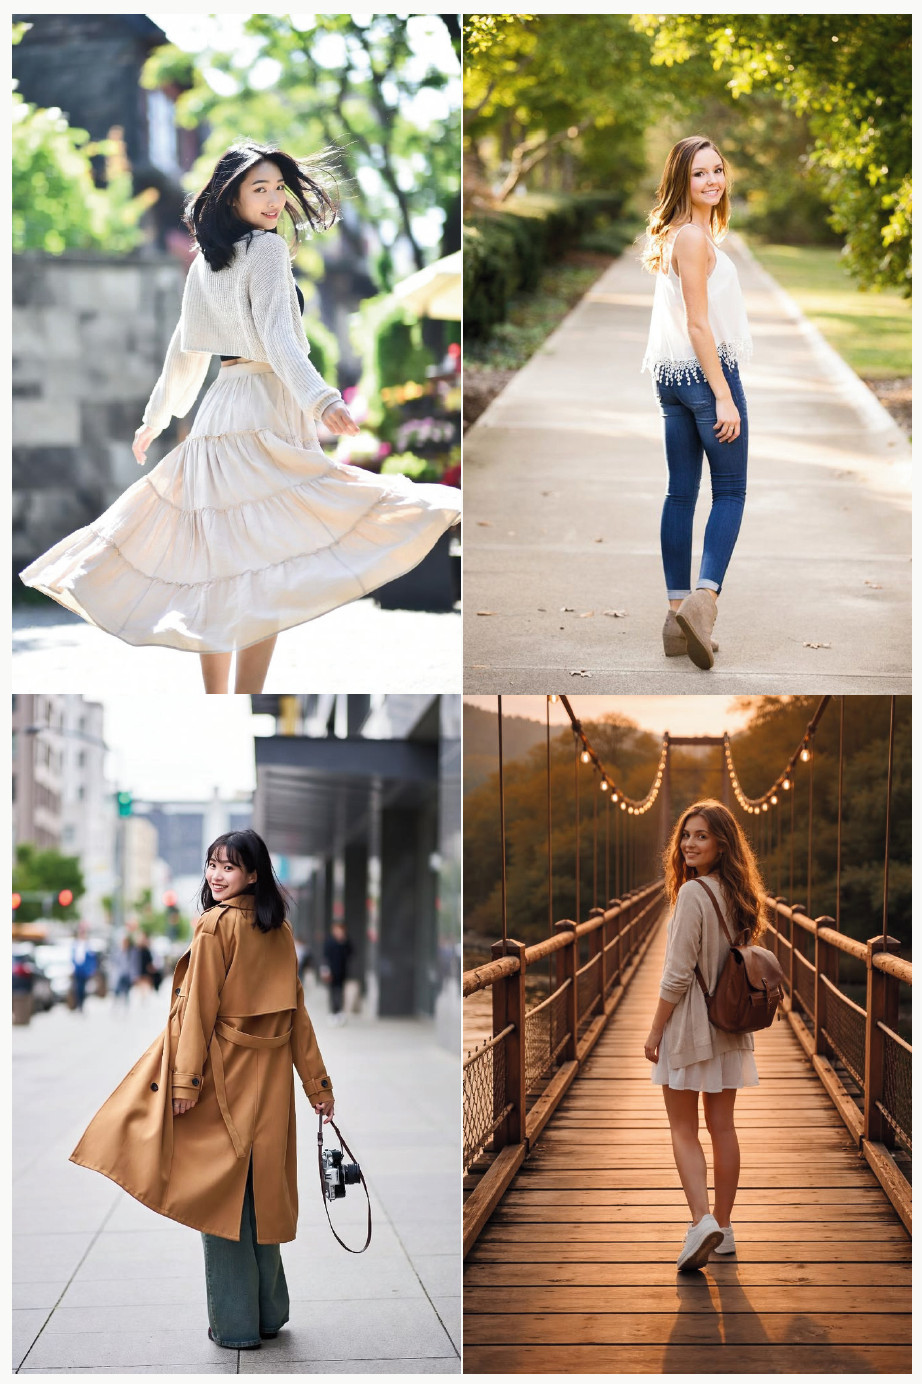
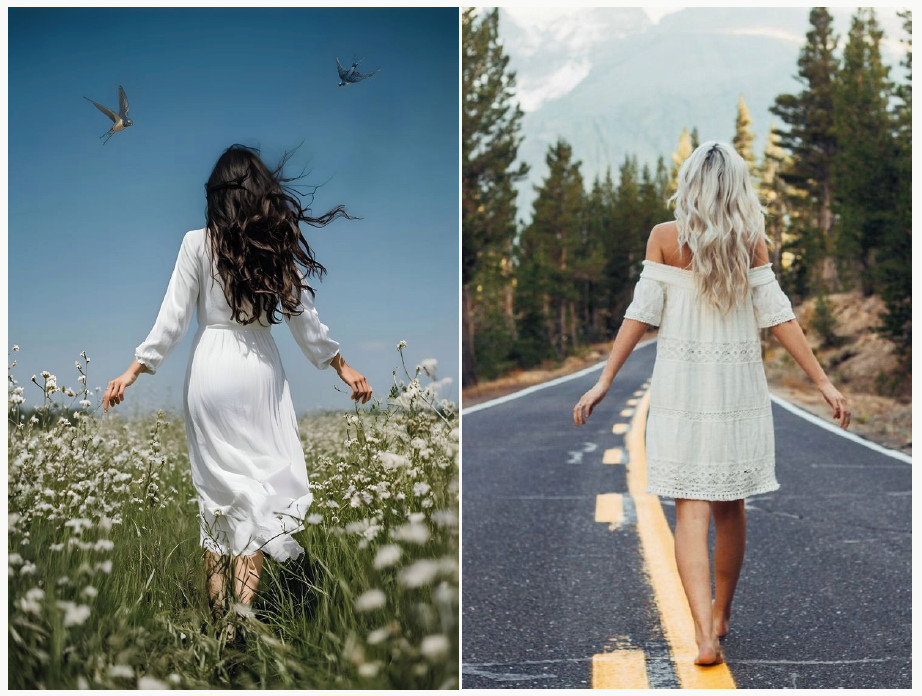
Walking Away From Camera
Model Instruction: Simply walk away from the camera at a relaxed pace, arms swinging naturally.
Photographer Instruction: A lovely storytelling shot for wide environmental portraits. Keep her slightly off-center using the rule of thirds.
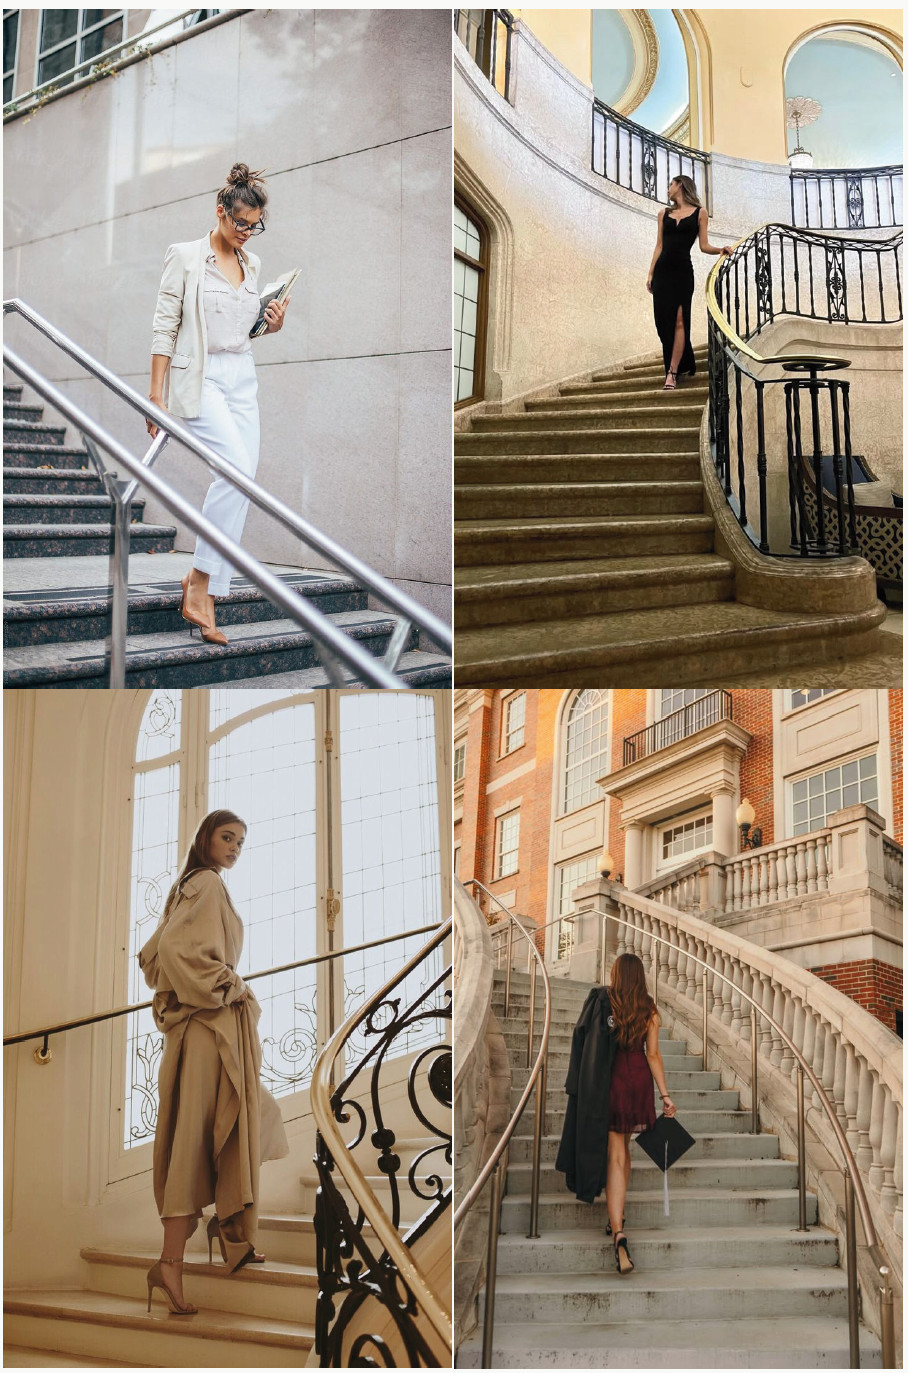
Walking Up a Staircase
Model Instruction: Climb the stairs at a relaxed pace, one hand trailing lightly along the railing.
Photographer Instruction: Shoot from below, using the staircase as a strong graphic leading line toward your subject.
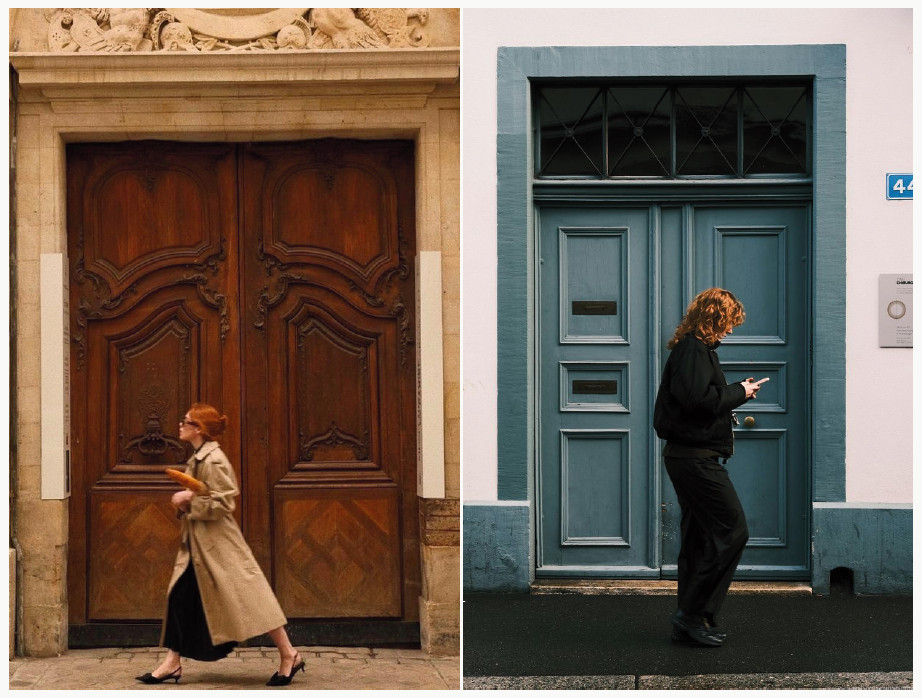
Walking Through a Doorway
Model Instruction: Step through the doorway as if entering a room, pausing briefly with one foot still on the threshold.
Photographer Instruction: Use the doorframe to frame her naturally, exposing for whichever side has better light.
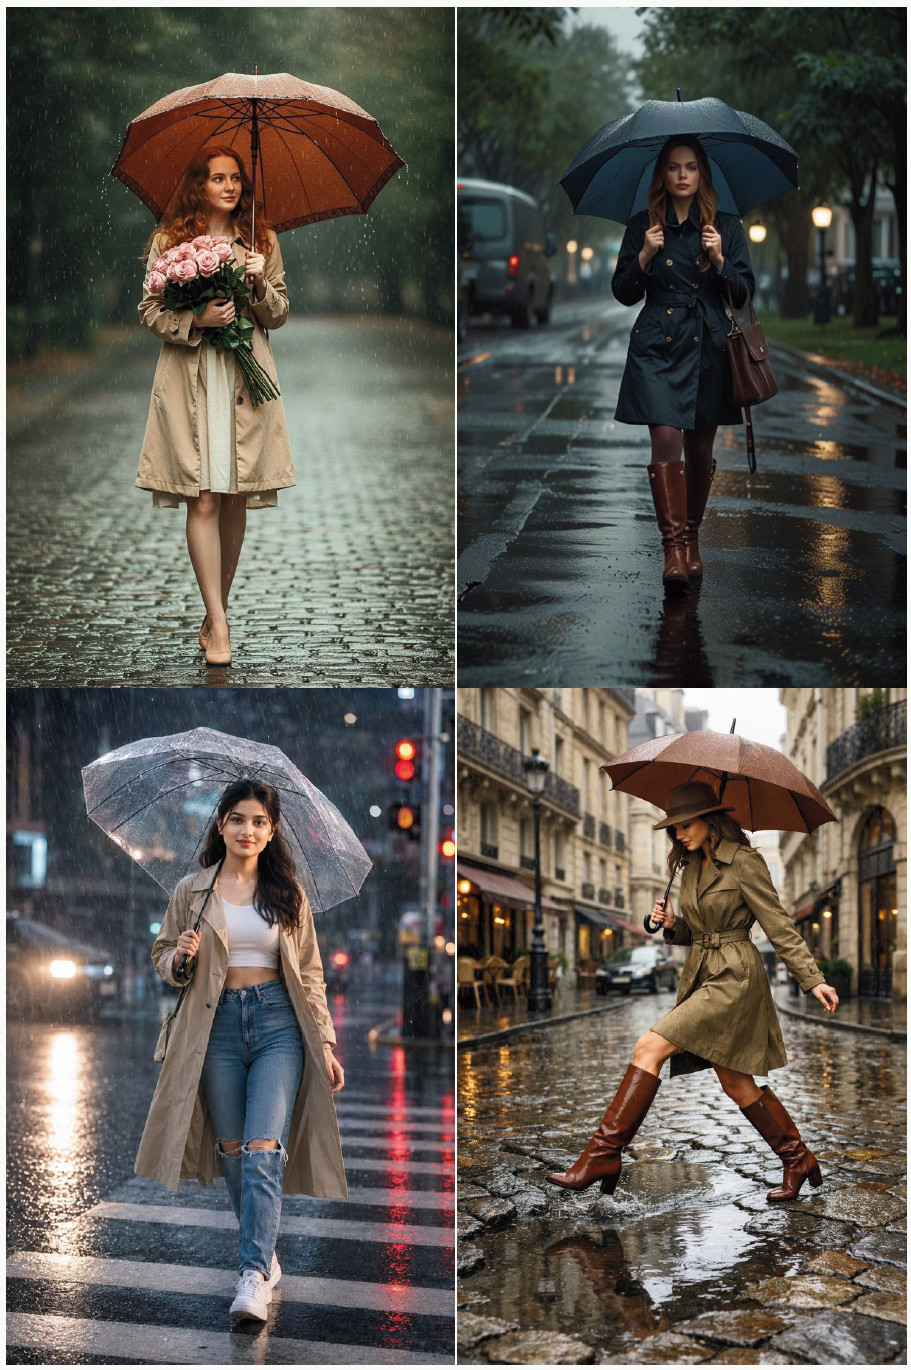
Walking with an Umbrella in Rain
Model Instruction: Walk slowly under the umbrella, tilting it back slightly so your face is visible to the camera.
Photographer Instruction: Protect your gear, use a faster shutter to freeze raindrops, and look for reflections in puddles for bonus atmosphere.
Chapter 4: Lying Down Poses
Lying-down poses feel a little intimidating to direct at first, but they’re some of the most relaxed, natural-looking poses in your entire toolkit, mostly because it’s genuinely hard to hold tension in your shoulders while lying on soft grass. Use these for outdoor sessions, styled shoots, or anywhere with a soft, safe surface.
⚠️ Common Mistake to Avoid: Shooting straight down from directly overhead without checking the background: stray twigs, trash, or a distracting patch of dirt right next to your subject’s face is an easy miss when you’re focused on the pose itself.
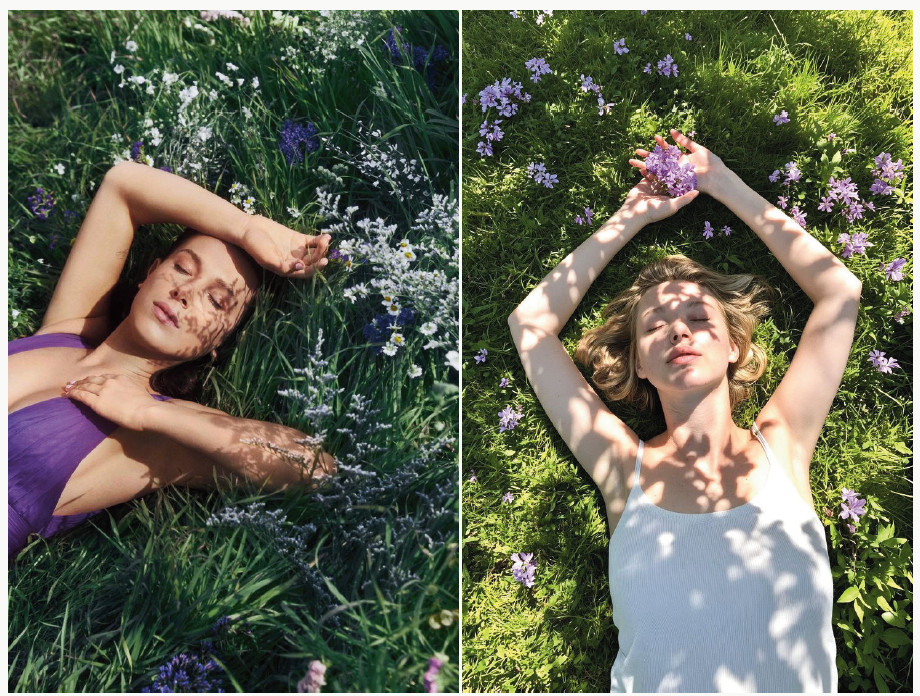
Lying on Grass, Overhead Shot
Model Instruction: Lie back on the grass with hair fanned out around your head, arms relaxed at your sides or gently framing your face.
Photographer Instruction: Shoot straight down from directly above, using natural leaves or flowers around the frame edges for an ethereal border.
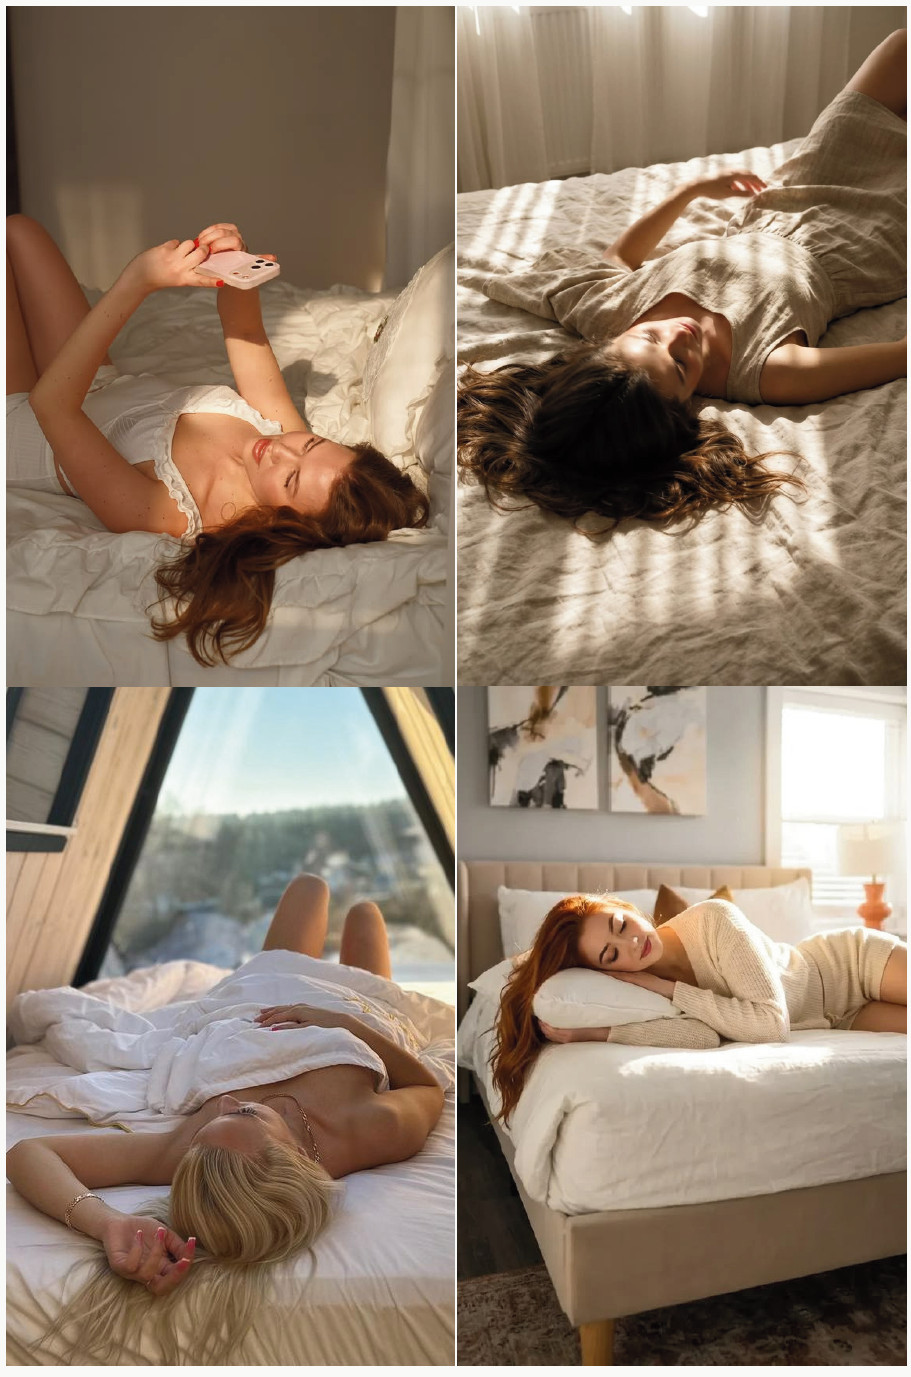
Lying on a Bed, Casual Morning
Model Instruction: Lie across the bed diagonally, propped on both forearms, with your feet gently kicked up behind you.
Photographer Instruction: Use soft window light rather than flash for this one. It keeps the whole scene feeling relaxed and unstaged.
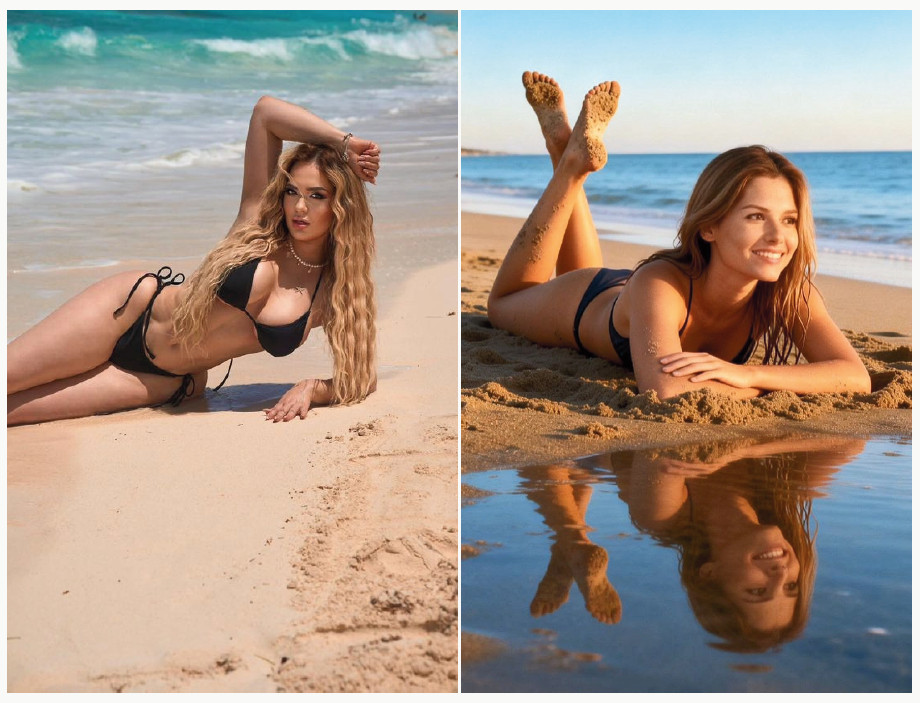
Lying on Sand, Beach
Model Instruction: Lie on your side in the sand, head resting on one arm, gazing out toward the water.
Photographer Instruction: Shoot low and close to the sand line for a beautiful foreground-to-background sweep.
Chapter 5: Close-Up & Headshot Poses
Close-ups are where posing meets micro-expression, and honestly, this chapter separates “nice photo” from “wow, that’s her.” At this distance, tiny adjustments a millimeter of chin tilt, a softened jaw make or break the shot. Slow down here.
⚠️ Common Mistake to Avoid: Cropping too tight, right at the chin or forehead, cuts off important visual “breathing room.” Leave a little space above the head and below the chin unless you’re intentionally going for an ultra-tight beauty crop.
Chin-Down, Eyes-Up “Power Gaze”
Model Instruction: Lower your chin slightly and look up at the lens through your brows, without tilting your head backward.
Photographer Instruction: Shoot from a touch below her eye level to intensify the effect. Keep catchlights visible in the eyes for life and sparkle.
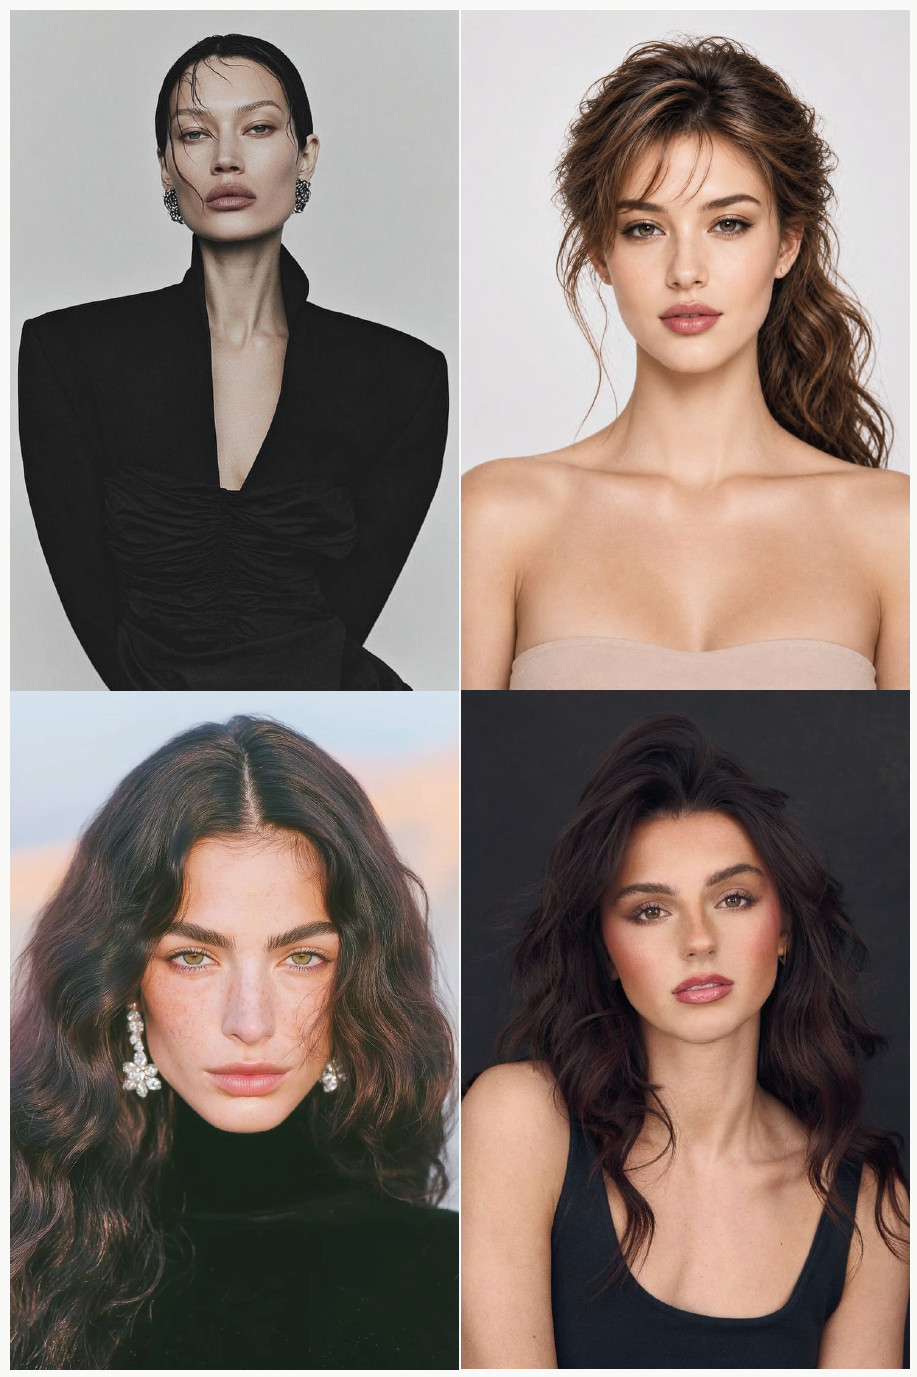
Profile Silhouette Close-Up
Model Instruction: Turn fully to the side, chin level, gaze fixed on a point straight ahead.
Photographer Instruction: Backlight strongly for a graphic silhouette, or side-light for a sculpted, dimensional profile. Both work beautifully.
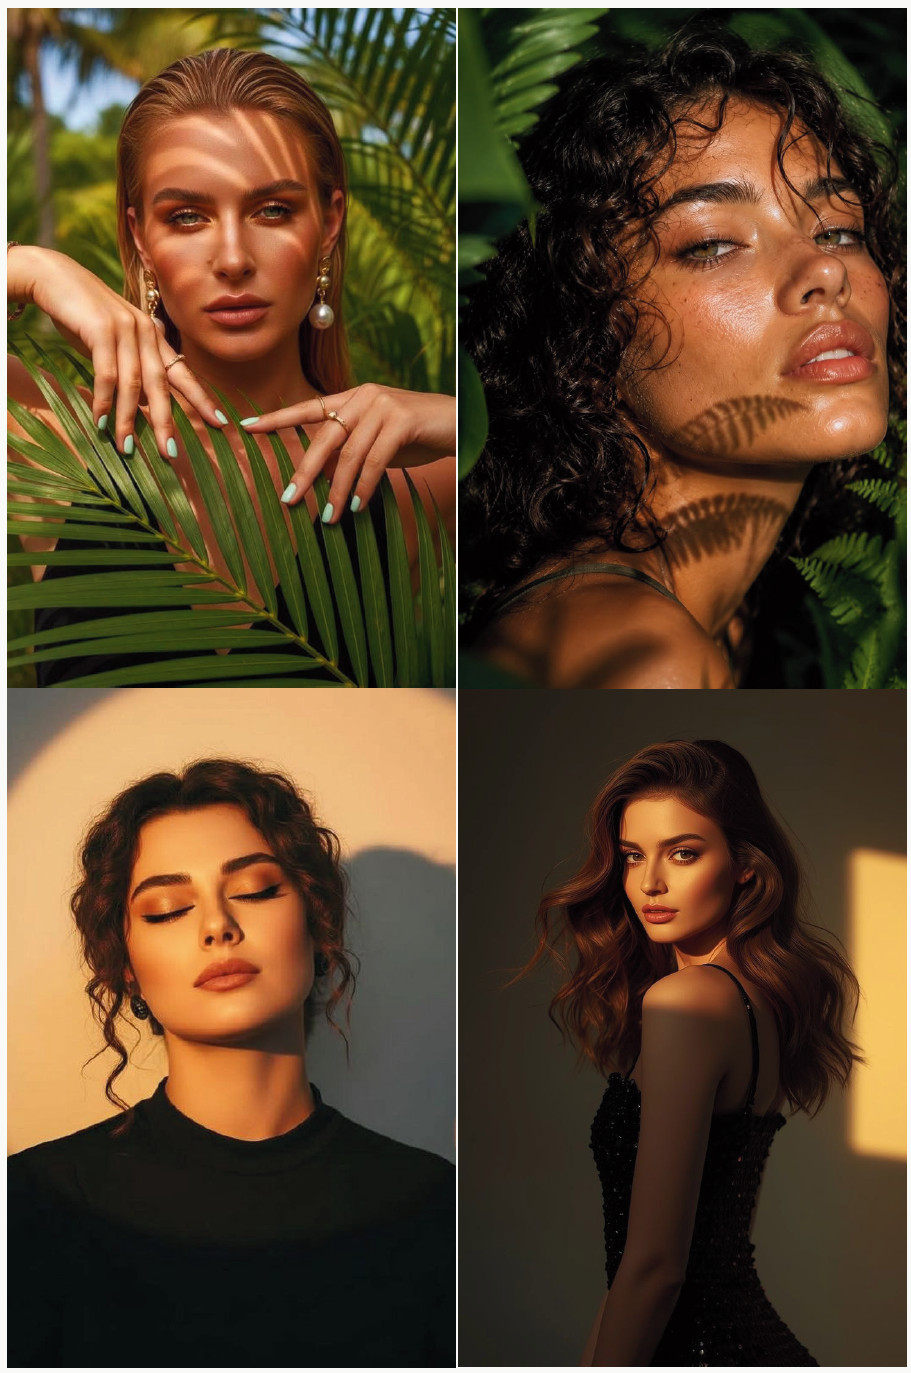
Close-Up, Laughing Candidly
Model Instruction: Just relax and think of something that genuinely makes you laugh. No need to perform it.
Photographer Instruction: Shoot continuously through the laugh. The frame right as the laugh begins to fade is usually more flattering than the peak.
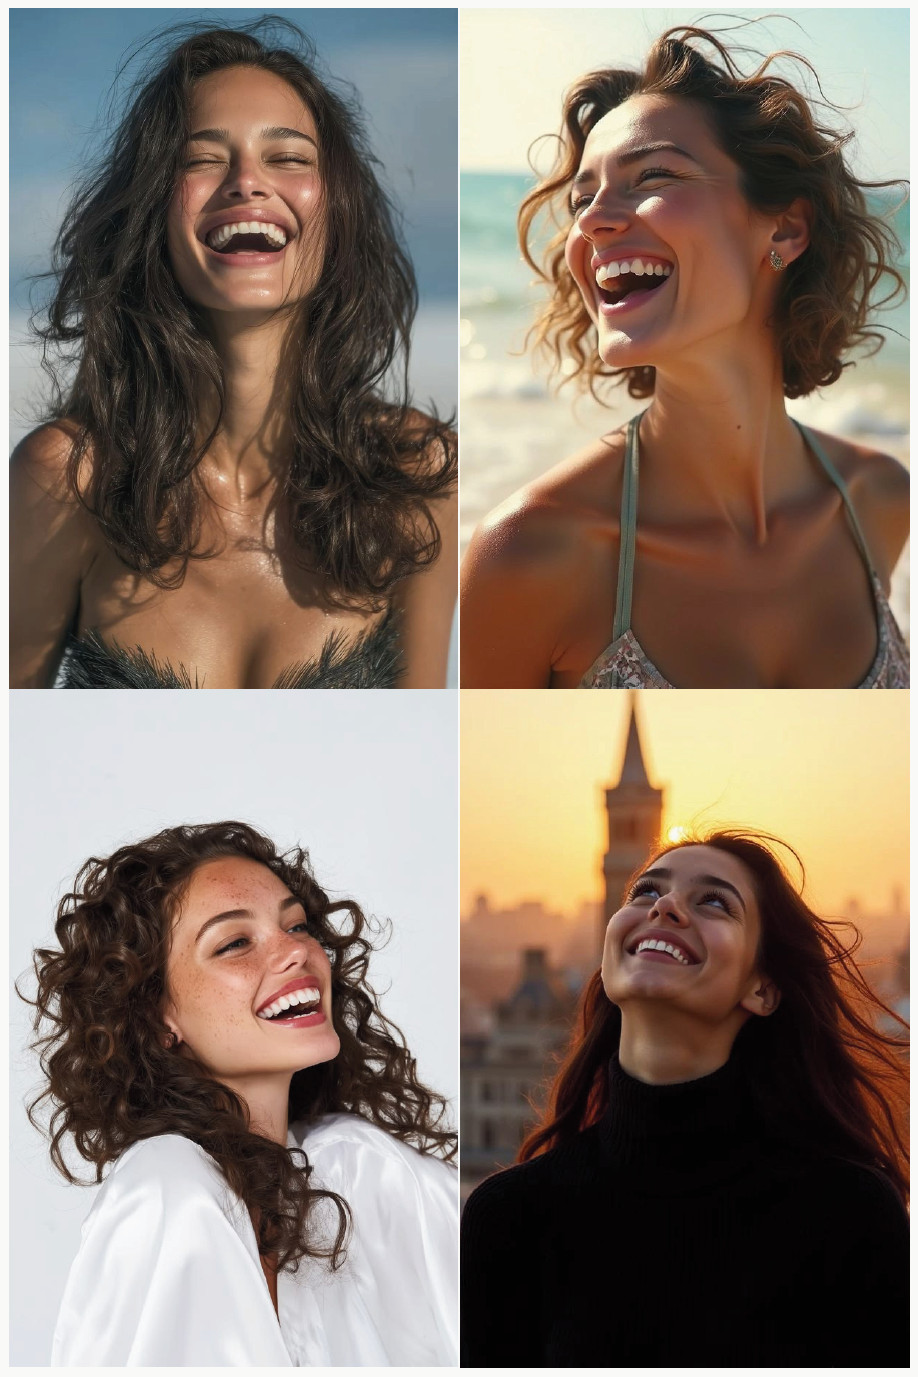
Close-Up, Soft Smile
Model Instruction: Let the corners of your mouth lift gently into a closed, relaxed smile, with slightly softened eyes.
Photographer Instruction: This subtler expression photographs beautifully in soft, diffused light. Avoid harsh flash, which can flatten a gentle smile.
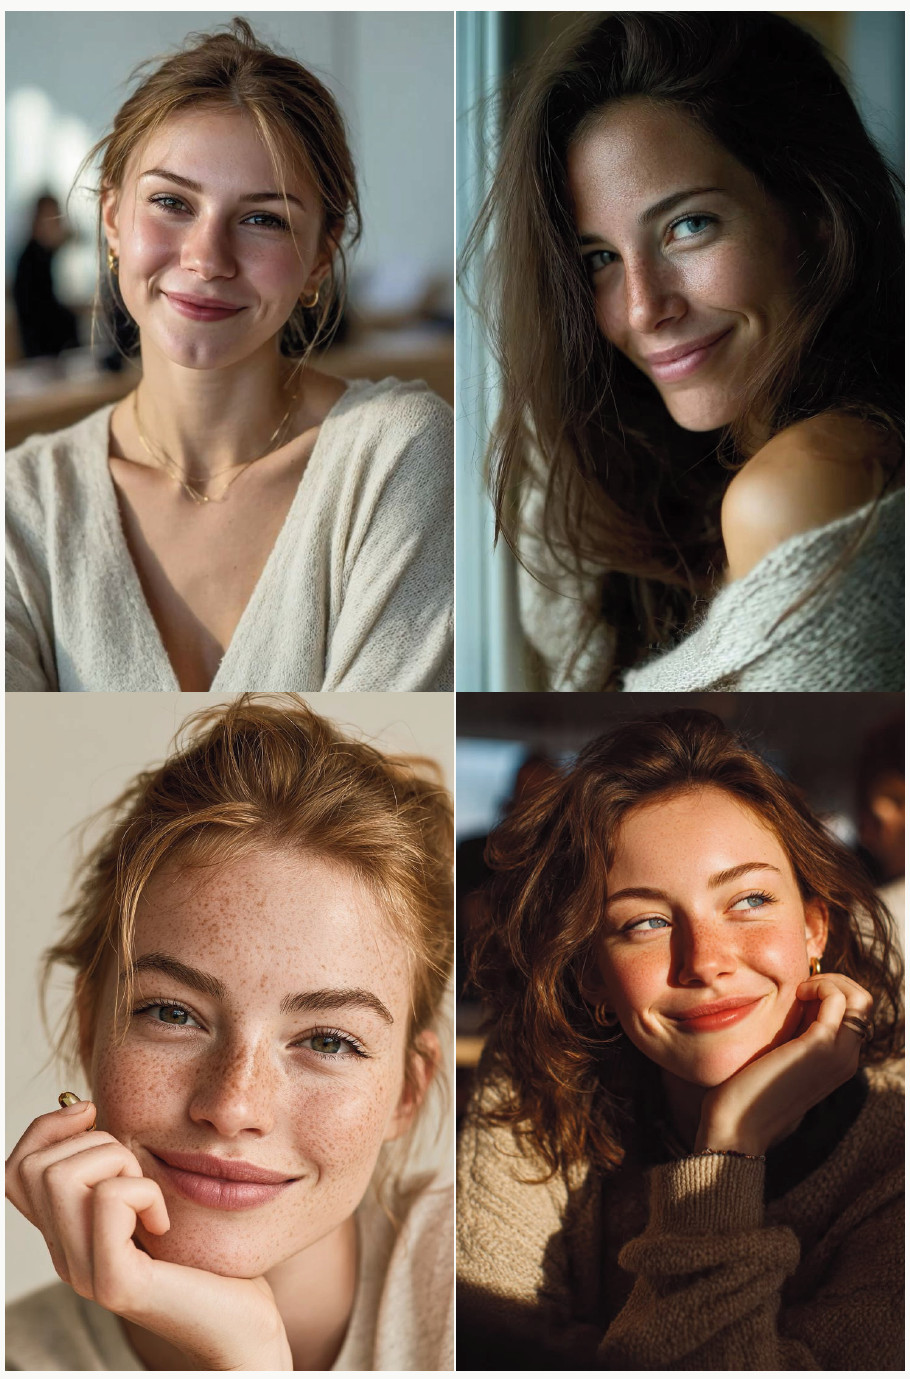
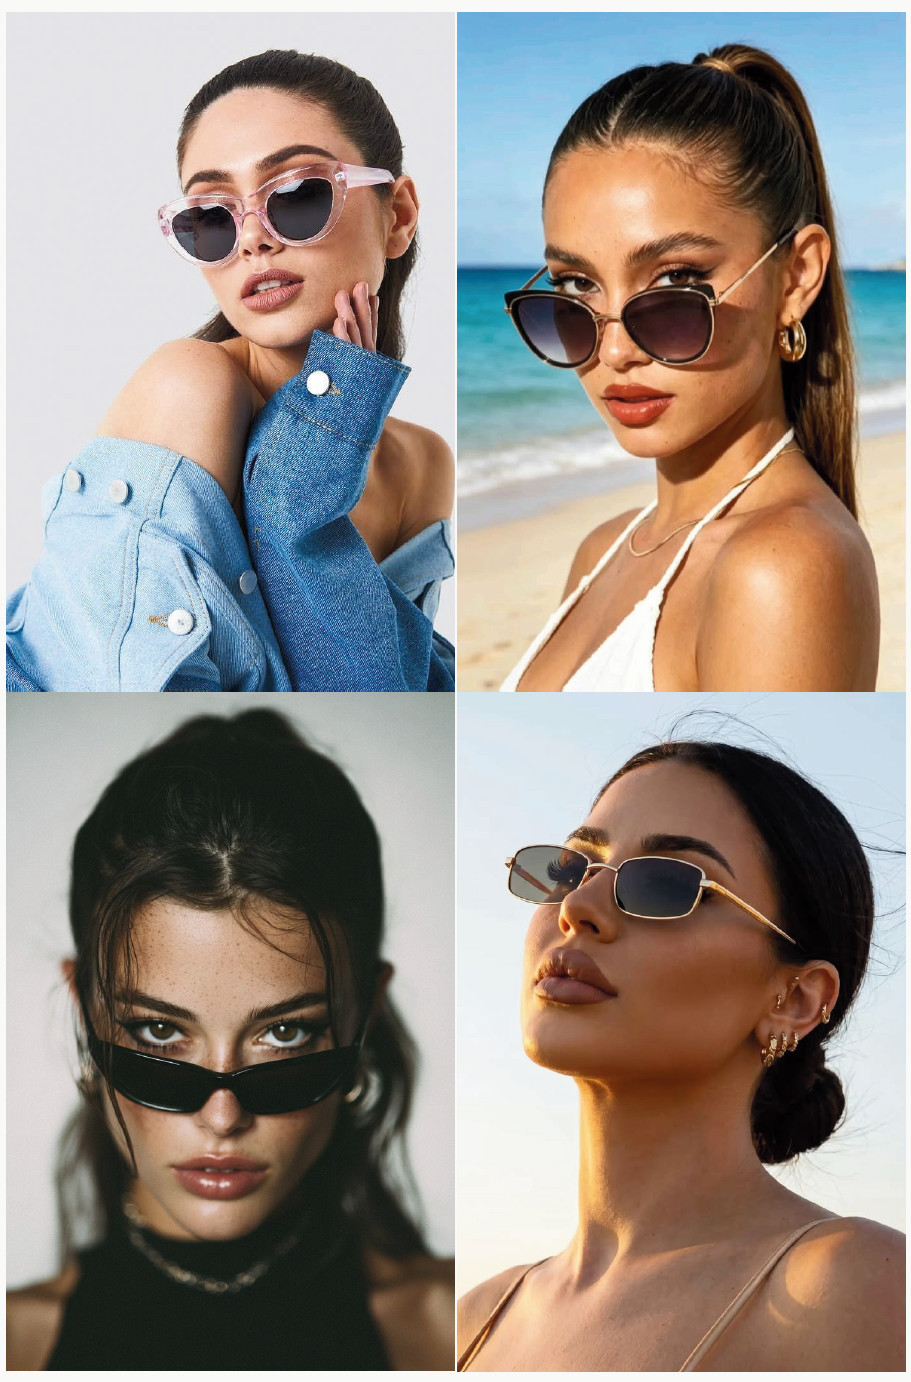
Close-Up with Sunglasses
Model Instruction: Push your sunglasses down slightly on your nose and peer just over the top toward the camera.
Photographer Instruction: Watch for unwanted reflections in the lenses. Angle slightly to avoid catching yourself or distracting elements.
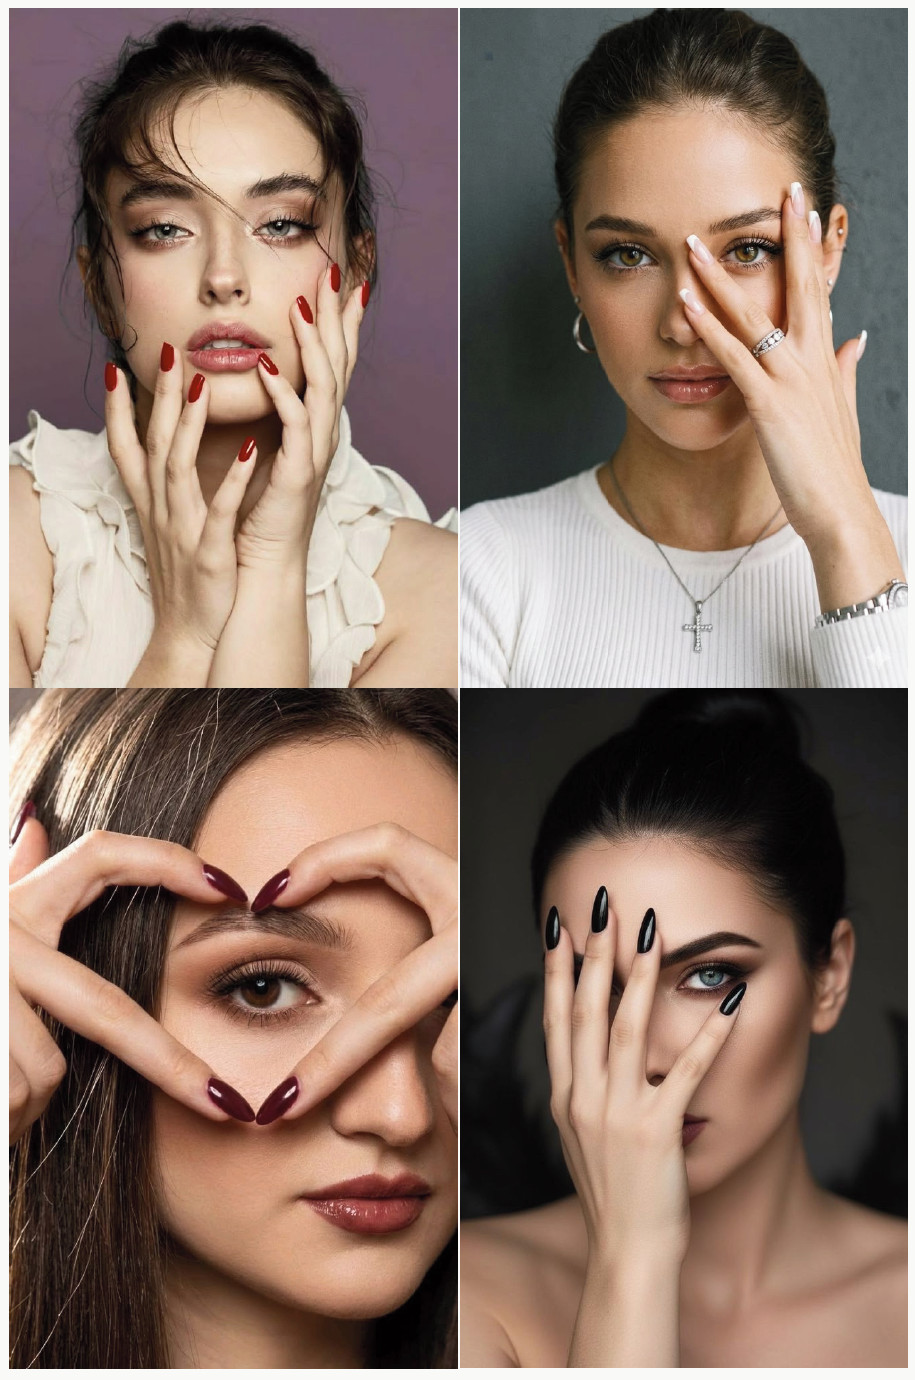
Chapter 6: Hand, Arm & Hair Poses
If there’s one question every photographer gets asked more than any other, it’s “what do I do with my hands?!” This entire chapter exists to answer that question in fifteen different ways, so you’re never caught scrambling again.
⚠️ Common Mistake to Avoid: Letting hands go completely limp and flat, or clench into tight fists – both read as tense in photos. Aim for soft, slightly bent fingers, like she’s gently holding an invisible egg.
Hands Framing the Face
Model Instruction: Bring both hands up loosely around your face, not quite touching your skin, fingers relaxed.
Photographer Instruction: A soft beauty pose: shoot close, at eye level, keeping focus locked on the eyes even with hands in frame.
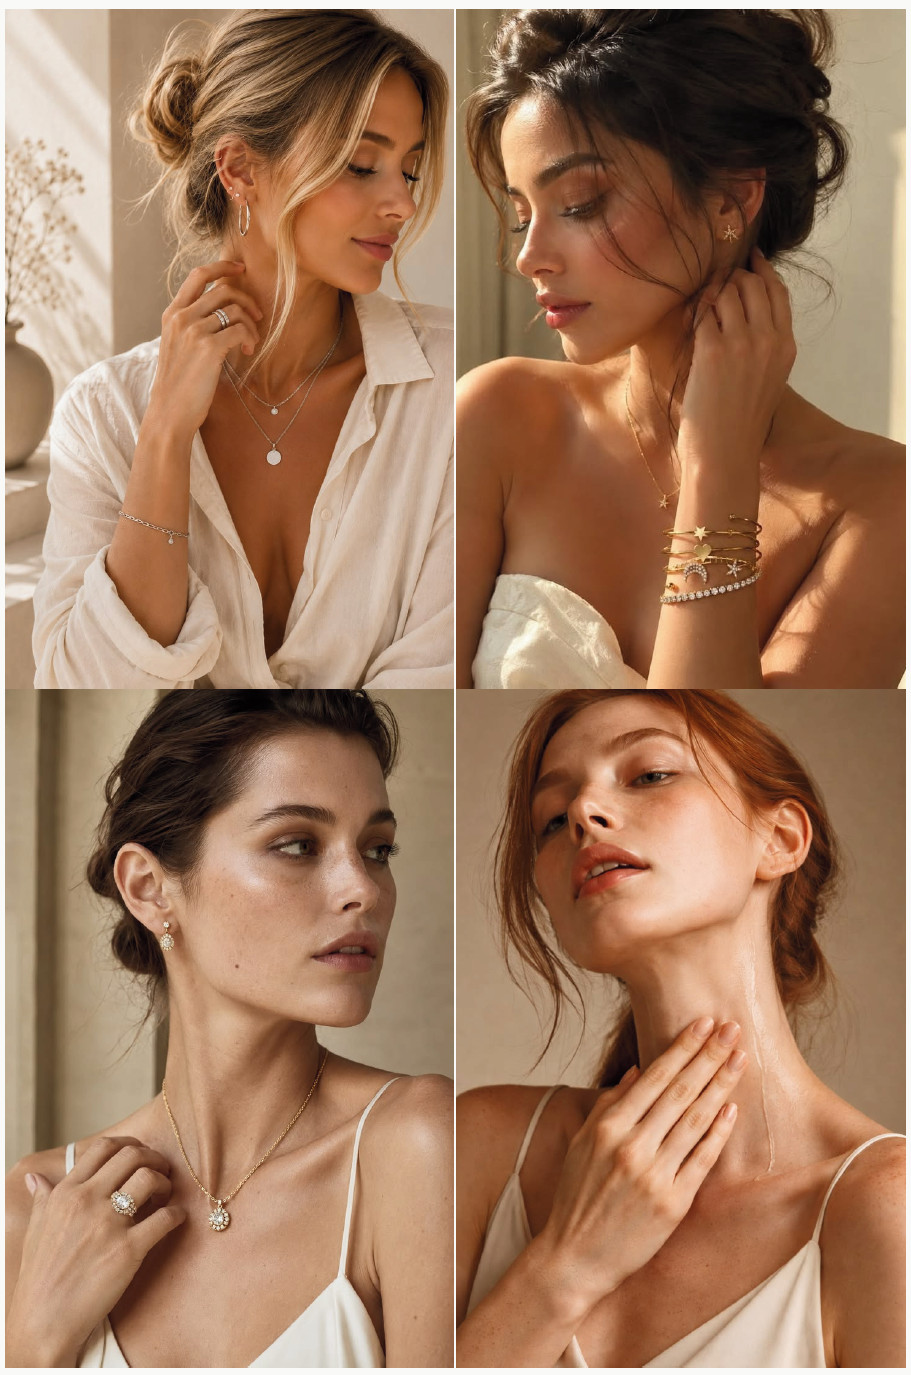
Hand Touching the Neck
Model Instruction: Rest your fingertips gently along the side of your neck or collarbone, elbow relaxed and slightly away from your body.
Photographer Instruction: Elegant and understated. Watch the wrist angle: a soft bend reads far better than a stiff, straight line.
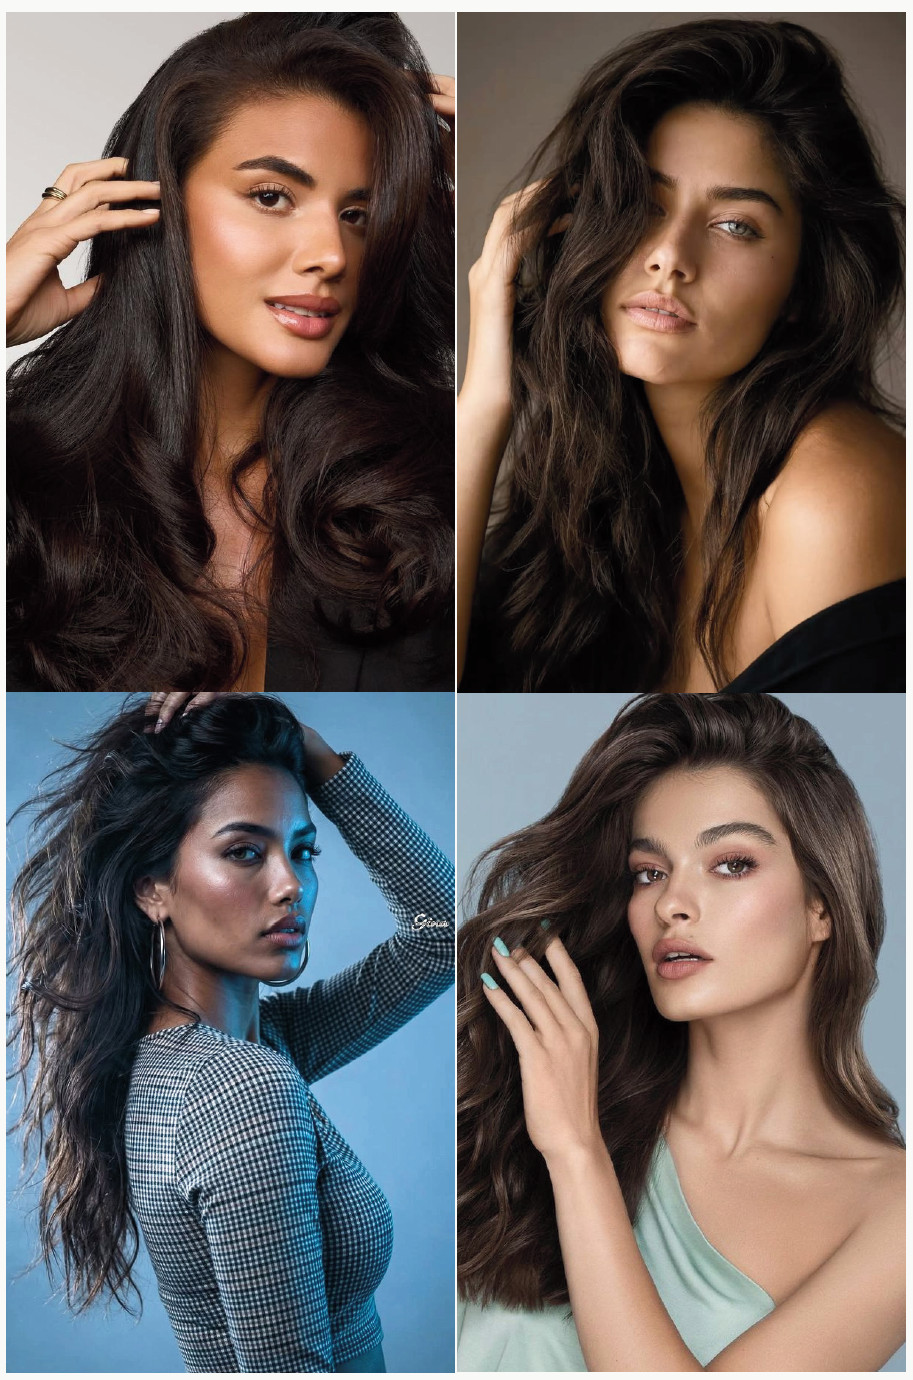
Hand in Hair, Tousled
Model Instruction: Run one hand up through your hair, lifting it slightly, as if pushing it back from your face.
Photographer Instruction: Shoot a quick burst as the hand moves through. Mid-motion frames often look more natural than a held pose.
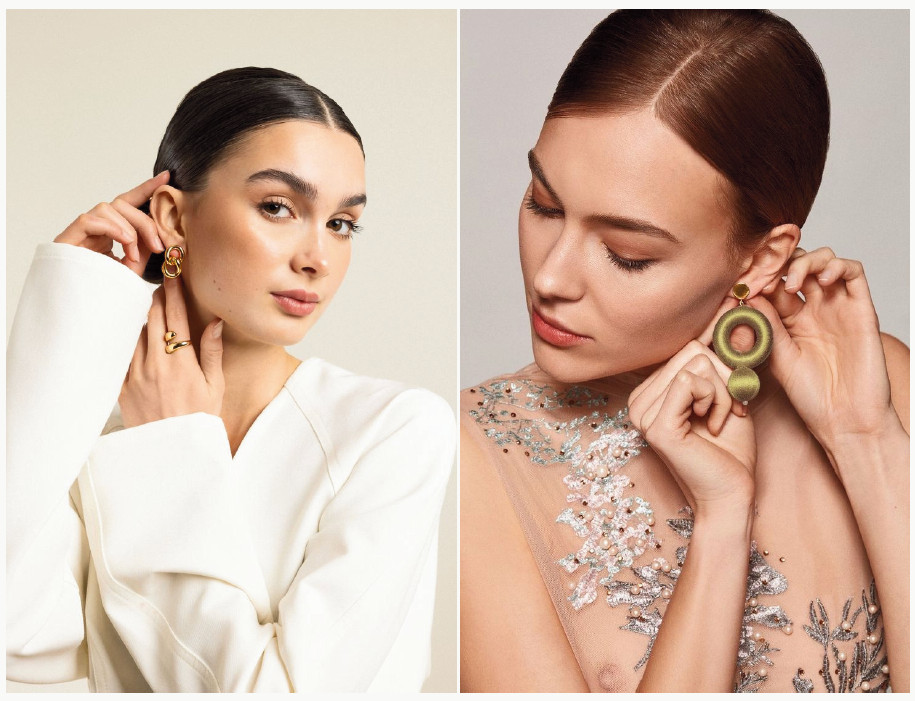
Hand Adjusting Earring
Model Instruction: Reach up to touch or adjust an earring, tilting your head very slightly toward that hand.
Photographer Instruction: A small, natural gesture that reads as candid. Shoot in burst mode to catch the most relaxed moment mid-motion.
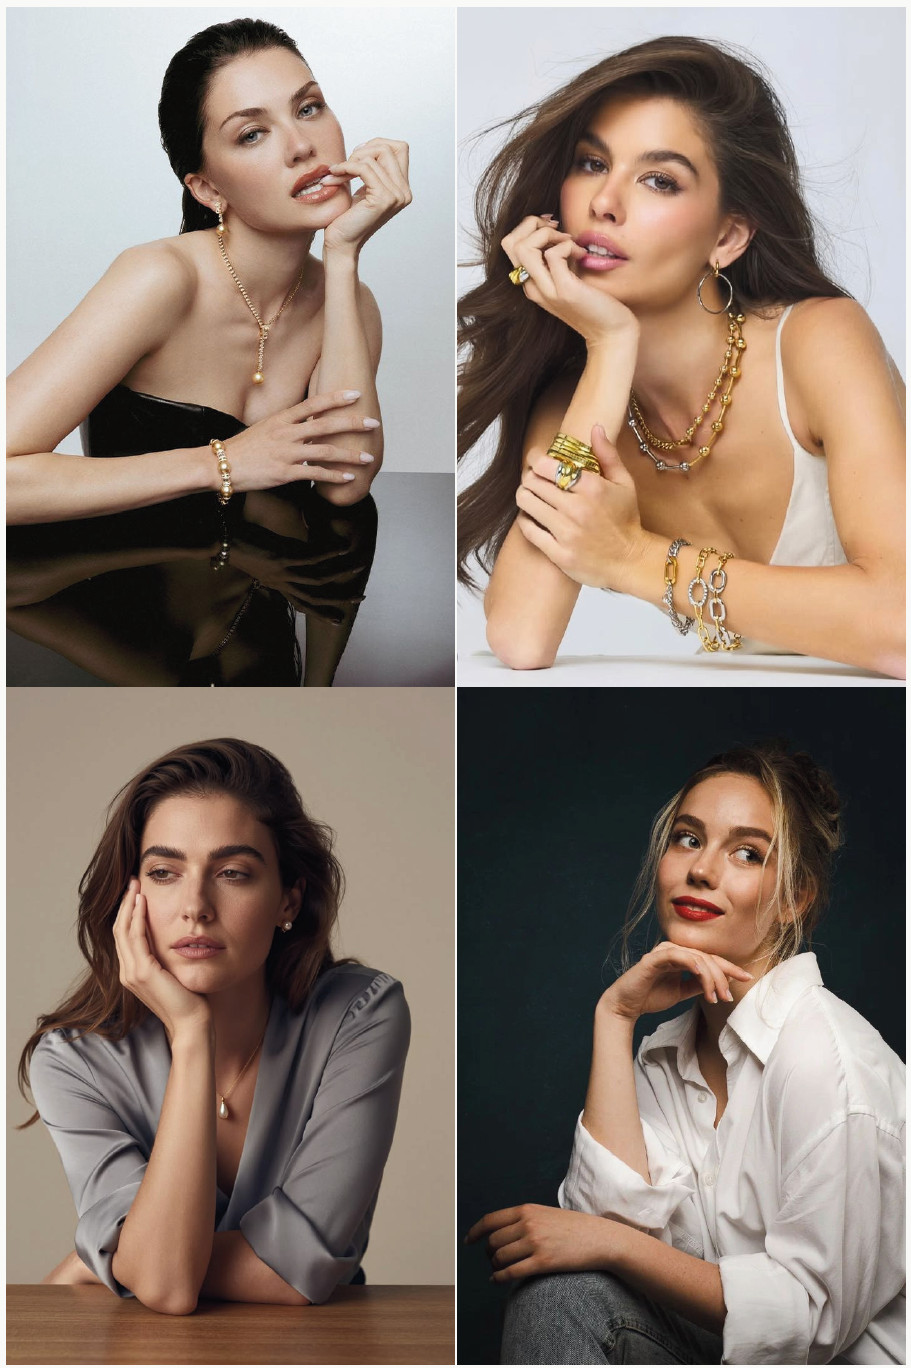
Hand Under Chin, Thoughtful
Model Instruction: Rest one or two fingers lightly under your chin, gaze soft and slightly off toward the distance.
Photographer Instruction: A quiet, contemplative feel. Use gentle, soft lighting rather than harsh flash to match the mood.
Chapter 7: Poses Using Props & Furniture
Props are a photographer’s best friend, especially with nervous or first-time subjects. They give the hands something to do, which quietly solves half the “what do I do with my hands” panic before it even starts. Keep a small prop kit in your bag: a hat, a scarf, a book, some string lights. You’ll use it constantly.
⚠️ Common Mistake to Avoid: Letting the prop become the whole photo. Props should support the pose, not compete with the model’s face and expression for attention. keep them secondary in the frame.
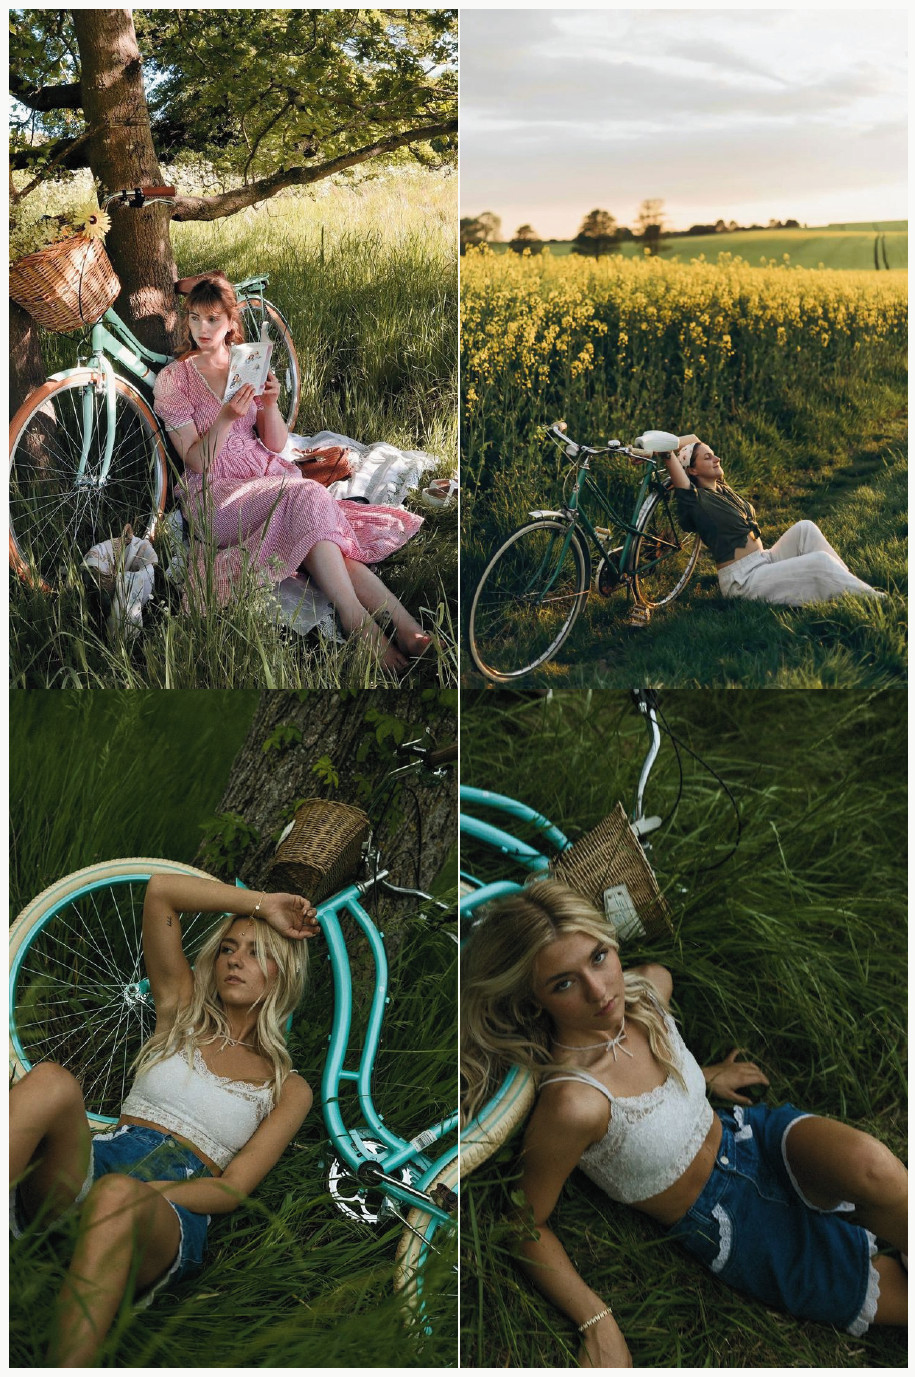
Leaning on a Bicycle
Model Instruction: Stand beside the bike, one hand on the handlebar, weight shifted onto your back leg.
Photographer Instruction: A charming lifestyle staple. Shoot at a slight angle so both the bike and her full silhouette read clearly.
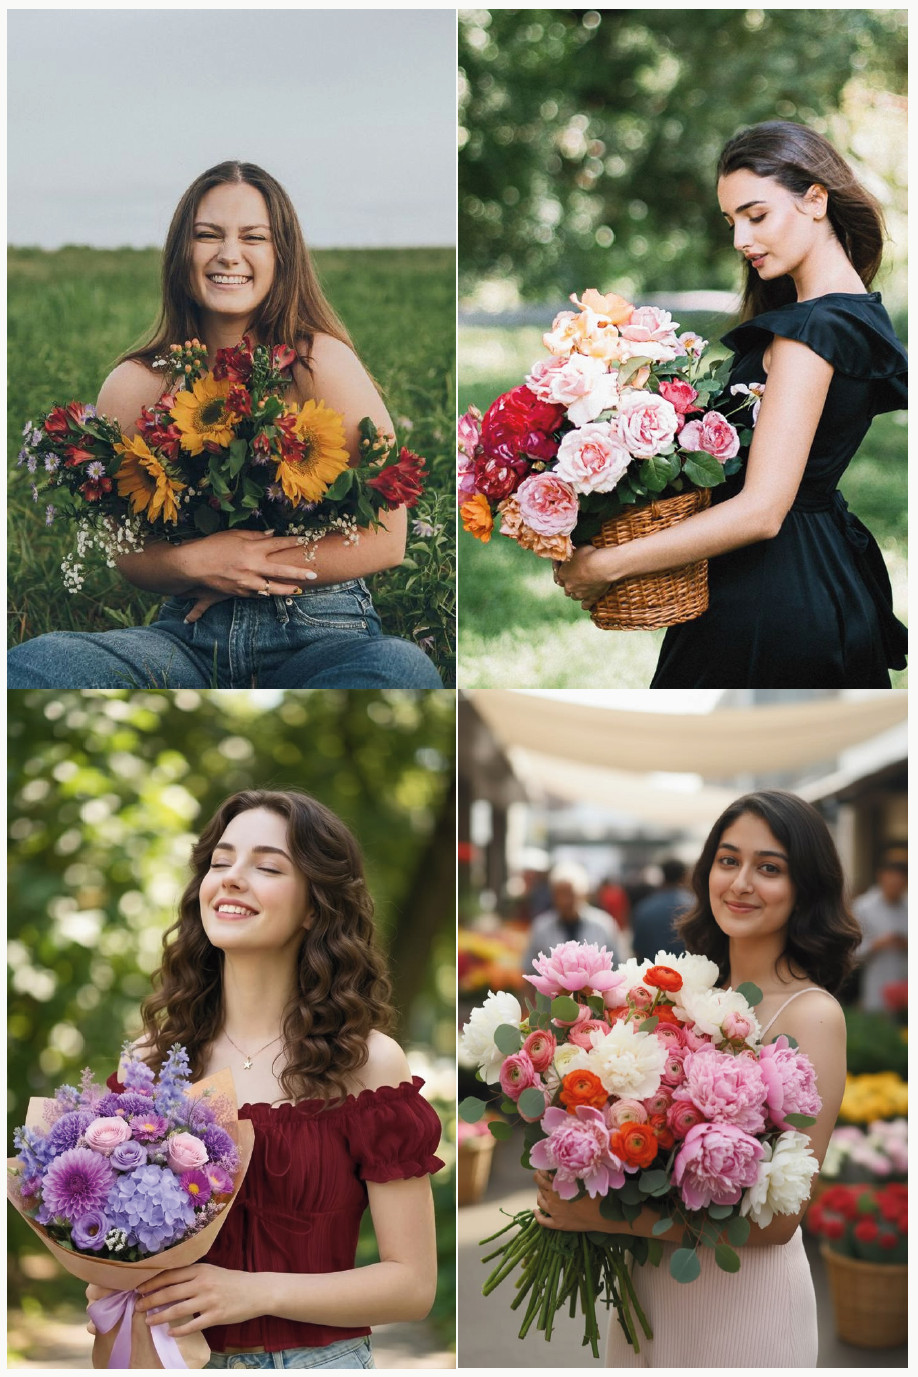
Holding a Bouquet of Flowers
Model Instruction: Hold the bouquet loosely at waist height with both hands, gaze either down at the flowers or up toward the camera.
Photographer Instruction: Watch that the bouquet doesn’t block her face from any angle. Reposition it slightly lower if needed.
Holding an Open Book
Model Instruction: Hold the book open at chest height, eyes down on the page, as if genuinely absorbed in reading.
Photographer Instruction: Let this play out candidly across a few frames. A real reading moment always beats a stiffly held pose.
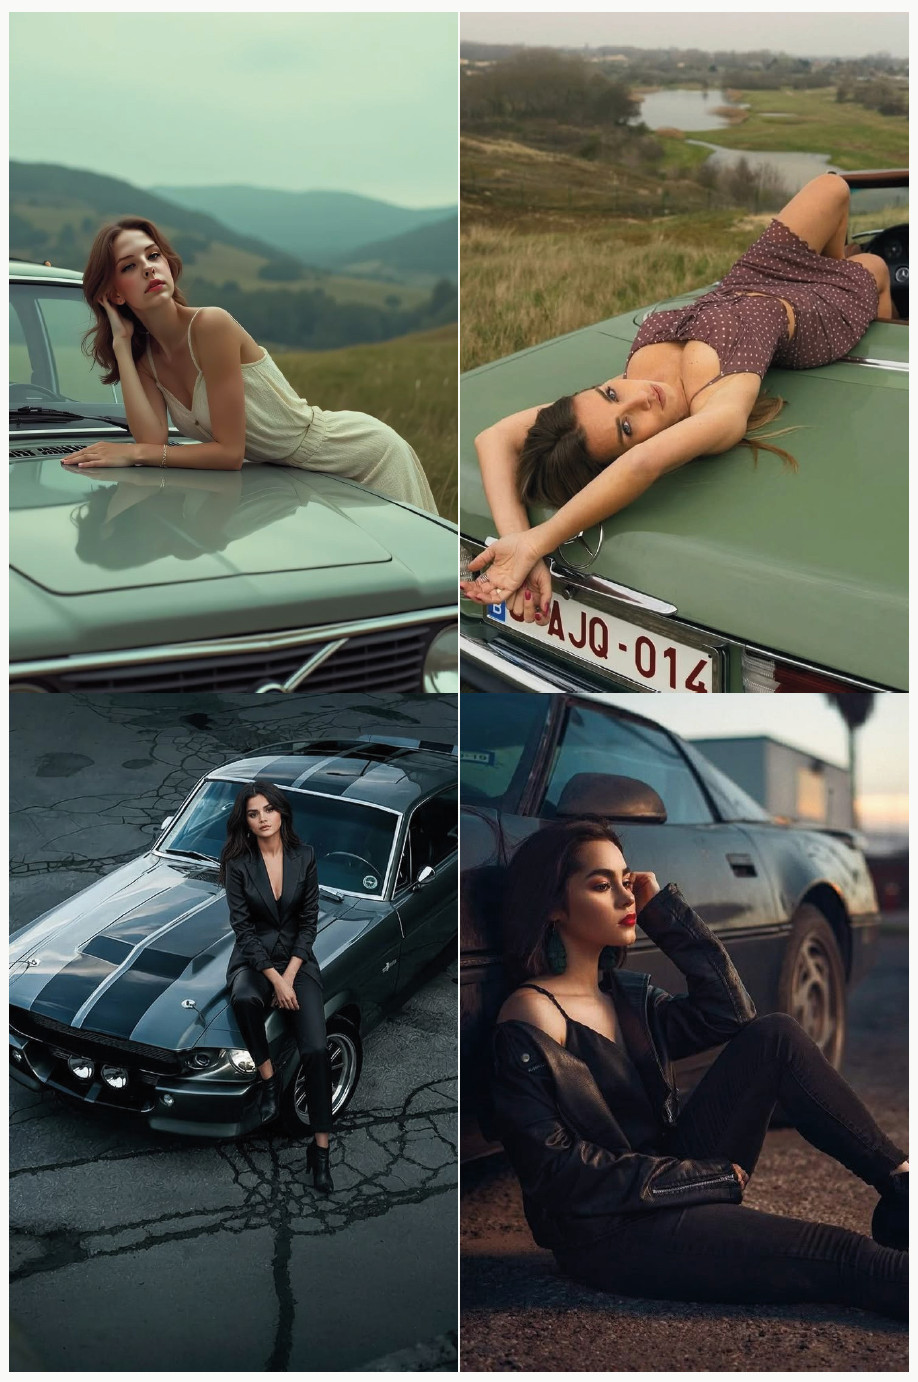
Leaning on a Car
Model Instruction: Lean your hip and one hand against the car door, ankles crossed, weight settled comfortably.
Photographer Instruction: A confident, editorial lifestyle shot. Shoot at a slight low angle for extra polish and presence.
Chapter 8: Poses Using Walls, Stairs & Architecture
Architecture gives you built-in leading lines, natural frames, and something for your subject to lean on. This chapter is your best friend for urban shoots, brownstone sessions, or any location scouting trip where you spot “ooh, that wall would be perfect.”
⚠️ Common Mistake to Avoid: Standing your subject flat against a wall, facing the camera head-on. It looks like a police lineup. Always angle the body and let at least one point of contact (a shoulder, a foot) touch the surface instead.
Classic Wall Lean
Model Instruction: Lean one shoulder against the wall, weight on your outer leg, inner leg free to bend or cross in front.
Photographer Instruction: Shoot at a 45-degree angle to the wall rather than straight-on for a much more dynamic composition.
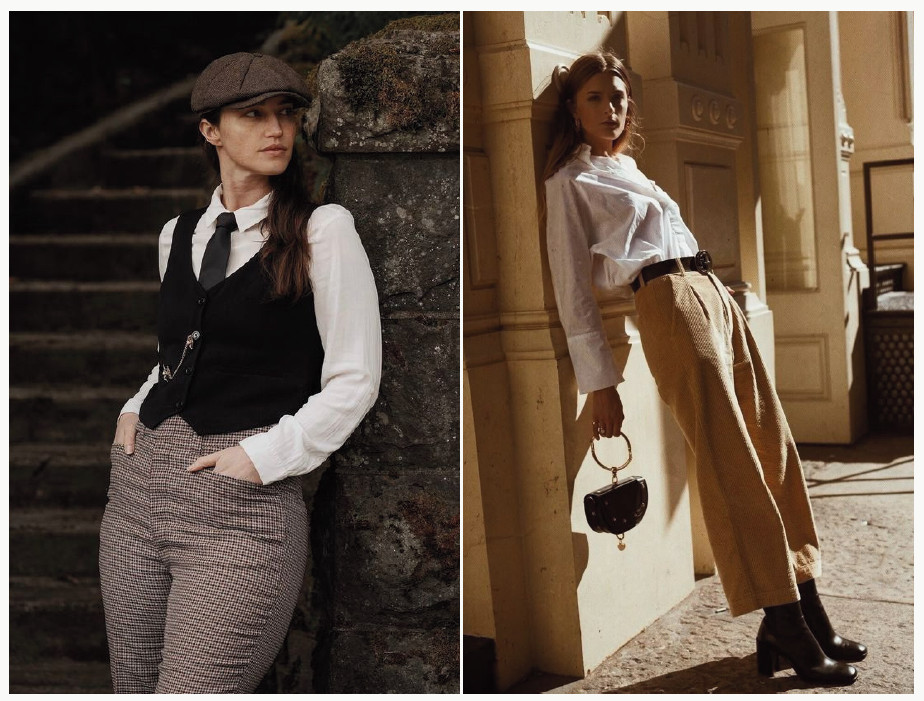
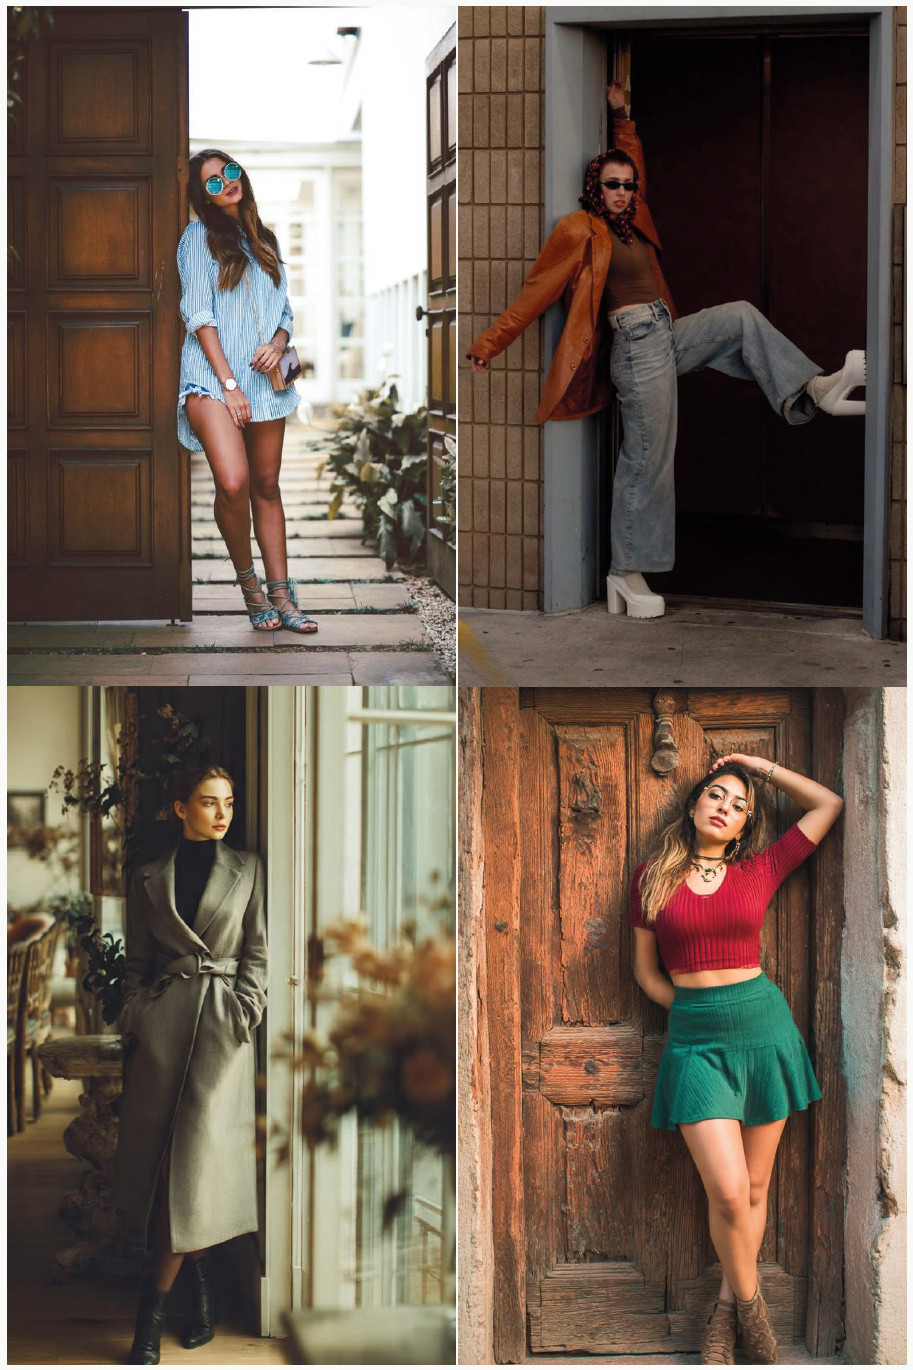
Leaning in a Doorway Frame
Model Instruction: Lean one shoulder against the doorframe, ankles crossed, gaze drifting toward the camera.
Photographer Instruction: Use the doorframe as a natural frame within a frame, exposing whichever side of the doorway has better light.
Chapter 9: Outdoor & Nature Poses
Nature does half your job for you: texture, color, natural light, movement. This chapter leans into that, using the landscape itself as your co-director. Just remember to always prioritize safety over the shot (looking at you, cliff-edge poses).
⚠️ Common Mistake to Avoid: Shooting in harsh midday sun with your subject facing directly into it, forcing a squint. Reposition so the sun is behind or to the side, or move into open shade whenever you can.
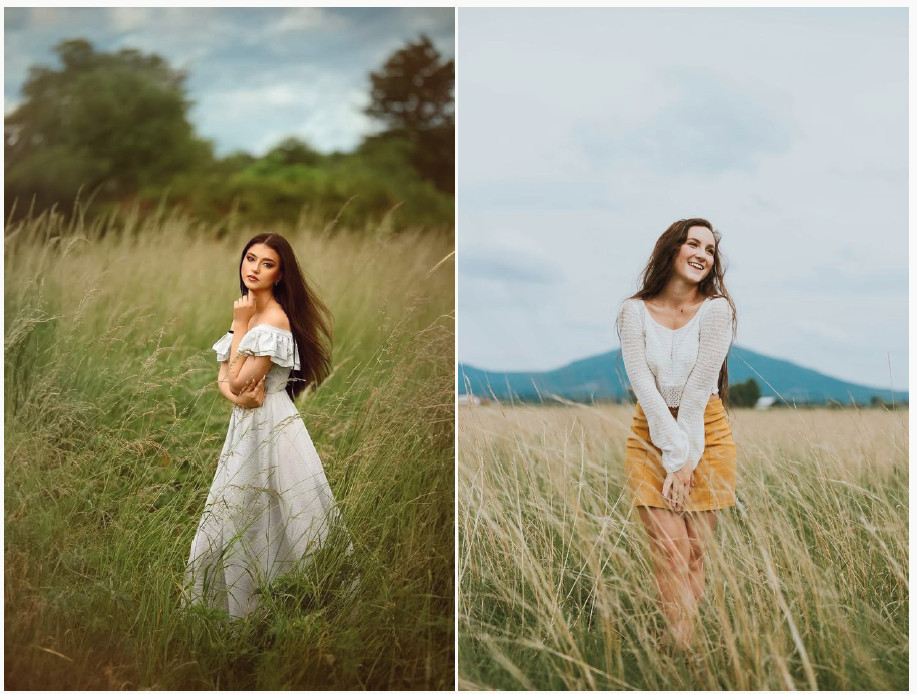
Standing in a Field of Tall Grass
Model Instruction: Stand with the grass brushing around your legs, arms relaxed, gaze toward the camera or off into the distance.
Photographer Instruction: Shoot with a wide aperture to blur the grass in the foreground and background, clearly isolating her.
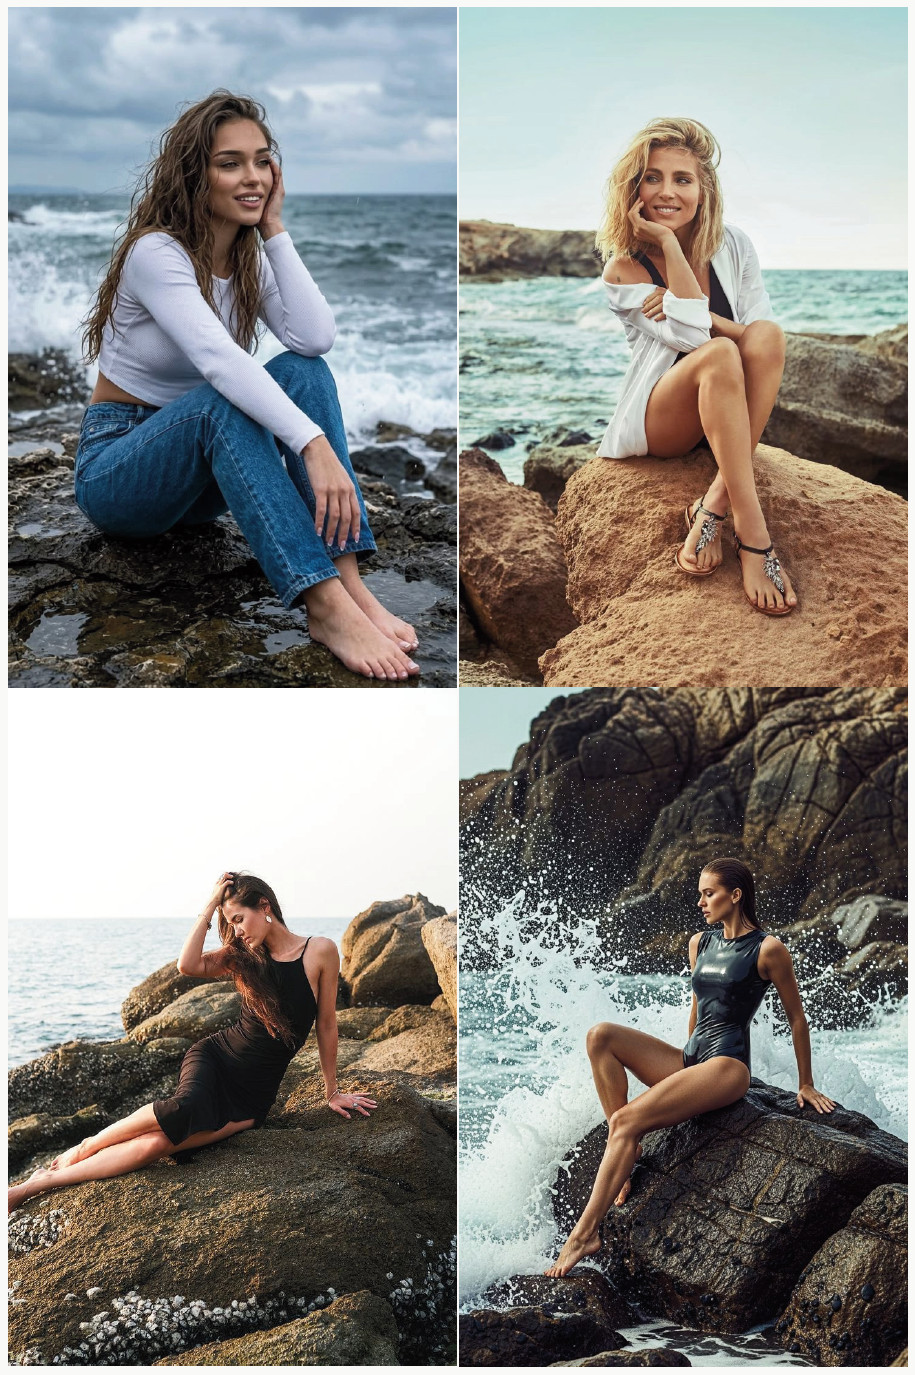
Sitting on Rocks by the Ocean
Model Instruction: Sit comfortably on the rocks, knees bent, hands resting on your legs or beside you.
Photographer Instruction: Shoot low and wide to include the crashing waves in the frame for dramatic scale.
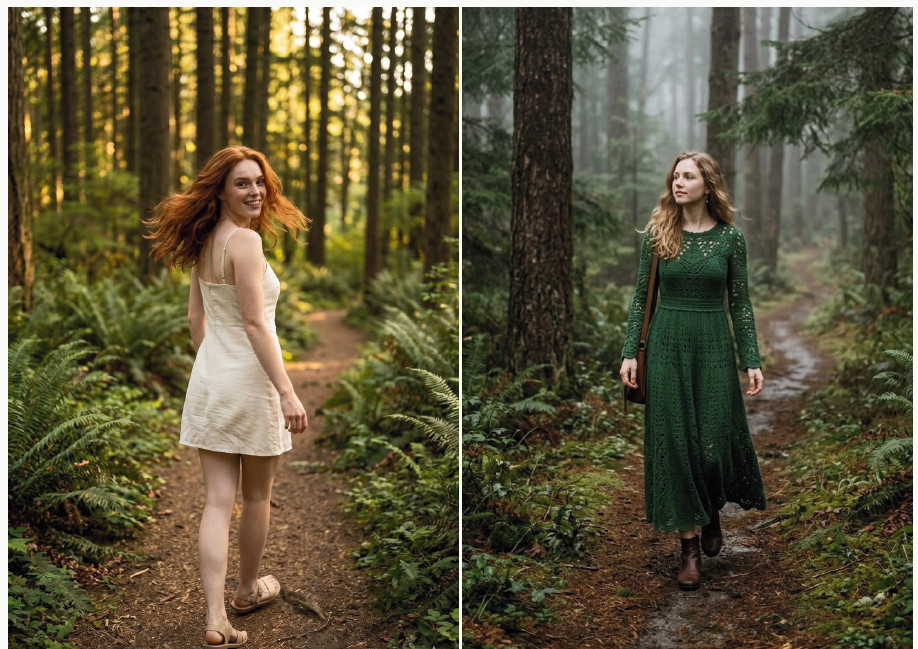
Walking Along a Forest Trail
Model Instruction: Walk along the path at a relaxed pace, occasionally glancing back toward the camera.
Photographer Instruction: Use the trail as a natural leading line, shooting from slightly behind or beside her as she walks.
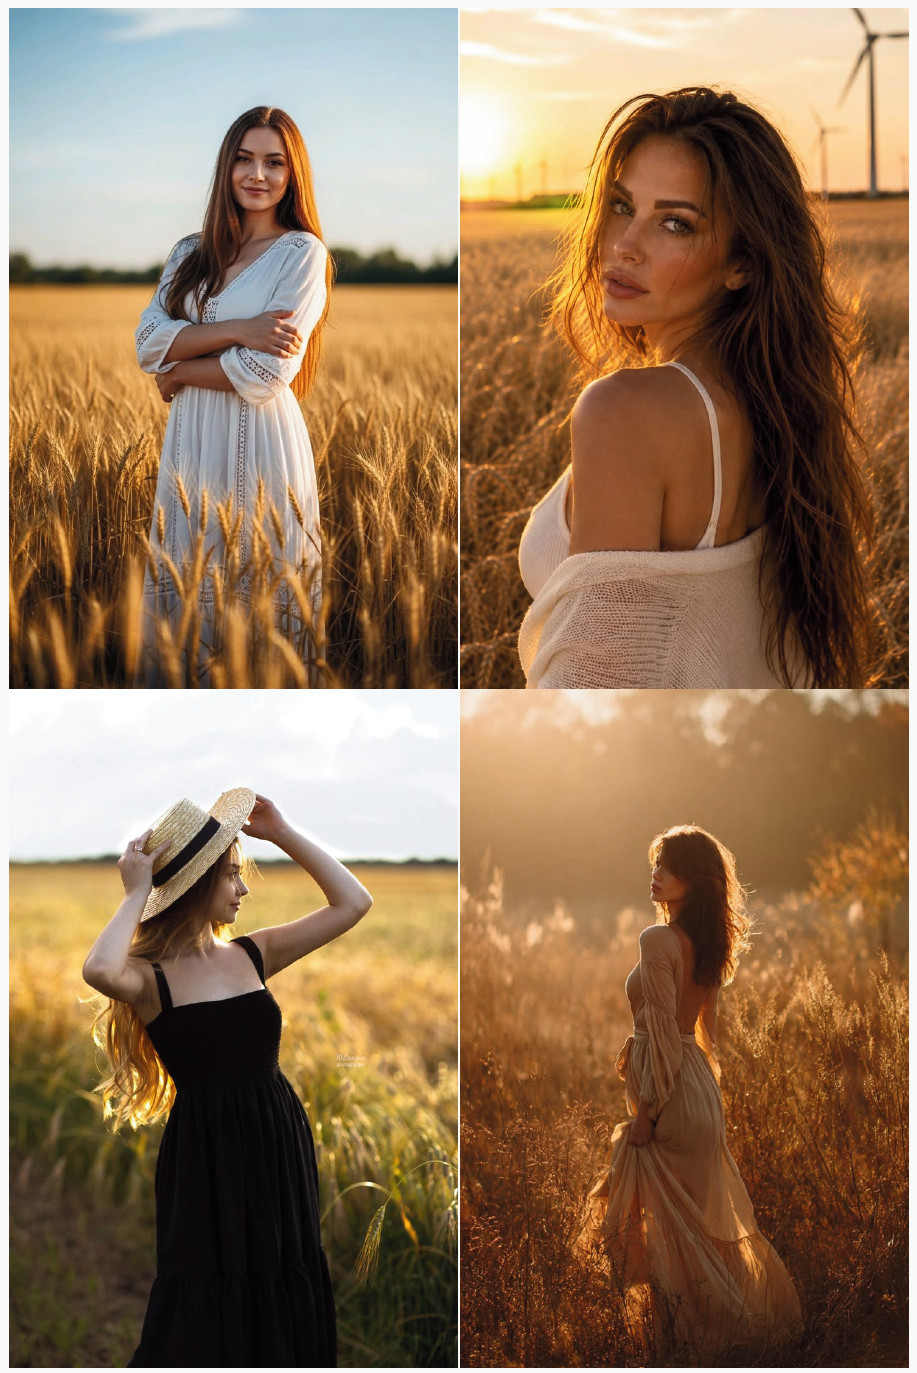
Silhouette Against a Golden Field
Model Instruction: Stand with the sun low behind you, keeping your arms slightly away from your body so your silhouette reads clearly.
Photographer Instruction: Expose for the sky, letting her fall into a clean, graphic silhouette against the golden light.
Chapter 10: Studio & Backdrop Poses
The studio strips away the environmental storytelling of an outdoor shoot, so posing, lighting, and expression have to do all the heavy lifting. These ten poses are studio-tested classics that work with almost any lighting setup.
⚠️ Common Mistake to Avoid: Positioning your subject too close to a seamless paper backdrop. it creates a harsh, distracting shadow. Give at least a few feet of separation so your background light can do its job cleanly.
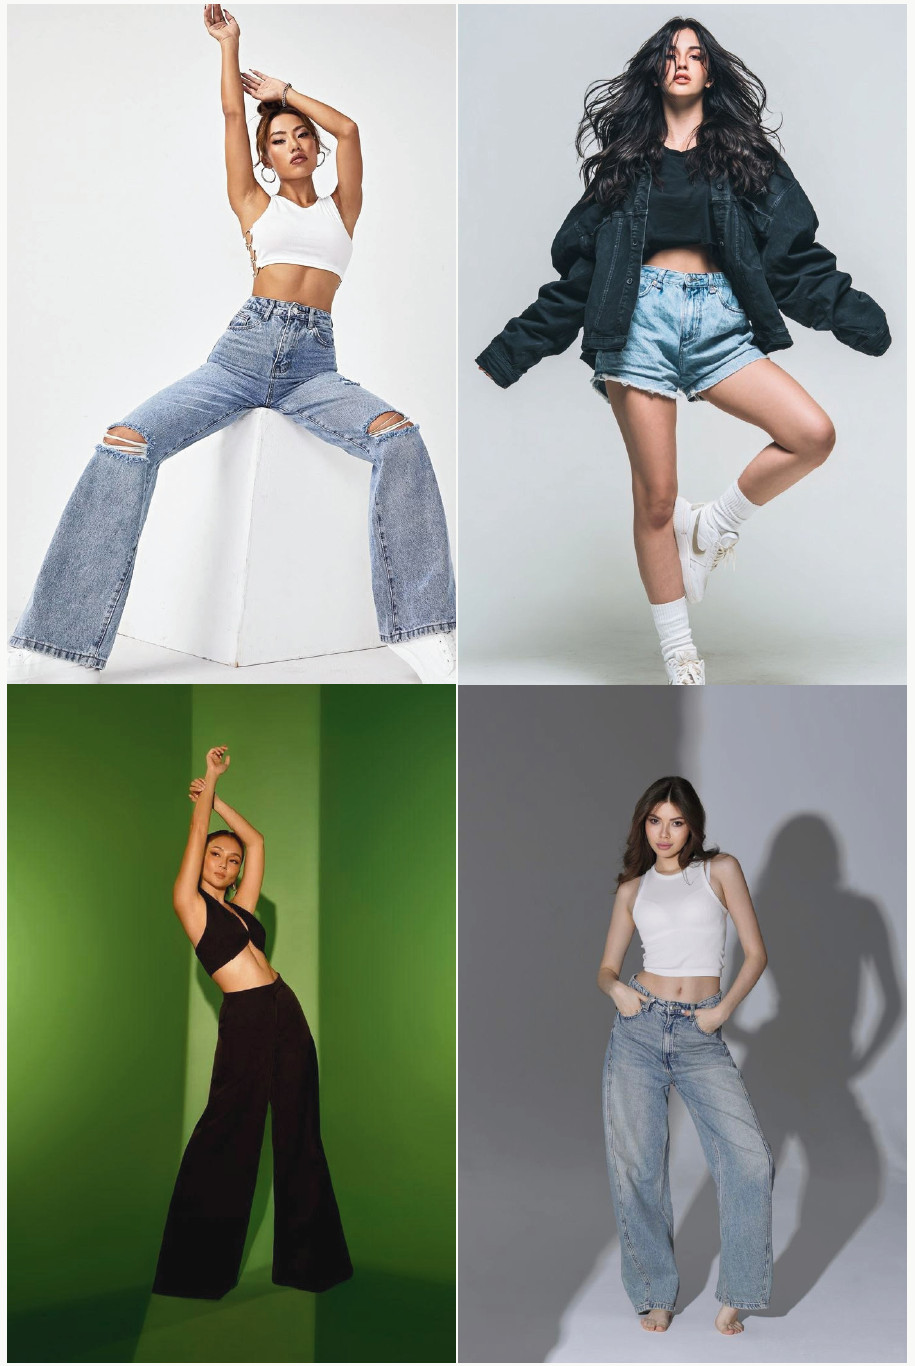
High-Fashion Editorial Stance
Model Instruction: Plant your feet in a wide, deliberate stance, one hip popped, chin lifted with a strong, direct gaze.
Photographer Instruction: Shoot from a low angle to add drama and presence. This pose thrives on confidence and sharp lines.
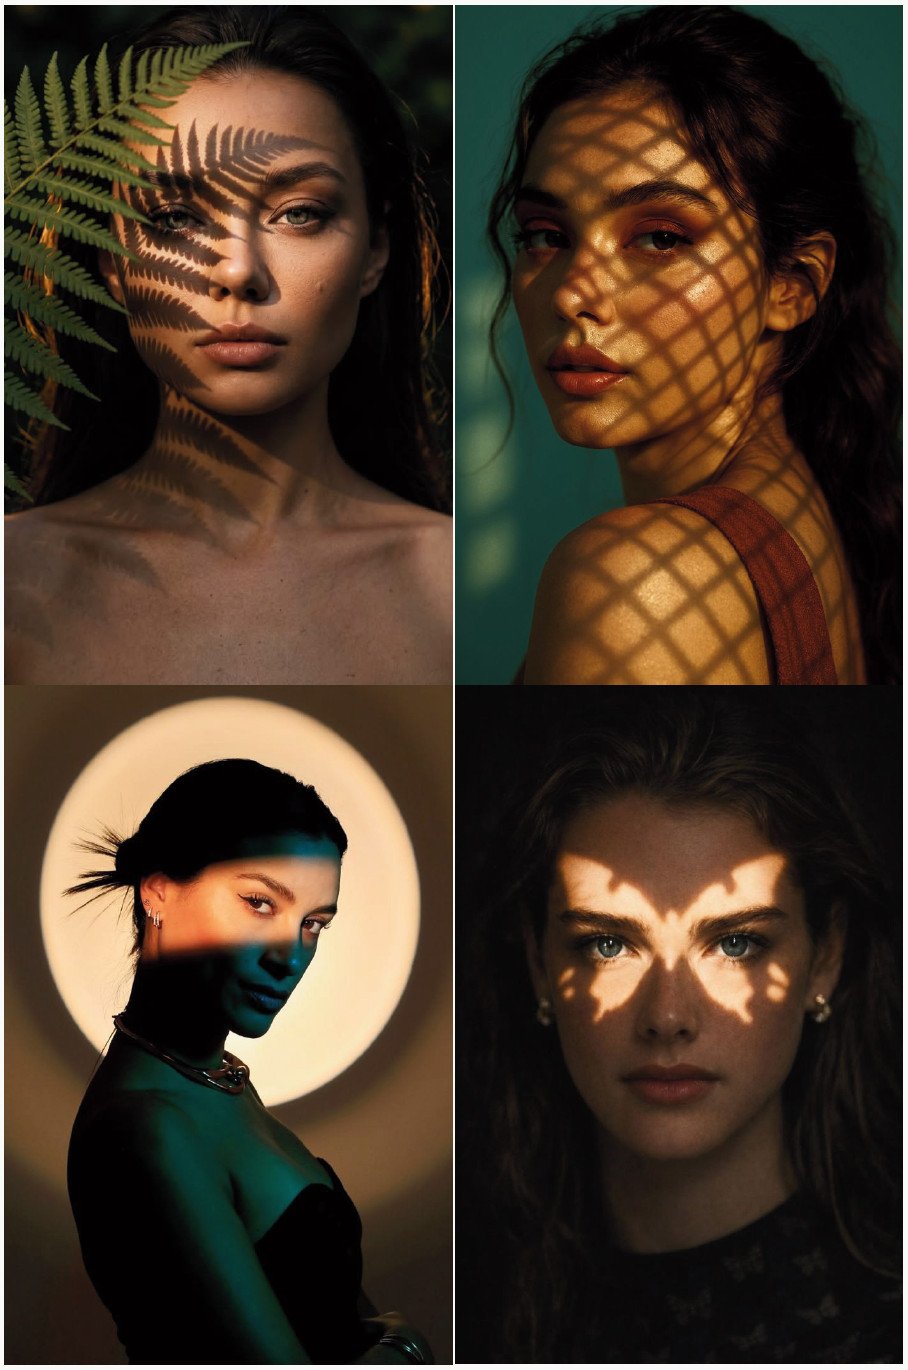
Fine Art Portrait, Dramatic Shadow
Model Instruction: Turn your face slightly toward the light, allowing half your face to fall into soft shadow.
Photographer Instruction: Use a single, narrow light source to carve dramatic shadow across the face. Meter for the highlight side.
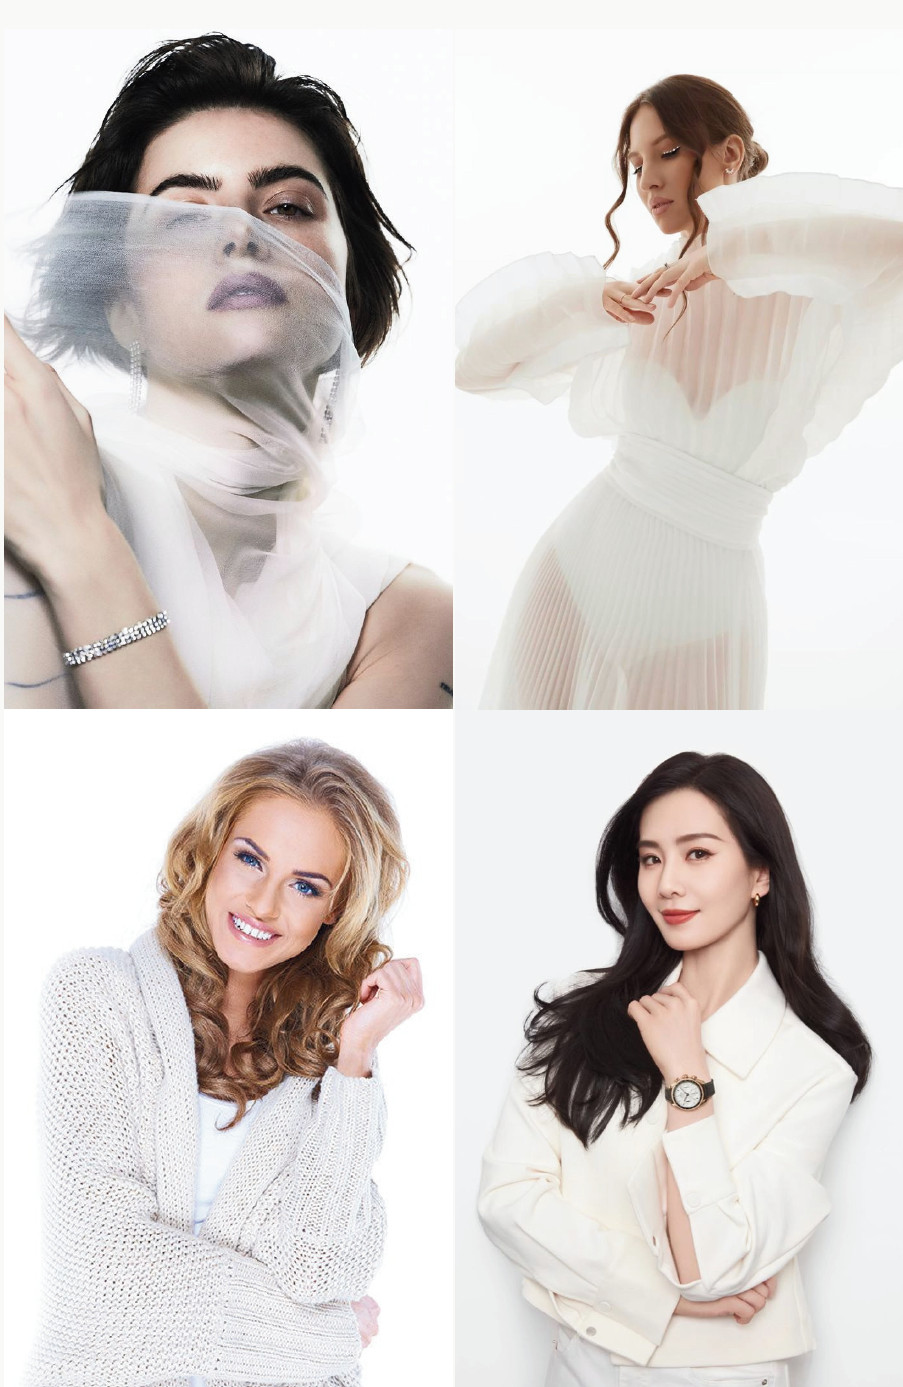
High-Key, White Backdrop
Model Instruction: Stand relaxed and open, facing the camera with a bright, easy expression.
Photographer Instruction: Overexpose the white background slightly to blow it out clean and bright, while keeping proper exposure on her skin.
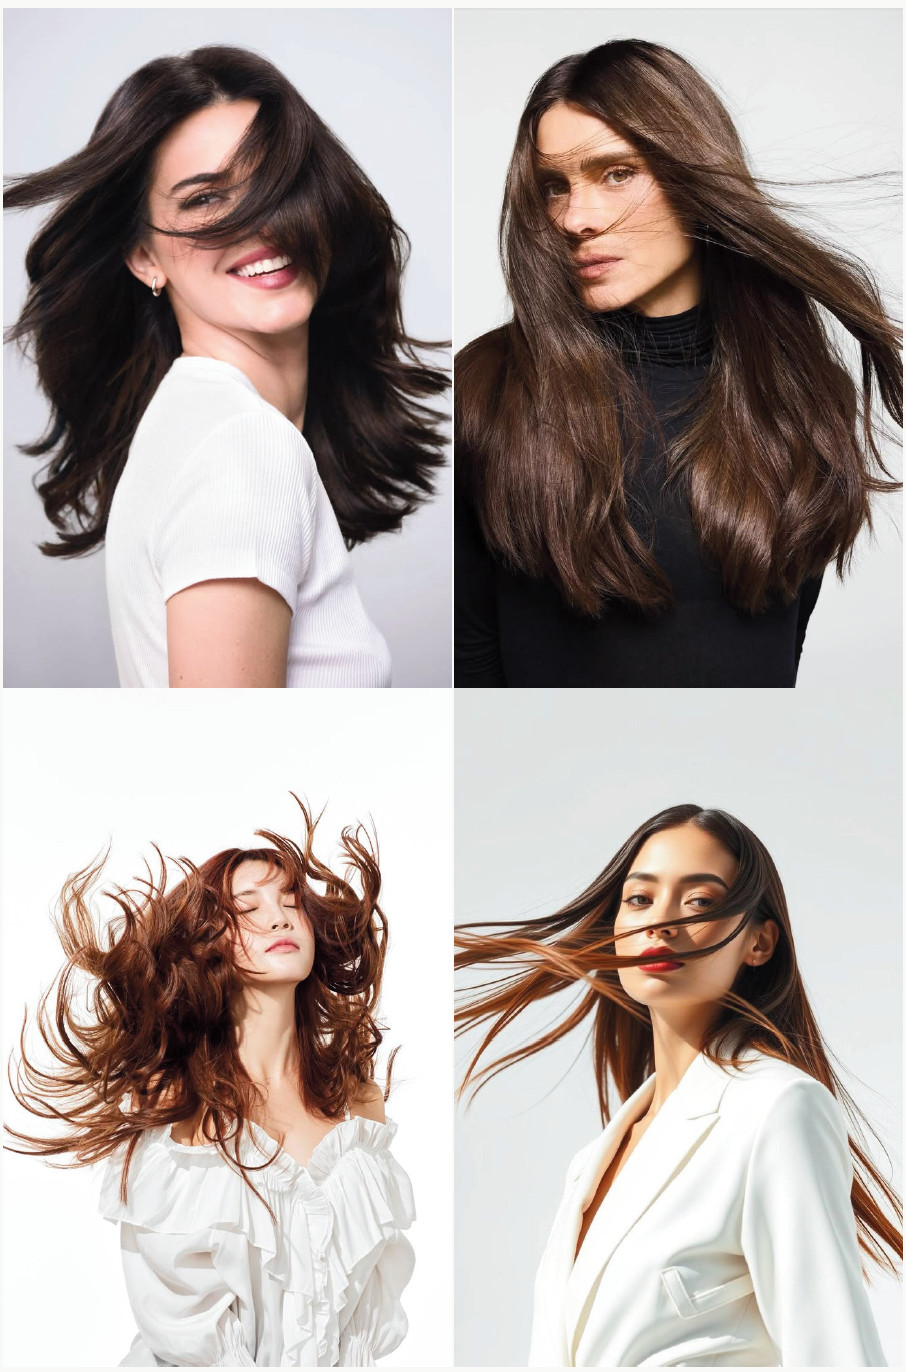
Studio Fan-Blown Hair Drama
Model Instruction: Face into the fan, letting your hair lift and flow backward. Keep your chin level and your eyes steady.
Photographer Instruction: Use a fast shutter speed to freeze the hair sharply, and shoot several frames as the movement varies each time.
Chapter 11: Candid & Laughing Poses
Here’s a secret: the most requested “pose” by real clients isn’t a pose at all. It’s genuine, unguarded emotion. This chapter is less about physical positioning and more about creating moments worth capturing. Use these when you want images that feel alive, not arranged.
⚠️ Common Mistake to Avoid: Saying “okay, now laugh!” on command. Forced laughter looks exactly like what it is forced. Give a real reason to laugh instead (a joke, a funny memory, an inside reference) and shoot the genuine reaction.
Adjusting Hair, Candidly
Model Instruction: Go ahead and just naturally fix your hair as if it were bothering you. No need to perform it for the camera.
Photographer Instruction: Shoot through the entire adjustment in burst mode; the unplanned in-between moments are usually the strongest.
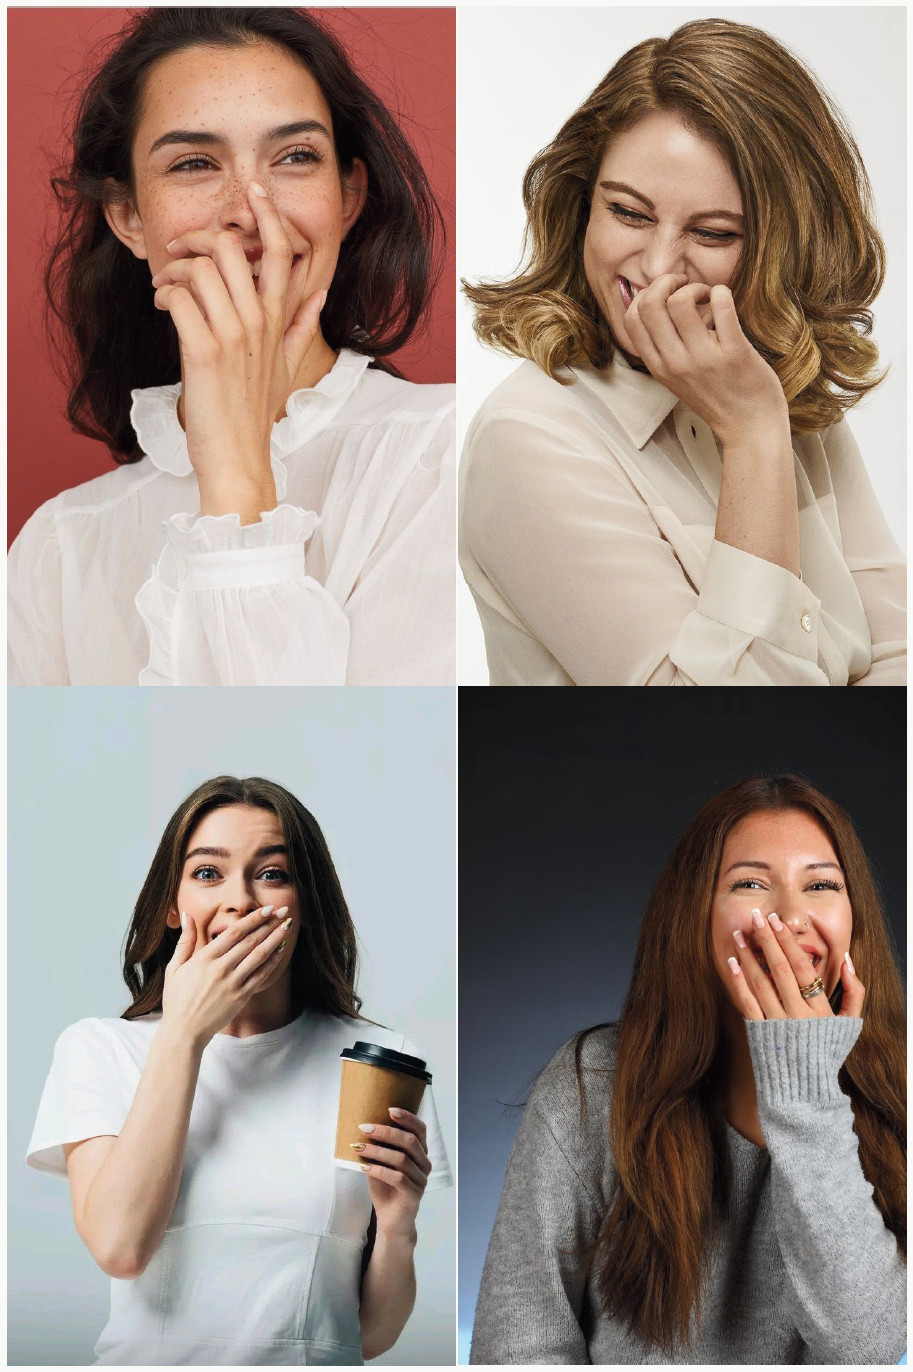
Sharing a Joke With the Photographer
Model Instruction: Just talk to me like we’re catching up as friends. The camera basically disappears from the conversation.
Photographer Instruction: Keep the shutter going throughout the conversation rather than waiting for a “pose”. Genuine engagement photographs beautifully.
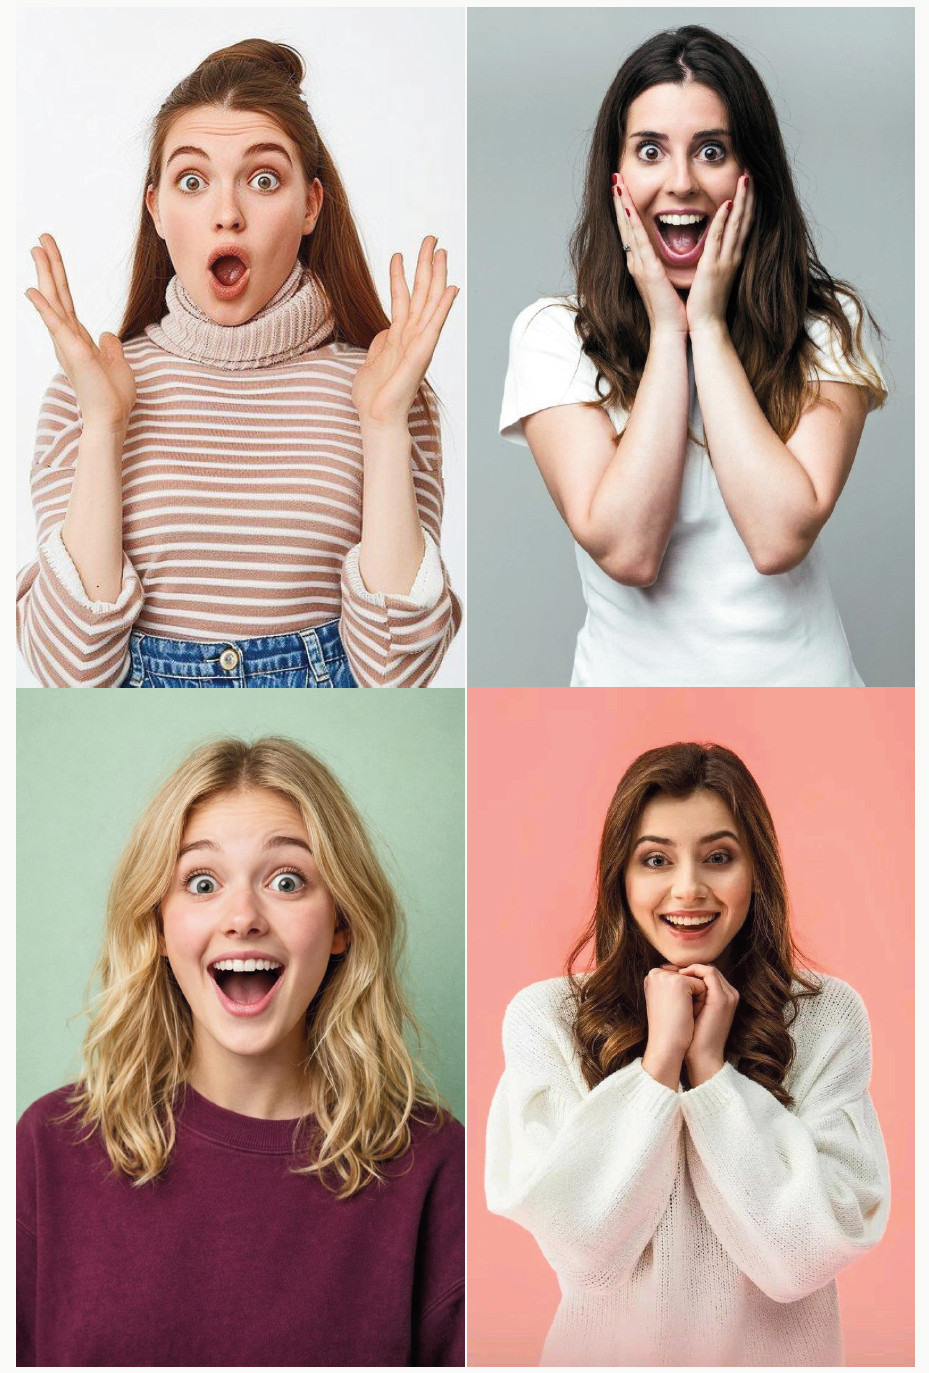
Candid Surprise Reaction
Model Instruction: No prep needed for this one. I’ll just say something unexpected, and we’ll see what happens.
Photographer Instruction: Keep your finger on the shutter at all times during this exchange; genuine surprise lasts a fraction of a second.
Chapter 12: Silhouette & Backlit Poses
Silhouettes strip a subject down to pure shape and outline, which makes them one of the most graphic, emotionally striking pose categories in this entire book. The trick isn’t complicated. It’s all about exposure and a clean, uncluttered outline.
⚠️ Common Mistake to Avoid: Letting the arms cross or overlap the torso in a true silhouette shot from a distance, it reads as a strange blob instead of a clear human shape. Keep limbs slightly separated from the body.
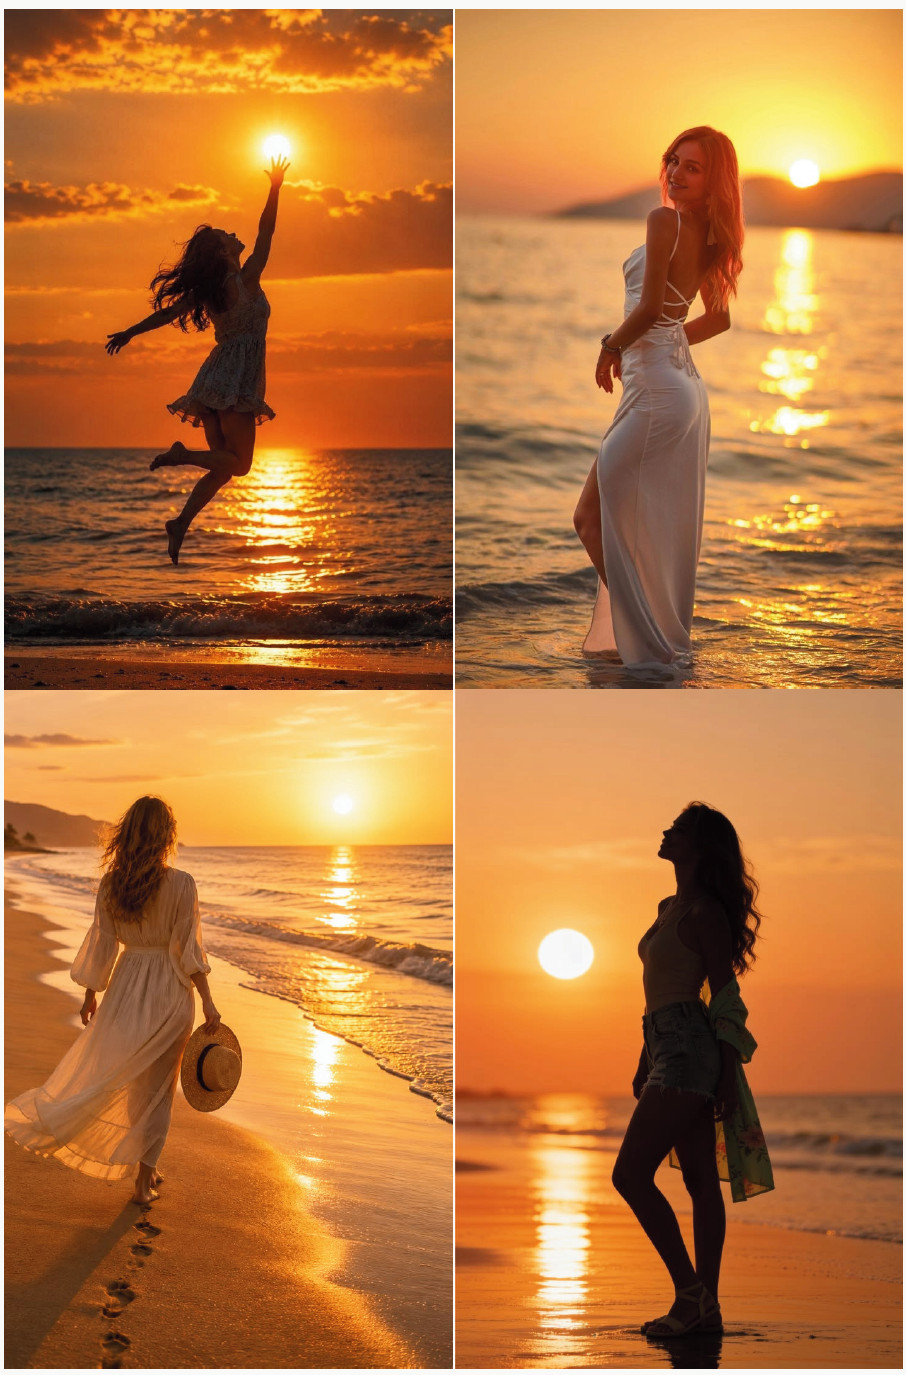
Sunset Silhouette, Full Body
Model Instruction: Stand with the sunset directly behind you, feet slightly apart, arms just a few inches away from your sides.
Photographer Instruction: Expose for the sky, not her face. Spot meter on the brightest part of the sunset for a clean, graphic silhouette.
Window Light Silhouette, Seated
Model Instruction: Sit facing the window, in profile toward the camera, hands resting gently in your lap.
Photographer Instruction: Turn off any interior lights and expose for the bright window so her form falls into a soft silhouette.
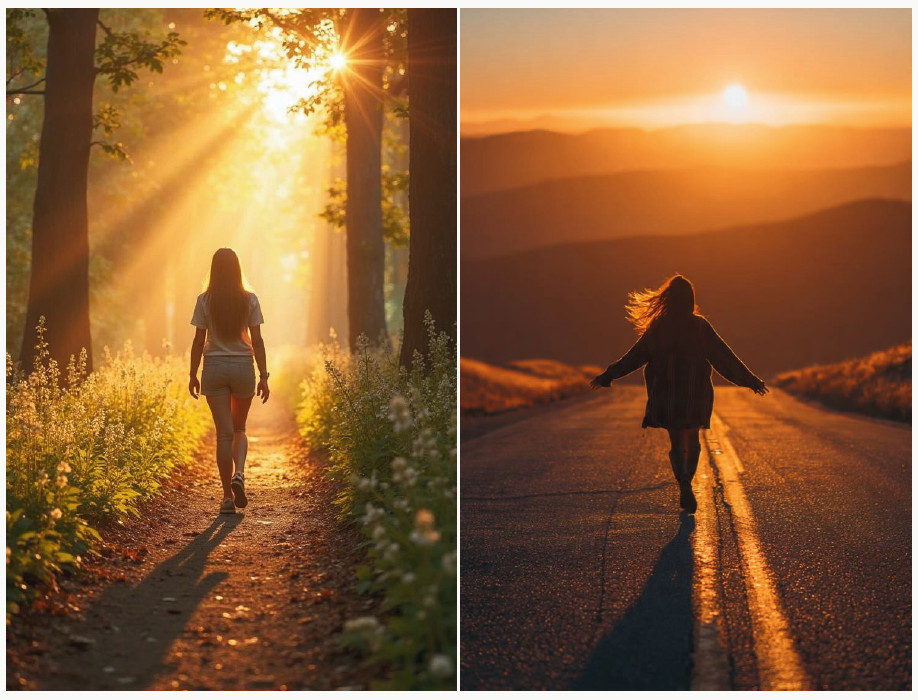
Silhouette, Walking Into Light
Model Instruction: Walk slowly toward the light source, keeping your arms swinging naturally rather than crossed.
Photographer Instruction: Shoot a burst as she walks. The stride adds dynamic energy to what would otherwise be a static silhouette.
Chapter 13: Fashion & Editorial Poses
This chapter is for when you want to push past “nice portrait” into “this belongs in a magazine.” Editorial poses are bolder, more angular, and less concerned with universal flattery. They focus on story and attitude. Bring energy and direction; these poses respond to confident cueing.
⚠️ Common Mistake to Avoid: Directing editorial poses too gently. These poses need clear, energetic direction (“sharp turn, chin up, hold it!”). a soft, hesitant instruction produces a soft, hesitant pose.
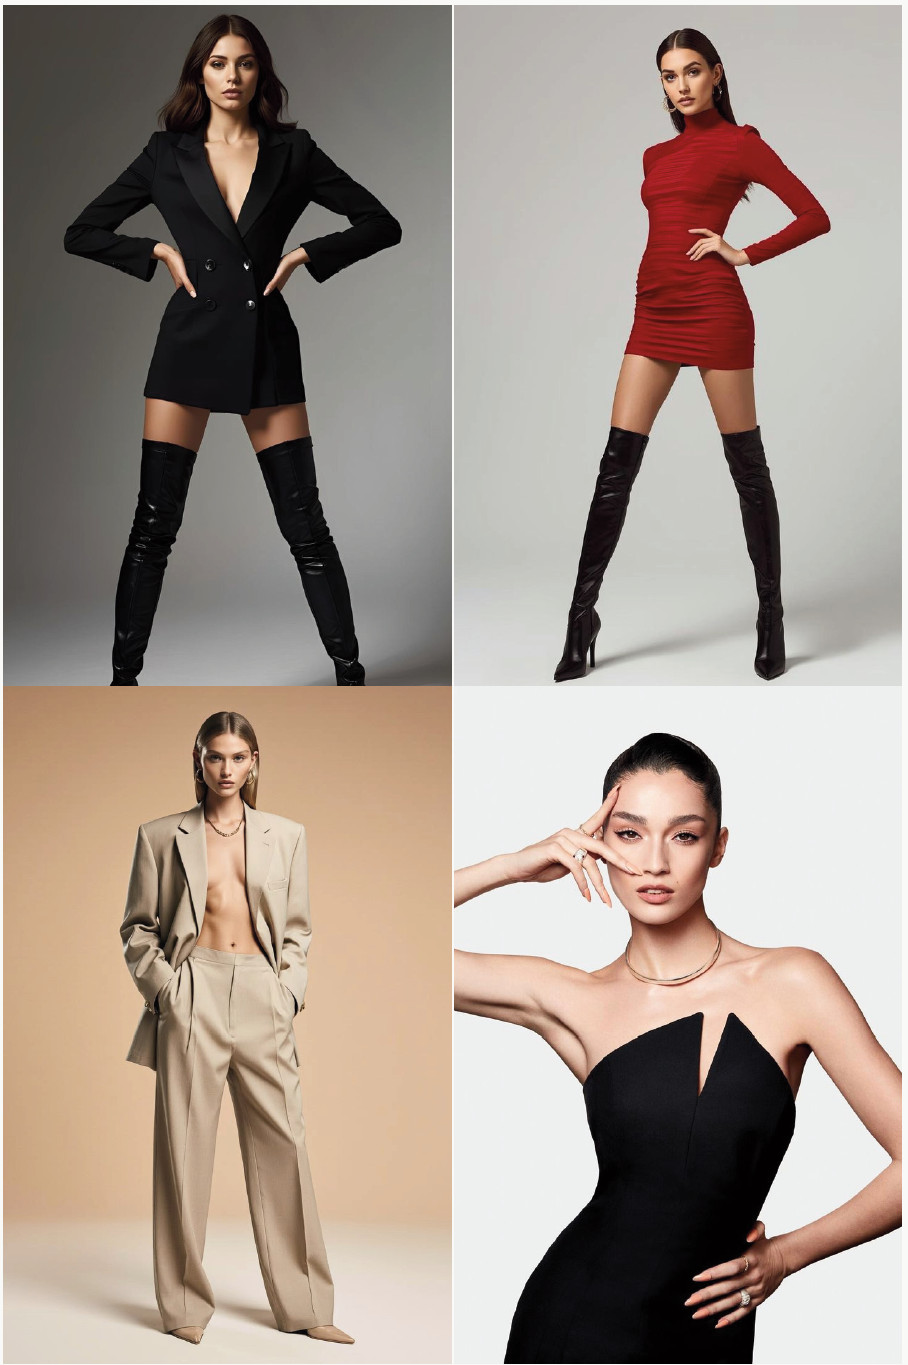
High-Fashion Power Stance
Model Instruction: Plant your feet wide and deliberate, one hip pushed out sharply, chin lifted with an unflinching gaze.
Photographer Instruction: Shoot from a low angle for maximum drama, and don’t be afraid to direct loudly and confidently. Energy is contagious.
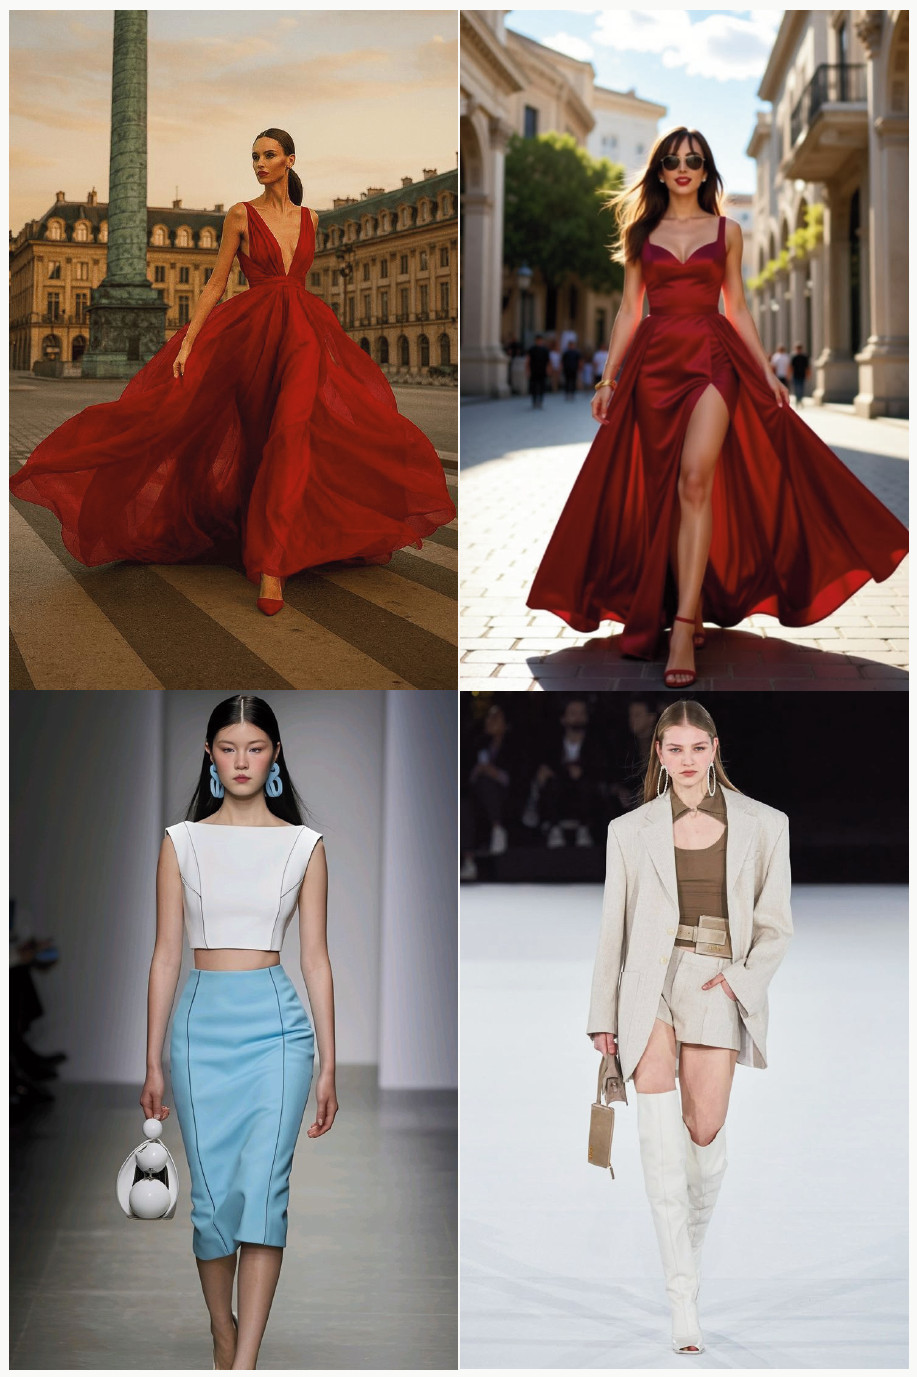
Runway-Inspired Walk
Model Instruction: Walk with long, deliberate strides, one foot crossing slightly in front of the other, shoulders back.
Photographer Instruction: Shoot from a low, front-facing angle, tracking with continuous autofocus as she approaches.
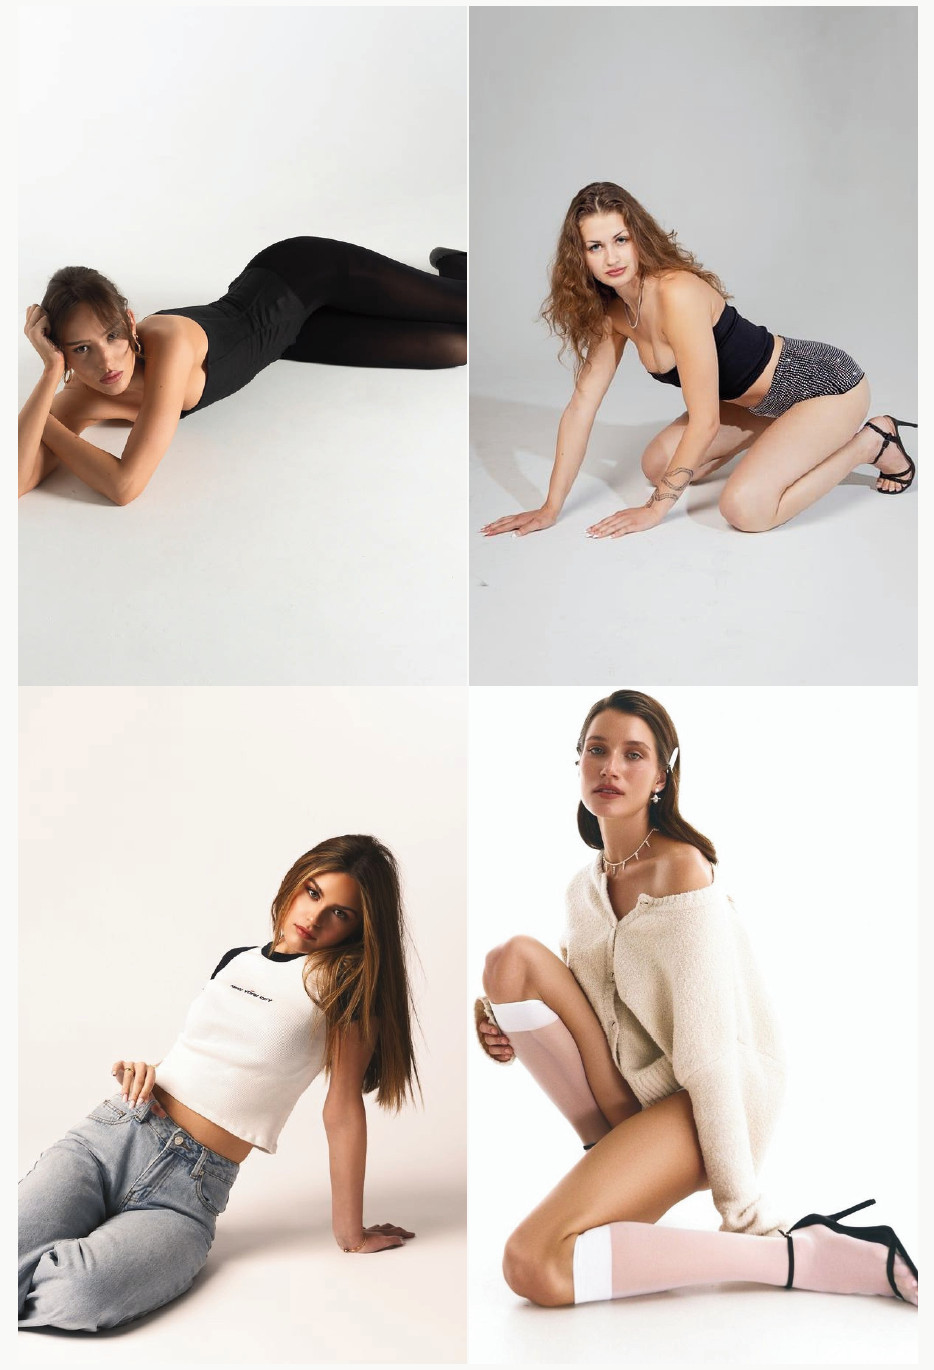
Editorial Floor Pose
Model Instruction: Sit or recline on the floor with limbs arranged in deliberate, sculptural angles rather than a relaxed sprawl.
Photographer Instruction: Shoot from directly above or from a very low angle for the most graphic, fashion-forward composition.
Chapter 14: Flattering Poses for Curvy & Plus-Size Women
Every body deserves to be photographed beautifully, and the truth is, the posing principles that flatter a curvy body are the same principles from Chapter 1, applied with a little more intention. This chapter exists because too many posing guides treat this as an afterthought. It shouldn’t be.
⚠️ Common Mistake to Avoid: Trying to “hide” a body rather than photograph it well. Camera angle, weight shift, and confident direction do far more for a flattering photo than awkwardly angling someone behind a prop to minimize them.
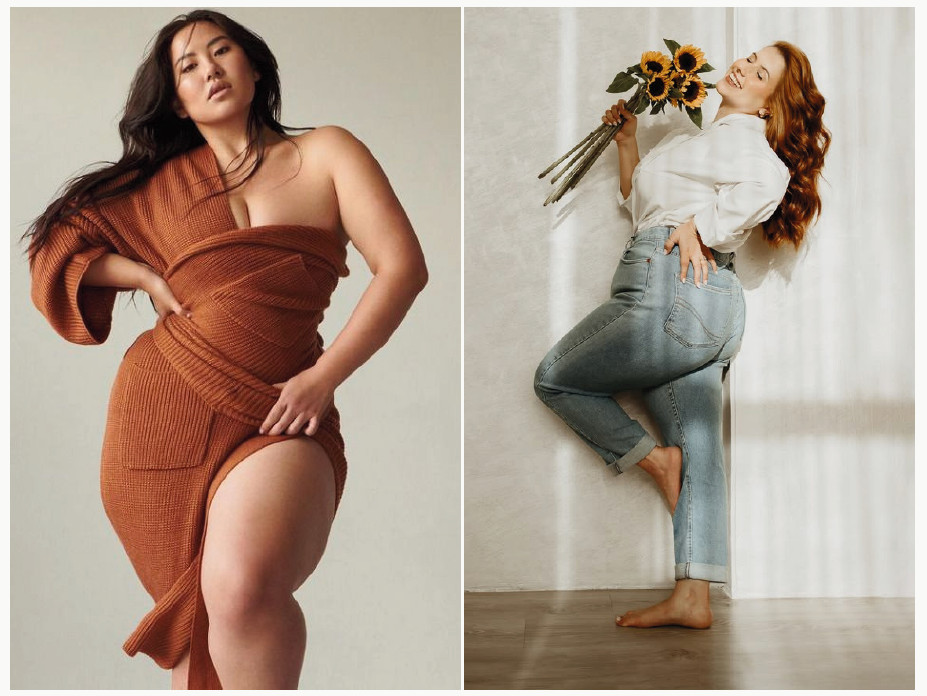
Weight-Back S-Curve
Model Instruction: Shift your weight onto your back leg, letting your spine settle into a natural, relaxed S-curve.
Photographer Instruction: Shoot from slightly above eye level, angling her body 45 degrees away from the lens rather than straight-on.
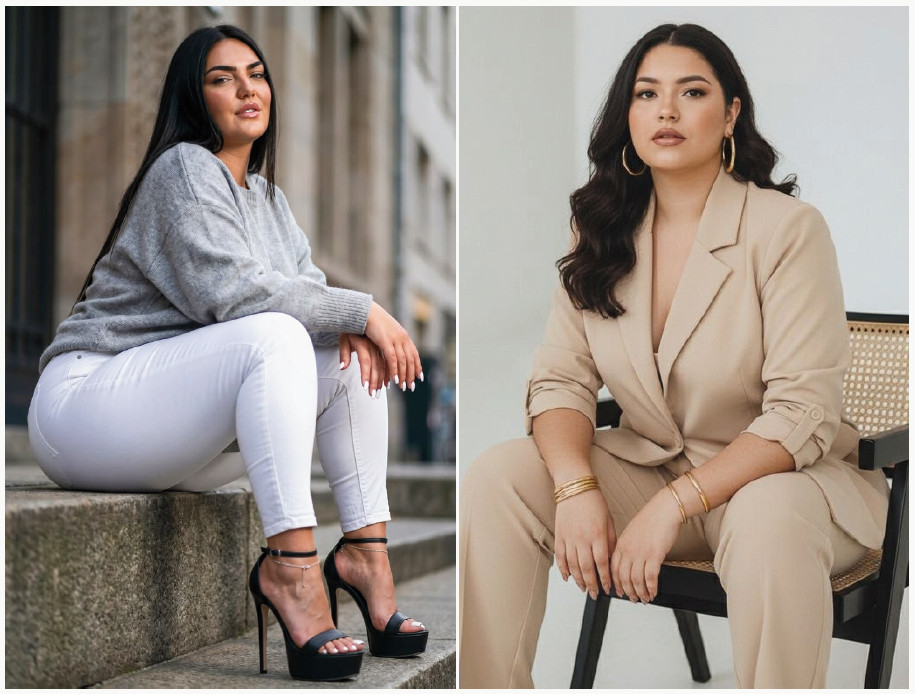
Seated Forward Lean
Model Instruction: Sit on the edge of your seat and lean forward slightly, elbows resting on your knees.
Photographer Instruction: Shoot from a few inches above her eye line. This is one of the most universally flattering seated angles for any body type.
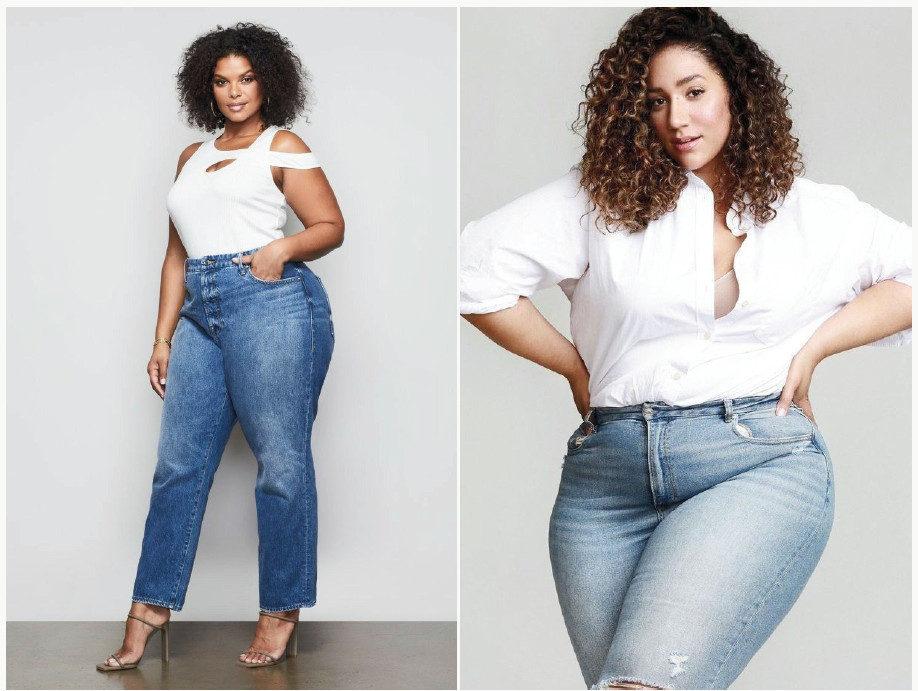
Hand-on-Hip Waist Definition
Model Instruction: Rest one hand on your hip, elbow bent outward, creating a visible bend at the waist.
Photographer Instruction: That “window” of space between the arm and torso naturally defines the waistline. Make sure it’s visible in your framing.
One-Leg-Forward Slimming Stance
Model Instruction: Step one leg forward, keeping your weight on the back leg, hips angled slightly away from the camera.
Photographer Instruction: This pushes the hips back from the lens for a naturally slimming line. Shoot from a three-quarter angle for best results.
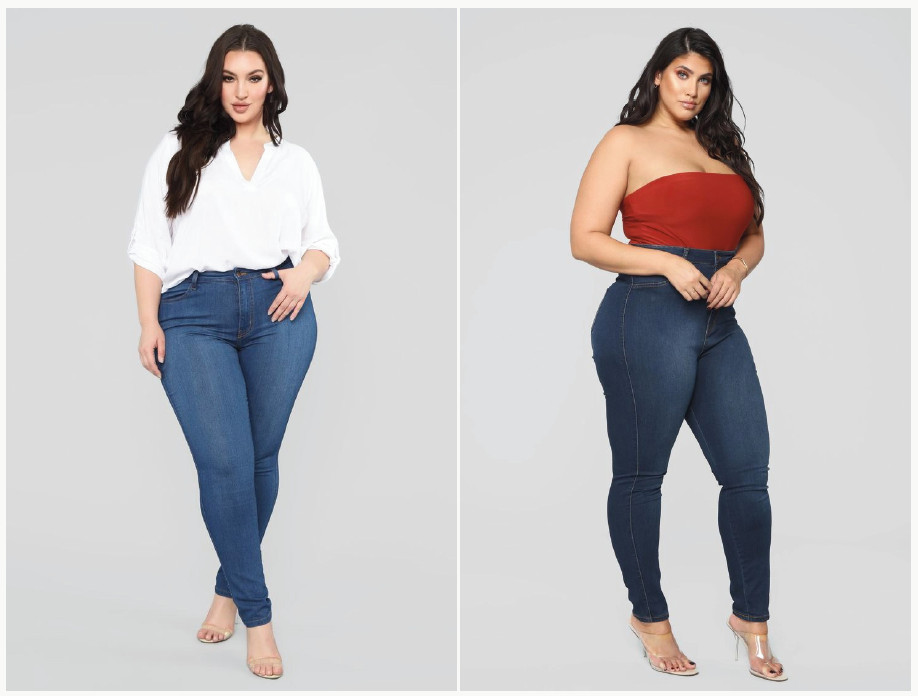
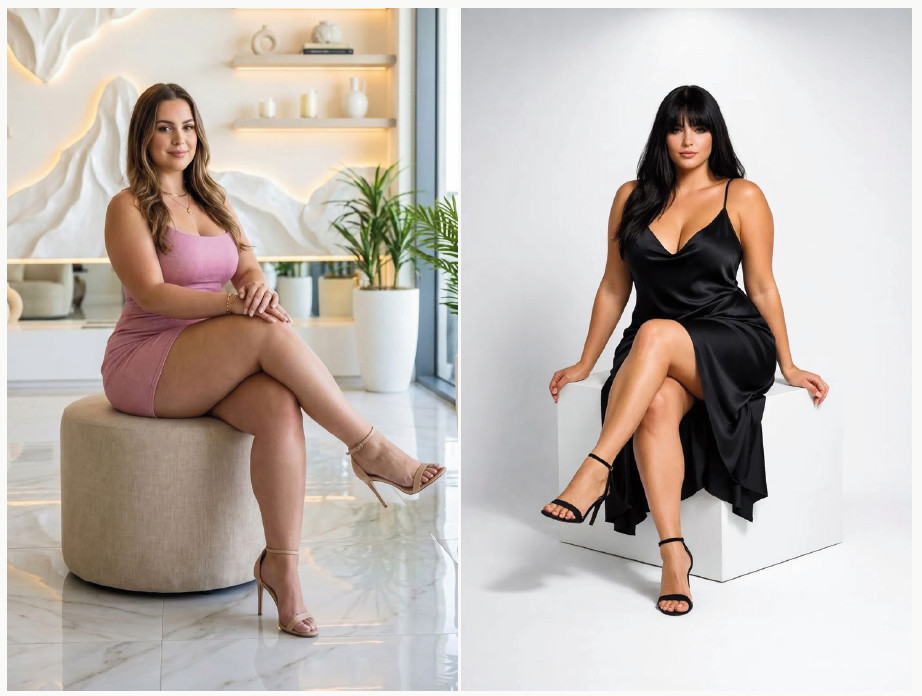
Seated, Confident Cross-Leg
Model Instruction: Sit with legs crossed at the knee, spine tall, shoulders relaxed and open, chin level.
Photographer Instruction: Shoot straight-on or at a slight angle. Good posture does more flattering work here than any camera trick.
Chapter 15: Professional Headshot & LinkedIn Poses
Corporate and professional headshots have their own rulebook: approachable but authoritative, polished but not stiff. These five poses are the bread and butter of every headshot session you’ll ever shoot.
⚠️ Common Mistake to Avoid: Directing a full “camera smile” for every single frame. Mix in a few calm, neutral expressions too many clients need a range of options for different platforms (LinkedIn vs. a company “About” page vs. a press kit).
Classic Corporate Headshot
Model Instruction: Face the camera with shoulders squared at a slight angle, chin level, and a warm, approachable expression.
Photographer Instruction: Use soft, even lighting (a large softbox or window light) and shoot at eye level with an 85mm lens for minimal distortion.

Arms Crossed, Approachable
Model Instruction: Cross your arms loosely, with relaxed shoulders rather than raised, and a genuine, easy smile.
Photographer Instruction: Angle her body slightly rather than shooting flat-on to keep the crossed arms from reading as closed-off or defensive.

Seated Desk Professional Portrait
Model Instruction: Sit with good posture, one arm resting on the desk, leaning very slightly toward the camera.
Photographer Instruction: Watch your background carefully for clutter. A wide aperture will blur a busy office environment nicely.

Walking Candid, Corporate Lifestyle
Model Instruction: Walk down the hallway or office space at a natural pace, as though heading to an actual meeting.
Photographer Instruction: Shoot in burst mode from slightly ahead or the side. Genuine movement makes corporate lifestyle shots feel far less stiff than posed stand-and-smile shots.
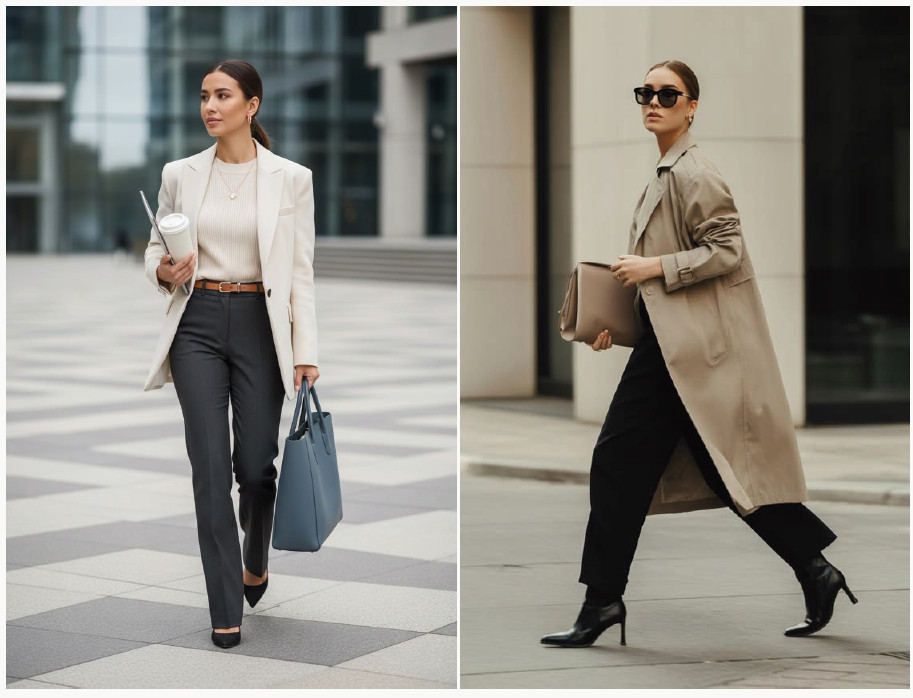
Table 1: Camera Settings Quick Reference
| Pose Category | Recommended Lens | Aperture | Shutter Speed | Camera Angle |
|---|---|---|---|---|
| Standing / Sitting Portraits | 50mm–85mm | f/1.8–f/4 | 1/125s or faster | Eye level or slightly above |
| Walking / Movement | 35mm–85mm | f/2.8–f/5.6 | 1/500s+ (or 1/15–1/30s for motion blur) | Eye level |
| Close-Up / Headshots | 85mm+ | f/1.8–f/2.8 | 1/160s or faster | Eye level |
| Outdoor / Nature | 24mm–85mm | f/2–f/5.6 | 1/250s or faster | Varies with terrain |
| Studio / Backdrop | 50mm–85mm | f/4–f/8 | 1/125–1/200s (flash sync) | Eye level or slightly above |
| Silhouette / Backlit | 50mm–85mm | f/5.6–f/11 | 1/500s or faster | Eye level |
| Boudoir | 50mm–85mm | f/1.8–f/2.8 | 1/125s or faster | Eye level or slightly above |
Table 2: Common Posing Problems & Quick Fixes
| Problem | Quick Fix |
|---|---|
| Double chin | Chin forward and down; shoot from slightly above eye level |
| Stiff, flat-looking arms | Bend the elbow to create a “window” of space between arm and torso |
| Awkward, fidgety hands | Give the hands a prop or a simple task (see Chapter 6) |
| Squinting in bright light | Reposition the sun behind or beside the subject, or move to open shade |
| Flat, front-facing stance | Angle the body 45°, shift weight onto the back leg |
| Tense, raised shoulders | Ask your subject to roll shoulders back and down, and take a breath |
| Compressed midsection when seated | Lean forward slightly; shoot from just above her eye line |
| Photos feel stiff or “posed” | Shoot in bursts, keep talking, add small movement (see Chapter 11) |
Table 3: Quick-Find Pose Directory
| If you need… | Go to… |
|---|---|
| Warm-up poses for a shy or first-time client | Chapter 2: Sitting Poses |
| A confident closing sequence | Chapter 15: Confidence & Empowerment Poses |
| Corporate or LinkedIn headshots | Chapter 15: Professional Headshot Poses |
| A golden-hour outdoor session | Chapter 9: Outdoor & Nature Poses |
| Bold, editorial energy | Chapter 13: Fashion & Editorial Poses |
| Flattering options for curvy/plus-size clients | Chapter 14: Curvy & Plus-Size Poses |
| Natural, unposed-looking images | Chapter 11: Candid & Laughing Poses |
| Hands that don’t know what to do | Chapter 6: Hand, Arm & Hair Poses |
FAQ: The Questions Every Photographer Asks
Get our app for women’s photography poses on the Google Play Store: Modelia
Final Thoughts
Here’s the truth nobody tells beginner photographers: posing isn’t really about memorizing exact positions. It’s about building a vocabulary a set of instincts you can reach for without thinking, the same way a chef doesn’t consciously recall a recipe for scrambled eggs anymore. They know.
That’s what this sourcebook is really for. Flip through it before a shoot. Keep it open on your phone between poses. Dog-ear the chapters you use most. But somewhere around these poses you’ll notice something happening. You’ll start inventing your own variations without even meaning to. A hand position from Chapter 6 will find its way into a standing pose from Chapter 1. A prop from Chapter 7 will show up in a candid moment from Chapter 11.
So shoot something. Mess it up a little. Laugh about the awkward frames.
More Photography Poses For You: